Preface
Before we get too far into the article, I need to post a little disclaimer. I am not an engine expert, nor am I trying to be. I am a die-hard classic car restomod-loving guy. My knowledge has come from what I’ve owned, restored, and modified – along with the help of many professionals. To be clear, I am not a mechanic. Regardless, please enjoy The Definitive Guide To An LS Engine Swap. There should be a few worthwhile nuggets in this article.
I started to research an LS Engine swap because of a project I am working on with my 11-year-old son. We bought a 1959 Chevrolet 3100 pickup truck and I had to decide what type of engine to put in it. And, there are a lot of other considerations that some people just don’t think even think about.
I decided to put together the definitive guide to an LS engine swap while researching the LS engine swap for our truck. Basically, I got the impression that everyone who wrote about it seemed to be trying to sell an LS engine or their parts and services for an LS engine swap. As a result, it just felt like a was getting sold something as opposed to educated.
I hope you find this guide helpful and informative. It’s the culmination of a few months of work that should cover what you need to know. Most importantly, I hope it’s organized and arranged in a manner that you find useful.
New or Used LS Engine?
When it comes to an engine swap, you can either purchase a new engine or go look for a low-mileage used one. The advantages and disadvantages are fairly obvious. For example, new engines have a warranty, are going to function as advertised, and rarely encounter any unpleasant experiences. However, they also cost a heck of a lot more.
Hunting down junkyard treasures is a little more hit or miss but will save you some money. Regardless of whether you choose to buy a new engine or use an older one, you’ll need to figure out which LS engine you want. Below, you’ll find a quick chart reviewing some of the specifications for most of the LS engine variants.


LS Engine Specifications Chart
| Engine | Displacement | Horsepower | Torque | Original Vehicles |
| LS1 | 5.7L | 305-350 hp | 225-365 lb-ft | 1997-2004 Corvette 1998-2002 Camaro 1998-2002 Pontiac Firebird 2004 Pontiac GTO |
| LS6 | 5.7L | 385-405 hp | 385-400 lb-ft | 2001-2004 Corvette -2004-2005 Cadillac CTS-V |
| -LS2 | 6.0L | 390-395 hp | 400 lb-ft | 2005-2007 Corvette 2005-2006 Pontiac GTO -2006-2007 Cadillac CTS-V |
| LS3 | 6.2L | 426-436 hp | 420-428 lb-ft | 2008-2013 Corvette 2009 Pontiac G8 GXP -2010-2013 Corvette Grand Sport 2010-2015 Camaro 2014-2017 Chevy SS |
| LS4 | 5.3L | 303 hp | 323 lb-ft | -2005-08 Pontiac Grand Prix 2006-07 Monte Carlo 2006-09 Chevy Impala -2008-09 Buick LaCrosse |
| -LS7 | 7.0L | 505 hp | 470-481 lb-f | 2006-2013 Corvette 2014-2015 Camaro |
| LS9 | 6.2L | 638 hp | 604 lb-ft | -2009-2013 Corvette |
| LQ4 | 6.0L | 300-325 hp | 360-370 lb-ft | 1999-2004 Chevy Express 1999-2004 GMC Savanna 1998/9-2004 Silverado 2500 1999-2004 Suburban 1999-2004 Yukon 1999-2004 Denali 1998/9-2004 Hummer H2 |
| LQ9 | 6.0L | 345 hp | 380 lb-ft | 2002-2006 Cadillac Escalade 2003-2007 Chevy Silverado -2003-2007 GMC Sierra |
| LY6 | 6.0L | 352 hp | 382 lb-ft | Some heavy-duty Silverados, Sierras, Suburbans, and Yukons |
Used OEM Engine
I’ve learned many people looking to purchase a used LS engine usually opt for a 5.3L or 6.0L. They can usually be purchased from $500-$1,500 depending on displacement and mileage. However, here are a few things to consider when buying a used LS engine:
- Run the engine. Try to hear the engine running before buying it. In fact, if the engine won’t turn over, and you’re ok with it for whatever reason, buy it cheaply as it probably has other issues.
- Check the oil. Despite knowing this is a best practice it’s a slippery slope. If it’s filthy at least you know what you’re getting. If there are other choices, perhaps explore those. For some reason, if there aren’t, then buy it cheaply as the bearings and cylinder walls may be worn out.
On the other hand, if the engine looks new, I’d also consider it filthy as someone may have been dishonest and put in fresh oil. I am not trying to be negative. But, when I’ve heard of a bad LS experience, it has always been something like this that opens up a whole can of unexpected worms. - Mileage. It’s not uncommon for these engines to have well over 150,000 miles on them. So, know what you’re getting into.
- Compression. A simple compression check with help assesses the health of the engine.
Parting used OEM LS engine thoughts…
Personally, I don’t buy much of anything used without bringing along a professional. And, I know that may violate some sort of man code for some of you. That said, I have solid engine knowledge and have been fascinated with all sorts of cars, and engines, for 30 years. But, the truth of the matter is, there is nothing like bringing a mechanic with 10-30 years of experience. The instincts, know-how, and expertise just ooze out of these folks.
Non-Pro-Tip. Throughout my fascination with cars, I have built relationships with a key set of industry experts. These relationships are mutually beneficial as I give them the bulk of my business. Sometimes, actually almost every time, I will try to pay an expert for their time. And, they decline and oftentimes say the expertise is happily shared for free. Well, I know only a precious few things in life are free… but, I’d like to think it’s because we have an appropriate blend of a business and personal relationship.
The bottom line is this, I highly recommend bringing an expert with you to evaluate a used LS engine. You may be quick to dismiss this given the relatively low cost of a used LS engine. And, if you are a mechanic or just flat out very knowledgeable about engines, then you don’t need the advice. But, I have seen a lot of people buy a $1,000 LS engine and then pretty much rebuild the whole thing.
Factory Crate Engine
At some point or another, money is darned, most people will think about a crate engine for their LS engine swap. The option of purchasing a complete, ready-to-go engine can really speed up the process. And, this demystifies the complexity of someone less knowledgeable about such activities.
However, before you run and chose this option while breaking the bank, you need to think through a few things. What are your goals and budget for the engine swap? How does this line item fit into your overall budget? Being honest with yourself about this, and slowing down to think this through, will ensure you get everything you want.
High-Performance Crate Engine

Ok, for those with a more generous budget and expectations, a high-performance crate engine may be in order. There are options from 400 HP to over 800 HP that use normal gas pump fuel. Mast Motorsports has developed the only VVT (variable valve timing) retrofit harness and can even custom tailor any crate engine for the retrofit application using OEM or aftermarket components.
Seriously, these guys are no joke when it comes to making ready-to-run monster LS power. Admittedly, I do have their LS7 engine, cammed up, in my 1969 Chevrolet Camaro Convertible. It’s nothing short of amazing.
Drive Systems
There are three different versions of front accessory drives from GM: the F-Body/GTO system, the Corvette and CTS-V system, and the truck, SUV, and SSR system. The car and Corvette systems are both tucked up close to the block and will fit in most conversions. Unfortunately, the truck’s bulkier design limits its ease of installation.
Any GM accessories can be modified to fit using GM or aftermarket components. On the truck accessories, a compact ’98-’02 Camaro alternator offers extra hood clearance. The aftermarket offers a high output alternator from PowerMaster. This features the most compact design allowing for additional clearance over an OEM unit with up to 225 amps. These guys also offer a stronger starter that helps crank up those big cube LSX engines. (As a car audio fanatic I love their alternators.)
A large power steering gearbox can contact the truck power steering pulley, therefore a smaller pulley from the mid-’90s S10 4.3 can be an easy press on a fix. The low-mount A/C compressor can contact the frame on all GM accessories in a few swaps. This can be a quick bolt-on fix with the top mount A/C kit. This bracket kit mounts the A/C compressors that are tucked up in front of the passenger’s side head.
A Sanden 508 compressor is the standard unit for most aftermarket A/C kits including Vintage Air. Vintage Air offers numerous A/C kits for just about everything with four wheels. These kits must be ordered specifically for LS platforms due to belt design.
Oil Pan
I get it, why am I putting an oil pan in the definitive guide to an LS engine swap? Well, these are definitely required for the LS engine swap. Each vehicle platform requires a specific oil pan depending on the vehicle’s unique frame design. Currently, several aftermarket oil pan options exist. The aftermarket options include increased oil capacity and better ground clearance over most OEM units. The Milodon unit holds 7 quarts of oil with a tucked-up 6in a low spot that allows for excellent ground clearance with a remote oil filter.
Don’t count out GM’s cast units either. GM has a wide range of production options that are designed to add block rigidity due to thick 3/8 flanges. But what I suggest looking for is the GMPP Muscle Car Oil Pan. This pan is designed to make LS swaps easy with plenty of ground and subframe clearance.
Do It Yourself Engine Mounting
So, now that you have purchased everything, how do you actually put it together? To start off, the LS series engines share no mounting characteristics with older small-block Chevys. In addition, all LS engines feature a new bolt pattern for the motor mount and require adapter kits to retrofit these in older applications.
There are really two ways to go about installing your new LS engine to the vehicle of your choosing. First, you can source all the necessary parts yourself or buy a kit that includes everything you need to make the swap happen. Secondly, the aftermarket has several choices that range from adapter plates to complete conversion kits that are specially engineered for each application.
Motor Mounts
Energy Suspension offers hyper-flex polyurethane performance motor mounts (two mounts and adapters) for GM LS-Series engine conversions. In addition, these mounts are drilled plates that allow for a polyurethane SBC motor mount to be bolted to the LS engine. However, these plates differ in the offset between manufacturers. It is highly recommended that all parts be bought with their corresponding parts in order to prevent mixing and matching headaches. The shops that I spoke with reported the challenge of helping a customer stuck with a hodgepodge install.
Be sure to check the requirements of each kit. Different versions can require aftermarket oil pans, certain front engine accessories, and custom cross members to clear with headers. To ease the installation process, it is recommended that you purchase your conversion kit and headers from the same retailer.
Engine Mounting – Swap Kits
Like we said earlier, the first concern when installing an engine in a car is obviously the mounts—where will they reside? Luckily, there are tons of companies out there making LS swap kits for everything from a first-gen F-body to a Mazda Miata.
For example, the TransDapt Swap-in-a-Box kit comes with everything you need to get an LS sitting between the fenders of your restomod. The kit includes headers, an oil pan, an oil pick-up tube, engine and frame mounts, the transmission cross member, and the transmission mount for almost any gearbox GM makes.
And TransDapt isn’t the only one making kits for LS swaps. There’s an LS swap kit out there for virtually any combination that you’d like to put together. Once the engine and trans are in, it’s time to think about how you’ll route the exhaust.
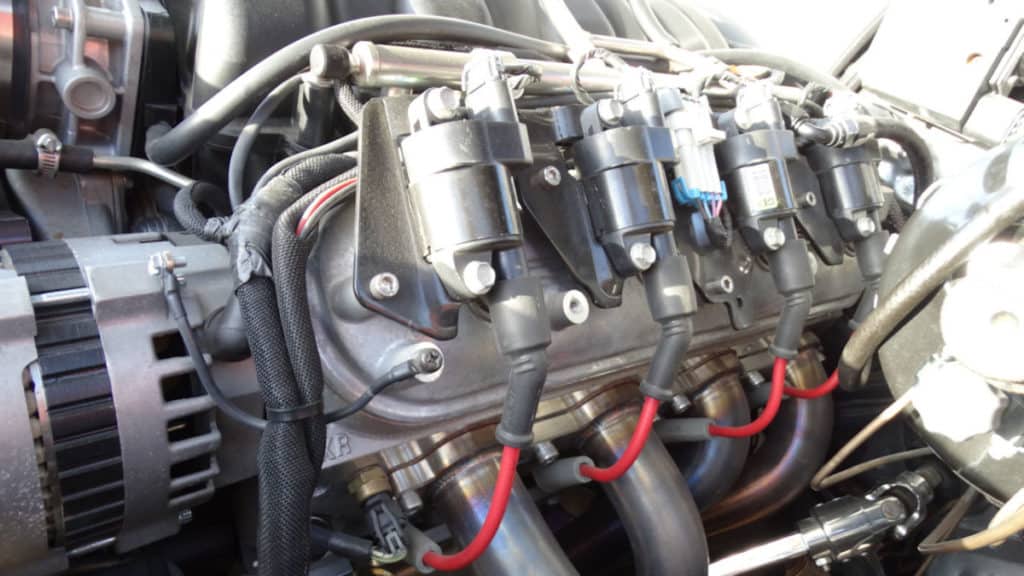
Intake & Exhaust
The respiratory system is attached to the engine, so when you’re replacing it, you’ll need to replace your intake manifold as well as your exhaust. Some people take the opportunity here to upgrade a few things as well, whether that means installing a cold air intake, or perhaps some LS-specific headers. Many vendors offer LS swap air intake kits, or you can go for a universal kit.
Fuel System
For any LS swap, you’re going to have to provide the engine with a steady 58 psi of fuel pressure. This can be accomplished in several ways. Mounting an external in-line fuel pump is probably the easiest. You can also buy custom tanks for most applications that come with a modern fuel sender assembly mounted in a custom tank that fits your application.
If you don’t already have a fuel injection-rated fuel line, you will need that as well. In a fuel inject setup the system needs consistent pressure to operate.
For the fuel system when doing an LS swap, the most common approach is to use a C5 Corvette fuel pressure regulator along with an electric fuel pump that has adequate flow, such as the Walbro 255. People also typically use Russel fitting adapters with this combo.
Transmission
After choosing which LS engine you will be using for the LS engine swap, you need to pick which transmission you want to run behind it.
Some people like to use the older GM TH350, TH400, or 700R4 transmissions. These are economically adequate choices. However, these transmissions require a flexplate adapter to work with the LS series flexplate.
Automatic Transmission
Most people I spoke with highly recommend the GM 4L60E transmission over a traditional 3-speed automatic. The 4L60E transmission provides an ideal driving experience to match the price point.
The 4L80E and 6L80E GM transmissions are fantastic choices as well if your budget allows. Usually, it seemed they are not needed unless you have a built engine.
All three of these GM transmissions can be cost-effectively sourced if money is an issue.
Manual Transmission
For those of you who want to bang through the gears for an exciting driving experience, I recommend the Magnum T56 transmission. I have this on my 1969 Camaro convertible and I love it. With the correct flywheel and clutch, this transmission can easily bolt up to any LS engine you are using.
Torque Converter
When it comes to the torque converter on an LS swap you have a few different options. For example, you can get a custom torque converter made for your particular swap, which changes the spacing and mounting locations, or you can just use a spacer.
The spacer makes the installation very simple as it moves the flexplate out toward the transmission, allowing it to properly mesh with the torque converter. Typically, you only want the torque converter to come toward the engine 1/2 of an inch from being fully seated. Any further and you risk the converter not aligning with the trans pump and input shaft correctly.
The spacer simply corrects this geometry by bolting between the flexplate and the crankshaft flange, eliminating the need for a custom piece. Obviously, this is the cheapest way to go as well.
Cooling System
Next up is how to keep your transplanted LS cool in the hot summer fun you are about to have with it. Most think that they’ll just find some conversion hoses and utilize their stock radiator. This is not always feasible in every application. Swapping out a radiator is a surefire way to make sure that your LS not only has the correct routing it needs but that the setup is up to the task of cooling as many ponies as you plan on making.
Throttle Control
Another thing I learned is many people struggle with how to run a cable-operated throttle body on an application that didn’t already come with one. There are many routes to overcome this, but some are more simple than others.
If you intend to run an engine that originally came with a drive-by-wire throttle body (anything Gen IV and above, and I’m pretty sure some Gen III applications), it is often easiest just to buy a pedal position sensor and mount it. Not only is it an easy way to do it, but it can really clean up the engine bay. Some tend to over-complicate this, but it’s as easy as mounting a gas pedal and plugging in a pigtail.
Re-Flashing the PCM
Other routes include re-flashing the PCM with an operating system that originally included a drive-by-cable throttle body in the original application. Typically this can only be accomplished with Gen III engines that were installed in vehicles both ways. The ECM has to have an IAC driver in it to be able to operate the idle air control valve, which most Gen IV controllers didn’t come with.
The key takeaway seems to be this, just stick with whatever the vehicle came with in the first place. Both routes are fairly straight forward so there is no need to overcomplicate it by swapping out controller operating systems.
Wiring & Computers
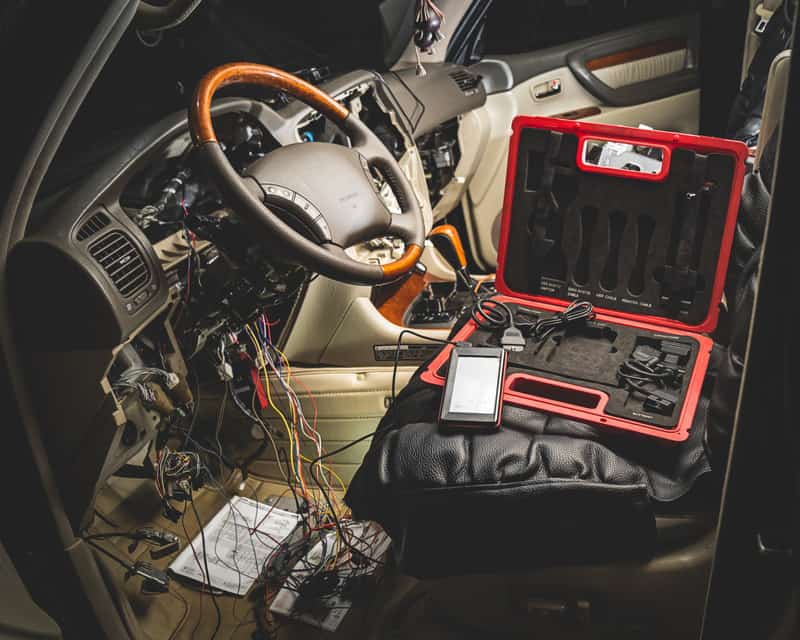
The engine wiring harness is an important component of your LS swap. It can be intimidating to some, but it really is pretty straightforward and simple.
When doing an LS swap, you have three options in integrating the engine wiring harness successfully. You can buy a stand-alone harness, have a new harness custom-built or rewire the harness that came with your LS engine.
In most cases, people end up having the harness that came with their LS engine rewired. This option is cost-effective and can be done easily by a professional who has experience with these harnesses. I don’t recommend trying this on your own, maybe that’s just me…?
Gauges and Other Electronics
After the engine is in the car and the cooling system is installed, the next step is to hook up the gauges. The easiest way to achieve this is to run an aftermarket gauge cluster. There seem to be countless styles of gauges for every gauge cluster with carbon fiber, brushed aluminum, or classic black dash finishes. If digital units aren’t in the budget, the OEM gauges can be modified to work with a couple of adapter parts.
The first gauge to consider is the speedometer. Modern GM transmissions use an electron signal (VSS) to determine the speed. Option one is to run a modified tail shaft with a gear drive built-in. There are fabrication kits that include an adapter bracket to bolt on a traditional four-bolt 4L60 tail shaft. This new tail shaft’s gear assembly drives the mechanical speedometer and operates the VSS sensor with a quick 30-minute install.
Cable X-box
A second option is to connect a Cable-X Box that converts the electronic signal to a gear-driven cable. The Cable-X Box is easy to install and hooks up with only a few wires. One nice feature of the Cable-X Box is that it’s tunable, so if the tire and rear gear ratio change the box can simply be reprogrammed.
The next gauge to consider is the tachometer. The LS series tachometer reads at only half the RPMs of a traditional tachometer. The readout is easily converted by setting the tachometer for a 4-cylinder readout (2 PPR). This bit of advice may seem strange given that the LS engine is a V8, however, the factory tachometer signal output is only a true 4-cylinder signal (2 PPR). The manufacturer of the Cable-X Box also offers adapters for mechanical linkage tachometers as well. The temp gauge is connected by removing the bolt on the rear of the passenger’s side head and installing a mechanical sending unit in its place.
Once the gauges are hooked up the swaps are pretty much wrapped up and the car should be ready for on-road testing.
Making Power
In addition to getting these engines into a classic car, it is possible to make extreme power with simple bolt-ons. Once the LS engine is in you can choose to make engine upgrades to get that healthy rumble. The professionals can definitely help with these upgrades.
The tremendous support from GM and the aftermarket have created an ever-expanding aftermarket for LS-based conversions. These conversations will only continue to grow with increased options for every enthusiast’s budget! With all of these options available, there’s no reason that you can’t have the best of both with your vehicle – classic looks with modern-day reliability.
Conclusion
An LS engine swap can be much more straightforward than other engines. From the intake to the oil pan, there are multiple vendors out there that most likely supply any part that you will really need to complete your swap without any fabrication.
Related Questions
The LS2 was essentially an aluminum version of the 6.0L truck block with flat-top pistons, LS6 heads, and an LS1 cam. However, it is a great motor for swaps and stroker kits, due to its exceptionally long cylinder sleeves and the power potential of the larger bore.
Yes, LS engines are some of the easiest engines to swap. Moreover, there are a lot of guides and manuals to accomplish this. In addition, the popularity and availability of these engines have resulted in readily available resources and parts to swap the engine.
Yes, LS engine swaps are worth it and we’ve never heard of anyone regret doing it. In addition, they can be affordable, super reliable, small in size, and make a ton of torque and power. We highly recommend an LS engine swap.
Yes, all LS-series engines have the exact same mounting bosses for the engine mounts. And, having the engine sit in the correct position will make installing other components like headers or oil pans much easier.