
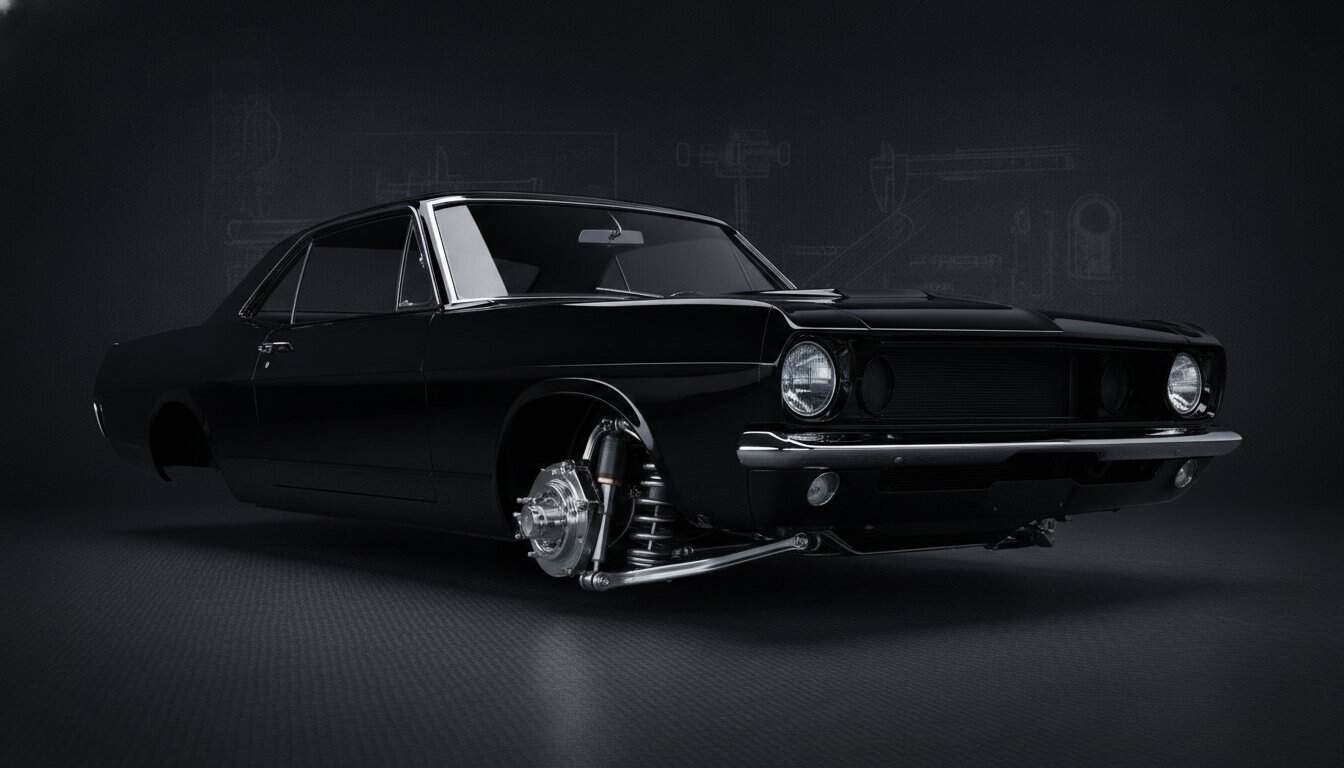
The stiffest suspension kit on the market won’t make your classic car faster on the street; it’ll just make it miserable to drive. That’s a truth most builders learn the hard way, and it’s exactly why choosing from the best restomod suspension kits requires a sharper lens than horsepower specs and spring rates alone.
You already know the frustration. You climb into a vintage muscle car that looks absolutely right, but the moment you push it through a corner, the body rolls like a ship in a swell and the steering wheel tells you almost nothing. That vague, disconnected feeling isn’t character; it’s a geometry problem that modern engineering can solve without stripping away the soul of the build.
This guide cuts through the noise on coilovers versus air ride, bolt-on versus frame-modifying systems, and what modern rack-and-pinion precision actually feels like when you’ve dialed it in yourself. By the end, you’ll know exactly which suspension approach fits your build goals, your budget, and your garage, and you’ll have the confidence to make that call without second-guessing every torque spec along the way.
Key Takeaways
- Modern suspension geometry is not just an upgrade — it is a fundamental safety correction that addresses the dangerous limitations baked into 50-year-old factory designs.
- Choosing from the best restomod suspension kits means understanding what each system actually includes, from tubular control arms to coilovers, and how those components work together rather than in isolation.
- Your primary use case — whether that is weekend cruising or autocross competition — should drive every kit decision, including spring rate selection relative to your engine’s weight distribution.
- Suspension planning cannot happen in a vacuum; it must be mapped alongside your brake upgrades and ride height targets from the very start of your build roadmap.
- Market leaders like Ridetech and QA1 serve genuinely different builder profiles, and knowing which camp you fall into will save you significant time, money, and frustration before you ever turn a wrench.
Beyond the Leaf Spring: Why Modern Suspension is the Soul of a Restomod
Pull back the fender skirt on a factory 1967 muscle car and you’re looking at suspension geometry that was engineered for bias-ply tires, two-lane highways, and a world where 70 mph was genuinely fast. That’s not a criticism of the engineers who designed it; it’s simply physics catching up with time. The chassis that felt planted in 1967 is actively working against you in modern traffic, and understanding that gap is the first step toward building something genuinely better.
Restomod vehicles exist precisely because nostalgia alone doesn’t keep you safe at a freeway merge. The restomod philosophy is a commitment to honoring classic aesthetics while correcting the mechanical shortcomings that five decades of automotive engineering have since solved. Suspension is where that correction matters most, and it’s why the best restomod suspension kits are engineered as complete geometry solutions rather than a collection of shinier parts bolted onto an unchanged foundation.
The Geometry Gap: Vintage Design vs Modern Expectations
Camber gain is the change in wheel angle as your suspension compresses through a corner. Vintage A-arm geometry was designed with minimal camber gain, which worked reasonably well with narrow bias-ply tires that had a relatively forgiving contact patch. Modern radial tires are an entirely different animal. They need the wheel to stay more perpendicular to the road surface under load to maintain their full contact patch, which means your classic car’s original geometry is actively fighting the tires you’ve already bolted on.
Caster, the rearward tilt of the steering axis, is equally misunderstood. Factory caster settings on most 1960s and 1970s American cars were conservative, often in the two to three degree range. Modern alignment specs for street performance typically target five to seven degrees of positive caster, which dramatically improves straight-line tracking and gives the steering wheel the self-centering feel that makes a car feel planted rather than nervous.
Original recirculating-ball steering boxes compound every geometry flaw. They introduce up to several inches of dead travel at the wheel’s center, meaning you’re already mid-correction before the front tires begin responding. A properly engineered rack-and-pinion conversion eliminates that vagueness entirely. The communication becomes direct and honest.
Reducing unsprung weight, the mass of wheels, tires, and suspension components not supported by the springs, is the quieter benefit of tubular control arms and modern hub assemblies. Less unsprung mass means the tire follows road imperfections more faithfully instead of bouncing away from them. The ride quality improvement is immediate and noticeable on the first drive.
Restomodding for Reliability and Road Comfort
Track-only thinking is a trap. Most restomod builds spend the overwhelming majority of their lives on public roads, which means vibration damping and predictable behavior at everyday speeds matter far more than peak lateral grip. Polyurethane bushings offer tighter geometry control than rubber but transmit more NVH, noise, vibration, and harshness, into the cabin. Rubber bushings absorb more vibration but allow more compliance under load. The right choice depends entirely on your use case, and it’s a decision worth mapping out before you spec a single component.
Safety, real safety, begins with a chassis that behaves predictably when you need it to respond. A stable, flat-cornering platform gives you the margin to react. You can explore that planning process in depth through Restomod Academy’s foundational guide, which frames every upgrade decision around the intersection of classic character and modern reliability. That intersection is exactly where the soul of a restomod lives.
Anatomy of a Performance Kit: Coilovers, Tubular Arms, and Subframes
Open the box on a premium restomod suspension kit and you’re not looking at a collection of individual parts. You’re looking at a system, one where every component is engineered to work in concert with the others. That distinction matters enormously. The geometry corrections we explored earlier only deliver their full benefit when the hardware executing those corrections is matched, measured, and installed as a cohesive unit rather than assembled piecemeal from a catalog.
Tubular control arms are the most visible upgrade in most front-end kits, and the engineering logic behind them is straightforward. Factory stamped steel arms were designed for mass production, not precision. Tubular chromoly or DOM steel arms are lighter, significantly stiffer under lateral load, and allow manufacturers to locate the pivot points exactly where modern geometry calculations demand them. That repositioning is what corrects the camber gain curve we discussed earlier; the material change is almost a secondary benefit.
The coilover versus traditional shock-and-spring debate comes down to one practical advantage: adjustability. A coilover combines the spring and damper into a single unit with a threaded collar that lets you dial ride height in precise increments without swapping springs. For a restomod that needs to clear a driveway apron at home and sit at a specific ride height for autocross, that flexibility is genuinely useful. Traditional setups with separate springs and shocks are simpler and often less expensive, but they lock you into a ride height at the point of purchase. If your build goals are firm and your stance is settled, that’s a perfectly rational choice. If you’re still refining the vision, coilovers give you room to evolve.
Front-End Conversions: Bolt-On vs Weld-In
Mustang II-style front crossmembers have earned their reputation as the accessible entry point for front suspension overhauls on a wide range of classic American platforms. They bolt into existing frame rails on many popular builds, incorporate rack-and-pinion steering mounts as part of the crossmember itself, and eliminate the need for a welder in your garage. The integrated rack mount is a genuine advantage; it ensures the steering geometry relationship is pre-engineered rather than approximated during fitment.
Full subframe replacements are a different conversation entirely. They demand more fabrication skill, more time, and more budget, but they deliver a level of torsional stiffness that a bolt-in crossmember simply cannot match. If you’re building a car that will see serious track use or carry a heavy engine package, the rigidity of a full subframe replacement pays dividends in steering precision and chassis response that you’ll feel in every corner. For a street-driven weekend cruiser, that investment is harder to justify.
Rear Suspension: 4-Link and Independent Systems
Leaf springs were adequate for the power levels muscle cars produced in 1969. They are not adequate for the power levels restomod builders are producing today. A properly engineered 4-link rear suspension controls axle rotation under hard acceleration, which is the root cause of wheel hop. By separating the job of locating the axle from the job of absorbing load, a 4-link system lets you tune each function independently. The result is dramatically improved traction off the line and a rear end that stays planted through corner exits.
Independent rear suspension raises the performance ceiling further, particularly for builds prioritizing road feel and handling balance over straight-line traction. IRS allows each rear wheel to respond to road surfaces independently, which improves ride quality and reduces the tendency to track in ruts. The trade-off is complexity: IRS requires more fabrication work, more precise alignment, and a higher parts cost than a well-sorted solid-axle 4-link. For a daily-driven restomod that spends time on imperfect roads, the ride quality gain is compelling. For a car that lives for weekend blasts on smooth pavement, a dialed 4-link with a quality Panhard bar or Watts link delivers most of the handling benefit at a fraction of the complexity.
Selecting from the best restomod suspension kits means understanding which of these rear configurations actually matches your driving reality, not the most impressive spec sheet. The Restomod Academy Recommended Gear page breaks down specific component categories worth evaluating as you map out your rear suspension approach.
The Top Restomod Suspension Kits for 2026: Market Leaders Analyzed
Knowing what a suspension system needs to do is one thing. Knowing which manufacturer actually delivers on that promise for your specific platform, your budget, and your skill level is an entirely different challenge. The market for the best restomod suspension kits has matured considerably, and the gap between a thoughtfully engineered system and a collection of attractive-looking parts has never been wider or more important to understand.
Best All-Around Performance: Ridetech and QA1
Ridetech has built its reputation on a straightforward premise: bolt-on geometry correction that a competent home builder can execute without a fabrication shop. Their Level 2 and Level 3 front suspension packages for popular GM platforms center on tubular control arms with corrected geometry, matched to their own coilover dampers. The Level 2 setup targets street-driven builds where ride quality and predictable handling share equal billing. The Level 3 steps up spring rates and damper valving for builders who push their cars harder on canyon roads or occasional track days. Neither kit demands welding. That accessibility is a genuine engineering achievement, not a marketing shortcut.
QA1 approaches the market from a different angle. Their full-vehicle handling kits are engineered with a sharp focus on Mopar and GM A-Body platforms, two communities that have historically been underserved by the broader aftermarket. The value-to-performance ratio at the mid-range budget level is where QA1 consistently earns its reputation. Their double-adjustable shocks allow damping tuning without purchasing an entirely new damper, which stretches your investment further as your build evolves. For the budget-conscious builder who refuses to compromise on geometry quality, QA1 deserves serious attention.
Pro-Touring Dominance: Detroit Speed and Speedtech
Detroit Speed operates at a different altitude entirely. Their X-Gen front suspension series for first and second-generation Camaros is a fully engineered geometry solution developed with direct input from competitive pro-touring racing. The spindle design, the control arm pivot locations, and the steering rack relationship are calculated as a unified system rather than adapted from an existing platform. The result is measurably higher lateral grip ceilings, but the installation demands a builder who is comfortable with precise measurement and, in many configurations, professional-level fabrication skills.
Speedtech’s ExtReme kits occupy a similar tier for builders chasing ultimate lateral G-force numbers. These systems are not weekend garage projects. They are investments in a chassis that can genuinely compete at the highest levels of pro-touring events. The engineering is exceptional. The learning curve is equally significant.
For classic truck builders and early muscle applications, Heidts and TCI both offer front crossmember solutions that bring rack-and-pinion steering and corrected geometry to platforms that other manufacturers often overlook. Heidts in particular has long-standing fitment data for a wide range of early Ford and GM truck applications, making their systems a logical starting point for builders working outside the mainstream Camaro and Mustang categories.
Choosing between these manufacturers isn’t about which name carries the most prestige. It’s about honest alignment between what each system delivers and what your build genuinely requires. The Restomod Academy product reviews section provides platform-specific breakdowns that help you make that match with confidence rather than guesswork.

How to Evaluate a Suspension Kit for Your Specific Project
Every suspension decision flows from one honest question: how do you actually use this car? A builder chasing autocross podiums needs a fundamentally different setup than someone who wants a composed, comfortable cruiser for Saturday morning drives. Getting that answer wrong is expensive. Getting it right means every component you select has a clear job to do, and does it well.
Start by mapping your use case against the kit’s design intent. Street-driven builds benefit from softer spring rates, compliance-friendly bushing materials, and damper valving tuned for road irregularities rather than smooth track surfaces. Competition-oriented builds demand stiffer rates, sharper damping response, and geometry tuned for maximum lateral load. Most builders live somewhere in the middle, which is exactly why coilovers earn their place in so many of the best restomod suspension kits: they let you adjust as your priorities shift rather than locking you into a single setup at the point of purchase.
Chassis stiffness is the foundation that every kit assumes exists beneath it. A premium suspension system installed on a chassis with cracked welds, rusted frame rails, or a body that flexes under cornering load will underperform a budget system on a solid, well-braced structure. Before you spec a single component, inspect the frame, address any structural fatigue, and consider subframe connectors if you’re working with a unibody platform. The kit can only be as precise as the structure it’s anchored to.
Budget honestly for the costs that don’t appear on the kit’s price tag. A professional four-wheel alignment after installation is not optional; it’s the final step that turns a collection of correctly installed parts into a calibrated system. Factor in wheel and tire clearance as well. Corrected geometry and lowered ride heights frequently change the relationship between the tire sidewall and the inner fender, and discovering that conflict after you’ve purchased new wheels is a frustration that careful planning eliminates.
Matching Spring Rates to Your Engine Swap
An aluminum LS engine can weigh roughly 150 pounds less than the iron-block V8 it replaces. That’s not a minor variable. It shifts the front-to-rear weight distribution meaningfully, which means the spring rates specified for a stock-engine application will leave your front end sitting higher than intended and feeling floaty under load. Consult directly with the kit manufacturer before finalizing your spring selection; most reputable brands will specify rates based on confirmed corner weights rather than a generic model year. Restomod Academy’s definitive LS swap guide walks through the weight distribution implications in detail, giving you the data you need to have that conversation confidently.
Installation Complexity: DIY vs Professional
Know your honest skill level before you commit. Most bolt-on front crossmember kits require a floor jack, quality jack stands, a torque wrench, and basic hand tools. Some rear 4-link configurations add a welder and a drill press to that list. The critical threshold is any modification that alters the vehicle’s structure permanently: cutting floor pans, trimming frame rails, or modifying firewall clearance. Those are points of no return that demand either verified fabrication skill or a professional shop. The Restomod Academy Recommended Gear page outlines the specific tools worth having before you begin, so you can assess your garage’s readiness before the kit arrives on your doorstep.
Plan the full scope before you turn a wrench. That single discipline separates builders who finish satisfied from those who finish frustrated.
Executing Your Build: Integrating Suspension into the Total Roadmap
Suspension doesn’t exist in isolation. That’s the lesson most builders absorb only after they’ve already made an expensive mistake, ordering a front crossmember kit before confirming that their chosen big brake setup will clear the new spindle. The best restomod suspension kits are engineered as complete systems, but they still operate within a larger build ecosystem that demands sequenced, deliberate planning from the very first component decision.
Ride height is the thread that connects every system on the car. Set it too low and you’re fighting bump steer, rubbing tires, and a radiator hose that contacts the fan shroud under compression. Set it too high and the aesthetic integrity of the build suffers, along with the center of gravity benefits that a lowered stance delivers. Establish your target ride height early, communicate it to every vendor you’re working with, and treat it as a fixed constraint rather than something you’ll sort out later. Later is where costly surprises live.
The final tuning phase is where a build transforms from a project into a driver’s car. Once the geometry is set and the alignment is dialed, spend time adjusting damper settings on your local roads rather than a smooth test track. Your daily driving environment is the real performance benchmark. A coilover that feels perfect on smooth pavement can feel punishing on frost-heaved asphalt, and the adjustment range on quality dampers exists precisely to solve that problem without a parts swap.
The Critical Sequence: Suspension, Brakes, and Wheels
Spindle selection drives brake kit compatibility, which drives wheel backspacing requirements. Work through that chain in order. A track width change of even half an inch alters the backspacing calculation enough to push a wheel into the inner fender under full compression. Measure twice, order once. The Restomod Academy handling guide maps this sequence clearly, giving you a structured checklist to verify compatibility across all three systems before a single component ships.
From Planning to Pavement: The Ultimate Restomod Guide
Choosing from the best restomod suspension kits becomes significantly less daunting when you’re working from a structured blueprint rather than assembling information from a dozen disconnected forum threads. Restomod Academy’s Premium Project Blueprints and consulting services exist precisely for this reason: to compress the learning curve and surface the part mismatches, clearance conflicts, and sequencing errors that derail builds before they reach the alignment rack.
Unique chassis challenges, a non-standard wheelbase, an unusual engine placement, a custom rear clip, genuinely benefit from expert input before fabrication begins. That conversation is far less expensive before cuts are made than after. The foundational restomod framework gives you the vocabulary and the decision structure to have that conversation productively, whether you’re working through it independently or alongside a professional.
Build with intention. Every component you select should serve a defined role in a system you understand completely. That discipline is what separates a finished restomod that genuinely performs from one that merely looks the part.
When a project reaches this level of professional execution, it often becomes a significant financial asset; for builders interested in the intersection of high-value holdings and technology, you can discover STO Foundation and their platform for tokenizing real-world assets.
Your Classic Deserves a Chassis That Matches Its Ambition
The best restomod suspension kits don’t just transform how a classic car handles; they transform how confidently you drive it. You now understand why vintage geometry falls short on modern roads, how coilovers and tubular arms work together as a system, and why sequencing your suspension alongside brakes and wheels isn’t optional. Those aren’t abstract concepts anymore. They’re decisions you can make with clarity.
The gap between a build that looks right and one that genuinely performs comes down to planning. Get the sequence right, match the spring rates to your actual corner weights, and let the alignment rack finish what your wrenches started.
Brook Walsh and the Restomod Academy community have already mapped that path for the most popular classic platforms. Step-by-step blueprints, expert guidance, and a community of builders who’ve solved the same problems you’re facing are all waiting for you. Download The Ultimate Restomod Guide and start planning your chassis upgrade today.
Your build is closer than you think. Go make it happen.
Frequently Asked Questions About Restomod Suspension Kits
Do I need to weld to install a restomod suspension kit?
Not always. Many of the most popular front-end kits, particularly Mustang II-style crossmember systems, are designed as true bolt-on installations that require only basic hand tools, a floor jack, and a torque wrench. The welding requirement typically enters the picture with rear 4-link configurations, full subframe replacements, or any modification that permanently alters your chassis structure. Read the installation requirements for your specific kit before purchasing, not after.
If welding is required and that’s outside your skill set, budget for professional fabrication time from the start. Attempting structural welds without the proper training creates safety risks that no amount of enthusiasm can compensate for.
Can I keep my original wheels with a modern suspension kit?
It depends on the specific kit and how aggressively it corrects your ride height and track width. Corrected geometry and lowered stance frequently change the relationship between your tire and inner fender, and some spindle designs alter the hub offset enough to push original wheels into clearance conflicts. Measure your current backspacing before committing to a kit, and confirm those numbers directly with the manufacturer.
Don’t assume compatibility based on the vehicle year alone. A half-inch change in track width is enough to create rubbing under full suspension compression, and discovering that conflict after your new wheels are mounted is an expensive lesson in planning sequence.
Is air ride better than coilovers for a restomod?
Neither is universally better; they solve different problems. Air ride excels at adjustable ride height on demand, which makes it genuinely useful for builds that need to clear low driveways at home and sit at show height on the weekend. The trade-off is system complexity, more components that can fail, and a compressor that needs space and maintenance. For drivers who prioritize dynamic handling feel and simpler long-term ownership, coilovers deliver more direct feedback and fewer points of potential failure.
Your use case should drive that decision. A show-focused cruiser that occasionally drives to events is a strong candidate for air ride. A car that sees canyon roads regularly is better served by a well-tuned coilover setup where the spring and damper relationship is fixed and predictable.
How much does a full restomod suspension kit cost?
Kit pricing varies widely based on platform, system complexity, and the manufacturer’s engineering tier, so quoting specific figures here would set inaccurate expectations for your actual purchase. Entry-level bolt-on front crossmember kits sit at a different price point than full front-and-rear systems from pro-touring-focused manufacturers. Factor in alignment costs, new wheels if required, and any fabrication labor before settling on a budget ceiling.
Treat the kit price as the starting number, not the final one. A professional four-wheel alignment after installation isn’t optional, and clearance conflicts discovered mid-build always cost more to resolve than they would have during the planning phase.
Will a modern suspension kit lower my classic car too much?
A quality kit gives you control over ride height rather than dictating it. Coilover-based systems allow incremental height adjustment through a threaded collar, so you’re not locked into a single stance at the point of purchase. The important variable is establishing your target ride height before you order, then confirming that the kit’s adjustment range actually covers it. Some kits are optimized for a specific drop range, and pushing beyond that range compromises geometry.
Communicate your target height to the manufacturer before finalizing your order. Most reputable brands will tell you directly whether their system achieves that stance without putting the geometry outside its designed operating range.
Do I need a modern steering rack if I upgrade my suspension?
You don’t always need one, but the combination delivers results that neither achieves independently. Many front crossmember kits include integrated rack-and-pinion mounts as part of the design, making the steering conversion a natural part of the front-end overhaul rather than a separate project. Installing corrected geometry while retaining a recirculating-ball box with several inches of center play leaves a significant portion of the handling improvement unrealized.
Think of it this way: the tubular arms and corrected geometry create the precise communication pathway, but the steering rack is what actually transmits that information to your hands. Doing one without the other is a compromise worth avoiding if your budget allows.
What is the best suspension kit for a first-time restomod builder?
Among the best restomod suspension kits for builders new to chassis work, bolt-on front crossmember systems with integrated rack-and-pinion mounts represent the most forgiving entry point. Ridetech’s street-oriented packages for popular GM platforms are frequently recommended for their installation accessibility and the quality of their included instructions. QA1’s mid-range kits offer comparable geometry correction for Mopar and GM A-Body platforms at a price point that leaves budget room for the alignment and tool costs that first-time builders often underestimate.
Prioritize a kit with strong technical support and a detailed installation manual over one with the most impressive spec sheet. Your first suspension build will generate questions, and a manufacturer with responsive support is worth more than marginal performance gains on paper.
How does a 4-link suspension differ from original leaf springs?
Leaf springs handle two jobs simultaneously: locating the axle and absorbing load. That compromise works at moderate power levels but breaks down under hard acceleration, where axle rotation causes the spring to wind up and release suddenly, producing wheel hop. A 4-link separates those functions entirely. Dedicated links locate the axle precisely while a separate coilover or shock-and-spring setup manages load absorption, letting you tune each function independently.
The practical result is dramatically better traction off the line, a rear end that stays planted through corner exits, and the ability to adjust pinion angle without affecting ride quality. For builds running serious power, the 4-link isn’t just a performance upgrade; it’s a traction management solution that leaf springs fundamentally can’t replicate.
The stiffest suspension kit on the market won’t make your classic car faster on the street; it’ll just make it miserable to drive. That’s a truth most builders learn the hard way, and it’s exactly why choosing from the best restomod suspension kits requires a sharper lens than horsepower specs and spring rates alone.
You already know the frustration. You climb into a vintage muscle car that looks absolutely right, but the moment you push it through a corner, the body rolls like a ship in a swell and the steering wheel tells you almost nothing. That vague, disconnected feeling isn’t character; it’s a geometry problem that modern engineering can solve without stripping away the soul of the build.
This guide cuts through the noise on coilovers versus air ride, bolt-on versus frame-modifying systems, and what modern rack-and-pinion precision actually feels like when you’ve dialed it in yourself. By the end, you’ll know exactly which suspension approach fits your build goals, your budget, and your garage, and you’ll have the confidence to make that call without second-guessing every torque spec along the way.
Key Takeaways
- Modern suspension geometry is not just an upgrade — it is a fundamental safety correction that addresses the dangerous limitations baked into 50-year-old factory designs.
- Choosing from the best restomod suspension kits means understanding what each system actually includes, from tubular control arms to coilovers, and how those components work together rather than in isolation.
- Your primary use case — whether that is weekend cruising or autocross competition — should drive every kit decision, including spring rate selection relative to your engine’s weight distribution.
- Suspension planning cannot happen in a vacuum; it must be mapped alongside your brake upgrades and ride height targets from the very start of your build roadmap.
- Market leaders like Ridetech and QA1 serve genuinely different builder profiles, and knowing which camp you fall into will save you significant time, money, and frustration before you ever turn a wrench.
Beyond the Leaf Spring: Why Modern Suspension is the Soul of a Restomod
Pull back the fender skirt on a factory 1967 muscle car and you’re looking at suspension geometry that was engineered for bias-ply tires, two-lane highways, and a world where 70 mph was genuinely fast. That’s not a criticism of the engineers who designed it; it’s simply physics catching up with time. The chassis that felt planted in 1967 is actively working against you in modern traffic, and understanding that gap is the first step toward building something genuinely better.
Restomod vehicles exist precisely because nostalgia alone doesn’t keep you safe at a freeway merge. The restomod philosophy is a commitment to honoring classic aesthetics while correcting the mechanical shortcomings that five decades of automotive engineering have since solved. Suspension is where that correction matters most, and it’s why the best restomod suspension kits are engineered as complete geometry solutions rather than a collection of shinier parts bolted onto an unchanged foundation.
The Geometry Gap: Vintage Design vs Modern Expectations
Camber gain is the change in wheel angle as your suspension compresses through a corner. Vintage A-arm geometry was designed with minimal camber gain, which worked reasonably well with narrow bias-ply tires that had a relatively forgiving contact patch. Modern radial tires are an entirely different animal. They need the wheel to stay more perpendicular to the road surface under load to maintain their full contact patch, which means your classic car’s original geometry is actively fighting the tires you’ve already bolted on.
Caster, the rearward tilt of the steering axis, is equally misunderstood. Factory caster settings on most 1960s and 1970s American cars were conservative, often in the two to three degree range. Modern alignment specs for street performance typically target five to seven degrees of positive caster, which dramatically improves straight-line tracking and gives the steering wheel the self-centering feel that makes a car feel planted rather than nervous.
Original recirculating-ball steering boxes compound every geometry flaw. They introduce up to several inches of dead travel at the wheel’s center, meaning you’re already mid-correction before the front tires begin responding. A properly engineered rack-and-pinion conversion eliminates that vagueness entirely. The communication becomes direct and honest.
Reducing unsprung weight, the mass of wheels, tires, and suspension components not supported by the springs, is the quieter benefit of tubular control arms and modern hub assemblies. Less unsprung mass means the tire follows road imperfections more faithfully instead of bouncing away from them. The ride quality improvement is immediate and noticeable on the first drive.
Restomodding for Reliability and Road Comfort
Track-only thinking is a trap. Most restomod builds spend the overwhelming majority of their lives on public roads, which means vibration damping and predictable behavior at everyday speeds matter far more than peak lateral grip. Polyurethane bushings offer tighter geometry control than rubber but transmit more NVH, noise, vibration, and harshness, into the cabin. Rubber bushings absorb more vibration but allow more compliance under load. The right choice depends entirely on your use case, and it’s a decision worth mapping out before you spec a single component.
Safety, real safety, begins with a chassis that behaves predictably when you need it to respond. A stable, flat-cornering platform gives you the margin to react. You can explore that planning process in depth through Restomod Academy’s foundational guide, which frames every upgrade decision around the intersection of classic character and modern reliability. That intersection is exactly where the soul of a restomod lives.
Anatomy of a Performance Kit: Coilovers, Tubular Arms, and Subframes
Open the box on a premium restomod suspension kit and you’re not looking at a collection of individual parts. You’re looking at a system, one where every component is engineered to work in concert with the others. That distinction matters enormously. The geometry corrections we explored earlier only deliver their full benefit when the hardware executing those corrections is matched, measured, and installed as a cohesive unit rather than assembled piecemeal from a catalog.
Tubular control arms are the most visible upgrade in most front-end kits, and the engineering logic behind them is straightforward. Factory stamped steel arms were designed for mass production, not precision. Tubular chromoly or DOM steel arms are lighter, significantly stiffer under lateral load, and allow manufacturers to locate the pivot points exactly where modern geometry calculations demand them. That repositioning is what corrects the camber gain curve we discussed earlier; the material change is almost a secondary benefit.
The coilover versus traditional shock-and-spring debate comes down to one practical advantage: adjustability. A coilover combines the spring and damper into a single unit with a threaded collar that lets you dial ride height in precise increments without swapping springs. For a restomod that needs to clear a driveway apron at home and sit at a specific ride height for autocross, that flexibility is genuinely useful. Traditional setups with separate springs and shocks are simpler and often less expensive, but they lock you into a ride height at the point of purchase. If your build goals are firm and your stance is settled, that’s a perfectly rational choice. If you’re still refining the vision, coilovers give you room to evolve.
Front-End Conversions: Bolt-On vs Weld-In
Mustang II-style front crossmembers have earned their reputation as the accessible entry point for front suspension overhauls on a wide range of classic American platforms. They bolt into existing frame rails on many popular builds, incorporate rack-and-pinion steering mounts as part of the crossmember itself, and eliminate the need for a welder in your garage. The integrated rack mount is a genuine advantage; it ensures the steering geometry relationship is pre-engineered rather than approximated during fitment.
Full subframe replacements are a different conversation entirely. They demand more fabrication skill, more time, and more budget, but they deliver a level of torsional stiffness that a bolt-in crossmember simply cannot match. If you’re building a car that will see serious track use or carry a heavy engine package, the rigidity of a full subframe replacement pays dividends in steering precision and chassis response that you’ll feel in every corner. For a street-driven weekend cruiser, that investment is harder to justify.
Rear Suspension: 4-Link and Independent Systems
Leaf springs were adequate for the power levels muscle cars produced in 1969. They are not adequate for the power levels restomod builders are producing today. A properly engineered 4-link rear suspension controls axle rotation under hard acceleration, which is the root cause of wheel hop. By separating the job of locating the axle from the job of absorbing load, a 4-link system lets you tune each function independently. The result is dramatically improved traction off the line and a rear end that stays planted through corner exits.
Independent rear suspension raises the performance ceiling further, particularly for builds prioritizing road feel and handling balance over straight-line traction. IRS allows each rear wheel to respond to road surfaces independently, which improves ride quality and reduces the tendency to track in ruts. The trade-off is complexity: IRS requires more fabrication work, more precise alignment, and a higher parts cost than a well-sorted solid-axle 4-link. For a daily-driven restomod that spends time on imperfect roads, the ride quality gain is compelling. For a car that lives for weekend blasts on smooth pavement, a dialed 4-link with a quality Panhard bar or Watts link delivers most of the handling benefit at a fraction of the complexity.
Selecting from the best restomod suspension kits means understanding which of these rear configurations actually matches your driving reality, not the most impressive spec sheet. The Restomod Academy Recommended Gear page breaks down specific component categories worth evaluating as you map out your rear suspension approach.
The Top Restomod Suspension Kits for 2026: Market Leaders Analyzed
Knowing what a suspension system needs to do is one thing. Knowing which manufacturer actually delivers on that promise for your specific platform, your budget, and your skill level is an entirely different challenge. The market for the best restomod suspension kits has matured considerably, and the gap between a thoughtfully engineered system and a collection of attractive-looking parts has never been wider or more important to understand.
Best All-Around Performance: Ridetech and QA1
Ridetech has built its reputation on a straightforward premise: bolt-on geometry correction that a competent home builder can execute without a fabrication shop. Their Level 2 and Level 3 front suspension packages for popular GM platforms center on tubular control arms with corrected geometry, matched to their own coilover dampers. The Level 2 setup targets street-driven builds where ride quality and predictable handling share equal billing. The Level 3 steps up spring rates and damper valving for builders who push their cars harder on canyon roads or occasional track days. Neither kit demands welding. That accessibility is a genuine engineering achievement, not a marketing shortcut.
QA1 approaches the market from a different angle. Their full-vehicle handling kits are engineered with a sharp focus on Mopar and GM A-Body platforms, two communities that have historically been underserved by the broader aftermarket. The value-to-performance ratio at the mid-range budget level is where QA1 consistently earns its reputation. Their double-adjustable shocks allow damping tuning without purchasing an entirely new damper, which stretches your investment further as your build evolves. For the budget-conscious builder who refuses to compromise on geometry quality, QA1 deserves serious attention.
Pro-Touring Dominance: Detroit Speed and Speedtech
Detroit Speed operates at a different altitude entirely. Their X-Gen front suspension series for first and second-generation Camaros is a fully engineered geometry solution developed with direct input from competitive pro-touring racing. The spindle design, the control arm pivot locations, and the steering rack relationship are calculated as a unified system rather than adapted from an existing platform. The result is measurably higher lateral grip ceilings, but the installation demands a builder who is comfortable with precise measurement and, in many configurations, professional-level fabrication skills.
Speedtech’s ExtReme kits occupy a similar tier for builders chasing ultimate lateral G-force numbers. These systems are not weekend garage projects. They are investments in a chassis that can genuinely compete at the highest levels of pro-touring events. The engineering is exceptional. The learning curve is equally significant.
For classic truck builders and early muscle applications, Heidts and TCI both offer front crossmember solutions that bring rack-and-pinion steering and corrected geometry to platforms that other manufacturers often overlook. Heidts in particular has long-standing fitment data for a wide range of early Ford and GM truck applications, making their systems a logical starting point for builders working outside the mainstream Camaro and Mustang categories.
Choosing between these manufacturers isn’t about which name carries the most prestige. It’s about honest alignment between what each system delivers and what your build genuinely requires. The Restomod Academy product reviews section provides platform-specific breakdowns that help you make that match with confidence rather than guesswork.
How to Evaluate a Suspension Kit for Your Specific Project
Every suspension decision flows from one honest question: how do you actually use this car? A builder chasing autocross podiums needs a fundamentally different setup than someone who wants a composed, comfortable cruiser for Saturday morning drives. Getting that answer wrong is expensive. Getting it right means every component you select has a clear job to do, and does it well.
Start by mapping your use case against the kit’s design intent. Street-driven builds benefit from softer spring rates, compliance-friendly bushing materials, and damper valving tuned for road irregularities rather than smooth track surfaces. Competition-oriented builds demand stiffer rates, sharper damping response, and geometry tuned for maximum lateral load. Most builders live somewhere in the middle, which is exactly why coilovers earn their place in so many of the best restomod suspension kits: they let you adjust as your priorities shift rather than locking you into a single setup at the point of purchase.
Chassis stiffness is the foundation that every kit assumes exists beneath it. A premium suspension system installed on a chassis with cracked welds, rusted frame rails, or a body that flexes under cornering load will underperform a budget system on a solid, well-braced structure. Before you spec a single component, inspect the frame, address any structural fatigue, and consider subframe connectors if you’re working with a unibody platform. The kit can only be as precise as the structure it’s anchored to.
Budget honestly for the costs that don’t appear on the kit’s price tag. A professional four-wheel alignment after installation is not optional; it’s the final step that turns a collection of correctly installed parts into a calibrated system. Factor in wheel and tire clearance as well. Corrected geometry and lowered ride heights frequently change the relationship between the tire sidewall and the inner fender, and discovering that conflict after you’ve purchased new wheels is a frustration that careful planning eliminates.
Matching Spring Rates to Your Engine Swap
An aluminum LS engine can weigh roughly 150 pounds less than the iron-block V8 it replaces. That’s not a minor variable. It shifts the front-to-rear weight distribution meaningfully, which means the spring rates specified for a stock-engine application will leave your front end sitting higher than intended and feeling floaty under load. Consult directly with the kit manufacturer before finalizing your spring selection; most reputable brands will specify rates based on confirmed corner weights rather than a generic model year. Restomod Academy’s definitive LS swap guide walks through the weight distribution implications in detail, giving you the data you need to have that conversation confidently.
Installation Complexity: DIY vs Professional
Know your honest skill level before you commit. Most bolt-on front crossmember kits require a floor jack, quality jack stands, a torque wrench, and basic hand tools. Some rear 4-link configurations add a welder and a drill press to that list. The critical threshold is any modification that alters the vehicle’s structure permanently: cutting floor pans, trimming frame rails, or modifying firewall clearance. Those are points of no return that demand either verified fabrication skill or a professional shop. The Restomod Academy Recommended Gear page outlines the specific tools worth having before you begin, so you can assess your garage’s readiness before the kit arrives on your doorstep.
Plan the full scope before you turn a wrench. That single discipline separates builders who finish satisfied from those who finish frustrated.
Executing Your Build: Integrating Suspension into the Total Roadmap
Suspension doesn’t exist in isolation. That’s the lesson most builders absorb only after they’ve already made an expensive mistake, ordering a front crossmember kit before confirming that their chosen big brake setup will clear the new spindle. The best restomod suspension kits are engineered as complete systems, but they still operate within a larger build ecosystem that demands sequenced, deliberate planning from the very first component decision.
Ride height is the thread that connects every system on the car. Set it too low and you’re fighting bump steer, rubbing tires, and a radiator hose that contacts the fan shroud under compression. Set it too high and the aesthetic integrity of the build suffers, along with the center of gravity benefits that a lowered stance delivers. Establish your target ride height early, communicate it to every vendor you’re working with, and treat it as a fixed constraint rather than something you’ll sort out later. Later is where costly surprises live.
The final tuning phase is where a build transforms from a project into a driver’s car. Once the geometry is set and the alignment is dialed, spend time adjusting damper settings on your local roads rather than a smooth test track. Your daily driving environment is the real performance benchmark. A coilover that feels perfect on smooth pavement can feel punishing on frost-heaved asphalt, and the adjustment range on quality dampers exists precisely to solve that problem without a parts swap.
The Critical Sequence: Suspension, Brakes, and Wheels
Spindle selection drives brake kit compatibility, which drives wheel backspacing requirements. Work through that chain in order. A track width change of even half an inch alters the backspacing calculation enough to push a wheel into the inner fender under full compression. Measure twice, order once. The Restomod Academy handling guide maps this sequence clearly, giving you a structured checklist to verify compatibility across all three systems before a single component ships.
From Planning to Pavement: The Ultimate Restomod Guide
Choosing from the best restomod suspension kits becomes significantly less daunting when you’re working from a structured blueprint rather than assembling information from a dozen disconnected forum threads. Restomod Academy’s Premium Project Blueprints and consulting services exist precisely for this reason: to compress the learning curve and surface the part mismatches, clearance conflicts, and sequencing errors that derail builds before they reach the alignment rack.
Unique chassis challenges, a non-standard wheelbase, an unusual engine placement, a custom rear clip, genuinely benefit from expert input before fabrication begins. That conversation is far less expensive before cuts are made than after. The foundational restomod framework gives you the vocabulary and the decision structure to have that conversation productively, whether you’re working through it independently or alongside a professional.
Build with intention. Every component you select should serve a defined role in a system you understand completely. That discipline is what separates a finished restomod that genuinely performs from one that merely looks the part.
When a project reaches this level of professional execution, it often becomes a significant financial asset; for builders interested in the intersection of high-value holdings and technology, you can discover STO Foundation and their platform for tokenizing real-world assets.
Your Classic Deserves a Chassis That Matches Its Ambition
The best restomod suspension kits don’t just transform how a classic car handles; they transform how confidently you drive it. You now understand why vintage geometry falls short on modern roads, how coilovers and tubular arms work together as a system, and why sequencing your suspension alongside brakes and wheels isn’t optional. Those aren’t abstract concepts anymore. They’re decisions you can make with clarity.
The gap between a build that looks right and one that genuinely performs comes down to planning. Get the sequence right, match the spring rates to your actual corner weights, and let the alignment rack finish what your wrenches started.
Brook Walsh and the Restomod Academy community have already mapped that path for the most popular classic platforms. Step-by-step blueprints, expert guidance, and a community of builders who’ve solved the same problems you’re facing are all waiting for you. Download The Ultimate Restomod Guide and start planning your chassis upgrade today.
Your build is closer than you think. Go make it happen.
Frequently Asked Questions About Restomod Suspension Kits
Do I need to weld to install a restomod suspension kit?
Not always. Many of the most popular front-end kits, particularly Mustang II-style crossmember systems, are designed as true bolt-on installations that require only basic hand tools, a floor jack, and a torque wrench. The welding requirement typically enters the picture with rear 4-link configurations, full subframe replacements, or any modification that permanently alters your chassis structure. Read the installation requirements for your specific kit before purchasing, not after.
If welding is required and that’s outside your skill set, budget for professional fabrication time from the start. Attempting structural welds without the proper training creates safety risks that no amount of enthusiasm can compensate for.
Can I keep my original wheels with a modern suspension kit?
It depends on the specific kit and how aggressively it corrects your ride height and track width. Corrected geometry and lowered stance frequently change the relationship between your tire and inner fender, and some spindle designs alter the hub offset enough to push original wheels into clearance conflicts. Measure your current backspacing before committing to a kit, and confirm those numbers directly with the manufacturer.
Don’t assume compatibility based on the vehicle year alone. A half-inch change in track width is enough to create rubbing under full suspension compression, and discovering that conflict after your new wheels are mounted is an expensive lesson in planning sequence.
Is air ride better than coilovers for a restomod?
Neither is universally better; they solve different problems. Air ride excels at adjustable ride height on demand, which makes it genuinely useful for builds that need to clear low driveways at home and sit at show height on the weekend. The trade-off is system complexity, more components that can fail, and a compressor that needs space and maintenance. For drivers who prioritize dynamic handling feel and simpler long-term ownership, coilovers deliver more direct feedback and fewer points of potential failure.
Your use case should drive that decision. A show-focused cruiser that occasionally drives to events is a strong candidate for air ride. A car that sees canyon roads regularly is better served by a well-tuned coilover setup where the spring and damper relationship is fixed and predictable.
How much does a full restomod suspension kit cost?
Kit pricing varies widely based on platform, system complexity, and the manufacturer’s engineering tier, so quoting specific figures here would set inaccurate expectations for your actual purchase. Entry-level bolt-on front crossmember kits sit at a different price point than full front-and-rear systems from pro-touring-focused manufacturers. Factor in alignment costs, new wheels if required, and any fabrication labor before settling on a budget ceiling.
Treat the kit price as the starting number, not the final one. A professional four-wheel alignment after installation isn’t optional, and clearance conflicts discovered mid-build always cost more to resolve than they would have during the planning phase.
Will a modern suspension kit lower my classic car too much?
A quality kit gives you control over ride height rather than dictating it. Coilover-based systems allow incremental height adjustment through a threaded collar, so you’re not locked into a single stance at the point of purchase. The important variable is establishing your target ride height before you order, then confirming that the kit’s adjustment range actually covers it. Some kits are optimized for a specific drop range, and pushing beyond that range compromises geometry.
Communicate your target height to the manufacturer before finalizing your order. Most reputable brands will tell you directly whether their system achieves that stance without putting the geometry outside its designed operating range.
Do I need a modern steering rack if I upgrade my suspension?
You don’t always need one, but the combination delivers results that neither achieves independently. Many front crossmember kits include integrated rack-and-pinion mounts as part of the design, making the steering conversion a natural part of the front-end overhaul rather than a separate project. Installing corrected geometry while retaining a recirculating-ball box with several inches of center play leaves a significant portion of the handling improvement unrealized.
Think of it this way: the tubular arms and corrected geometry create the precise communication pathway, but the steering rack is what actually transmits that information to your hands. Doing one without the other is a compromise worth avoiding if your budget allows.
What is the best suspension kit for a first-time restomod builder?
Among the best restomod suspension kits for builders new to chassis work, bolt-on front crossmember systems with integrated rack-and-pinion mounts represent the most forgiving entry point. Ridetech’s street-oriented packages for popular GM platforms are frequently recommended for their installation accessibility and the quality of their included instructions. QA1’s mid-range kits offer comparable geometry correction for Mopar and GM A-Body platforms at a price point that leaves budget room for the alignment and tool costs that first-time builders often underestimate.
Prioritize a kit with strong technical support and a detailed installation manual over one with the most impressive spec sheet. Your first suspension build will generate questions, and a manufacturer with responsive support is worth more than marginal performance gains on paper.
How does a 4-link suspension differ from original leaf springs?
Leaf springs handle two jobs simultaneously: locating the axle and absorbing load. That compromise works at moderate power levels but breaks down under hard acceleration, where axle rotation causes the spring to wind up and release suddenly, producing wheel hop. A 4-link separates those functions entirely. Dedicated links locate the axle precisely while a separate coilover or shock-and-spring setup manages load absorption, letting you tune each function independently.
The practical result is dramatically better traction off the line, a rear end that stays planted through corner exits, and the ability to adjust pinion angle without affecting ride quality. For builds running serious power, the 4-link isn’t just a performance upgrade; it’s a traction management solution that leaf springs fundamentally can’t replicate.