
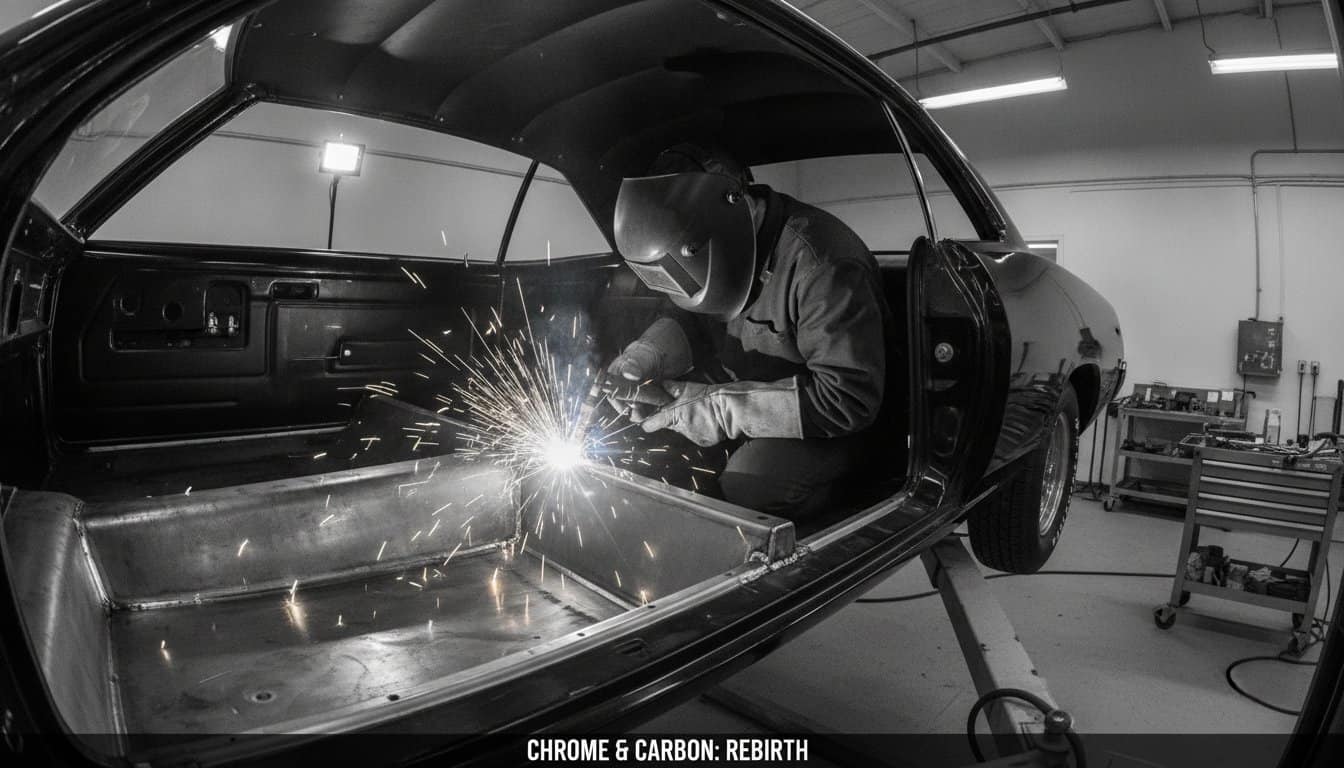
Your high-performance engine is a masterpiece of modern engineering, but it’s completely useless if the chassis beneath you can’t handle the twist. Many builders focus on the visible glitz of a restoration while ignoring the thinning, brittle steel right under their boots. You understand that a successful classic car floor pan replacement is the only way to build a foundation that can withstand the aggressive torque of 2026 performance standards. It’s common to feel a sense of dread when peeling back old carpet only to find “Swiss cheese” metal. These valid anxieties about structural integrity or weld penetration can stall any project. Selecting the wrong steel gauge isn’t just a cosmetic issue, it’s a safety hazard that can compromise your entire build.
Master the fabrication process to establish the essential first step in building a world-class machine. Follow this methodical walkthrough of the technical journey, from initial structural assessments to the final, clean surface ready for your modern interior upgrades. You’ll learn how to achieve deep, reliable penetration and a rigid, rust-free floor that serves as the perfect canvas for your creative vision. This guide transforms an intimidating hurdle into a rewarding achievement of precision engineering. Let’s get to work on building a foundation that’s as strong as your ambition.
Key Takeaways
- Distinguish between cosmetic surface rust and deep structural decay using the hammer and punch test to ensure your chassis is safe for high-performance use.
- Discover why a MIG welder with 75/25 shielding gas is the professional standard for achieving the deep weld penetration required in a classic car floor pan replacement.
- Protect your vehicle alignment by mastering body bracing techniques that prevent door sag and structural shifting while you cut out compromised metal.
- Prevent sheet metal warping and ensure a factory-perfect fit by utilizing methodical dry fitting and the strategic stitch welding technique.
- Seal your work for decades to come by applying epoxy primer and automotive seam sealer to create a moisture-proof barrier against future corrosion.
Assessing the Foundation: Identifying Surface Rust vs Structural Floor Failure
Peel back the decades-old carpet of your project car and you’ll likely face the most daunting sight in the shop: rust. Distinguishing between manageable surface scale and terminal structural decay is the first skill you must master. Surface rust looks ugly, but the metal remains thick and resonant when tapped. Structural failure, however, manifests as pinholes, lace edges, or metal that flakes away in layers like a dry pastry. In the professional world of Conservation and restoration of road vehicles, we treat these two conditions with entirely different levels of severity. Surface rust can often be neutralized, but structural decay requires surgical intervention.
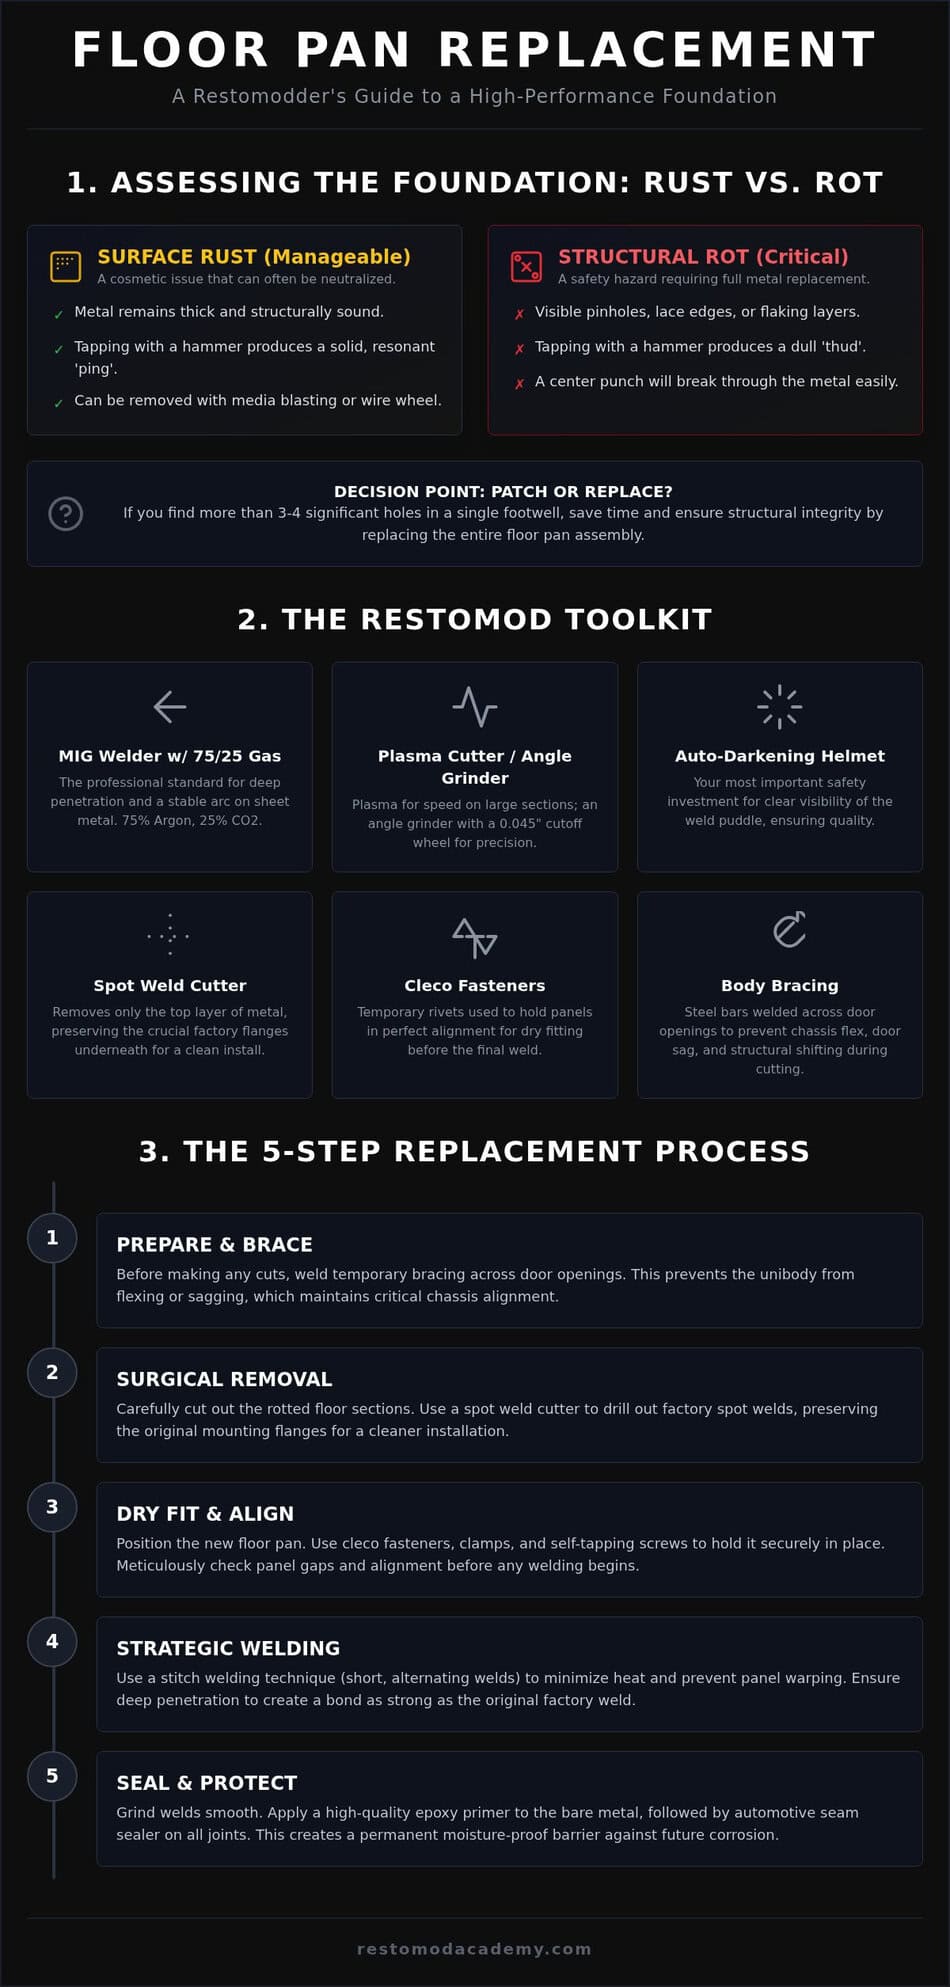
Don’t trust your eyes alone. Use the hammer and punch test to find hidden thin spots. Take a small hammer and tap across the floor pans; a solid ping indicates healthy steel, while a dull thud signals internal corrosion. Follow up by applying firm pressure with a center punch in suspicious areas. If the punch breaks through, the metal is too thin to support a weld or handle the stresses of a modern drivetrain. This assessment determines whether your classic car floor pan replacement involves localized patches or a complete, factory-style floor assembly.
The Structural Role of the Floor Pan
Most classic cars rely on the floor pan as a vital component of their unibody or body-on-frame stiffness. These panels prevent chassis flex during high-performance cornering, acting as a horizontal brace between the rockers. You must pay close attention to where the floor integrates with torque boxes and frame rail points. For a 2026 restomod build, structural floor integrity means the assembly can withstand the twisting forces of high-horsepower engines without allowing the body to sag or the doors to bind.
Planning Your Metal Restoration Strategy
Efficiency in your classic car floor pan replacement depends on a realistic cost-to-labor ratio. If you find more than three or four significant holes in a single footwell, you’ll save dozens of hours by replacing the entire pan rather than stitching together a quilt of small patches. Map out your repair sequence on paper before making the first cut. Identify every spot weld and overlap. This methodical approach ensures you don’t remove critical support material before you’re ready to tack in the new steel, keeping the car square and true throughout the process.
The Restomod Toolkit: Essential Gear for Professional Metal Fabrication
Success in a classic car floor pan replacement doesn’t just come from your steady hand; it depends on the quality of your arsenal. You can’t fight 2026-level performance goals with 1970s hardware. A MIG welder paired with 75/25 shielding gas is the absolute standard for this job. This mixture of 75 percent Argon and 25 percent Carbon Dioxide provides the stable arc and deep penetration necessary for structural sheet metal without the excessive spatter of pure CO2.
When executing a classic car floor pan replacement, you have two primary paths for removal. A plasma cutter offers surgical speed and leaves a narrow kerf, making it ideal for large floor sections. However, a high-speed angle grinder with a thin 0.045-inch cutoff wheel remains the most versatile tool for tight corners and precision trimming. To hold everything together before the first spark, invest in a set of cleco fasteners. These temporary rivets allow you to align panels perfectly and test fit your work multiple times, ensuring the floor sits exactly where the factory intended.
Never compromise on your vision. A high-quality auto-darkening helmet is your most important investment. It allows you to see your weld puddle clearly, which is the difference between a structural bond and a weld that fails under torque. If you’re unsure about your current setup, our Recommended Gear for Builders list outlines the specific models we trust in the shop.
Precision Cutting and Preparation Tools
Preserving your factory flanges is critical for a clean install. Use a dedicated spot weld cutter rather than a standard drill bit. A cutter removes only the top layer of metal, leaving the underlying support structure intact for your new pan. Once the old metal is gone, use flap discs to prep the surface. These discs allow you to clean away rust and old paint without thinning the surrounding steel, which is a common mistake with aggressive grinding wheels.
Metal Shaping for the DIY Mentor
Even the best aftermarket pans require some fine-tuning. A basic set of body hammers and dollies will help you massage the edges for a seamless transition. For custom patches, a simple sheet metal brake is invaluable for creating crisp, professional bends. Remember that removing every trace of oil, rust, and coating is the only way to ensure your weld becomes a permanent, structural part of the chassis. If you want to dive deeper into these techniques, our Restomod Consulting Services can help you refine your fabrication skills for complex builds.
Surgical Removal: Cutting Out the Rot Without Damaging the Car
Approach your first cut with the mindset of a surgeon, not a demolition crew. A classic car floor pan replacement requires you to understand exactly what’s happening beneath the surface before you pull the trigger on your plasma cutter. Modernizing a vintage chassis for 2026 performance means every cut must be calculated and deliberate. Before you remove a single square inch of steel, verify the location of fuel lines, brake lines, and wiring harnesses. These often hide within frame rails or along the transmission tunnel. Move them aside or shield them with a welding blanket to prevent a catastrophic fire or a tedious electrical repair later.
Chassis Bracing and Stability
Stability is your highest priority during this phase. If you’re working on a convertible or a unibody car with severe rot, the body can sag the moment you remove the floor’s structural support. This leads to doors that won’t close and a chassis that’s permanently out of alignment. Build a simple internal brace using one-inch square tubing. Weld these bars across the door openings and diagonally between the B-pillars. Always perform this work on level ground. If your jack stands aren’t perfectly even, you’ll bake a permanent twist into your car’s geometry. Document your measurements between the seat risers and rockers now, because once the metal is gone, those reference points vanish.
Locating and Drifting Spot Welds
Identifying factory spot welds is often the most tedious part of the job. Wipe the flanges with a wire brush or a flap disc to reveal the small, circular indentations where the panels meet. Use a center punch to create a pilot mark in the exact middle of each weld. This prevents your spot weld cutter from walking and damaging the underlying flange you need to save. Once you’ve drilled through the top layer, use a pneumatic chisel to gently separate the panels. Don’t force it. If the panels don’t pop apart, you likely haven’t drilled deep enough or missed a weld. A surgical separation preserves the integrity of the factory flanges, providing a clean, flat surface for your new metal. Clean the remaining flanges down to bright, bare steel. This meticulous preparation is what separates a professional classic car floor pan replacement from a backyard patch job. It ensures your new foundation is ready for the high-performance journey ahead.
Mastering the Installation: Welding and Fitting Your New Floor
The moment of truth in any classic car floor pan replacement arrives when you lay your fresh steel into the chassis. This is the most important hour of your project. Dry fitting isn’t just a suggestion; it’s the phase where you ensure the car’s future comfort and structural safety. If the pan doesn’t sit flush against the rockers or the transmission tunnel, your welds will be weak and your modern interior will never fit right. Take the time to massage the metal until it looks like it grew there from the factory.
Achieving the Perfect Fitment
Precision starts with the trim. Aim for a tight 1/16 inch gap around the perimeter of your replacement pan. This gap allows the weld pool to penetrate both pieces of metal equally, creating a bond that’s as strong as the original steel. Use strong magnets and those cleco fasteners we discussed earlier to lock the pan into position. Before you strike an arc, verify your seat mount and shifter hole alignment. It’s much easier to adjust a clecoed panel now than it is to relocate a welded seat riser later.
Welding for Structural Strength
Set your MIG welder specifically for 18-20 gauge automotive steel. For a restomod build that’s expected to handle modern torque, your weld penetration must be flawless. Use the stitch welding technique to prevent warping. This involves making short, one-inch beads and then moving to a different quadrant of the floor. By alternating your weld locations, you manage heat soak and keep the thin sheet metal from distorting under the high temperatures. You can learn more about these specialized techniques in our Classic Car Bodywork Guide.
Choose your weld style based on the location. Plug welding is the gold standard for matching factory appearance on flanges, while butt welding provides a seamless joint on flat floor sections. Once the welding is complete, grind the beads flush with a 36-grit flap disc followed by an 80-grit finish. This creates a professional, seamless look that’s ready for high-performance coatings. If you’re feeling uncertain about your structural welds, our Restomod Consulting Services can help you verify your technique before you move to the final assembly phase.
Foundation Protection: Sealing and Strengthening Your Restomod
Completing the metalwork is a massive milestone, but your project isn’t truly finished until you’ve armored the steel against the elements. Raw metal is a ticking clock, especially in the high-stress environment of a performance vehicle. To ensure your labor lasts for decades, you need a chemical barrier that does more than just sit on the surface. Epoxy primer is the undisputed gold standard for this task. Unlike standard primers, epoxy creates a non-porous seal that chemically bonds to the metal, effectively blocking oxygen and moisture from reaching the substrate.
Applying automotive seam sealer to every joint and overlap is your next critical move. This step is frequently rushed, yet it is essential for preventing water from wicking into the tight spaces between panels. Use a high-quality brush-on or caulk-style sealer after your primer has cured. This creates a flexible, waterproof bead that mimics factory standards while offering 2026-level durability. While the floor is open and accessible, consider integrating subframe connectors. These bars tie the front and rear subframes together, turning a flexible vintage chassis into a rigid platform capable of handling modern suspension loads without twisting the body.
Modern Chemical Barriers
Many builders fall for the trap of rust encapsulation products that promise to stop decay without proper preparation. For a professional restomod, always choose true epoxy protection. It provides a stable, durable base for topcoats and sound-deadening materials. Don’t forget the hidden areas. Use internal cavity wax with a long spray wand to coat the inside of frame rails and rockers that you cannot reach with a brush or gun. You can find our top-rated chemicals in our Product Reviews for Coatings section.
Preparing for Modern Power
A solid floor is the literal anchor for all your performance upgrades. If you are following our LS Engine Swap Guide, remember that the sheer torque of a modern V8 can twist a compromised chassis. A fresh classic car floor pan replacement provides the structural integrity needed to keep your drivetrain aligned under hard acceleration. This rigidity also allows your Suspension Upgrades Guide to work as intended, as the chassis no longer acts as an uncontrolled spring. Finally, use this clean surface to install modern butyl-based sound deadening. It transforms the driving experience from a noisy vintage cabin into a refined, modern environment that matches the high-performance nature of your build.
Forging the Future of Your Project
You’ve transitioned from assessing cancerous decay to mastering the surgical precision required for a world-class foundation. A successful classic car floor pan replacement is more than a simple repair; it’s the definitive engineering step that allows your vintage machine to handle modern horsepower. By prioritizing deep weld penetration and applying modern chemical barriers like epoxy primer, you’ve ensured your labor will withstand the tests of time and torque. This meticulous approach to metalwork sets the stage for every upgrade that follows, from high-performance suspension to contemporary interior comfort.
We are here to support your journey from the first cut to the final drive. Our safety-first engineering approach and authoritative DIY mentorship provide the clarity you need to tackle complex fabrication with confidence. Download The Ultimate Restomod Guide to master your build from metal to motor and leverage our expert-led project blueprints for your next phase. The shop is open, the metal is ready, and your vision is finally taking shape. Keep pushing the boundaries of what your classic can become.
Frequently Asked Questions
Can I replace a classic car floor pan without a welder?
No, you cannot safely replace a floor pan without a welder. While some modern panel adhesives are incredibly strong, they are not designed to handle the structural loads and high torque of a restomod. Welding provides the thermal fusion necessary to make the new metal a permanent part of the chassis. Relying on rivets or bolts creates stress risers that will eventually fail, compromising your safety and the car’s structural integrity.
What gauge steel is best for classic car floor pan replacement?
Use 18-gauge to 20-gauge cold-rolled steel for your project. Most factory floors were originally 19-gauge or 20-gauge, but 18-gauge is the preferred choice for a classic car floor pan replacement in a performance build. This slightly thicker material offers superior rigidity and is easier to weld without burning through. Avoid using 22-gauge steel for floor sections, as it lacks the strength required to support seat mounts or resist chassis flex.
How much does it cost to have a professional replace floor pans in 2026?
Professional labor rates in 2026 vary, but you should expect a significant investment for expert fabrication. Industry professionals report that a full floor replacement typically involves 20 to 40 hours of dedicated labor, including removal, fitment, and finishing. Since every project has unique rust challenges, many builders find it more cost-effective to utilize our restomod consulting services to master the fabrication themselves, ensuring the work meets their own high standards.
Should I use a one-piece floor pan or multiple patch panels?
Choose a one-piece floor pan if your damage extends beyond small, isolated footwell holes. A one-piece unit eliminates dozens of feet of weld seams and ensures your seat and seatbelt mounts are perfectly aligned to factory specifications. Patch panels are excellent for localized repairs where the surrounding metal is healthy. If you are stitching together more than three large patches, a full pan will save you significant time and provide a cleaner result.
How do I stop rust from returning after replacing the floor?
Seal every joint with automotive seam sealer and apply a high-quality epoxy primer to prevent rust from returning. Moisture often enters through tiny gaps in weld seams or overlaps, so thorough sealing is non-negotiable. Additionally, spray internal cavity wax into frame rails and rockers that were exposed during the classic car floor pan replacement. This creates a waxy, hydrophobic barrier in enclosed areas where condensation naturally forms, protecting your new steel from the inside out.
What is the best primer to use on a new floor pan?
Two-part epoxy primer is the absolute best choice for sealing a new floor pan. Unlike traditional primers, epoxy is non-porous and creates a chemical bond with the steel that effectively blocks moisture. It provides a stable base for sound deadening and topcoats. Always apply it to bare, clean metal that has been prepped with a wax and grease remover. This ensures your foundation remains rust-free for the life of your restomod.
How do I identify if my floor rust is structural or cosmetic?
Perform the hammer and punch test to distinguish between cosmetic surface rust and structural failure. Strike the metal with a small hammer; a bright ping indicates solid steel, while a dull thud suggests internal decay. Follow this by applying firm pressure with a center punch. If the punch pierces the metal, the section has lost its structural integrity and must be replaced. Healthy metal will resist the punch without deforming or cracking.
Can I use body filler to fix small holes in the floor?
Never use body filler to repair holes in a floor pan. Filler is a cosmetic product designed for smoothing surfaces, not for structural repair. It is porous and will eventually trap moisture against the metal, leading to hidden rust that spreads rapidly. In a performance vehicle, using filler to hide holes is a dangerous shortcut. Always replace compromised metal with new steel to ensure the chassis can handle the stresses of modern driving.
Your high-performance engine is a masterpiece of modern engineering, but it’s completely useless if the chassis beneath you can’t handle the twist. Many builders focus on the visible glitz of a restoration while ignoring the thinning, brittle steel right under their boots. You understand that a successful classic car floor pan replacement is the only way to build a foundation that can withstand the aggressive torque of 2026 performance standards. It’s common to feel a sense of dread when peeling back old carpet only to find “Swiss cheese” metal. These valid anxieties about structural integrity or weld penetration can stall any project. Selecting the wrong steel gauge isn’t just a cosmetic issue, it’s a safety hazard that can compromise your entire build.
Master the fabrication process to establish the essential first step in building a world-class machine. Follow this methodical walkthrough of the technical journey, from initial structural assessments to the final, clean surface ready for your modern interior upgrades. You’ll learn how to achieve deep, reliable penetration and a rigid, rust-free floor that serves as the perfect canvas for your creative vision. This guide transforms an intimidating hurdle into a rewarding achievement of precision engineering. Let’s get to work on building a foundation that’s as strong as your ambition.
Key Takeaways
- Distinguish between cosmetic surface rust and deep structural decay using the hammer and punch test to ensure your chassis is safe for high-performance use.
- Discover why a MIG welder with 75/25 shielding gas is the professional standard for achieving the deep weld penetration required in a classic car floor pan replacement.
- Protect your vehicle alignment by mastering body bracing techniques that prevent door sag and structural shifting while you cut out compromised metal.
- Prevent sheet metal warping and ensure a factory-perfect fit by utilizing methodical dry fitting and the strategic stitch welding technique.
- Seal your work for decades to come by applying epoxy primer and automotive seam sealer to create a moisture-proof barrier against future corrosion.
Assessing the Foundation: Identifying Surface Rust vs Structural Floor Failure
Peel back the decades-old carpet of your project car and you’ll likely face the most daunting sight in the shop: rust. Distinguishing between manageable surface scale and terminal structural decay is the first skill you must master. Surface rust looks ugly, but the metal remains thick and resonant when tapped. Structural failure, however, manifests as pinholes, lace edges, or metal that flakes away in layers like a dry pastry. In the professional world of Conservation and restoration of road vehicles, we treat these two conditions with entirely different levels of severity. Surface rust can often be neutralized, but structural decay requires surgical intervention.
Don’t trust your eyes alone. Use the hammer and punch test to find hidden thin spots. Take a small hammer and tap across the floor pans; a solid ping indicates healthy steel, while a dull thud signals internal corrosion. Follow up by applying firm pressure with a center punch in suspicious areas. If the punch breaks through, the metal is too thin to support a weld or handle the stresses of a modern drivetrain. This assessment determines whether your classic car floor pan replacement involves localized patches or a complete, factory-style floor assembly.
The Structural Role of the Floor Pan
Most classic cars rely on the floor pan as a vital component of their unibody or body-on-frame stiffness. These panels prevent chassis flex during high-performance cornering, acting as a horizontal brace between the rockers. You must pay close attention to where the floor integrates with torque boxes and frame rail points. For a 2026 restomod build, structural floor integrity means the assembly can withstand the twisting forces of high-horsepower engines without allowing the body to sag or the doors to bind.
Planning Your Metal Restoration Strategy
Efficiency in your classic car floor pan replacement depends on a realistic cost-to-labor ratio. If you find more than three or four significant holes in a single footwell, you’ll save dozens of hours by replacing the entire pan rather than stitching together a quilt of small patches. Map out your repair sequence on paper before making the first cut. Identify every spot weld and overlap. This methodical approach ensures you don’t remove critical support material before you’re ready to tack in the new steel, keeping the car square and true throughout the process.
The Restomod Toolkit: Essential Gear for Professional Metal Fabrication
Success in a classic car floor pan replacement doesn’t just come from your steady hand; it depends on the quality of your arsenal. You can’t fight 2026-level performance goals with 1970s hardware. A MIG welder paired with 75/25 shielding gas is the absolute standard for this job. This mixture of 75 percent Argon and 25 percent Carbon Dioxide provides the stable arc and deep penetration necessary for structural sheet metal without the excessive spatter of pure CO2.
When executing a classic car floor pan replacement, you have two primary paths for removal. A plasma cutter offers surgical speed and leaves a narrow kerf, making it ideal for large floor sections. However, a high-speed angle grinder with a thin 0.045-inch cutoff wheel remains the most versatile tool for tight corners and precision trimming. To hold everything together before the first spark, invest in a set of cleco fasteners. These temporary rivets allow you to align panels perfectly and test fit your work multiple times, ensuring the floor sits exactly where the factory intended.
Never compromise on your vision. A high-quality auto-darkening helmet is your most important investment. It allows you to see your weld puddle clearly, which is the difference between a structural bond and a weld that fails under torque. If you’re unsure about your current setup, our Recommended Gear for Builders list outlines the specific models we trust in the shop.
Precision Cutting and Preparation Tools
Preserving your factory flanges is critical for a clean install. Use a dedicated spot weld cutter rather than a standard drill bit. A cutter removes only the top layer of metal, leaving the underlying support structure intact for your new pan. Once the old metal is gone, use flap discs to prep the surface. These discs allow you to clean away rust and old paint without thinning the surrounding steel, which is a common mistake with aggressive grinding wheels.
Metal Shaping for the DIY Mentor
Even the best aftermarket pans require some fine-tuning. A basic set of body hammers and dollies will help you massage the edges for a seamless transition. For custom patches, a simple sheet metal brake is invaluable for creating crisp, professional bends. Remember that removing every trace of oil, rust, and coating is the only way to ensure your weld becomes a permanent, structural part of the chassis. If you want to dive deeper into these techniques, our Restomod Consulting Services can help you refine your fabrication skills for complex builds.
Surgical Removal: Cutting Out the Rot Without Damaging the Car
Approach your first cut with the mindset of a surgeon, not a demolition crew. A classic car floor pan replacement requires you to understand exactly what’s happening beneath the surface before you pull the trigger on your plasma cutter. Modernizing a vintage chassis for 2026 performance means every cut must be calculated and deliberate. Before you remove a single square inch of steel, verify the location of fuel lines, brake lines, and wiring harnesses. These often hide within frame rails or along the transmission tunnel. Move them aside or shield them with a welding blanket to prevent a catastrophic fire or a tedious electrical repair later.
Chassis Bracing and Stability
Stability is your highest priority during this phase. If you’re working on a convertible or a unibody car with severe rot, the body can sag the moment you remove the floor’s structural support. This leads to doors that won’t close and a chassis that’s permanently out of alignment. Build a simple internal brace using one-inch square tubing. Weld these bars across the door openings and diagonally between the B-pillars. Always perform this work on level ground. If your jack stands aren’t perfectly even, you’ll bake a permanent twist into your car’s geometry. Document your measurements between the seat risers and rockers now, because once the metal is gone, those reference points vanish.
Locating and Drifting Spot Welds
Identifying factory spot welds is often the most tedious part of the job. Wipe the flanges with a wire brush or a flap disc to reveal the small, circular indentations where the panels meet. Use a center punch to create a pilot mark in the exact middle of each weld. This prevents your spot weld cutter from walking and damaging the underlying flange you need to save. Once you’ve drilled through the top layer, use a pneumatic chisel to gently separate the panels. Don’t force it. If the panels don’t pop apart, you likely haven’t drilled deep enough or missed a weld. A surgical separation preserves the integrity of the factory flanges, providing a clean, flat surface for your new metal. Clean the remaining flanges down to bright, bare steel. This meticulous preparation is what separates a professional classic car floor pan replacement from a backyard patch job. It ensures your new foundation is ready for the high-performance journey ahead.
Mastering the Installation: Welding and Fitting Your New Floor
The moment of truth in any classic car floor pan replacement arrives when you lay your fresh steel into the chassis. This is the most important hour of your project. Dry fitting isn’t just a suggestion; it’s the phase where you ensure the car’s future comfort and structural safety. If the pan doesn’t sit flush against the rockers or the transmission tunnel, your welds will be weak and your modern interior will never fit right. Take the time to massage the metal until it looks like it grew there from the factory.
Achieving the Perfect Fitment
Precision starts with the trim. Aim for a tight 1/16 inch gap around the perimeter of your replacement pan. This gap allows the weld pool to penetrate both pieces of metal equally, creating a bond that’s as strong as the original steel. Use strong magnets and those cleco fasteners we discussed earlier to lock the pan into position. Before you strike an arc, verify your seat mount and shifter hole alignment. It’s much easier to adjust a clecoed panel now than it is to relocate a welded seat riser later.
Welding for Structural Strength
Set your MIG welder specifically for 18-20 gauge automotive steel. For a restomod build that’s expected to handle modern torque, your weld penetration must be flawless. Use the stitch welding technique to prevent warping. This involves making short, one-inch beads and then moving to a different quadrant of the floor. By alternating your weld locations, you manage heat soak and keep the thin sheet metal from distorting under the high temperatures. You can learn more about these specialized techniques in our Classic Car Bodywork Guide.
Choose your weld style based on the location. Plug welding is the gold standard for matching factory appearance on flanges, while butt welding provides a seamless joint on flat floor sections. Once the welding is complete, grind the beads flush with a 36-grit flap disc followed by an 80-grit finish. This creates a professional, seamless look that’s ready for high-performance coatings. If you’re feeling uncertain about your structural welds, our Restomod Consulting Services can help you verify your technique before you move to the final assembly phase.
Foundation Protection: Sealing and Strengthening Your Restomod
Completing the metalwork is a massive milestone, but your project isn’t truly finished until you’ve armored the steel against the elements. Raw metal is a ticking clock, especially in the high-stress environment of a performance vehicle. To ensure your labor lasts for decades, you need a chemical barrier that does more than just sit on the surface. Epoxy primer is the undisputed gold standard for this task. Unlike standard primers, epoxy creates a non-porous seal that chemically bonds to the metal, effectively blocking oxygen and moisture from reaching the substrate.
Applying automotive seam sealer to every joint and overlap is your next critical move. This step is frequently rushed, yet it is essential for preventing water from wicking into the tight spaces between panels. Use a high-quality brush-on or caulk-style sealer after your primer has cured. This creates a flexible, waterproof bead that mimics factory standards while offering 2026-level durability. While the floor is open and accessible, consider integrating subframe connectors. These bars tie the front and rear subframes together, turning a flexible vintage chassis into a rigid platform capable of handling modern suspension loads without twisting the body.
Modern Chemical Barriers
Many builders fall for the trap of rust encapsulation products that promise to stop decay without proper preparation. For a professional restomod, always choose true epoxy protection. It provides a stable, durable base for topcoats and sound-deadening materials. Don’t forget the hidden areas. Use internal cavity wax with a long spray wand to coat the inside of frame rails and rockers that you cannot reach with a brush or gun. You can find our top-rated chemicals in our Product Reviews for Coatings section.
Preparing for Modern Power
A solid floor is the literal anchor for all your performance upgrades. If you are following our LS Engine Swap Guide, remember that the sheer torque of a modern V8 can twist a compromised chassis. A fresh classic car floor pan replacement provides the structural integrity needed to keep your drivetrain aligned under hard acceleration. This rigidity also allows your Suspension Upgrades Guide to work as intended, as the chassis no longer acts as an uncontrolled spring. Finally, use this clean surface to install modern butyl-based sound deadening. It transforms the driving experience from a noisy vintage cabin into a refined, modern environment that matches the high-performance nature of your build.
Forging the Future of Your Project
You’ve transitioned from assessing cancerous decay to mastering the surgical precision required for a world-class foundation. A successful classic car floor pan replacement is more than a simple repair; it’s the definitive engineering step that allows your vintage machine to handle modern horsepower. By prioritizing deep weld penetration and applying modern chemical barriers like epoxy primer, you’ve ensured your labor will withstand the tests of time and torque. This meticulous approach to metalwork sets the stage for every upgrade that follows, from high-performance suspension to contemporary interior comfort.
We are here to support your journey from the first cut to the final drive. Our safety-first engineering approach and authoritative DIY mentorship provide the clarity you need to tackle complex fabrication with confidence. Download The Ultimate Restomod Guide to master your build from metal to motor and leverage our expert-led project blueprints for your next phase. The shop is open, the metal is ready, and your vision is finally taking shape. Keep pushing the boundaries of what your classic can become.
Frequently Asked Questions
Can I replace a classic car floor pan without a welder?
No, you cannot safely replace a floor pan without a welder. While some modern panel adhesives are incredibly strong, they are not designed to handle the structural loads and high torque of a restomod. Welding provides the thermal fusion necessary to make the new metal a permanent part of the chassis. Relying on rivets or bolts creates stress risers that will eventually fail, compromising your safety and the car’s structural integrity.
What gauge steel is best for classic car floor pan replacement?
Use 18-gauge to 20-gauge cold-rolled steel for your project. Most factory floors were originally 19-gauge or 20-gauge, but 18-gauge is the preferred choice for a classic car floor pan replacement in a performance build. This slightly thicker material offers superior rigidity and is easier to weld without burning through. Avoid using 22-gauge steel for floor sections, as it lacks the strength required to support seat mounts or resist chassis flex.
How much does it cost to have a professional replace floor pans in 2026?
Professional labor rates in 2026 vary, but you should expect a significant investment for expert fabrication. Industry professionals report that a full floor replacement typically involves 20 to 40 hours of dedicated labor, including removal, fitment, and finishing. Since every project has unique rust challenges, many builders find it more cost-effective to utilize our restomod consulting services to master the fabrication themselves, ensuring the work meets their own high standards.
Should I use a one-piece floor pan or multiple patch panels?
Choose a one-piece floor pan if your damage extends beyond small, isolated footwell holes. A one-piece unit eliminates dozens of feet of weld seams and ensures your seat and seatbelt mounts are perfectly aligned to factory specifications. Patch panels are excellent for localized repairs where the surrounding metal is healthy. If you are stitching together more than three large patches, a full pan will save you significant time and provide a cleaner result.
How do I stop rust from returning after replacing the floor?
Seal every joint with automotive seam sealer and apply a high-quality epoxy primer to prevent rust from returning. Moisture often enters through tiny gaps in weld seams or overlaps, so thorough sealing is non-negotiable. Additionally, spray internal cavity wax into frame rails and rockers that were exposed during the classic car floor pan replacement. This creates a waxy, hydrophobic barrier in enclosed areas where condensation naturally forms, protecting your new steel from the inside out.
What is the best primer to use on a new floor pan?
Two-part epoxy primer is the absolute best choice for sealing a new floor pan. Unlike traditional primers, epoxy is non-porous and creates a chemical bond with the steel that effectively blocks moisture. It provides a stable base for sound deadening and topcoats. Always apply it to bare, clean metal that has been prepped with a wax and grease remover. This ensures your foundation remains rust-free for the life of your restomod.
How do I identify if my floor rust is structural or cosmetic?
Perform the hammer and punch test to distinguish between cosmetic surface rust and structural failure. Strike the metal with a small hammer; a bright ping indicates solid steel, while a dull thud suggests internal decay. Follow this by applying firm pressure with a center punch. If the punch pierces the metal, the section has lost its structural integrity and must be replaced. Healthy metal will resist the punch without deforming or cracking.
Can I use body filler to fix small holes in the floor?
Never use body filler to repair holes in a floor pan. Filler is a cosmetic product designed for smoothing surfaces, not for structural repair. It is porous and will eventually trap moisture against the metal, leading to hidden rust that spreads rapidly. In a performance vehicle, using filler to hide holes is a dangerous shortcut. Always replace compromised metal with new steel to ensure the chassis can handle the stresses of modern driving.