
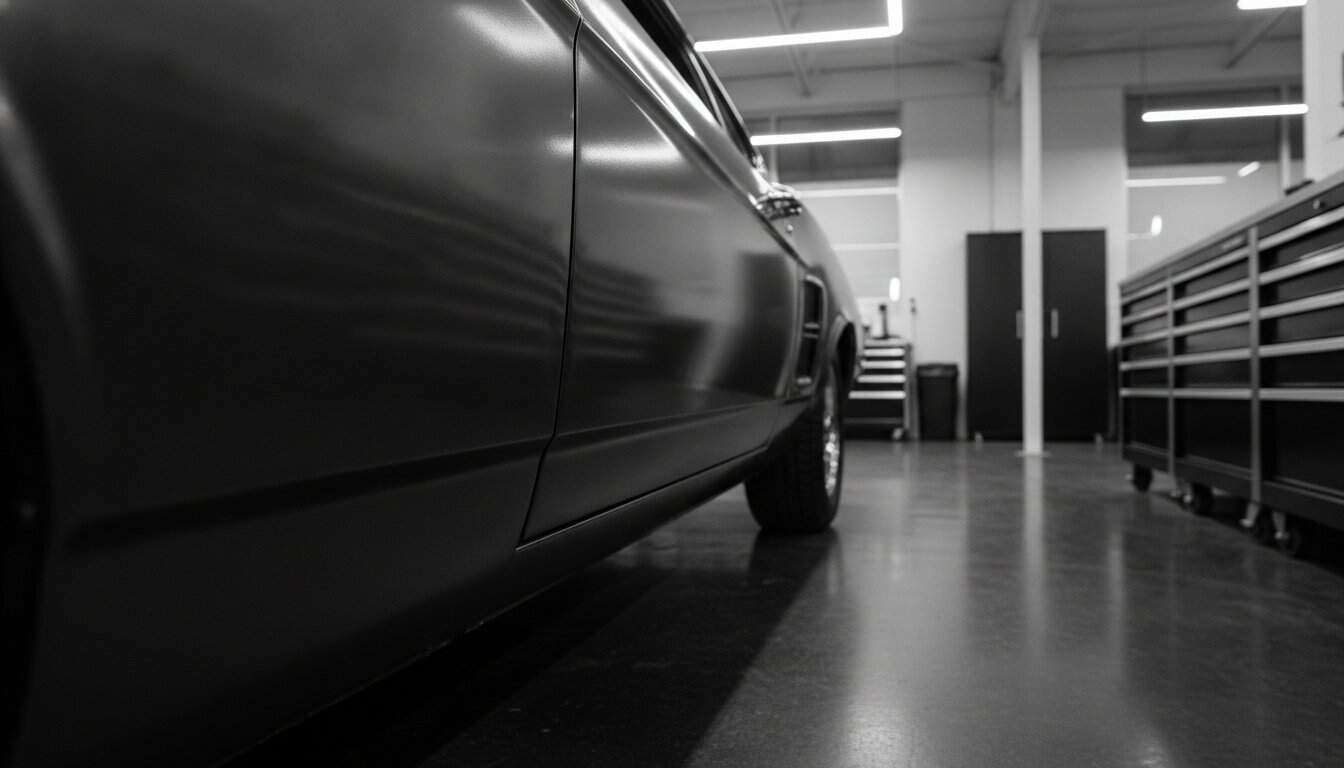
A flawless paint job is a wasted investment if your body lines don’t line up with mathematical precision. You can spend thousands on the deepest clear coat, but the human eye will always gravitate toward a crooked trunk lid or a sagging door. Achieving professional classic car panel alignment is often the most taxing phase of a build, especially when fixing one gap seems to ruin three others. It’s the difference between a car that looks like a project and one that commands respect on the show floor.
I know the frustration of wrestling with aftermarket panels that seem to be the wrong shape or doors that refuse to close with that satisfying, modern thud. You’re not alone in chasing these elusive tolerances. This guide will teach you the methodical sequence required to achieve factory-perfect or show-quality panel gaps on your restomod. We’ll explore how to work from the fixed rear quarters forward, ensuring every line flows seamlessly before you ever touch a spray gun. With restoration labor rates reaching $163 per hour as of June 2026, learning to execute this precision work yourself is the best way to ensure your project looks expensive and stays on track.
Key Takeaways
- Learn why the rear quarter panel serves as your North Star and how to prepare a perfectly level surface to avoid chasing ghost gaps.
- Master the methodical rear-to-front sequence for classic car panel alignment to ensure every body line flows seamlessly into the next.
- Discover professional metalworking techniques to modify ill-fitting aftermarket panels so they meet show-quality standards.
- Understand how proper alignment acts as a prerequisite for high-performance suspension and reveals potential hidden frame issues.
- Execute a strategic final mock-up and marking process to preserve your precision work for easy reassembly after the paint phase.
The Architecture of a Great Build: Why Alignment is Everything
A “10-foot car” might turn heads at a stoplight, but the true mark of a master builder is found in the shadows of the door jams. When we talk about classic car panel alignment, we’re discussing the visual language of quality. Large, uneven gaps scream of a rushed project or a neglected past. Conversely, tight, uniform lines suggest a vehicle that has been engineered rather than just assembled. This precision is the foundation of the entire automotive restoration process, and it must be addressed long before you consider opening a can of primer.
Think of your body panels as a skin that must fit perfectly over a skeletal structure. If the gaps are wider at the top of a door than the bottom, the car is telling you something. It might be a sagging body mount or a subtle twist in the frame from decades of hard launches. You must solve these riddles while the car is in bare metal. Adding modern weatherstripping to a poorly aligned door creates uneven pressure, leading to wind noise and water leaks that can ruin a fresh interior. Alignment isn’t just about looks; it’s about making the car function like a modern machine.
Alignment as a Structural Diagnostic Tool
Use your panel gaps to verify the integrity of your chassis. If you’ve recently completed an LS engine swap or installed a high-torque drivetrain, the increased stress can reveal hidden weaknesses. High-horsepower builds often suffer from chassis flex that manifests as panels rubbing under load. Tightening your tolerances now ensures that your modern, stiff suspension doesn’t cause body panels to collide when you dive into a corner. Precision classic car panel alignment acts as a final check to ensure your foundation is square and ready for performance.
Setting the Standard: What Defines a Perfect Gap?
Factory tolerances in the 1960s were surprisingly loose. It wasn’t uncommon for a brand-new Mustang or Chevelle to leave the lot with gaps exceeding 1/4 inch. However, the modern restomod standard has shifted toward a uniform 3/16 inch. This sweet spot provides enough clearance for movement while maintaining a high-end, cohesive aesthetic. Remember to account for paint thickness. A show-quality finish involving multiple coats of high-build primer, base, and clear can easily add 15 mils of material to every edge. If your gaps are too tight in the mock-up phase, your doors will chip the paint the first time you close them after final assembly.
The Reference Point Strategy: Tools and Preparation
Every great build needs an anchor. In the world of classic car panel alignment, that anchor is the rear quarter panel. Unlike fenders, hoods, or doors, the quarter panel is a fixed structural component welded to the inner structure. It cannot be moved to accommodate other parts. This makes it your North Star. You must align every other moving part to this single, unyielding point of reference. If you start at the front of the car and work backward, you will eventually find yourself with a door that refuses to match a quarter panel that cannot be adjusted.
Before you loosen a single bolt, you must prepare the environment. Gravity is your enemy if the car is sitting on jack stands. A chassis supported only at four points will flex, distorting your measurements. To achieve results that meet professional automotive engineering standards, the vehicle must be on a perfectly level surface with the suspension fully loaded. This means the car should be sitting on its wheels or on ramps that support the tires. This ensures the frame is in the same state it will be when cruising down the highway, preventing the gaps from shifting once the car is off the lift.
Don’t overlook the hardware. Modern restomod builds often benefit from high-quality aftermarket hinges and strikers. If your original hinges have even a fraction of an inch of play in the pins, your alignment will never hold. Replace or rebuild these components first. A solid foundation allows you to use drift punches and floor jacks to nudge heavy doors into position with the confidence that they will stay where you put them.
The Restomod Builder’s Toolkit for Gapping
Precision requires the right instruments. You will need a comprehensive set of body shims in various thicknesses, typically ranging from 1/16 to 1/8 inch. These allow for incremental adjustments that are impossible to eyeball. Use high-quality masking tape to double-wrap the edges of every panel. This protects your metal and prevents heart-breaking chips during the inevitable trial and error phase. For a complete list of the essentials, see our recommended gear for body assembly. Having the right spacers and gauges on hand will save you hours of frustration.
Establishing the Anchor: Quarter Panels and Rockers
Start by identifying your baselines. The quarter panel provides your vertical reference, while the rocker panel establishes your horizontal line. Check these for straightness before you begin. Document the “as-found” state of the car with photos and measurements. This baseline helps you track progress and ensures you aren’t fighting a pre-existing condition like a previous poor repair. If you want to master the entire build process from the ground up, our Premium Project Blueprints offer the methodical planning you need to succeed.
The Master Sequence: Aligning Panels from the Rear Forward
Aligning a vehicle is like solving a three-dimensional puzzle where the pieces can change shape. To succeed, you must follow a rigid hierarchy. This master sequence for classic car panel alignment is built on a simple truth: work from the fixed points to the adjustable ones. By starting at the rear and moving toward the grille, you lock in your progress and prevent the “chasing your tail” syndrome that plagues so many DIY builds. If you start at the hood, you will eventually find that the cumulative errors make it impossible to fit the doors to the quarter panels.
This methodical flow ensures that every adjustment builds upon a solid foundation. By the time you reach the front bumper, the entire car functions as a cohesive unit rather than a collection of loosely related parts. It takes patience to resist the urge to jump around, but following this order is the only way to achieve the uniform gaps seen on high-end restomod builds.
Step 1: The Door-to-Quarter Anchor
Your door is the most complex moving part of the body. Begin by aligning the rear edge of the door to the fixed quarter panel. Adjust the hinges for vertical height, lateral depth, and tilt. You aren’t just looking at the gap; you’re ensuring the body swage lines flow seamlessly across the divide. Once the gap is set, use the door striker to pull the door flush with the quarter. Be careful not to let the striker lift or drop the door’s resting position; its job is to latch the door, not to hold its weight. If the door doesn’t close with a solid thud, your hinge geometry is likely still off.
Step 2: Fenders and the Front-End Dance
Once the door is locked in, hang the fender. Your primary concern here is the vertical gap between the door’s leading edge and the fender’s trailing edge. This is also where you manage the A-pillar transition, a notorious spot for poor fitment in vintage steel. If the front of the fender doesn’t want to cooperate, don’t be afraid to shift the radiator support. A few millimeters of movement at the core support can fix a massive gap issue at the cowl. This is a common requirement when reconciling 1960s factory tolerances with modern expectations.
With the doors and fenders secure, center the hood between the fenders and the cowl. Use your fenders as the boundaries, moving them slightly if the hood gaps are uneven. After the front clip is square, move to the rear to align the trunk lid. It must match both the rear deck and the quarter panels simultaneously. Finally, install the valances and bumpers. These final pieces often require custom bracket modifications or shims to sit tight against the body, providing that high-end, modern look that separates a professional build from an amateur one.
Advanced Troubleshooting: Aftermarket Metal and Fiberglass
Many builders assume that a new part means a perfect fit. In reality, reproduction steel often requires more work than the original rust-pitted panels they replace. These parts are frequently stamped using dies that don’t quite match the original factory geometry, leading to gaps that vary wildly. This is where classic car panel alignment transitions from simple adjustment into actual fabrication. You must be prepared to modify the metal to achieve the show-quality results your project deserves. With professional restoration labor rates reaching up to $150 per hour in 2026, mastering these advanced techniques yourself is both a financial necessity and a badge of honor.
If a panel is too long or the curve doesn’t match the door, you can’t just shim your way out of it. The cut and weld technique is your most powerful tool. By slicing into a mounting flange or the edge of a panel, you can relieve tension and physically move the metal into the correct position. If a gap is too wide, don’t just reach for the body filler. Instead, weld a 1/8 inch rod to the edge of the panel and grind it back until the gap is a uniform 3/16 inch. This creates a hard, metal edge that won’t chip or crack over time, ensuring your restomod maintains its value for years to come. For those who want to ensure their build meets these rigorous standards without the DIY trial and error, you can explore Car Service from experts who specialize in precision metalwork.
Correcting Poor Reproduction Fitment
When a reproduction fender won’t sit flush against the cowl, look at the mounting flange. You can often pie-cut these hidden areas to allow the panel to bend without distorting the outer skin. If the crown of the fender is too high compared to the door, you may need to use a hammer and dolly to reshape the profile. It’s a slow, deliberate process of checking, marking, and adjusting. If you find yourself struggling with these complex metal-shaping tasks, our Restomod Consulting Services can provide the one-on-one guidance needed to overcome even the most stubborn fitment issues.
Dealing with Fiberglass and Composites
Fiberglass hoods and fenders present a different set of challenges due to their thermal expansion rates. Unlike steel, composites move significantly as they heat up. Before you finalize your classic car panel alignment, you must sun-bake these panels. Leave the car in direct sunlight for several hours to let the resins settle and the panels reach their maximum expansion. If you align them in a cold shop, they may expand and rub against your paint once you take the car to a show. Reinforce thin fiberglass edges with structural adhesive and metal strips to ensure they maintain their shape and don’t chip during the rigors of final assembly. Using the right tools for these adjustments is critical, so be sure to check our recommended gear for the best composite-working supplies.
The Final Mock-Up: Locking in Perfection Before Paint
The moment of truth has arrived. Your classic car panel alignment is complete, and for the first time, your project looks like a finished machine rather than a collection of parts. But before you rush into the paint booth, you must perform a rigorous final walk-around. Step back 20 feet and view the car as a complete unit. Observe how the light reflects off the body lines and transitions across the gaps. If there is a slight ripple or a gap that looks just a fraction off, fix it now. Once the color and clear coat are applied, every tiny imperfection will be magnified tenfold.
Test every moving part under real-world tension. Install your hood springs, trunk torsions, and window regulators. It’s a common mistake to align a hood without the springs, only to find that the tension of the hinges pulls the rear of the hood up once the car is fully assembled. Ensure your latches click with a solid, modern feel and that the windows track smoothly through the new weatherstripping. This is the final stage of restomod project planning, where you transition from the grit of fabrication to the precision of finishing.
The Marking and Indexing Process
The most heartbreaking part of a build is losing your perfect alignment during the final teardown. You must index every component to ensure it returns to its exact home. Use a 1/8 inch drill bit to create small indexing holes through the hinges and into the mounting surface. When it comes time for final assembly, you can simply drop a pin through these holes to align the panels instantly. Create a detailed map of your shim stacks. Label every shim by its location, such as “driver side upper hinge” or “passenger side fender mount”, and tape them together. Take hundreds of photos of every bolt, bracket, and spacer. These images will be your best friend when you’re trying to remember the exact orientation of a hidden bracket six months from now.
Transitioning to the Paint Booth
As you disassemble the car, take the opportunity to clean and degrease the hidden areas that have been tucked away for decades. This is the foundation for a world-class finish. You’ve done the hard work of wrestling with steel and fiberglass to achieve a level of precision that few DIY builders ever reach. Achieving this level of classic car panel alignment is a marathon, not a sprint, and you’ve crossed the hardest mile. If you want a second pair of eyes on your project before the first drop of paint hits the metal, consider our Restomod Consulting Services for personalized build advice. You have successfully bridged the gap between vintage character and modern excellence. Stand tall, take a breath, and get ready for the paint phase.
Building for the Next Generation
Mastering classic car panel alignment is the bridge between a simple restoration and a world-class restomod. By respecting the master sequence and anchoring your build to the fixed rear quarters, you’ve transformed a collection of vintage parts into a precision-engineered machine. You now have the tactical knowledge to manage complex aftermarket fitment and the foresight to index your work before the paint phase. This foundation ensures your project doesn’t just look expensive but functions with modern reliability and safety.
If you’re ready to transition from a garage enthusiast to a master creator, I’m here to guide you through every mechanical hurdle. Master every step of your build with The Ultimate Restomod Guide. Our expert mentor-led instruction and comprehensive blueprints are designed to empower DIY builders to achieve professional results. Your workshop is a place of artistry and engineering, and The Garage RX can help you optimize that space into a professional-grade environment. Keep your shims close, your measurements tighter, and your passion for the craft alive. You’re well on your way to a finished masterpiece.
Frequently Asked Questions
What is the correct order for classic car panel alignment?
The correct sequence for classic car panel alignment is to start at the rear and work forward toward the grille. Align your doors to the fixed quarter panels and rockers first, as these structural points cannot be moved. Once the doors are locked in, you can hang the fenders and finally center the hood. This methodical approach ensures that each new adjustment has a solid, verified reference point to follow.
How do I fix a door gap that is wider at the top than the bottom?
This issue is usually solved by adjusting the hinge shims or the hinge mounting bolts. If the gap is wide at the top rear, try shimming the bottom hinge outward or moving the top hinge forward. Before you touch the hinges, however, inspect your body mounts. A collapsed mount can cause the entire body to sag, making it impossible to achieve a square door opening.
Should I align my panels before or after I paint the car?
You must perform your classic car panel alignment during the metal fabrication stage, long before the paint booth. Achieving show-quality gaps often requires welding, grinding, and heavy physical adjustment that would ruin a finished surface. By perfecting the fit in bare metal, you can index your hinges and ensure the final assembly after paint is a straightforward, stress-free process.
Can I use shims to fix a twisted car frame?
Shims are designed for minute adjustments of body panels, not for correcting a compromised chassis. If your frame is twisted or bent, you must have it professionally straightened on a frame rack. Attempting to shim your way around a structural issue will result in a car that handles poorly and body panels that may collide or bind when the chassis flexes under load.
Why do my panel gaps change when I put the car on jack stands?
Chassis flex is the primary culprit. When you support a car on jack stands, the frame bows because the weight is no longer distributed through the suspension. Always perform your alignment with the vehicle sitting on its tires or on drive-on ramps. This simulates the actual load the car carries on the road, ensuring your gaps remain consistent once the project is finished.
How do I make a reproduction fender fit my classic car?
Reproduction fenders often require significant fabrication to meet modern standards. Use the cut and weld technique to relieve tension in the mounting flanges or to extend edges that fall short of a perfect gap. Treat these aftermarket parts as raw materials. You may need to reshape the crown with a hammer and dolly to ensure the profile matches the door perfectly before moving into primer.
What size should the gap be between a door and a fender?
A gap of 3/16 inch is the gold standard for a modern restomod. While original factory tolerances for 1960s vehicles were often much larger, a tighter, uniform gap creates that expensive, high-end look. Be sure to measure your gaps with the thickness of the final paint in mind. Multiple layers of high-build primer and clear coat will narrow that gap during the final assembly.
Do I need to remove the engine to align the front fenders and hood?
It is actually preferable to keep the engine in place during the alignment process. The weight of the engine, transmission, and radiator loads the front frame and suspension, which can subtly change the shape of the engine bay. Aligning the front clip with a bare chassis often leads to shifting gaps and hood clearance issues once the full weight of the powertrain is reinstalled.
A flawless paint job is a wasted investment if your body lines don’t line up with mathematical precision. You can spend thousands on the deepest clear coat, but the human eye will always gravitate toward a crooked trunk lid or a sagging door. Achieving professional classic car panel alignment is often the most taxing phase of a build, especially when fixing one gap seems to ruin three others. It’s the difference between a car that looks like a project and one that commands respect on the show floor.
I know the frustration of wrestling with aftermarket panels that seem to be the wrong shape or doors that refuse to close with that satisfying, modern thud. You’re not alone in chasing these elusive tolerances. This guide will teach you the methodical sequence required to achieve factory-perfect or show-quality panel gaps on your restomod. We’ll explore how to work from the fixed rear quarters forward, ensuring every line flows seamlessly before you ever touch a spray gun. With restoration labor rates reaching $163 per hour as of June 2026, learning to execute this precision work yourself is the best way to ensure your project looks expensive and stays on track.
Key Takeaways
- Learn why the rear quarter panel serves as your North Star and how to prepare a perfectly level surface to avoid chasing ghost gaps.
- Master the methodical rear-to-front sequence for classic car panel alignment to ensure every body line flows seamlessly into the next.
- Discover professional metalworking techniques to modify ill-fitting aftermarket panels so they meet show-quality standards.
- Understand how proper alignment acts as a prerequisite for high-performance suspension and reveals potential hidden frame issues.
- Execute a strategic final mock-up and marking process to preserve your precision work for easy reassembly after the paint phase.
The Architecture of a Great Build: Why Alignment is Everything
A “10-foot car” might turn heads at a stoplight, but the true mark of a master builder is found in the shadows of the door jams. When we talk about classic car panel alignment, we’re discussing the visual language of quality. Large, uneven gaps scream of a rushed project or a neglected past. Conversely, tight, uniform lines suggest a vehicle that has been engineered rather than just assembled. This precision is the foundation of the entire automotive restoration process, and it must be addressed long before you consider opening a can of primer.
Think of your body panels as a skin that must fit perfectly over a skeletal structure. If the gaps are wider at the top of a door than the bottom, the car is telling you something. It might be a sagging body mount or a subtle twist in the frame from decades of hard launches. You must solve these riddles while the car is in bare metal. Adding modern weatherstripping to a poorly aligned door creates uneven pressure, leading to wind noise and water leaks that can ruin a fresh interior. Alignment isn’t just about looks; it’s about making the car function like a modern machine.
Alignment as a Structural Diagnostic Tool
Use your panel gaps to verify the integrity of your chassis. If you’ve recently completed an LS engine swap or installed a high-torque drivetrain, the increased stress can reveal hidden weaknesses. High-horsepower builds often suffer from chassis flex that manifests as panels rubbing under load. Tightening your tolerances now ensures that your modern, stiff suspension doesn’t cause body panels to collide when you dive into a corner. Precision classic car panel alignment acts as a final check to ensure your foundation is square and ready for performance.
Setting the Standard: What Defines a Perfect Gap?
Factory tolerances in the 1960s were surprisingly loose. It wasn’t uncommon for a brand-new Mustang or Chevelle to leave the lot with gaps exceeding 1/4 inch. However, the modern restomod standard has shifted toward a uniform 3/16 inch. This sweet spot provides enough clearance for movement while maintaining a high-end, cohesive aesthetic. Remember to account for paint thickness. A show-quality finish involving multiple coats of high-build primer, base, and clear can easily add 15 mils of material to every edge. If your gaps are too tight in the mock-up phase, your doors will chip the paint the first time you close them after final assembly.
The Reference Point Strategy: Tools and Preparation
Every great build needs an anchor. In the world of classic car panel alignment, that anchor is the rear quarter panel. Unlike fenders, hoods, or doors, the quarter panel is a fixed structural component welded to the inner structure. It cannot be moved to accommodate other parts. This makes it your North Star. You must align every other moving part to this single, unyielding point of reference. If you start at the front of the car and work backward, you will eventually find yourself with a door that refuses to match a quarter panel that cannot be adjusted.
Before you loosen a single bolt, you must prepare the environment. Gravity is your enemy if the car is sitting on jack stands. A chassis supported only at four points will flex, distorting your measurements. To achieve results that meet professional automotive engineering standards, the vehicle must be on a perfectly level surface with the suspension fully loaded. This means the car should be sitting on its wheels or on ramps that support the tires. This ensures the frame is in the same state it will be when cruising down the highway, preventing the gaps from shifting once the car is off the lift.
Don’t overlook the hardware. Modern restomod builds often benefit from high-quality aftermarket hinges and strikers. If your original hinges have even a fraction of an inch of play in the pins, your alignment will never hold. Replace or rebuild these components first. A solid foundation allows you to use drift punches and floor jacks to nudge heavy doors into position with the confidence that they will stay where you put them.
The Restomod Builder’s Toolkit for Gapping
Precision requires the right instruments. You will need a comprehensive set of body shims in various thicknesses, typically ranging from 1/16 to 1/8 inch. These allow for incremental adjustments that are impossible to eyeball. Use high-quality masking tape to double-wrap the edges of every panel. This protects your metal and prevents heart-breaking chips during the inevitable trial and error phase. For a complete list of the essentials, see our recommended gear for body assembly. Having the right spacers and gauges on hand will save you hours of frustration.
Establishing the Anchor: Quarter Panels and Rockers
Start by identifying your baselines. The quarter panel provides your vertical reference, while the rocker panel establishes your horizontal line. Check these for straightness before you begin. Document the “as-found” state of the car with photos and measurements. This baseline helps you track progress and ensures you aren’t fighting a pre-existing condition like a previous poor repair. If you want to master the entire build process from the ground up, our Premium Project Blueprints offer the methodical planning you need to succeed.
The Master Sequence: Aligning Panels from the Rear Forward
Aligning a vehicle is like solving a three-dimensional puzzle where the pieces can change shape. To succeed, you must follow a rigid hierarchy. This master sequence for classic car panel alignment is built on a simple truth: work from the fixed points to the adjustable ones. By starting at the rear and moving toward the grille, you lock in your progress and prevent the “chasing your tail” syndrome that plagues so many DIY builds. If you start at the hood, you will eventually find that the cumulative errors make it impossible to fit the doors to the quarter panels.
This methodical flow ensures that every adjustment builds upon a solid foundation. By the time you reach the front bumper, the entire car functions as a cohesive unit rather than a collection of loosely related parts. It takes patience to resist the urge to jump around, but following this order is the only way to achieve the uniform gaps seen on high-end restomod builds.
Step 1: The Door-to-Quarter Anchor
Your door is the most complex moving part of the body. Begin by aligning the rear edge of the door to the fixed quarter panel. Adjust the hinges for vertical height, lateral depth, and tilt. You aren’t just looking at the gap; you’re ensuring the body swage lines flow seamlessly across the divide. Once the gap is set, use the door striker to pull the door flush with the quarter. Be careful not to let the striker lift or drop the door’s resting position; its job is to latch the door, not to hold its weight. If the door doesn’t close with a solid thud, your hinge geometry is likely still off.
Step 2: Fenders and the Front-End Dance
Once the door is locked in, hang the fender. Your primary concern here is the vertical gap between the door’s leading edge and the fender’s trailing edge. This is also where you manage the A-pillar transition, a notorious spot for poor fitment in vintage steel. If the front of the fender doesn’t want to cooperate, don’t be afraid to shift the radiator support. A few millimeters of movement at the core support can fix a massive gap issue at the cowl. This is a common requirement when reconciling 1960s factory tolerances with modern expectations.
With the doors and fenders secure, center the hood between the fenders and the cowl. Use your fenders as the boundaries, moving them slightly if the hood gaps are uneven. After the front clip is square, move to the rear to align the trunk lid. It must match both the rear deck and the quarter panels simultaneously. Finally, install the valances and bumpers. These final pieces often require custom bracket modifications or shims to sit tight against the body, providing that high-end, modern look that separates a professional build from an amateur one.
Advanced Troubleshooting: Aftermarket Metal and Fiberglass
Many builders assume that a new part means a perfect fit. In reality, reproduction steel often requires more work than the original rust-pitted panels they replace. These parts are frequently stamped using dies that don’t quite match the original factory geometry, leading to gaps that vary wildly. This is where classic car panel alignment transitions from simple adjustment into actual fabrication. You must be prepared to modify the metal to achieve the show-quality results your project deserves. With professional restoration labor rates reaching up to $150 per hour in 2026, mastering these advanced techniques yourself is both a financial necessity and a badge of honor.
If a panel is too long or the curve doesn’t match the door, you can’t just shim your way out of it. The cut and weld technique is your most powerful tool. By slicing into a mounting flange or the edge of a panel, you can relieve tension and physically move the metal into the correct position. If a gap is too wide, don’t just reach for the body filler. Instead, weld a 1/8 inch rod to the edge of the panel and grind it back until the gap is a uniform 3/16 inch. This creates a hard, metal edge that won’t chip or crack over time, ensuring your restomod maintains its value for years to come. For those who want to ensure their build meets these rigorous standards without the DIY trial and error, you can explore Car Service from experts who specialize in precision metalwork.
Correcting Poor Reproduction Fitment
When a reproduction fender won’t sit flush against the cowl, look at the mounting flange. You can often pie-cut these hidden areas to allow the panel to bend without distorting the outer skin. If the crown of the fender is too high compared to the door, you may need to use a hammer and dolly to reshape the profile. It’s a slow, deliberate process of checking, marking, and adjusting. If you find yourself struggling with these complex metal-shaping tasks, our Restomod Consulting Services can provide the one-on-one guidance needed to overcome even the most stubborn fitment issues.
Dealing with Fiberglass and Composites
Fiberglass hoods and fenders present a different set of challenges due to their thermal expansion rates. Unlike steel, composites move significantly as they heat up. Before you finalize your classic car panel alignment, you must sun-bake these panels. Leave the car in direct sunlight for several hours to let the resins settle and the panels reach their maximum expansion. If you align them in a cold shop, they may expand and rub against your paint once you take the car to a show. Reinforce thin fiberglass edges with structural adhesive and metal strips to ensure they maintain their shape and don’t chip during the rigors of final assembly. Using the right tools for these adjustments is critical, so be sure to check our recommended gear for the best composite-working supplies.
The Final Mock-Up: Locking in Perfection Before Paint
The moment of truth has arrived. Your classic car panel alignment is complete, and for the first time, your project looks like a finished machine rather than a collection of parts. But before you rush into the paint booth, you must perform a rigorous final walk-around. Step back 20 feet and view the car as a complete unit. Observe how the light reflects off the body lines and transitions across the gaps. If there is a slight ripple or a gap that looks just a fraction off, fix it now. Once the color and clear coat are applied, every tiny imperfection will be magnified tenfold.
Test every moving part under real-world tension. Install your hood springs, trunk torsions, and window regulators. It’s a common mistake to align a hood without the springs, only to find that the tension of the hinges pulls the rear of the hood up once the car is fully assembled. Ensure your latches click with a solid, modern feel and that the windows track smoothly through the new weatherstripping. This is the final stage of restomod project planning, where you transition from the grit of fabrication to the precision of finishing.
The Marking and Indexing Process
The most heartbreaking part of a build is losing your perfect alignment during the final teardown. You must index every component to ensure it returns to its exact home. Use a 1/8 inch drill bit to create small indexing holes through the hinges and into the mounting surface. When it comes time for final assembly, you can simply drop a pin through these holes to align the panels instantly. Create a detailed map of your shim stacks. Label every shim by its location, such as “driver side upper hinge” or “passenger side fender mount”, and tape them together. Take hundreds of photos of every bolt, bracket, and spacer. These images will be your best friend when you’re trying to remember the exact orientation of a hidden bracket six months from now.
Transitioning to the Paint Booth
As you disassemble the car, take the opportunity to clean and degrease the hidden areas that have been tucked away for decades. This is the foundation for a world-class finish. You’ve done the hard work of wrestling with steel and fiberglass to achieve a level of precision that few DIY builders ever reach. Achieving this level of classic car panel alignment is a marathon, not a sprint, and you’ve crossed the hardest mile. If you want a second pair of eyes on your project before the first drop of paint hits the metal, consider our Restomod Consulting Services for personalized build advice. You have successfully bridged the gap between vintage character and modern excellence. Stand tall, take a breath, and get ready for the paint phase.
Building for the Next Generation
Mastering classic car panel alignment is the bridge between a simple restoration and a world-class restomod. By respecting the master sequence and anchoring your build to the fixed rear quarters, you’ve transformed a collection of vintage parts into a precision-engineered machine. You now have the tactical knowledge to manage complex aftermarket fitment and the foresight to index your work before the paint phase. This foundation ensures your project doesn’t just look expensive but functions with modern reliability and safety.
If you’re ready to transition from a garage enthusiast to a master creator, I’m here to guide you through every mechanical hurdle. Master every step of your build with The Ultimate Restomod Guide. Our expert mentor-led instruction and comprehensive blueprints are designed to empower DIY builders to achieve professional results. Your workshop is a place of artistry and engineering, and The Garage RX can help you optimize that space into a professional-grade environment. Keep your shims close, your measurements tighter, and your passion for the craft alive. You’re well on your way to a finished masterpiece.
Frequently Asked Questions
What is the correct order for classic car panel alignment?
The correct sequence for classic car panel alignment is to start at the rear and work forward toward the grille. Align your doors to the fixed quarter panels and rockers first, as these structural points cannot be moved. Once the doors are locked in, you can hang the fenders and finally center the hood. This methodical approach ensures that each new adjustment has a solid, verified reference point to follow.
How do I fix a door gap that is wider at the top than the bottom?
This issue is usually solved by adjusting the hinge shims or the hinge mounting bolts. If the gap is wide at the top rear, try shimming the bottom hinge outward or moving the top hinge forward. Before you touch the hinges, however, inspect your body mounts. A collapsed mount can cause the entire body to sag, making it impossible to achieve a square door opening.
Should I align my panels before or after I paint the car?
You must perform your classic car panel alignment during the metal fabrication stage, long before the paint booth. Achieving show-quality gaps often requires welding, grinding, and heavy physical adjustment that would ruin a finished surface. By perfecting the fit in bare metal, you can index your hinges and ensure the final assembly after paint is a straightforward, stress-free process.
Can I use shims to fix a twisted car frame?
Shims are designed for minute adjustments of body panels, not for correcting a compromised chassis. If your frame is twisted or bent, you must have it professionally straightened on a frame rack. Attempting to shim your way around a structural issue will result in a car that handles poorly and body panels that may collide or bind when the chassis flexes under load.
Why do my panel gaps change when I put the car on jack stands?
Chassis flex is the primary culprit. When you support a car on jack stands, the frame bows because the weight is no longer distributed through the suspension. Always perform your alignment with the vehicle sitting on its tires or on drive-on ramps. This simulates the actual load the car carries on the road, ensuring your gaps remain consistent once the project is finished.
How do I make a reproduction fender fit my classic car?
Reproduction fenders often require significant fabrication to meet modern standards. Use the cut and weld technique to relieve tension in the mounting flanges or to extend edges that fall short of a perfect gap. Treat these aftermarket parts as raw materials. You may need to reshape the crown with a hammer and dolly to ensure the profile matches the door perfectly before moving into primer.
What size should the gap be between a door and a fender?
A gap of 3/16 inch is the gold standard for a modern restomod. While original factory tolerances for 1960s vehicles were often much larger, a tighter, uniform gap creates that expensive, high-end look. Be sure to measure your gaps with the thickness of the final paint in mind. Multiple layers of high-build primer and clear coat will narrow that gap during the final assembly.
Do I need to remove the engine to align the front fenders and hood?
It is actually preferable to keep the engine in place during the alignment process. The weight of the engine, transmission, and radiator loads the front frame and suspension, which can subtly change the shape of the engine bay. Aligning the front clip with a bare chassis often leads to shifting gaps and hood clearance issues once the full weight of the powertrain is reinstalled.