
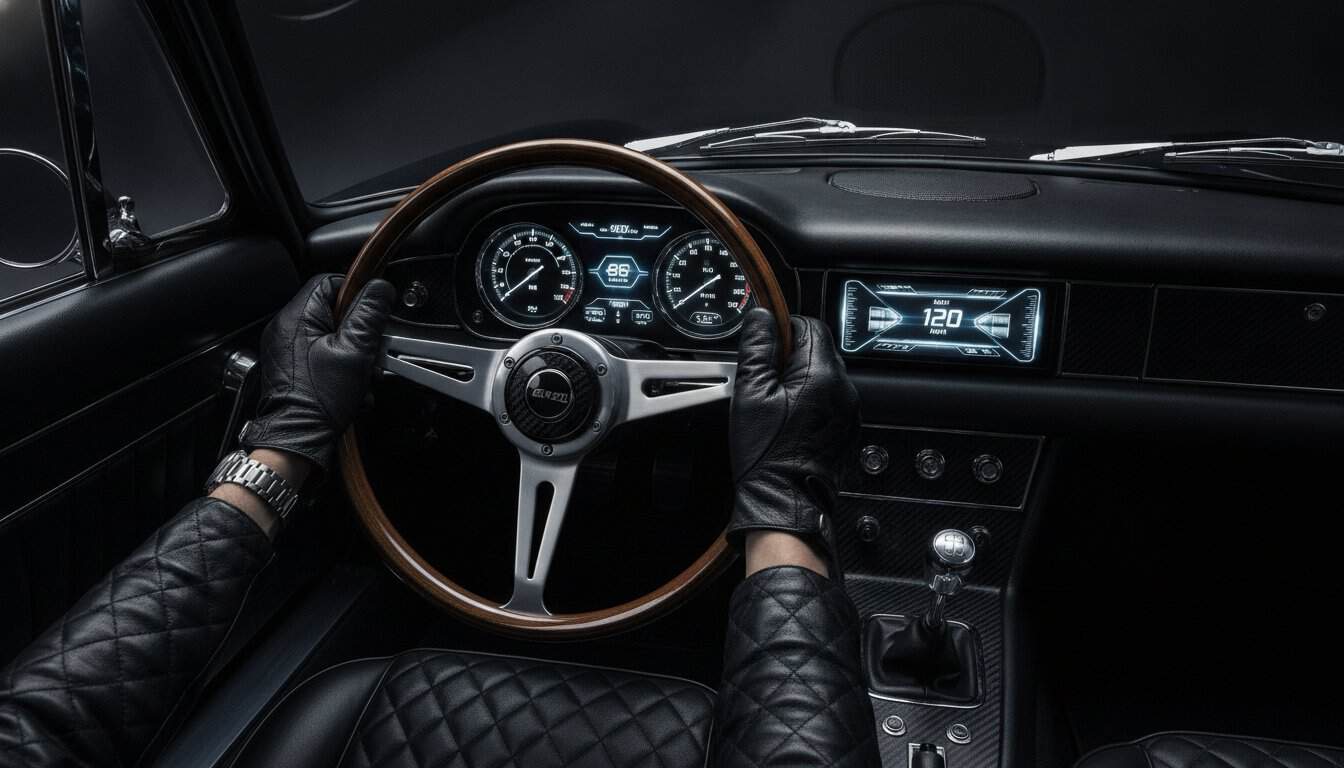
Installing a digital dash for classic car projects is not just about adding a screen; it is about building a communication bridge between vintage iron and modern performance. You know the unique anxiety of watching a jittery needle and wondering if your temperature gauge is lying to you during a summer heatwave. It’s frustrating to pour your heart into a restoration only to be held back by fifty-year-old electrical gremlins and sensors that refuse to cooperate with a modern engine swap.
I understand the fear of losing the vintage feel of your cockpit, but you can absolutely have the best of both worlds. Master the transition to high-definition data while protecting the heritage of your machine. You’ll learn to achieve GPS-based speed accuracy and professional-grade reliability through a clean, intentional installation. We will explore the 2026 technology options and the technical roadmap required to bridge the gap between classic aesthetics and modern precision.
Key Takeaways
- Differentiate between plug and play panels and custom DIY solutions to find the right technical fit for your specific skill level and build goals.
- Learn how to implement a digital dash for classic car interiors that preserves the soul of your cockpit using vintage inspired graphics and stealth mounting.
- Prioritize your electrical foundation by assessing battery health and selecting the correct digital sending units before you begin the wiring process.
- Ensure a professional finish by mastering high quality grounding techniques and integrating your new display with modern climate control and audio systems.
- Transition from mechanical guesswork to real time engine data to improve the overall safety and long term reliability of your restomod project.
The Evolution of the Classic Cockpit: Why Digital Dashes Matter in 2026
Take a seat in your favorite project car and look past the steering wheel. That cluster of gauges represents the heartbeat of your machine, but for many builders, it’s also a source of constant frustration. The history of the dashboard shows a steady march from simple wooden planks to the complex mechanical assemblies of the mid-century era. However, decades of heat cycles and vibration eventually turn those sweeping needles into liars. In 2026, a digital dash for classic car enthusiasts isn’t just a luxury; it’s a critical tool for survival on modern roads.
We’ve moved beyond the era of flickering LEDs and clunky interfaces. Today’s technology allows us to maintain the aesthetic soul of a vintage cockpit while gaining the surgical precision of modern sensors. You’re no longer just monitoring speed; you’re managing a complex ecosystem of performance data that original designers never imagined. I’ve spent countless hours under dashboards trying to calibrate mechanical cables that just won’t behave. Reliability is the foundation of every great build, and modern digital systems provide that stability.
To better understand how these systems blend customization with modern functionality, watch this demonstration of current interface design:
Analog Soul vs Digital Precision
There is an undeniable charm in the steady sweep of a mechanical needle, but that charm fades when you’re stuck on the shoulder because a fifty-year-old temperature gauge failed to warn you of a spike. The 2026 landscape offers high-definition TFT screens that can replicate the look of original equipment while providing instant alerts for low oil pressure or high coolant temperatures. This isn’t about replacing the character of your car. It’s about empowering you with reliable, real-time engine data so you can drive with confidence instead of anxiety. You get the visual heritage you love with the accuracy your engine deserves.
Beyond Speed: Modern Data Points You Need
Modern builds demand more than just a speedometer and a fuel level indicator. If you’ve performed a high-performance upgrade like an LS engine swap, your data needs have changed significantly. You need to monitor air-fuel ratios, transmission temperatures, and even diagnostic trouble codes directly from your seat. Integrating a digital dash for classic car projects also solves the classic cable-driven speedometer headache. By utilizing GPS-based speed tracking, you bypass the inaccuracies caused by different tire sizes or rear-end gear swaps. You get a clean, professional-looking interior that provides trip computers and precise data logs, turning your vintage machine into a truly capable modern performer.
Navigating the Tech: Types of Digital Dash Systems for Restomods
Choose your hardware based on the specific goals of your build. The market for a digital dash for classic car projects has expanded significantly by 2026, offering everything from factory-look replacements to modular tablet interfaces. You must decide if you want the technology to disappear into the dashboard or stand out as a centerpiece of modern engineering. This choice dictates your installation complexity and the final aesthetic of your cockpit. As the future of vehicle interiors continues to lean toward high-definition displays, builders now have access to refresh rates and color depths that were once reserved for luxury supercars.
Direct-Fit Replacement Panels
Select a direct-fit system if you want to maintain the original architecture of your dashboard. These units are engineered to bolt directly into your factory gauge bezel, preserving the iconic lines of muscle cars like the 1969 Camaro or the 1967-1972 C10. Manufacturers have refined these systems into distinct tiers. For example, the Dakota Digital VHX series offers a solid entry point starting around $945.25, while the HDX and RTX series provide more sophisticated styling and integration, starting at $1,543.75 and $1,676.75 respectively. The flagship for 2026 is the GRFX series, which features full-color TFT screens and starts at $1,900.00. While these are plug-and-play, remember that lead times can range from 8 to 20 weeks, so plan your project calendar accordingly.
Universal Clusters and Custom Fabrication
Look toward universal displays when working with rare imports or one-off custom builds where no direct-fit kit exists. These systems typically come in 7-inch or 12.3-inch formats and require you to fabricate a custom housing. This is where your artistry as a builder shines. You’ll need to use Bus Interface Modules (BIMs) to bridge the gap between your engine’s ECU and the display, ensuring that data flows seamlessly from your modern drivetrain to the screen. If you’re a true DIY enthusiast, you can even construct a custom system using a Raspberry Pi or Arduino for approximately $200 to $300 in parts. This path offers total control over the interface but demands a high level of programming and electrical knowledge. For those who want to see the specific tools I use for these intricate electrical tasks, check out my recommended gear for the workshop.
Choosing Your Interface: Matching Tech to Your Build Aesthetic
Your dashboard is the primary interface between you and your machine. When you select a digital dash for classic car projects, you’re making a design statement that impacts every minute you spend behind the wheel. I’ve seen too many builders treat the instrument cluster as an afterthought. At Restomod Academy, we believe technology should enhance your driving experience, not distract from the heritage of the vehicle. A poorly chosen interface looks like a cheap tablet glued to a masterpiece, while a well-curated one feels like a natural evolution of the original design.
Decide early in your build if you want the technology to be a hidden partner or a visible centerpiece. This decision influences everything from the wiring harness to the custom fabrication of your gauge cluster. You aren’t limited to generic readouts anymore. Modern systems allow you to fine-tune the color palette, font weights, and even the needle sweep behavior to match your custom upholstery and interior trim. This level of detail is what separates a professional build from a weekend experiment. Choose wisely.
The Stealth Look: Modern Performance in Vintage Housing
The stealth approach is perfect for builders who value a period-correct appearance but demand modern accuracy. You can now select software skins that perfectly mimic the unique typography used by manufacturers in the 1960s and 70s. By mounting high-resolution screens behind original glass lenses, you maintain the depth and texture of a vintage cockpit. This allows you to monitor critical engine data without breaking the visual spell of a classic interior. To see how others have successfully blended vintage style with modern comfort, explore these restomod interior ideas and design philosophies.
Full Modernization: The Pro-Touring Digital Experience
If your goal is a track-ready machine, embrace a high-density data interface. Pro-Touring builds require more than just speed and RPM. You need real-time feedback on oil temperature, fuel pressure, and lateral forces. A digital dash for classic car racing applications allows you to configure programmable shift lights and performance timers that help you shave seconds off your lap times. This data-heavy approach is the perfect complement to aggressive suspension upgrades that turn a wallowing classic into a precision instrument. Prioritize a layout that keeps the most critical information in your peripheral vision, ensuring you stay focused on the apex while the hardware monitors the vitals.
From Wires to Windows: A Mentor’s Guide to Installation Planning
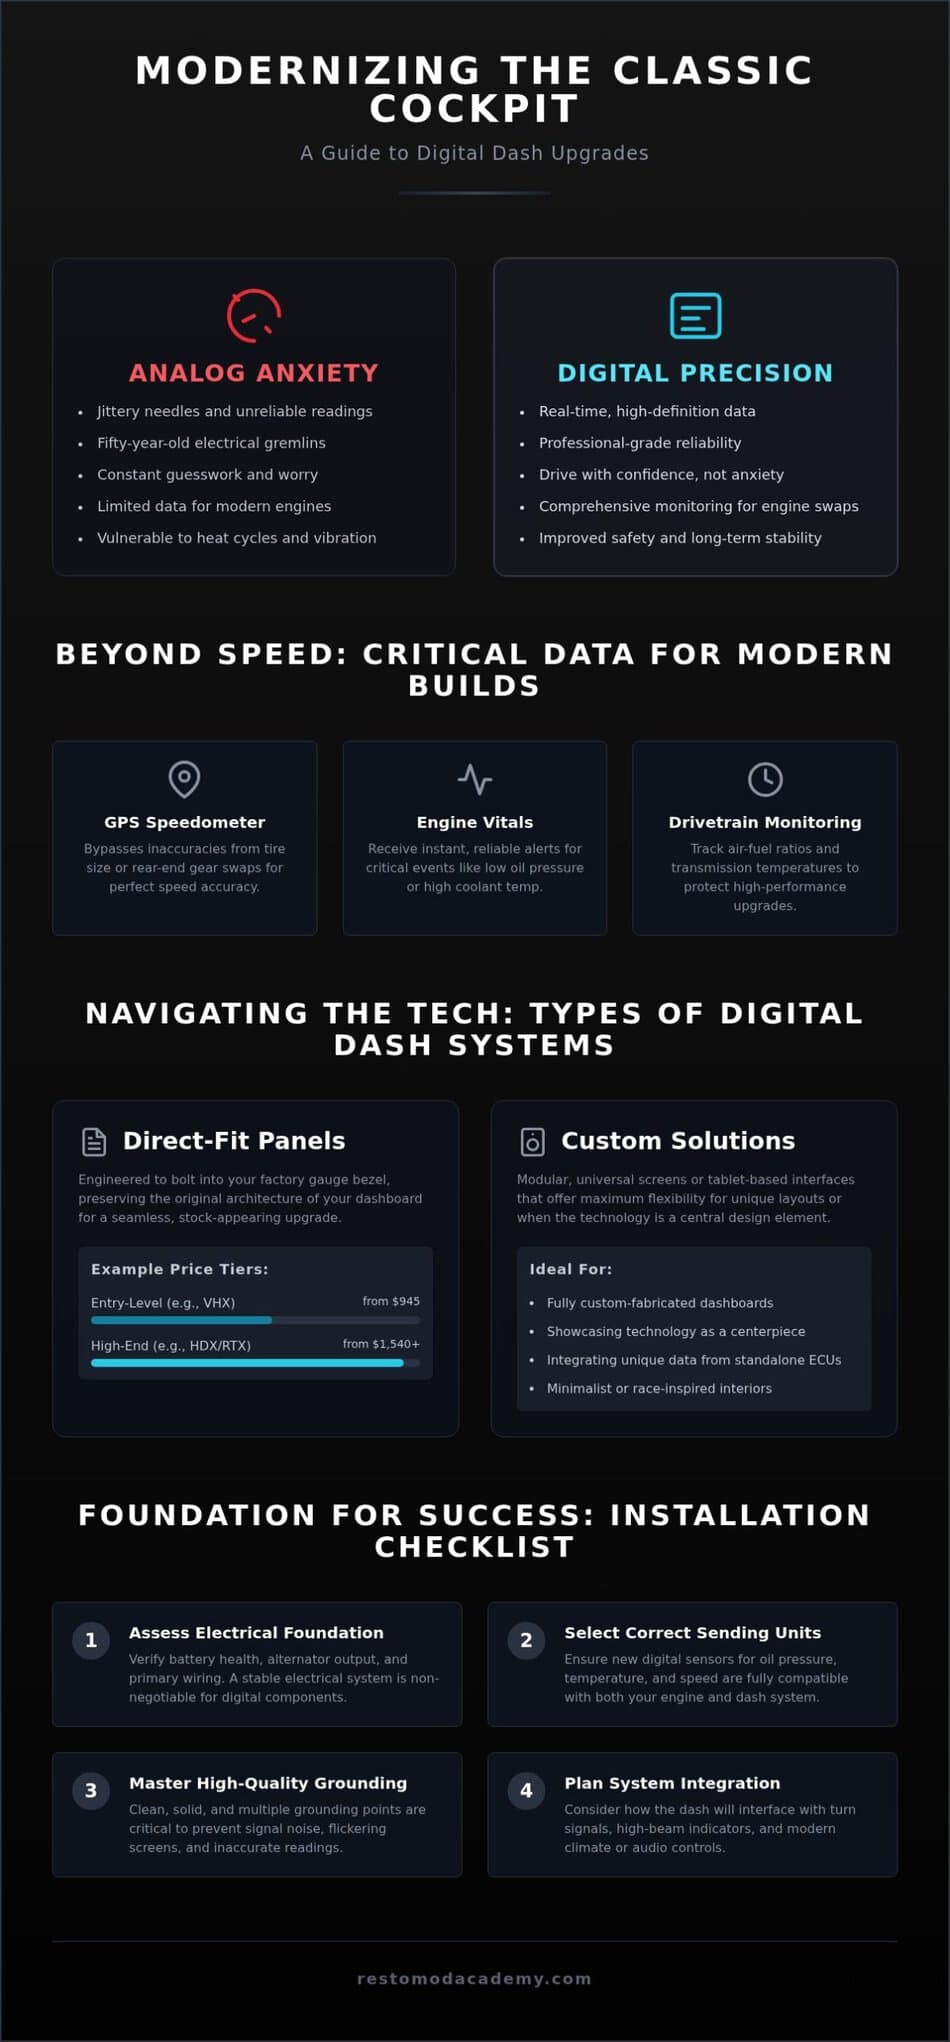
Commit to a methodical plan before you strip a single wire from your dashboard. A digital dash for classic car projects is only as reliable as the electrical foundation supporting it. Most builders fail because they rush into the “spaghetti” behind the cluster without verifying their power source. Start by assessing your battery health and alternator output; digital electronics demand stable voltage and can behave erratically if your charging system is weak. You are building a high tech nerve center, and it requires a clean environment to function correctly.
Follow this five phase roadmap to ensure a professional result in your workshop:
- Phase 1: Verify your electrical system can handle the modern load and check for existing parasitic draws.
- Phase 2: Select and install high precision digital transducers to replace your old mechanical sending units.
- Phase 3: Route your wiring harness using high quality loom and dedicated ground blocks to prevent signal interference.
- Phase 4: Calibrate your speedometer using GPS signals or specific pulse counts for pinpoint accuracy.
- Phase 5: Execute a validation drive to confirm that every digital readout matches your engine’s actual physical behavior.
Solving the Wiring Puzzle: CAN Bus vs Traditional Sensors
Precision depends entirely on how your hardware communicates with your drivetrain. If you are following the definitive guide to an LS engine swap, your digital dash can likely pull data directly from the ECU via a CAN Bus interface. This single cable connection replaces a dozen individual sensor wires, simplifying your installation significantly. However, if you are running a traditional carbureted setup, you’ll need to manually wire individual sensors for oil pressure and water temperature. Be meticulous with your signal types; verify whether your dash requires ground switched or power switched inputs to avoid damaging delicate circuitry. If you want to master these complex high tech transitions, my Restomod Consulting Services can help you navigate the specific wiring requirements of your unique build.
Planning Your Dash Layout for Ergonomics and Safety
Think deeply about the environment where you’ll actually be driving your machine. Position your screen to minimize glare and sun washout, which can render a digital interface useless during a mid day cruise. Ensure that critical warnings, such as low oil pressure or high heat alerts, sit clearly within your peripheral vision. In any performance build, the tachometer should be the focal point of your display to ensure you hit every shift point perfectly without losing focus on the road ahead. This isn’t just about modern aesthetics; it’s about creating a safe, functional workspace that lets you push your machine to its limits with total peace of mind.
Mastering the Modern Interior: Next Steps in Your Build Journey
Completing the installation of your digital dash for classic car projects marks a major milestone, but your journey toward a master-class interior doesn’t end there. Think of your new display as the brain of a larger ecosystem. To truly achieve that professional restomod finish, you must ensure your high-tech gauges harmonize with your audio and climate control systems. A cohesive interior is one of the most effective ways to increase the resale value of your machine. Buyers in 2026 aren’t just looking for a vintage shell; they’re looking for a vehicle that offers the seamless reliability of a modern daily driver while retaining its heritage soul.
Integrating Audio and HVAC with Your New Display
Strive for a tech stack that feels intentional rather than cluttered. If you’ve chosen a minimalist or stealth aesthetic, consider hiding your modern HVAC and audio controls behind original trim panels or inside the glove box. This keeps the focus on your primary display while providing the comfort of modern air conditioning and high-fidelity sound. If you find yourself struggling with the complexities of signal interference between these components, I recommend consulting with the Restomod Academy team to help map out your electrical architecture. A clean center console is the hallmark of a builder who understands the balance between form and function.
Pay absolute attention to your grounding strategy. Digital electronics are incredibly sensitive to electrical noise, which can cause flickering screens or inaccurate data. Don’t rely on the original 50-year-old chassis grounds. Instead, run a dedicated, high-quality ground wire from your dash directly to a common ground block or the battery. This simple step prevents the “ghost” signals that plague so many DIY builds and ensures your data remains rock-solid during every mile of your journey.
Final Calibration and the First Test Drive
Your first test drive is the reward for all your meticulous labor. Before you pull out of the workshop, use the GPS functionality to calibrate your speedometer. This is especially critical if you’ve changed your tire diameter or rear-end gear ratios since the original build. Take the time to set up your warning thresholds for oil pressure and water temperature based on your engine’s specific requirements. There is a profound sense of pride in seeing real-time, high-definition data come to life as you hit the open road. Once you’ve mastered the dash, you’re ready to finalize the rest of your build journey using The Ultimate Restomod Guide as your primary planning resource. You’ve transitioned from a passive admirer to an active creator, and your classic machine is better for it.
Bring Your Classic Vision to Life
You’ve seen how a digital dash for classic car projects bridges the gap between vintage style and modern performance. By prioritizing a clean electrical foundation and selecting an interface that honors your car’s heritage, you transform your cockpit into a precision environment. Whether you choose the stealth look of vintage-inspired graphics or the data-dense experience of a pro-touring build, the goal remains clear: drive with absolute confidence. Precision data is the key to protecting your investment and ensuring your machine performs at its peak for years to come.
Don’t let the complexity of wiring or sensor compatibility stall your progress. You have access to expert mentorship from Brook Walsh and comprehensive project blueprints designed to guide you through every stage of your build. This educational framework, which mirrors the structured approach that Modularis takes toward accelerating complex software delivery, ensures that even the most daunting technical tasks are broken down into achievable, logical steps. Join a community of dedicated restomod enthusiasts who value precision and personal labor. Your workshop is the place where heritage meets the future through careful, intentional craftsmanship.
Start your project today with The Ultimate Restomod Guide and take the first step toward a more reliable, high-performing classic. Your workshop is ready for the next evolution, and I am here to help you cross the finish line with confidence and pride.
Frequently Asked Questions
Is a digital dash hard to install in an older classic car?
Installation is a methodical process that requires basic electrical knowledge rather than advanced engineering. If you can read a wiring diagram and use a crimping tool correctly, you can successfully integrate a digital dash for classic car projects. The most time consuming phase is often the removal of the old mechanical cluster and the routing of new sensor wires. Stay patient and follow a logical roadmap to ensure every connection is secure and properly grounded.
Can I keep my original speedometer cable with a digital dash?
You cannot directly connect a mechanical cable to a digital display because the unit requires an electronic pulse to function. You must replace the cable with an electronic speed sensor at the transmission or utilize a GPS receiver. Some builders choose to use a cable drive adapter that converts the mechanical rotation into a digital signal; this allows you to keep the transmission side stock while providing the high definition data your new dash demands.
Will a digital dash drain my battery if the car sits for a long time?
Modern digital systems have a very low parasitic draw, typically less than a few milliamps to maintain your clock and settings. However, classic cars often have older electrical systems that aren’t as efficient. If your project sits for more than two weeks, I recommend using a battery tender or a high quality disconnect switch. This simple habit protects your battery’s health and ensures your digital electronics have stable voltage when you’re ready to drive.
Can I customize the colors and layout of a digital dash for my restomod?
Customization is one of the primary rewards of this upgrade, especially with 2026 technology like the Dakota Digital GRFX series. You can adjust color palettes, font styles, and gauge layouts to perfectly match your upholstery or exterior paint. Many systems allow you to toggle between a minimalist stealth look for night cruising and a data heavy performance layout for track days. This flexibility ensures your technology always complements the soul of your machine.
How does a digital dash work with an LS swap or Coyote engine?
Digital systems communicate with modern engines through a CAN Bus interface or specific Bus Interface Modules. These modules plug directly into your engine’s ECU to pull real time data for RPM, engine temperature, and diagnostic codes. This eliminates the need to install redundant sensors on your new engine block. It creates a clean, professional installation that utilizes the precision of your modern drivetrain to provide accurate information on your digital dash for classic car builds.
What happens if the digital dash screen fails while I am driving?
Total screen failure is rare in high quality, automotive grade units, but it’s often caused by poor grounding or voltage spikes. If a failure occurs, your engine will continue to run normally because the dash is a monitoring tool, not a primary controller. To prevent this, ensure your electrical system is robust and your grounds are connected to a dedicated block. Meticulous installation is your best defense against losing your data while you’re on the road.
Do digital dashes work with original fuel sending units?
Most modern digital clusters are engineered with programmable inputs that recognize various Ohm ranges from original fuel sending units. Whether your classic uses a 0-90 Ohm GM sender or a 73-10 Ohm Ford unit, you can calibrate the dash to read your tank level accurately. This prevents you from having to drop the fuel tank to replace a functioning sensor. Always verify the Ohm range of your specific vehicle before finalizing your programming.
Is a GPS-based speedometer better than a traditional sensor?
GPS based speedometers offer superior accuracy and a much simpler installation process compared to traditional transmission sensors. They bypass the need for mechanical cables and aren’t affected by changes in tire size or rear end gear ratios. A GPS unit provides a steady signal regardless of mechanical wear. While they may lose signal in long tunnels, their reliability and ease of setup make them the preferred choice for modern restomod builders who value precision.
Installing a digital dash for classic car projects is not just about adding a screen; it is about building a communication bridge between vintage iron and modern performance. You know the unique anxiety of watching a jittery needle and wondering if your temperature gauge is lying to you during a summer heatwave. It’s frustrating to pour your heart into a restoration only to be held back by fifty-year-old electrical gremlins and sensors that refuse to cooperate with a modern engine swap.
I understand the fear of losing the vintage feel of your cockpit, but you can absolutely have the best of both worlds. Master the transition to high-definition data while protecting the heritage of your machine. You’ll learn to achieve GPS-based speed accuracy and professional-grade reliability through a clean, intentional installation. We will explore the 2026 technology options and the technical roadmap required to bridge the gap between classic aesthetics and modern precision.
Key Takeaways
- Differentiate between plug and play panels and custom DIY solutions to find the right technical fit for your specific skill level and build goals.
- Learn how to implement a digital dash for classic car interiors that preserves the soul of your cockpit using vintage inspired graphics and stealth mounting.
- Prioritize your electrical foundation by assessing battery health and selecting the correct digital sending units before you begin the wiring process.
- Ensure a professional finish by mastering high quality grounding techniques and integrating your new display with modern climate control and audio systems.
- Transition from mechanical guesswork to real time engine data to improve the overall safety and long term reliability of your restomod project.
The Evolution of the Classic Cockpit: Why Digital Dashes Matter in 2026
Take a seat in your favorite project car and look past the steering wheel. That cluster of gauges represents the heartbeat of your machine, but for many builders, it’s also a source of constant frustration. The history of the dashboard shows a steady march from simple wooden planks to the complex mechanical assemblies of the mid-century era. However, decades of heat cycles and vibration eventually turn those sweeping needles into liars. In 2026, a digital dash for classic car enthusiasts isn’t just a luxury; it’s a critical tool for survival on modern roads.
We’ve moved beyond the era of flickering LEDs and clunky interfaces. Today’s technology allows us to maintain the aesthetic soul of a vintage cockpit while gaining the surgical precision of modern sensors. You’re no longer just monitoring speed; you’re managing a complex ecosystem of performance data that original designers never imagined. I’ve spent countless hours under dashboards trying to calibrate mechanical cables that just won’t behave. Reliability is the foundation of every great build, and modern digital systems provide that stability.
To better understand how these systems blend customization with modern functionality, watch this demonstration of current interface design:
Analog Soul vs Digital Precision
There is an undeniable charm in the steady sweep of a mechanical needle, but that charm fades when you’re stuck on the shoulder because a fifty-year-old temperature gauge failed to warn you of a spike. The 2026 landscape offers high-definition TFT screens that can replicate the look of original equipment while providing instant alerts for low oil pressure or high coolant temperatures. This isn’t about replacing the character of your car. It’s about empowering you with reliable, real-time engine data so you can drive with confidence instead of anxiety. You get the visual heritage you love with the accuracy your engine deserves.
Beyond Speed: Modern Data Points You Need
Modern builds demand more than just a speedometer and a fuel level indicator. If you’ve performed a high-performance upgrade like an LS engine swap, your data needs have changed significantly. You need to monitor air-fuel ratios, transmission temperatures, and even diagnostic trouble codes directly from your seat. Integrating a digital dash for classic car projects also solves the classic cable-driven speedometer headache. By utilizing GPS-based speed tracking, you bypass the inaccuracies caused by different tire sizes or rear-end gear swaps. You get a clean, professional-looking interior that provides trip computers and precise data logs, turning your vintage machine into a truly capable modern performer.
Navigating the Tech: Types of Digital Dash Systems for Restomods
Choose your hardware based on the specific goals of your build. The market for a digital dash for classic car projects has expanded significantly by 2026, offering everything from factory-look replacements to modular tablet interfaces. You must decide if you want the technology to disappear into the dashboard or stand out as a centerpiece of modern engineering. This choice dictates your installation complexity and the final aesthetic of your cockpit. As the future of vehicle interiors continues to lean toward high-definition displays, builders now have access to refresh rates and color depths that were once reserved for luxury supercars.
Direct-Fit Replacement Panels
Select a direct-fit system if you want to maintain the original architecture of your dashboard. These units are engineered to bolt directly into your factory gauge bezel, preserving the iconic lines of muscle cars like the 1969 Camaro or the 1967-1972 C10. Manufacturers have refined these systems into distinct tiers. For example, the Dakota Digital VHX series offers a solid entry point starting around $945.25, while the HDX and RTX series provide more sophisticated styling and integration, starting at $1,543.75 and $1,676.75 respectively. The flagship for 2026 is the GRFX series, which features full-color TFT screens and starts at $1,900.00. While these are plug-and-play, remember that lead times can range from 8 to 20 weeks, so plan your project calendar accordingly.
Universal Clusters and Custom Fabrication
Look toward universal displays when working with rare imports or one-off custom builds where no direct-fit kit exists. These systems typically come in 7-inch or 12.3-inch formats and require you to fabricate a custom housing. This is where your artistry as a builder shines. You’ll need to use Bus Interface Modules (BIMs) to bridge the gap between your engine’s ECU and the display, ensuring that data flows seamlessly from your modern drivetrain to the screen. If you’re a true DIY enthusiast, you can even construct a custom system using a Raspberry Pi or Arduino for approximately $200 to $300 in parts. This path offers total control over the interface but demands a high level of programming and electrical knowledge. For those who want to see the specific tools I use for these intricate electrical tasks, check out my recommended gear for the workshop.
Choosing Your Interface: Matching Tech to Your Build Aesthetic
Your dashboard is the primary interface between you and your machine. When you select a digital dash for classic car projects, you’re making a design statement that impacts every minute you spend behind the wheel. I’ve seen too many builders treat the instrument cluster as an afterthought. At Restomod Academy, we believe technology should enhance your driving experience, not distract from the heritage of the vehicle. A poorly chosen interface looks like a cheap tablet glued to a masterpiece, while a well-curated one feels like a natural evolution of the original design.
Decide early in your build if you want the technology to be a hidden partner or a visible centerpiece. This decision influences everything from the wiring harness to the custom fabrication of your gauge cluster. You aren’t limited to generic readouts anymore. Modern systems allow you to fine-tune the color palette, font weights, and even the needle sweep behavior to match your custom upholstery and interior trim. This level of detail is what separates a professional build from a weekend experiment. Choose wisely.
The Stealth Look: Modern Performance in Vintage Housing
The stealth approach is perfect for builders who value a period-correct appearance but demand modern accuracy. You can now select software skins that perfectly mimic the unique typography used by manufacturers in the 1960s and 70s. By mounting high-resolution screens behind original glass lenses, you maintain the depth and texture of a vintage cockpit. This allows you to monitor critical engine data without breaking the visual spell of a classic interior. To see how others have successfully blended vintage style with modern comfort, explore these restomod interior ideas and design philosophies.
Full Modernization: The Pro-Touring Digital Experience
If your goal is a track-ready machine, embrace a high-density data interface. Pro-Touring builds require more than just speed and RPM. You need real-time feedback on oil temperature, fuel pressure, and lateral forces. A digital dash for classic car racing applications allows you to configure programmable shift lights and performance timers that help you shave seconds off your lap times. This data-heavy approach is the perfect complement to aggressive suspension upgrades that turn a wallowing classic into a precision instrument. Prioritize a layout that keeps the most critical information in your peripheral vision, ensuring you stay focused on the apex while the hardware monitors the vitals.
From Wires to Windows: A Mentor’s Guide to Installation Planning
Commit to a methodical plan before you strip a single wire from your dashboard. A digital dash for classic car projects is only as reliable as the electrical foundation supporting it. Most builders fail because they rush into the “spaghetti” behind the cluster without verifying their power source. Start by assessing your battery health and alternator output; digital electronics demand stable voltage and can behave erratically if your charging system is weak. You are building a high tech nerve center, and it requires a clean environment to function correctly.
Follow this five phase roadmap to ensure a professional result in your workshop:
- Phase 1: Verify your electrical system can handle the modern load and check for existing parasitic draws.
- Phase 2: Select and install high precision digital transducers to replace your old mechanical sending units.
- Phase 3: Route your wiring harness using high quality loom and dedicated ground blocks to prevent signal interference.
- Phase 4: Calibrate your speedometer using GPS signals or specific pulse counts for pinpoint accuracy.
- Phase 5: Execute a validation drive to confirm that every digital readout matches your engine’s actual physical behavior.
Solving the Wiring Puzzle: CAN Bus vs Traditional Sensors
Precision depends entirely on how your hardware communicates with your drivetrain. If you are following the definitive guide to an LS engine swap, your digital dash can likely pull data directly from the ECU via a CAN Bus interface. This single cable connection replaces a dozen individual sensor wires, simplifying your installation significantly. However, if you are running a traditional carbureted setup, you’ll need to manually wire individual sensors for oil pressure and water temperature. Be meticulous with your signal types; verify whether your dash requires ground switched or power switched inputs to avoid damaging delicate circuitry. If you want to master these complex high tech transitions, my Restomod Consulting Services can help you navigate the specific wiring requirements of your unique build.
Planning Your Dash Layout for Ergonomics and Safety
Think deeply about the environment where you’ll actually be driving your machine. Position your screen to minimize glare and sun washout, which can render a digital interface useless during a mid day cruise. Ensure that critical warnings, such as low oil pressure or high heat alerts, sit clearly within your peripheral vision. In any performance build, the tachometer should be the focal point of your display to ensure you hit every shift point perfectly without losing focus on the road ahead. This isn’t just about modern aesthetics; it’s about creating a safe, functional workspace that lets you push your machine to its limits with total peace of mind.
Mastering the Modern Interior: Next Steps in Your Build Journey
Completing the installation of your digital dash for classic car projects marks a major milestone, but your journey toward a master-class interior doesn’t end there. Think of your new display as the brain of a larger ecosystem. To truly achieve that professional restomod finish, you must ensure your high-tech gauges harmonize with your audio and climate control systems. A cohesive interior is one of the most effective ways to increase the resale value of your machine. Buyers in 2026 aren’t just looking for a vintage shell; they’re looking for a vehicle that offers the seamless reliability of a modern daily driver while retaining its heritage soul.
Integrating Audio and HVAC with Your New Display
Strive for a tech stack that feels intentional rather than cluttered. If you’ve chosen a minimalist or stealth aesthetic, consider hiding your modern HVAC and audio controls behind original trim panels or inside the glove box. This keeps the focus on your primary display while providing the comfort of modern air conditioning and high-fidelity sound. If you find yourself struggling with the complexities of signal interference between these components, I recommend consulting with the Restomod Academy team to help map out your electrical architecture. A clean center console is the hallmark of a builder who understands the balance between form and function.
Pay absolute attention to your grounding strategy. Digital electronics are incredibly sensitive to electrical noise, which can cause flickering screens or inaccurate data. Don’t rely on the original 50-year-old chassis grounds. Instead, run a dedicated, high-quality ground wire from your dash directly to a common ground block or the battery. This simple step prevents the “ghost” signals that plague so many DIY builds and ensures your data remains rock-solid during every mile of your journey.
Final Calibration and the First Test Drive
Your first test drive is the reward for all your meticulous labor. Before you pull out of the workshop, use the GPS functionality to calibrate your speedometer. This is especially critical if you’ve changed your tire diameter or rear-end gear ratios since the original build. Take the time to set up your warning thresholds for oil pressure and water temperature based on your engine’s specific requirements. There is a profound sense of pride in seeing real-time, high-definition data come to life as you hit the open road. Once you’ve mastered the dash, you’re ready to finalize the rest of your build journey using The Ultimate Restomod Guide as your primary planning resource. You’ve transitioned from a passive admirer to an active creator, and your classic machine is better for it.
Bring Your Classic Vision to Life
You’ve seen how a digital dash for classic car projects bridges the gap between vintage style and modern performance. By prioritizing a clean electrical foundation and selecting an interface that honors your car’s heritage, you transform your cockpit into a precision environment. Whether you choose the stealth look of vintage-inspired graphics or the data-dense experience of a pro-touring build, the goal remains clear: drive with absolute confidence. Precision data is the key to protecting your investment and ensuring your machine performs at its peak for years to come.
Don’t let the complexity of wiring or sensor compatibility stall your progress. You have access to expert mentorship from Brook Walsh and comprehensive project blueprints designed to guide you through every stage of your build. This educational framework, which mirrors the structured approach that Modularis takes toward accelerating complex software delivery, ensures that even the most daunting technical tasks are broken down into achievable, logical steps. Join a community of dedicated restomod enthusiasts who value precision and personal labor. Your workshop is the place where heritage meets the future through careful, intentional craftsmanship.
Start your project today with The Ultimate Restomod Guide and take the first step toward a more reliable, high-performing classic. Your workshop is ready for the next evolution, and I am here to help you cross the finish line with confidence and pride.
Frequently Asked Questions
Is a digital dash hard to install in an older classic car?
Installation is a methodical process that requires basic electrical knowledge rather than advanced engineering. If you can read a wiring diagram and use a crimping tool correctly, you can successfully integrate a digital dash for classic car projects. The most time consuming phase is often the removal of the old mechanical cluster and the routing of new sensor wires. Stay patient and follow a logical roadmap to ensure every connection is secure and properly grounded.
Can I keep my original speedometer cable with a digital dash?
You cannot directly connect a mechanical cable to a digital display because the unit requires an electronic pulse to function. You must replace the cable with an electronic speed sensor at the transmission or utilize a GPS receiver. Some builders choose to use a cable drive adapter that converts the mechanical rotation into a digital signal; this allows you to keep the transmission side stock while providing the high definition data your new dash demands.
Will a digital dash drain my battery if the car sits for a long time?
Modern digital systems have a very low parasitic draw, typically less than a few milliamps to maintain your clock and settings. However, classic cars often have older electrical systems that aren’t as efficient. If your project sits for more than two weeks, I recommend using a battery tender or a high quality disconnect switch. This simple habit protects your battery’s health and ensures your digital electronics have stable voltage when you’re ready to drive.
Can I customize the colors and layout of a digital dash for my restomod?
Customization is one of the primary rewards of this upgrade, especially with 2026 technology like the Dakota Digital GRFX series. You can adjust color palettes, font styles, and gauge layouts to perfectly match your upholstery or exterior paint. Many systems allow you to toggle between a minimalist stealth look for night cruising and a data heavy performance layout for track days. This flexibility ensures your technology always complements the soul of your machine.
How does a digital dash work with an LS swap or Coyote engine?
Digital systems communicate with modern engines through a CAN Bus interface or specific Bus Interface Modules. These modules plug directly into your engine’s ECU to pull real time data for RPM, engine temperature, and diagnostic codes. This eliminates the need to install redundant sensors on your new engine block. It creates a clean, professional installation that utilizes the precision of your modern drivetrain to provide accurate information on your digital dash for classic car builds.
What happens if the digital dash screen fails while I am driving?
Total screen failure is rare in high quality, automotive grade units, but it’s often caused by poor grounding or voltage spikes. If a failure occurs, your engine will continue to run normally because the dash is a monitoring tool, not a primary controller. To prevent this, ensure your electrical system is robust and your grounds are connected to a dedicated block. Meticulous installation is your best defense against losing your data while you’re on the road.
Do digital dashes work with original fuel sending units?
Most modern digital clusters are engineered with programmable inputs that recognize various Ohm ranges from original fuel sending units. Whether your classic uses a 0-90 Ohm GM sender or a 73-10 Ohm Ford unit, you can calibrate the dash to read your tank level accurately. This prevents you from having to drop the fuel tank to replace a functioning sensor. Always verify the Ohm range of your specific vehicle before finalizing your programming.
Is a GPS-based speedometer better than a traditional sensor?
GPS based speedometers offer superior accuracy and a much simpler installation process compared to traditional transmission sensors. They bypass the need for mechanical cables and aren’t affected by changes in tire size or rear end gear ratios. A GPS unit provides a steady signal regardless of mechanical wear. While they may lose signal in long tunnels, their reliability and ease of setup make them the preferred choice for modern restomod builders who value precision.