
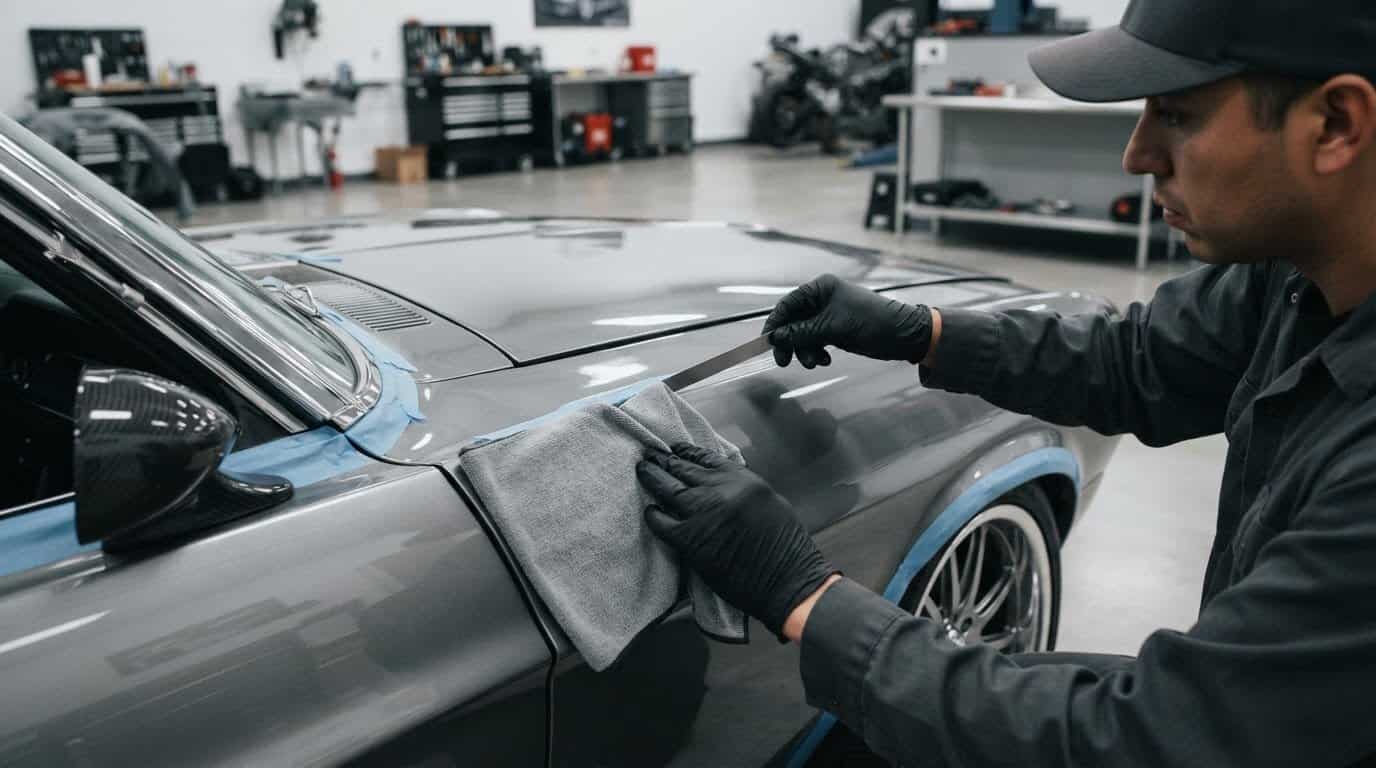
Fresh paint can make a panel gap look worse, but forcing an adjustment can damage the finish. If a door, hood, trunk lid, or fender sits unevenly, fixing panel gaps and alignment after paint starts with a careful diagnosis, not a wrench. First identify whether the gap changes in width, the panel sits proud or recessed, or the whole panel is out of position.
Paint and clear coat can make every mismatch stand out, and not every problem can be corrected at a hinge or mounting bolt. This guide explains how to assess the fit, protect the finish, and make small, controlled adjustments when the panel and its fasteners allow them. Before touching freshly painted parts, follow the paint manufacturer’s handling and curing guidance. Work methodically: start with the panel you’re adjusting, then check how it relates to neighboring panels. The warning signs below can help you recognize when the cause is underlying bodywork rather than a simple bolt-on adjustment. Precision is the goal; patience helps keep the finish intact.
Key Takeaways
- Separate uneven gap width from a panel that sits proud or recessed before choosing an adjustment.
- Recognize when hinge or mounting-point adjustments may help, and when welded sections or multiple misaligned panels point to bodywork.
- For fixing panel gaps and alignment after paint, document the starting position, protect vulnerable edges, and make small, supported adjustments.
- Recheck how neighboring panels relate, then confirm doors, hood, and trunk open, close, and latch without binding or abnormal contact.
- Know when to stop rather than force a panel into place, helping preserve the finish and the integrity of the build.
Fixing panel gaps and alignment after paint starts with diagnosis
Glossy paint draws your eye to an uneven door gap or a fender that doesn’t follow the body line. Before reaching for a wrench, identify what’s actually wrong. Fixing panel gaps and alignment after paint starts with separating spacing, surface flushness, and overall alignment, because each points to a different fit problem.
A panel gap is the space between neighboring panels. Flushness describes whether their outer surfaces meet evenly, while alignment describes how panels sit in relation to body lines and adjacent components. Compare corresponding areas on both sides, use repeatable reference points, and measure at the same locations. Record whether the gap widens, narrows, or stays consistent, and whether either edge sits proud or recessed. A single measurement rarely tells the whole story.
Watch this brief example of a trunk panel adjustment, then use the checks below to diagnose your own panel before making changes.
How to tell a gap problem from a flushness problem
Look at a door-to-fender opening from top to bottom. If the space widens or narrows noticeably, you’re looking at a gap issue. If the spacing stays consistent but the door edge sits higher or lower than the fender, that’s a flushness issue. A panel can have consistent spacing and still sit proud or recessed, so check the edge profile as well as the gap.
What to inspect before touching fasteners
Trace the panel edges and body lines, then check how the latch engages and how the panel relates to its neighbors. Record measurements at several consistent points, but don’t assume there’s one universal gap specification for every vehicle. Compare corresponding areas on both sides and note where the fit changes. A gap that changes along one panel suggests a different issue from several body lines that fall out of step together.
Also consider the vehicle’s construction. In a unibody, the body shell forms part of the vehicle’s underlying structure; body-on-frame vehicles use a separate frame. A panel mismatch by itself doesn’t prove structural damage, but a fit problem spanning several areas deserves more than cosmetic adjustment. Careful observation is a core bodywork skill, especially on a classic build where every line contributes to the finished character.
Why panel alignment changes after paint, and what the symptoms reveal
A fresh finish can make a body line look sharper and a neighboring gap more obvious, drawing attention to a mismatch that was already present. Paint doesn’t automatically mean the panels shifted. Removal and reinstallation, existing fit inconsistencies, or earlier metalwork may all contribute to what you notice once the surface is glossy.
Start by identifying which parts can move. Doors, hoods, and trunk lids are typically bolt-on panels attached through hinges or mounting points, so their position may be adjustable. Welded body sections, such as a quarter panel, aren’t repositioned through ordinary hinge or bolt adjustment. If their shape or relationship to adjacent panels is wrong, the solution may involve bodywork rather than shifting fasteners.
Common causes of uneven door, hood, and trunk gaps
On a door, hinge position can affect its height, angle, and gap, while latch position can influence how the door sits when closed. A latch adjustment may change how the panel rests, but it won’t necessarily correct a gap caused by hinge position or distorted metal. Compare the door’s open and closed positions rather than treating the latch as a cure-all.
Hood and trunk fit can be affected by mounting points, hinges, and how the panel is supported as it’s positioned. If one corner sits high, check whether the panel is seated evenly at its mounts before assuming the surrounding body is at fault. Prior repairs or distorted structure can also leave multiple panels out of relationship. Adjusting one bolt-on panel may only disguise the mismatch at another edge.
When a visible gap points beyond simple adjustment
Pay attention to patterns. A body line that breaks across several panels, a door that binds, or multiple gaps that vary together suggests a wider fit issue than one misplaced fastener. A welded quarter panel generally requires bodywork to correct its shape or position; it doesn’t have the hinge-style adjustment available on a door. These symptoms help guide diagnosis, but they don’t prove a single cause.
That’s why fixing panel gaps and alignment after paint should begin with finding the source of the mismatch, not assuming a quick adjustment will solve it. If the trouble appears across adjoining panels, reassess the underlying metalwork and how the parts meet before proceeding. A measured diagnosis protects the finish and helps preserve the clean lines that give a classic build its character.
Which post-paint panel adjustments are safe, and which need bodywork?
A small shift at a bolt-on panel’s mounting points may correct a localized fit issue, but it won’t reshape distorted metal or repair a welded section. The safe choice depends on the symptom and the vehicle’s design. Exact adjustment points and procedures vary, so use vehicle-specific service information rather than assuming every hinge or fastener works the same way.
Before loosening hardware, support the panel so it can’t drop or swing, and protect nearby painted edges from tools or contact with adjacent parts. Follow the paint manufacturer’s handling and curing guidance before working around a fresh finish. Even a minor adjustment can cause a chip if an edge slips or panels rub together.
Bolt-on panels, hinges, and latches
Some doors, hoods, and trunk lids have mounting provisions that allow limited repositioning. Hinge position affects a door’s location and movement; latch position affects how it meets and rests against the body when closed. Changing one can affect another part of the fit or operation. Make a small, controlled change, then reassess the panel’s gaps, flushness, and movement before proceeding.
Don’t force a panel into position. Resistance, binding, or a fit that worsens elsewhere is a reason to stop and reassess, not tighten hardware against the mismatch.
| Symptom | Likely adjustment area | Main paint-protection concern |
|---|---|---|
| Door gap or height varies, but the surrounding body lines remain consistent | Door hinge or mounting points | Supporting the door and preventing its edge from contacting the fender |
| Door gap looks reasonable, but the closed door sits incorrectly or doesn’t engage smoothly | Latch position, after checking hinge fit | Keeping the door edge clear of the striker area and adjacent paint |
| Hood or trunk lid sits unevenly at its corners | Panel mounts, hinges, or supports | Preventing sudden movement or edge-to-edge contact |
| Several panels or body lines are out of relationship | Underlying alignment or bodywork, not just one fastener | Avoiding repeated adjustments that may scuff or chip the finish |
Welded panels and bodywork that adjustment cannot fix
Welded sections, including quarter panels, generally don’t have ordinary bolt-on repositioning points. If a welded panel’s shape or alignment is off, correcting it may require renewed metal shaping, alignment, and finish work. A localized hardware adjustment can’t reliably fix that underlying condition. For a deeper look at fabrication and restoration fundamentals, explore the classic car bodywork guide.
In short, fixing panel gaps and alignment after paint can involve careful adjustment, but only when the panel and its mounting provisions support it. Identify the source first; don’t ask force to do the work of body repair.

How to adjust painted panels without rushing or damaging the finish
Work in stages. The aim isn’t to make a panel move at any cost, but to make a measured change and confirm it improves the fit without creating another problem. Before working near a newly painted finish, follow the paint system manufacturer’s handling and curing guidance.
Prepare the vehicle, panel, and reference measurements
Park securely on a stable surface, then inspect how the panel moves and closes. Look over its fasteners, hinges, and latch operation before changing anything. Record the starting fit at repeatable points, such as the top, middle, and bottom of the gap, and note how the panel sits against adjoining surfaces. Take reference photos and use the same measuring method each time so you can compare results. Recommended workshop gear can help you prepare for careful work.
Make a controlled adjustment and check the result
Protect the finish and support the panel before loosening hardware. Then follow this sequence:
- Inspect: Confirm the panel moves freely and identify the specific fasteners related to the fit issue.
- Document: Note your measurements and take reference photos so you can compare the result with the original position.
- Protect: Mask vulnerable edges and nearby painted surfaces where contact could occur.
- Support: Hold the panel securely to prevent it from dropping, swinging, or striking an adjacent edge.
- Adjust incrementally: Loosen only the necessary hardware, shift the panel a small amount, then secure it enough to check the fit.
- Recheck: Compare the gap, flushness, and body lines, then open and close the panel to check for smooth movement and proper latch engagement.
Make one change at a time. If a door looks better at the fender but now sits proud at the rear, diagnose the new mismatch instead of applying more force. Stop if you feel unexpected resistance, notice binding, or see the finish rubbing or marking. Reassess the adjustment point and panel support before continuing.
That deliberate rhythm is the heart of fixing panel gaps and alignment after paint: measure, move carefully, and verify the whole panel relationship before deciding the adjustment worked. For guidance that connects precise fit to the larger restoration, explore The Ultimate Restomod Guide.
Final checks after panel alignment, and when to revisit the bodywork
A panel can look improved on its own and still sit awkwardly against the rest of the vehicle. Finish by checking the overall relationships, not just one gap. A clean fit should follow the surrounding body lines, maintain consistent spacing where the design calls for it, and allow each panel to operate smoothly.
A practical final-fit inspection
Inspect the car in good light, looking along the panels as well as directly at their edges. Compare left and right sides when the design gives you a useful reference, but don’t assume every vehicle is perfectly symmetrical. Check:
- Whether gaps remain consistent along their length and relate naturally to neighboring panels.
- Whether panel surfaces sit flush, without an edge standing noticeably proud or recessed.
- Whether body lines continue cleanly from one panel to the next.
- Whether doors, hood, and trunk open, close, and latch without binding or abnormal contact.
- Whether paint edges and surrounding surfaces show scuffs, chips, or signs of rubbing.
Record the final measurements and take reference photos. Those notes make it easier to spot changes if later assembly or bodywork affects the fit. They also help distinguish a new issue from a condition that was present before the adjustment.
When to stop and plan a bodywork correction
Stop adjusting if a panel binds, an adjustment point reaches its limit, or the gap remains inconsistent despite a careful change. Don’t force hardware or keep moving one panel to compensate for another. If several panels appear out of position, or body lines don’t align across adjoining sections, reassess the underlying structure and any previous repairs. The source may require renewed bodywork rather than more bolt-on adjustment.
Good judgment is part of fixing panel gaps and alignment after paint. A successful result isn’t simply a pleasing gap; it’s a panel that fits in context, operates correctly, and keeps its finish intact. If you’re planning the next stages of a broader build, explore this restomod project roadmap to connect careful fitment with the larger vision for your car.
Carry Your Restomod Finish Forward
Great panel fit comes from patience and sound judgment. Diagnose whether the issue is gap width, flushness, or broader alignment before touching hardware. Protect the finish, support the panel, and make only small, measured adjustments. If panels bind, several body lines fall out of step, or the adjustment points can’t correct the fit, pause and revisit the underlying bodywork.
That deliberate approach to fixing panel gaps and alignment after paint is part of building a classic that looks right and works as it should. Restomod Academy shares educational guidance on classic-car restoration and modern modifications, helping builders approach each stage with a clear plan.
Explore The Ultimate Restomod Guide and build your restomod with a clear learning path.
Frequently Asked Questions
Can you adjust panel gaps after a car has been painted?
Yes, some bolt-on panels can be adjusted carefully after painting. First identify whether the issue is gap spacing, flushness, hinge position, or latch engagement, since each points to a different adjustment. Support the panel, protect painted edges, and make small changes while checking the fit again. Follow the paint system’s handling guidance before working near a fresh finish. Welded panels or broader body misalignment may need bodywork instead.
How do you fix uneven door gaps after paint?
Start by comparing the door’s gap and flushness at consistent points, then inspect hinge position, latch engagement, and neighboring panels. Support the door and protect painted edges before adjusting relevant hardware. Make a small change, then check both the panel’s appearance and how it opens, closes, and latches. If the door binds or body lines remain inconsistent, stop and reassess the underlying alignment or previous repairs rather than forcing it.
Can adjusting a panel chip fresh paint?
Yes, paint can chip if panel edges rub, a tool slips, or a panel shifts unexpectedly. Mask vulnerable edges, provide suitable support, and avoid forcing the hardware or panel. Check the paint system’s handling guidance before working near a newly finished surface. If the finish may still be vulnerable, or the panel needs substantial movement, pause until conditions are appropriate. Careful preparation reduces avoidable contact, but can’t remove every risk.
What causes panel gaps to look uneven after painting?
Paint can make an existing mismatch easier to see, but it isn’t necessarily the cause. Possible contributors include hinge position, latch alignment, panel mounting, previous metalwork, or the surrounding body structure. Compare multiple points along the gap and follow the neighboring body lines before choosing an adjustment. One uneven opening is a clue, not proof of a single fault. Diagnose the panel and its surrounding fit together.
Should you adjust the hinges or the striker to align a door?
Choose based on the symptom, because hinges and strikers serve different roles. Hinge position affects how the door sits and swings in its opening; the striker meets the latch and influences how the door rests when closed. Changing either without diagnosing the fit can create binding or a new mismatch. Record the original position, support the door, protect the finish, and make only a controlled adjustment that addresses the observed issue.
Can you adjust a welded quarter panel after paint?
A welded quarter panel doesn’t have the ordinary bolt-on repositioning available to a door or fender. If its gap or body line is incorrect, the cause may involve panel shaping, earlier repairs, or surrounding structure. Don’t try to pull it into place by changing unrelated hardware. Reassess the bodywork needed to correct the fit, and protect the painted surface while planning the repair. A gap alone doesn’t identify the underlying cause.
How do you check panel alignment after making an adjustment?
Recheck gap consistency, flushness, and body lines, then operate the door, hood, or trunk you adjusted. Compare measurements at the same points you used before the change, and inspect the finish in good light for rubbing, scuffs, or chips. Confirm the panel moves freely and latches as intended. If improving one area creates another mismatch, stop and reassess the adjustment rather than continuing to force the panel into position.
Fresh paint can make a panel gap look worse, but forcing an adjustment can damage the finish. If a door, hood, trunk lid, or fender sits unevenly, fixing panel gaps and alignment after paint starts with a careful diagnosis, not a wrench. First identify whether the gap changes in width, the panel sits proud or recessed, or the whole panel is out of position.
Paint and clear coat can make every mismatch stand out, and not every problem can be corrected at a hinge or mounting bolt. This guide explains how to assess the fit, protect the finish, and make small, controlled adjustments when the panel and its fasteners allow them. Before touching freshly painted parts, follow the paint manufacturer’s handling and curing guidance. Work methodically: start with the panel you’re adjusting, then check how it relates to neighboring panels. The warning signs below can help you recognize when the cause is underlying bodywork rather than a simple bolt-on adjustment. Precision is the goal; patience helps keep the finish intact.
Key Takeaways
- Separate uneven gap width from a panel that sits proud or recessed before choosing an adjustment.
- Recognize when hinge or mounting-point adjustments may help, and when welded sections or multiple misaligned panels point to bodywork.
- For fixing panel gaps and alignment after paint, document the starting position, protect vulnerable edges, and make small, supported adjustments.
- Recheck how neighboring panels relate, then confirm doors, hood, and trunk open, close, and latch without binding or abnormal contact.
- Know when to stop rather than force a panel into place, helping preserve the finish and the integrity of the build.
Fixing panel gaps and alignment after paint starts with diagnosis
Glossy paint draws your eye to an uneven door gap or a fender that doesn’t follow the body line. Before reaching for a wrench, identify what’s actually wrong. Fixing panel gaps and alignment after paint starts with separating spacing, surface flushness, and overall alignment, because each points to a different fit problem.
A panel gap is the space between neighboring panels. Flushness describes whether their outer surfaces meet evenly, while alignment describes how panels sit in relation to body lines and adjacent components. Compare corresponding areas on both sides, use repeatable reference points, and measure at the same locations. Record whether the gap widens, narrows, or stays consistent, and whether either edge sits proud or recessed. A single measurement rarely tells the whole story.
Watch this brief example of a trunk panel adjustment, then use the checks below to diagnose your own panel before making changes.
How to tell a gap problem from a flushness problem
Look at a door-to-fender opening from top to bottom. If the space widens or narrows noticeably, you’re looking at a gap issue. If the spacing stays consistent but the door edge sits higher or lower than the fender, that’s a flushness issue. A panel can have consistent spacing and still sit proud or recessed, so check the edge profile as well as the gap.
What to inspect before touching fasteners
Trace the panel edges and body lines, then check how the latch engages and how the panel relates to its neighbors. Record measurements at several consistent points, but don’t assume there’s one universal gap specification for every vehicle. Compare corresponding areas on both sides and note where the fit changes. A gap that changes along one panel suggests a different issue from several body lines that fall out of step together.
Also consider the vehicle’s construction. In a unibody, the body shell forms part of the vehicle’s underlying structure; body-on-frame vehicles use a separate frame. A panel mismatch by itself doesn’t prove structural damage, but a fit problem spanning several areas deserves more than cosmetic adjustment. Careful observation is a core bodywork skill, especially on a classic build where every line contributes to the finished character.
Why panel alignment changes after paint, and what the symptoms reveal
A fresh finish can make a body line look sharper and a neighboring gap more obvious, drawing attention to a mismatch that was already present. Paint doesn’t automatically mean the panels shifted. Removal and reinstallation, existing fit inconsistencies, or earlier metalwork may all contribute to what you notice once the surface is glossy.
Start by identifying which parts can move. Doors, hoods, and trunk lids are typically bolt-on panels attached through hinges or mounting points, so their position may be adjustable. Welded body sections, such as a quarter panel, aren’t repositioned through ordinary hinge or bolt adjustment. If their shape or relationship to adjacent panels is wrong, the solution may involve bodywork rather than shifting fasteners.
Common causes of uneven door, hood, and trunk gaps
On a door, hinge position can affect its height, angle, and gap, while latch position can influence how the door sits when closed. A latch adjustment may change how the panel rests, but it won’t necessarily correct a gap caused by hinge position or distorted metal. Compare the door’s open and closed positions rather than treating the latch as a cure-all.
Hood and trunk fit can be affected by mounting points, hinges, and how the panel is supported as it’s positioned. If one corner sits high, check whether the panel is seated evenly at its mounts before assuming the surrounding body is at fault. Prior repairs or distorted structure can also leave multiple panels out of relationship. Adjusting one bolt-on panel may only disguise the mismatch at another edge.
When a visible gap points beyond simple adjustment
Pay attention to patterns. A body line that breaks across several panels, a door that binds, or multiple gaps that vary together suggests a wider fit issue than one misplaced fastener. A welded quarter panel generally requires bodywork to correct its shape or position; it doesn’t have the hinge-style adjustment available on a door. These symptoms help guide diagnosis, but they don’t prove a single cause.
That’s why fixing panel gaps and alignment after paint should begin with finding the source of the mismatch, not assuming a quick adjustment will solve it. If the trouble appears across adjoining panels, reassess the underlying metalwork and how the parts meet before proceeding. A measured diagnosis protects the finish and helps preserve the clean lines that give a classic build its character.
Which post-paint panel adjustments are safe, and which need bodywork?
A small shift at a bolt-on panel’s mounting points may correct a localized fit issue, but it won’t reshape distorted metal or repair a welded section. The safe choice depends on the symptom and the vehicle’s design. Exact adjustment points and procedures vary, so use vehicle-specific service information rather than assuming every hinge or fastener works the same way.
Before loosening hardware, support the panel so it can’t drop or swing, and protect nearby painted edges from tools or contact with adjacent parts. Follow the paint manufacturer’s handling and curing guidance before working around a fresh finish. Even a minor adjustment can cause a chip if an edge slips or panels rub together.
Bolt-on panels, hinges, and latches
Some doors, hoods, and trunk lids have mounting provisions that allow limited repositioning. Hinge position affects a door’s location and movement; latch position affects how it meets and rests against the body when closed. Changing one can affect another part of the fit or operation. Make a small, controlled change, then reassess the panel’s gaps, flushness, and movement before proceeding.
Don’t force a panel into position. Resistance, binding, or a fit that worsens elsewhere is a reason to stop and reassess, not tighten hardware against the mismatch.
| Symptom | Likely adjustment area | Main paint-protection concern |
|---|---|---|
| Door gap or height varies, but the surrounding body lines remain consistent | Door hinge or mounting points | Supporting the door and preventing its edge from contacting the fender |
| Door gap looks reasonable, but the closed door sits incorrectly or doesn’t engage smoothly | Latch position, after checking hinge fit | Keeping the door edge clear of the striker area and adjacent paint |
| Hood or trunk lid sits unevenly at its corners | Panel mounts, hinges, or supports | Preventing sudden movement or edge-to-edge contact |
| Several panels or body lines are out of relationship | Underlying alignment or bodywork, not just one fastener | Avoiding repeated adjustments that may scuff or chip the finish |
Welded panels and bodywork that adjustment cannot fix
Welded sections, including quarter panels, generally don’t have ordinary bolt-on repositioning points. If a welded panel’s shape or alignment is off, correcting it may require renewed metal shaping, alignment, and finish work. A localized hardware adjustment can’t reliably fix that underlying condition. For a deeper look at fabrication and restoration fundamentals, explore the classic car bodywork guide.
In short, fixing panel gaps and alignment after paint can involve careful adjustment, but only when the panel and its mounting provisions support it. Identify the source first; don’t ask force to do the work of body repair.
How to adjust painted panels without rushing or damaging the finish
Work in stages. The aim isn’t to make a panel move at any cost, but to make a measured change and confirm it improves the fit without creating another problem. Before working near a newly painted finish, follow the paint system manufacturer’s handling and curing guidance.
Prepare the vehicle, panel, and reference measurements
Park securely on a stable surface, then inspect how the panel moves and closes. Look over its fasteners, hinges, and latch operation before changing anything. Record the starting fit at repeatable points, such as the top, middle, and bottom of the gap, and note how the panel sits against adjoining surfaces. Take reference photos and use the same measuring method each time so you can compare results. Recommended workshop gear can help you prepare for careful work.
Make a controlled adjustment and check the result
Protect the finish and support the panel before loosening hardware. Then follow this sequence:
- Inspect: Confirm the panel moves freely and identify the specific fasteners related to the fit issue.
- Document: Note your measurements and take reference photos so you can compare the result with the original position.
- Protect: Mask vulnerable edges and nearby painted surfaces where contact could occur.
- Support: Hold the panel securely to prevent it from dropping, swinging, or striking an adjacent edge.
- Adjust incrementally: Loosen only the necessary hardware, shift the panel a small amount, then secure it enough to check the fit.
- Recheck: Compare the gap, flushness, and body lines, then open and close the panel to check for smooth movement and proper latch engagement.
Make one change at a time. If a door looks better at the fender but now sits proud at the rear, diagnose the new mismatch instead of applying more force. Stop if you feel unexpected resistance, notice binding, or see the finish rubbing or marking. Reassess the adjustment point and panel support before continuing.
That deliberate rhythm is the heart of fixing panel gaps and alignment after paint: measure, move carefully, and verify the whole panel relationship before deciding the adjustment worked. For guidance that connects precise fit to the larger restoration, explore The Ultimate Restomod Guide.
Final checks after panel alignment, and when to revisit the bodywork
A panel can look improved on its own and still sit awkwardly against the rest of the vehicle. Finish by checking the overall relationships, not just one gap. A clean fit should follow the surrounding body lines, maintain consistent spacing where the design calls for it, and allow each panel to operate smoothly.
A practical final-fit inspection
Inspect the car in good light, looking along the panels as well as directly at their edges. Compare left and right sides when the design gives you a useful reference, but don’t assume every vehicle is perfectly symmetrical. Check:
- Whether gaps remain consistent along their length and relate naturally to neighboring panels.
- Whether panel surfaces sit flush, without an edge standing noticeably proud or recessed.
- Whether body lines continue cleanly from one panel to the next.
- Whether doors, hood, and trunk open, close, and latch without binding or abnormal contact.
- Whether paint edges and surrounding surfaces show scuffs, chips, or signs of rubbing.
Record the final measurements and take reference photos. Those notes make it easier to spot changes if later assembly or bodywork affects the fit. They also help distinguish a new issue from a condition that was present before the adjustment.
When to stop and plan a bodywork correction
Stop adjusting if a panel binds, an adjustment point reaches its limit, or the gap remains inconsistent despite a careful change. Don’t force hardware or keep moving one panel to compensate for another. If several panels appear out of position, or body lines don’t align across adjoining sections, reassess the underlying structure and any previous repairs. The source may require renewed bodywork rather than more bolt-on adjustment.
Good judgment is part of fixing panel gaps and alignment after paint. A successful result isn’t simply a pleasing gap; it’s a panel that fits in context, operates correctly, and keeps its finish intact. If you’re planning the next stages of a broader build, explore this restomod project roadmap to connect careful fitment with the larger vision for your car.
Carry Your Restomod Finish Forward
Great panel fit comes from patience and sound judgment. Diagnose whether the issue is gap width, flushness, or broader alignment before touching hardware. Protect the finish, support the panel, and make only small, measured adjustments. If panels bind, several body lines fall out of step, or the adjustment points can’t correct the fit, pause and revisit the underlying bodywork.
That deliberate approach to fixing panel gaps and alignment after paint is part of building a classic that looks right and works as it should. Restomod Academy shares educational guidance on classic-car restoration and modern modifications, helping builders approach each stage with a clear plan.
Explore The Ultimate Restomod Guide and build your restomod with a clear learning path.
Frequently Asked Questions
Can you adjust panel gaps after a car has been painted?
Yes, some bolt-on panels can be adjusted carefully after painting. First identify whether the issue is gap spacing, flushness, hinge position, or latch engagement, since each points to a different adjustment. Support the panel, protect painted edges, and make small changes while checking the fit again. Follow the paint system’s handling guidance before working near a fresh finish. Welded panels or broader body misalignment may need bodywork instead.
How do you fix uneven door gaps after paint?
Start by comparing the door’s gap and flushness at consistent points, then inspect hinge position, latch engagement, and neighboring panels. Support the door and protect painted edges before adjusting relevant hardware. Make a small change, then check both the panel’s appearance and how it opens, closes, and latches. If the door binds or body lines remain inconsistent, stop and reassess the underlying alignment or previous repairs rather than forcing it.
Can adjusting a panel chip fresh paint?
Yes, paint can chip if panel edges rub, a tool slips, or a panel shifts unexpectedly. Mask vulnerable edges, provide suitable support, and avoid forcing the hardware or panel. Check the paint system’s handling guidance before working near a newly finished surface. If the finish may still be vulnerable, or the panel needs substantial movement, pause until conditions are appropriate. Careful preparation reduces avoidable contact, but can’t remove every risk.
What causes panel gaps to look uneven after painting?
Paint can make an existing mismatch easier to see, but it isn’t necessarily the cause. Possible contributors include hinge position, latch alignment, panel mounting, previous metalwork, or the surrounding body structure. Compare multiple points along the gap and follow the neighboring body lines before choosing an adjustment. One uneven opening is a clue, not proof of a single fault. Diagnose the panel and its surrounding fit together.
Should you adjust the hinges or the striker to align a door?
Choose based on the symptom, because hinges and strikers serve different roles. Hinge position affects how the door sits and swings in its opening; the striker meets the latch and influences how the door rests when closed. Changing either without diagnosing the fit can create binding or a new mismatch. Record the original position, support the door, protect the finish, and make only a controlled adjustment that addresses the observed issue.
Can you adjust a welded quarter panel after paint?
A welded quarter panel doesn’t have the ordinary bolt-on repositioning available to a door or fender. If its gap or body line is incorrect, the cause may involve panel shaping, earlier repairs, or surrounding structure. Don’t try to pull it into place by changing unrelated hardware. Reassess the bodywork needed to correct the fit, and protect the painted surface while planning the repair. A gap alone doesn’t identify the underlying cause.
How do you check panel alignment after making an adjustment?
Recheck gap consistency, flushness, and body lines, then operate the door, hood, or trunk you adjusted. Compare measurements at the same points you used before the change, and inspect the finish in good light for rubbing, scuffs, or chips. Confirm the panel moves freely and latches as intended. If improving one area creates another mismatch, stop and reassess the adjustment rather than continuing to force the panel into position.