
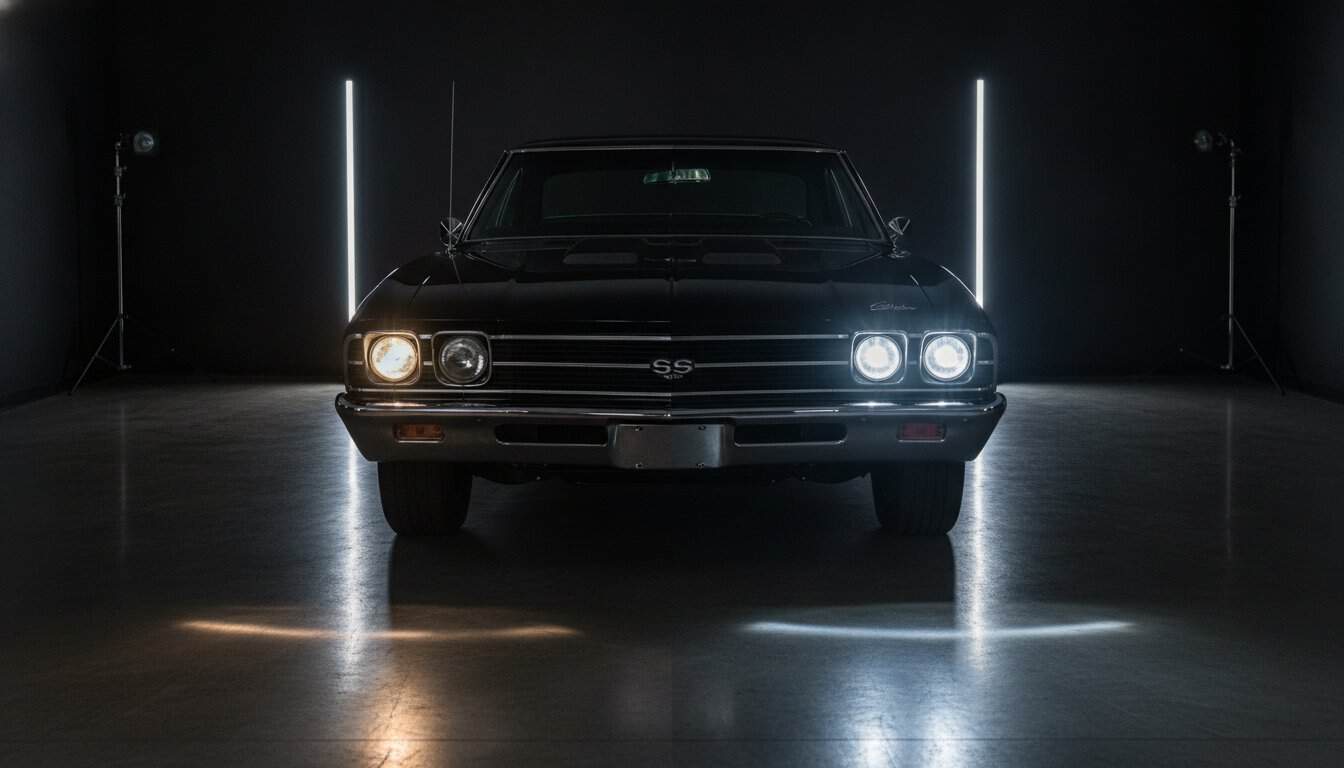
Driving your vintage pride and joy at night shouldn’t feel like a high-stakes gamble with a pair of flickering candles. You value the heritage of your machine, but there’s no denying that original sealed beams often leave much to be desired when the sun goes down. You likely worry about the heavy electrical draw on your aging alternator and the confusing sea of cheap, glare-heavy bulbs that threaten to ruin your car’s aesthetic. It’s a common frustration for the dedicated builder who wants to actually drive their project rather than just polish it in the driveway.
This guide empowers you to master the classic car led headlight conversion with the precision of a seasoned restorer. I’ll show you how to achieve superior safety and a crisp, powerful beam pattern without sacrificing the period-correct look that defines your vehicle. We’ll explore the technical nuances of modern optical engineering, help you choose between warm and cool light temperatures, and ensure your installation is a seamless, plug-and-play process. By the end of this article, you’ll have a clear roadmap to modernizing your lighting system while preserving every ounce of its vintage character.
Key Takeaways
- Bridge the massive lumen gap between dim factory sealed beams and modern tech to finally see the road ahead with absolute clarity.
- Execute a classic car led headlight conversion that honors heritage aesthetics by selecting glass lenses that maintain a period-correct appearance.
- Identify the exact fitment for your vehicle by cross-referencing industry standard numbers like H6024 with modern replacements.
- Master a methodical installation workflow that prioritizes electrical safety and ensures a reliable, plug-and-play connection.
- Learn how this upgrade serves as a gateway to the comprehensive build strategies found in the Ultimate Restomod Guide.
Why Your Classic Car Original Sealed Beams Are a Safety Hazard
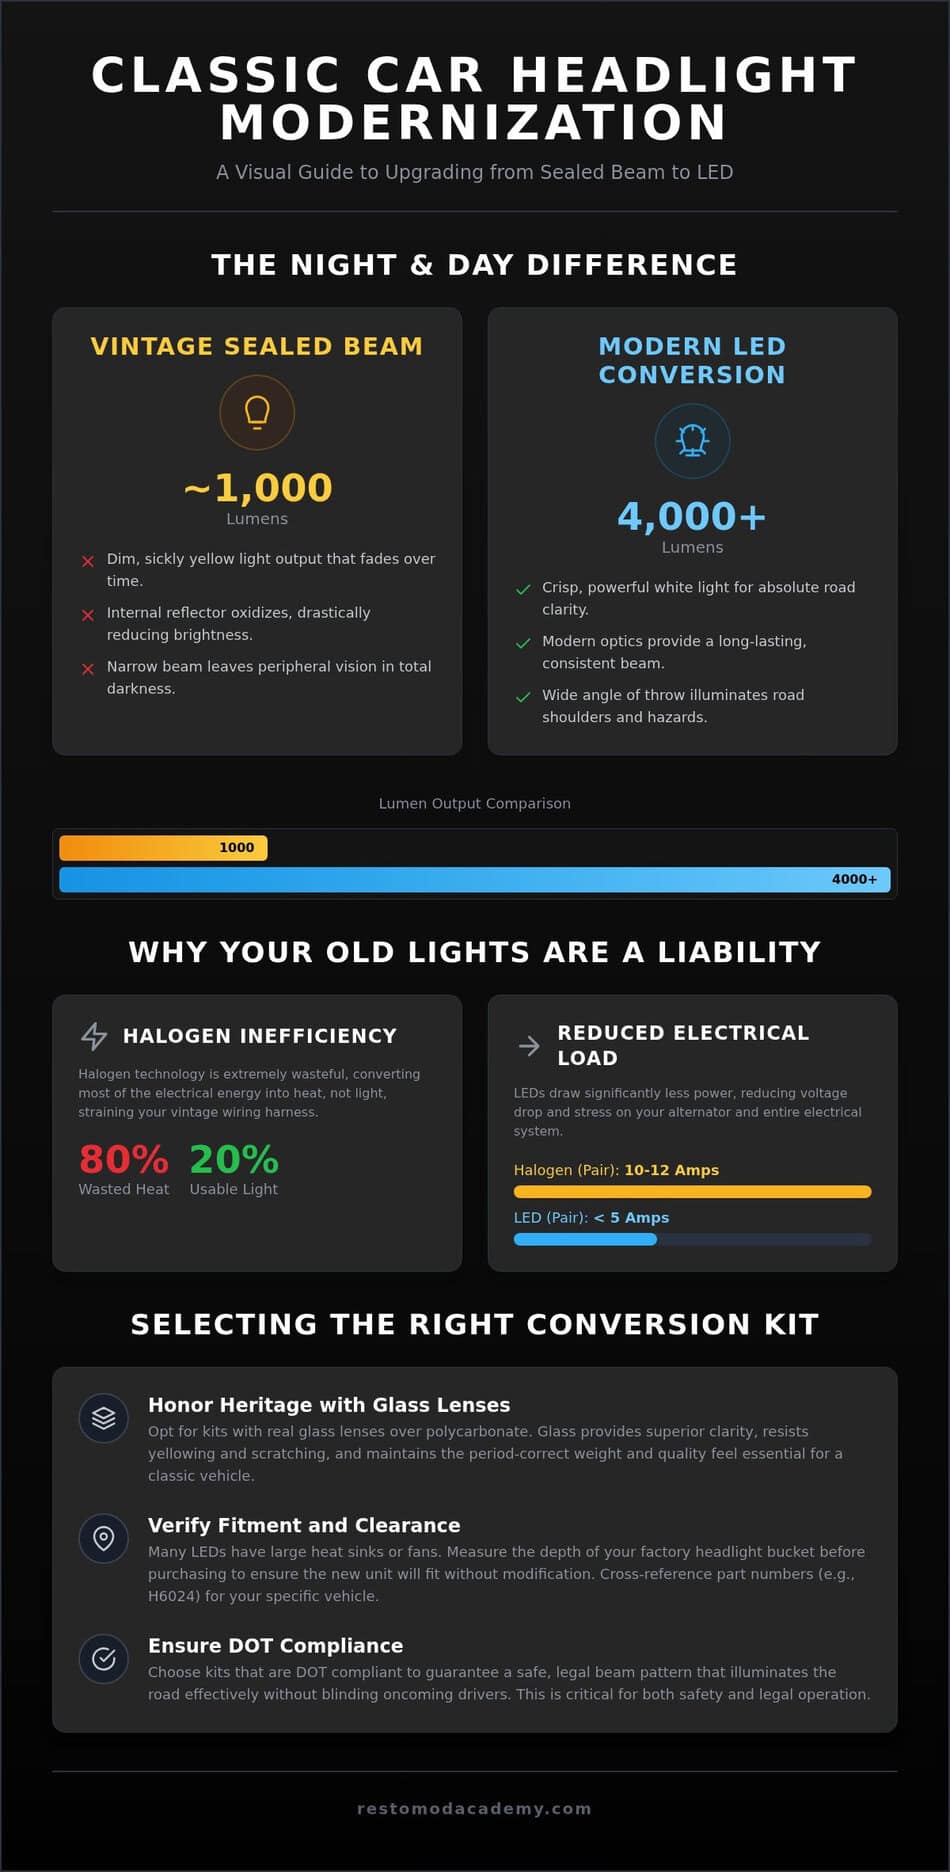
Look closely at the face of your vintage machine. Those glass circles or rectangles are more than just styling cues; they are sealed beam units, a technology that has remained largely unchanged since the mid-20th century. A sealed beam is a singular, vacuum-sealed component where the lens, reflector, and filament are fused into one piece. While this design was revolutionary for its time, it creates a significant bottleneck for modern drivers. Most factory halogen units struggle to produce even 1000 lumens, whereas a high-quality classic car led headlight conversion can easily push 4000 lumens or more onto the pavement. This isn’t just about brightness; it’s about the fundamental history of automotive lighting and how far we’ve come from those early safety standards.
Time is the constant enemy of the sealed beam. Over decades, the internal silvering of the reflector oxidizes, turning a once-bright mirror into a dull, grey surface. Simultaneously, the tungsten filament thins with every hour of use, eventually reaching a point where it glows with a sickly yellow hue rather than a piercing white. When you combine this physical decay with the speeds of modern highway traffic, the danger becomes clear. You’re essentially outdriving your headlights at 65 miles per hour, leaving yourself precious little time to react to hazards that weren’t even on the radar in 1965.
To better understand the mechanics of this upgrade, watch this helpful video from the experts at Summit Racing:
The Technical Limitation of Halogen Filaments
Halogen technology is remarkably inefficient by modern standards. Roughly 80 percent of the energy pulled from your battery is converted into wasted heat rather than usable light. This creates a massive strain on 40 to 50 year old factory wiring harnesses that weren’t designed for peak efficiency. You might notice your lights dimming when you hit the turn signal or the heater fan; that’s a classic sign of voltage drop. Simply tossing a high-output bulb into an old housing rarely solves the problem because the original optics can’t focus the light correctly. You need a complete system rethink to truly modernize your visibility.
Modern Traffic and the Peripheral Vision Gap
Modern infrastructure has changed the way we see at night. High-intensity LED streetlights and the piercing white beams of oncoming SUVs make your vintage yellow glow feel even more inadequate. This creates a dangerous contrast that can effectively blind you to what’s happening in the shadows. A proper classic car led headlight conversion provides a much wider angle of throw, illuminating the shoulders where pedestrians or wildlife might be lurking. Vintage glass lenses often cast a narrow, focused beam that leaves your peripheral vision in total darkness. Modern optics correct this, spreading a uniform blanket of light that gives you the confidence to enjoy your car long after the sun has set.
Selecting the Right LED Conversion Kit for Your Vintage Aesthetic
Choosing the right kit for a classic car led headlight conversion requires a balance between modern performance and period-correct soul. The goal of a successful restomod is to integrate technology so seamlessly that a casual observer might not even notice it’s there until the sun sets. Opt for housings that feature real glass lenses whenever possible. While polycarbonate is lighter, it lacks the depth and clarity of glass; it’s also prone to yellowing and micro-scratching over time. Glass maintains that heavy, quality feel that belongs on a vintage steel fender and stands up to the rigors of the road without losing its luster.
Don’t overlook the physical dimensions of the unit. Many high-output LEDs feature bulky cooling fans or heat sinks that extend far beyond the original sealed beam’s footprint. This can lead to a frustrating discovery during installation where the unit hits the back of the factory headlight bucket. Always measure your available depth before ordering. On the plus side, switching to LED drastically reduces the load on your electrical system. While a pair of halogens might pull 10 to 12 amps, a modern LED setup often pulls less than half of that, giving your vintage alternator much-needed breathing room and potentially solving those annoying idle-speed dimming issues.
Color Temperature: 3000K Classic vs 5700K Modern
The color of your light, measured in Kelvin, dictates the psychological impact of your build. For a faithful restoration, seek out 3000K LEDs. These produce a warm, golden hue that mimics original incandescent bulbs while providing modern brightness. If you’re building a high-performance pro-touring machine, 5700K offers a crisp, daylight-white beam that looks right at home next to modern paint finishes. Avoid cheap bulbs in the 6500K range; these often cast a blue tint that actually reduces contrast and increases eye strain during long night drives. An SAE International study on LED bulb performance highlights how critical proper beam alignment and color are to maintaining road safety and preventing glare for oncoming traffic.
Heat Management: Fanless vs Active Cooling Designs
LEDs are sensitive to heat, and how they shed it determines their lifespan. You’ll choose between active cooling and passive cooling. Active fans are powerful but introduce a mechanical failure point; if the fan dies, the LED will likely burn out within minutes. Passive heat sinks, such as braided copper or aluminum fins, are more reliable for tight, enclosed spaces. Check your clearance inside the bucket carefully. If you’re planning a more extensive electrical overhaul, you can find expert advice on matching components in our recommended gear section. Understanding these thermal dynamics ensures your lighting remains as reliable as the rest of your build. If you want to master every aspect of your project, consider reviewing the Ultimate Restomod Guide for a complete roadmap to performance.
Navigating Fitment Sizes and DOT Compliance
Before you turn a single screw, you must identify the physical footprint of your lighting setup. Most vintage enthusiasts work with three standard sizes: the iconic 7-inch round unit, the smaller 5.75-inch round used in quad-headlight configurations, or the rectangular shapes common in late 70s and 80s designs. Identifying your specific type is the first step in a successful classic car led headlight conversion. You can usually find a part number cast directly into the glass of your current sealed beam. A number like H6024 points to a standard 7-inch round, while H5006 typically denotes the 5.75-inch high and low beam units. Matching these numbers to your new LED housing ensures that the physical mounting points will align with your factory retaining rings.
Compliance is where many builders stumble. It’s tempting to grab the most powerful unit available, but without a DOT or SAE stamp, you’re inviting trouble from both local law enforcement and state inspectors. These stamps signify that the manufacturer has met specific federal safety standards for light intensity and distribution. Choosing a unit with these markings ensures your upgrade is street-legal and safe for everyone on the road. You also need to decide between a projector-style housing and a multi-reflector design. Projectors offer a modern, tech-forward look with a very sharp light focus, while multi-reflectors use a faceted interior that more closely mimics the appearance of a traditional headlight. Think about the final personality of your build before making the choice.
Understanding Beam Patterns and Street Legality
A high-quality LED must have a distinct horizontal cutoff line. This sharp edge prevents light from bleeding upward into the eyes of oncoming drivers, a common issue with cheap, unbranded conversion kits. While flood patterns are excellent for off-road adventures, they’re dangerous on the street. You need a focused driving beam that puts light exactly where your tires are headed. DOT compliance serves as the definitive standard for ensuring your light distribution is both legal and effective.
Housing Depth and the Bucket Modification Dilemma
Be prepared for the extra physical depth that modern electronics require. While the face of the LED matches your original glass, the rear heat sinks can add an extra 1 to 2 inches of bulk. In some vehicles, this results in the headlight hitting the back of the metal bucket. If you encounter this, don’t panic. You can often perform non-destructive trimming of the bucket with a small rotary tool to create the necessary clearance. If you want to avoid cutting your vintage steel, check our recommended gear page to find shallow-fit LED options specifically engineered for tight spaces. Taking the time to measure twice will save you from an afternoon of frustration in the garage.
Step by Step Installation: From Dim Yellow to Brilliant White
Clear your workbench and prepare for a transformation that will fundamentally change how you experience your vehicle at night. Before you dive into the engine bay, gather your essentials: a Phillips head screwdriver, a set of non-marring plastic trim tools, and a can of high-quality electrical contact cleaner. These tools ensure you can work with precision without damaging your vintage chrome or paint. Safety is your first priority. Disconnect the negative battery terminal to eliminate the risk of accidental shorts while you’re manipulating the lighting circuit. It’s a simple habit that separates the amateur from the seasoned builder.
Start by carefully removing the headlight bezels or trim rings. Use your plastic pry tools to gently release any clips or tension points; these pieces are often brittle after decades of heat cycles. Once the bezel is clear, you’ll find the inner retaining ring held by small screws. Be careful not to confuse these with the spring-loaded adjustment screws used for aiming. Remove the retaining ring, pull the old sealed beam forward, and unplug the factory harness. This is the perfect moment to spray a bit of contact cleaner into the original plug to ensure your classic car led headlight conversion has a solid, low-resistance path for power.
The Wiring Reality: Why You Need a Relay Harness
Your factory headlight switch is likely a bottleneck. In most vintage systems, the full current for the lights travels from the battery, through the dash switch, and then out to the front of the car. Over forty years, those copper contacts build up internal resistance, which creates heat and drops voltage. This is the primary cause of the flickering or dimming often seen in poor quality LED swaps. To do it right, install a dedicated relay harness. This setup uses your factory switch as a low-voltage trigger to close a relay, which then pulls clean, fused power directly from the battery. It’s the only way to guarantee your new LEDs receive the steady voltage they need to perform at their peak.
Precision Aiming: Don’t Blind Oncoming Traffic
Once your new units are securely mounted, you must calibrate their throw. Park on a level surface exactly 25 feet away from a flat wall. Measure the distance from the ground to the center of your headlight lens, then mark that same height on the wall with a strip of painter’s tape. Turn on your low beams. The sharp horizontal cutoff line should sit roughly two inches below your tape mark. This ensures you’re casting light onto the pavement rather than into the eyes of other drivers. Remember that your vehicle’s stance dictates your light path; if you’ve modified your springs or shocks, your aim will change. You can find more details on how geometry affects your build in our guide on what is a restomod.
Mastering your lighting is just the beginning of a truly refined build. If you’re ready to move beyond basic upgrades and start a comprehensive vehicle transformation, get your copy of the Ultimate Restomod Guide to map out your entire project with professional precision.
Elevating Your Build with Modern Reliability and Safety
Completing a classic car led headlight conversion marks a pivotal moment in your project’s timeline. It signifies a transition from a vehicle that is merely a fair-weather weekend toy to a reliable machine capable of handling any environment. Beyond the immediate gain in lumens, you’ve introduced a level of durability that was unthinkable when your car first rolled off the assembly line. Modern LEDs often carry lifespans exceeding 30,000 to 50,000 hours. By moving away from the fragile, heat-stressed filaments of the past, you’re investing in a component that will likely outlive the engine under the hood. It’s a set-and-forget upgrade that pays dividends every time the sun dips below the horizon.
Before you consider the job finished, perform a meticulous final inspection. Cycle through your high and low beams multiple times to ensure the relay harness is switching cleanly without delay. Check your turn signals while the headlights are on; occasionally, the increased electrical activity or electromagnetic interference from cheaper LED drivers can cause hyper-flash or radio static. If everything is clear, take a moment to document the beam pattern. Snapping a photo of the light spread against a wall for your build book is a professional touch that adds value to your vehicle’s history. It proves that the work was done with precision rather than just thrown together.
Integrating Lighting into Your Total Restomod Roadmap
I always encourage builders to view lighting as one third of the essential safety trifecta: brakes, suspension, and lights. A car that can’t be seen or see properly is just as dangerous as one that can’t stop. If you’re just starting your journey, understanding what is a restomod will help you place this lighting upgrade within the context of a total vehicle transformation. This holistic approach ensures that every modern enhancement works in harmony with your car’s vintage soul. Don’t stop at the headlights; consider how this new reliability sets the stage for future electrical or performance upgrades.
The Satisfaction of the First Night Drive
The real reward isn’t found under the fluorescent lights of your garage. It’s found on a winding backroad at midnight. There is a profound psychological shift that happens when you can finally see the road clearly through a vintage windshield. The anxiety of outdriving your headlights vanishes, replaced by the pure thrill of the drive. This sense of confidence is exactly why we do what we do at Restomod Academy. You’ve moved from a passive admirer of classic style to an active creator of modern performance. When you’re ready to tackle the next phase of your build, Explore our Recommended Gear for your next lighting project to ensure you’re using the best tools for the job.
Take Command of the Road Ahead
Mastering your lighting is about more than just seeing the road; it’s about reclaiming the freedom to drive your machine whenever you choose. By executing a proper classic car led headlight conversion, you’ve successfully bridged the gap between vintage charm and modern safety. You now understand the importance of choosing glass lenses for authenticity, the critical role of relay harnesses in protecting your factory wiring, and the precision required for proper beam aiming. These technical hurdles are simply stepping stones toward a more reliable and enjoyable driving experience. Every adjustment you make in the garage translates directly to confidence behind the wheel.
Restomod Academy is here to support every turn of the wrench with authoritative guidance from Brook Walsh. We focus on DIY empowerment and provide comprehensive product reviews to ensure you’re always using the best parts for your heritage project. Lighting is just one piece of the puzzle. To see how these upgrades fit into a complete vehicle transformation, Download the Ultimate Restomod Guide to plan your full build. Your journey from a passive admirer to an active creator is well underway. Keep that momentum going and enjoy the clarity of the path ahead.
Expert Guidance: Frequently Asked Questions
Will LED headlights fit my classic car without modifications?
Most 7-inch and 5.75-inch units are direct replacements for factory sealed beams, but housing depth is the primary concern for the builder. High-output LEDs with large heat sinks or active cooling fans often require an extra inch or two of clearance behind the lens. Check the back of your headlight bucket for depth before starting your project. Some vehicles might require minor, non-destructive trimming of the metal bucket to seat the new housing properly.
Do I need a special wiring harness for classic car LED conversion?
You should install a dedicated relay harness to ensure your classic car led headlight conversion performs reliably over the long haul. Vintage headlight switches often suffer from internal resistance and voltage drop, which can starve modern electronics of necessary power. A relay harness pulls current directly from the battery and uses your factory switch only as a trigger. This simple addition prevents overheating your original dash wiring and guarantees maximum brightness.
Why are my new LED headlights flickering or not turning on?
Flickering is usually caused by insufficient voltage or a poor ground connection in your aging electrical system. If the lights don’t turn on at all, verify the pin configuration on your H4 or H13 connector immediately. Some older vehicles use a non-standard ground-switched circuit rather than the common positive-switched setup. Cleaning your electrical contacts and ensuring a solid chassis ground often resolves these frustrating technical hurdles without needing a professional.
Are LED headlight conversions legal for vintage cars on the street?
LED conversions are street-legal as long as the housing carries a visible DOT or SAE certification stamp on the lens. These markings indicate the unit meets federal safety standards for beam pattern and light distribution. Using unbranded, non-certified LEDs can lead to failed inspections or fines because they often lack the sharp horizontal cutoff required to prevent blinding oncoming traffic. Always prioritize safety and legal compliance when selecting your components.
What is the best color temperature for a classic car LED upgrade?
Choose 3000K for a warm, period-correct golden glow or 5700K for a modern, high-performance white beam. Avoid bulbs in the 6500K range, as the blue tint reduces contrast and causes significant eye strain during long night drives. 3000K is the gold standard for restorations that value heritage aesthetics, while 5700K suits aggressive pro-touring builds. Selecting the right Kelvin rating ensures your car’s personality remains intact while improving visibility.
Can I keep my original glass lenses and just change the bulb?
You cannot simply swap an LED bulb into an original sealed beam housing because the lens and reflector are a single, non-serviceable unit. You must replace the entire assembly with a dedicated LED housing designed for your vehicle’s specific dimensions. These modern units often feature real glass lenses that preserve your vehicle’s classic look while providing the advanced optical precision needed to focus the powerful light output of an LED chip.
How do I aim my new LED headlights correctly?
Park your car on a level surface 25 feet away from a flat wall to calibrate your beam path with precision. Measure the height from the ground to the center of your headlight and mark that same height on the wall with painter’s tape. Your low beam cutoff should sit roughly two inches below that mark. This prevents your lights from shining into the eyes of other drivers while providing a long, safe sightline on the road ahead.
Will LED headlights drain my classic cars old battery?
No, LED headlights actually pull significantly less current than your original halogen sealed beams. A standard pair of vintage headlights might draw 10 to 12 amps, while a modern classic car led headlight conversion typically draws less than 5 amps in total. This reduced electrical load is a massive benefit for old alternators and helps maintain a steady idle. It’s an efficient upgrade that preserves your battery’s health and overall system reliability.
Driving your vintage pride and joy at night shouldn’t feel like a high-stakes gamble with a pair of flickering candles. You value the heritage of your machine, but there’s no denying that original sealed beams often leave much to be desired when the sun goes down. You likely worry about the heavy electrical draw on your aging alternator and the confusing sea of cheap, glare-heavy bulbs that threaten to ruin your car’s aesthetic. It’s a common frustration for the dedicated builder who wants to actually drive their project rather than just polish it in the driveway.
This guide empowers you to master the classic car led headlight conversion with the precision of a seasoned restorer. I’ll show you how to achieve superior safety and a crisp, powerful beam pattern without sacrificing the period-correct look that defines your vehicle. We’ll explore the technical nuances of modern optical engineering, help you choose between warm and cool light temperatures, and ensure your installation is a seamless, plug-and-play process. By the end of this article, you’ll have a clear roadmap to modernizing your lighting system while preserving every ounce of its vintage character.
Key Takeaways
- Bridge the massive lumen gap between dim factory sealed beams and modern tech to finally see the road ahead with absolute clarity.
- Execute a classic car led headlight conversion that honors heritage aesthetics by selecting glass lenses that maintain a period-correct appearance.
- Identify the exact fitment for your vehicle by cross-referencing industry standard numbers like H6024 with modern replacements.
- Master a methodical installation workflow that prioritizes electrical safety and ensures a reliable, plug-and-play connection.
- Learn how this upgrade serves as a gateway to the comprehensive build strategies found in the Ultimate Restomod Guide.
Why Your Classic Car Original Sealed Beams Are a Safety Hazard
Look closely at the face of your vintage machine. Those glass circles or rectangles are more than just styling cues; they are sealed beam units, a technology that has remained largely unchanged since the mid-20th century. A sealed beam is a singular, vacuum-sealed component where the lens, reflector, and filament are fused into one piece. While this design was revolutionary for its time, it creates a significant bottleneck for modern drivers. Most factory halogen units struggle to produce even 1000 lumens, whereas a high-quality classic car led headlight conversion can easily push 4000 lumens or more onto the pavement. This isn’t just about brightness; it’s about the fundamental history of automotive lighting and how far we’ve come from those early safety standards.
Time is the constant enemy of the sealed beam. Over decades, the internal silvering of the reflector oxidizes, turning a once-bright mirror into a dull, grey surface. Simultaneously, the tungsten filament thins with every hour of use, eventually reaching a point where it glows with a sickly yellow hue rather than a piercing white. When you combine this physical decay with the speeds of modern highway traffic, the danger becomes clear. You’re essentially outdriving your headlights at 65 miles per hour, leaving yourself precious little time to react to hazards that weren’t even on the radar in 1965.
To better understand the mechanics of this upgrade, watch this helpful video from the experts at Summit Racing:
The Technical Limitation of Halogen Filaments
Halogen technology is remarkably inefficient by modern standards. Roughly 80 percent of the energy pulled from your battery is converted into wasted heat rather than usable light. This creates a massive strain on 40 to 50 year old factory wiring harnesses that weren’t designed for peak efficiency. You might notice your lights dimming when you hit the turn signal or the heater fan; that’s a classic sign of voltage drop. Simply tossing a high-output bulb into an old housing rarely solves the problem because the original optics can’t focus the light correctly. You need a complete system rethink to truly modernize your visibility.
Modern Traffic and the Peripheral Vision Gap
Modern infrastructure has changed the way we see at night. High-intensity LED streetlights and the piercing white beams of oncoming SUVs make your vintage yellow glow feel even more inadequate. This creates a dangerous contrast that can effectively blind you to what’s happening in the shadows. A proper classic car led headlight conversion provides a much wider angle of throw, illuminating the shoulders where pedestrians or wildlife might be lurking. Vintage glass lenses often cast a narrow, focused beam that leaves your peripheral vision in total darkness. Modern optics correct this, spreading a uniform blanket of light that gives you the confidence to enjoy your car long after the sun has set.
Selecting the Right LED Conversion Kit for Your Vintage Aesthetic
Choosing the right kit for a classic car led headlight conversion requires a balance between modern performance and period-correct soul. The goal of a successful restomod is to integrate technology so seamlessly that a casual observer might not even notice it’s there until the sun sets. Opt for housings that feature real glass lenses whenever possible. While polycarbonate is lighter, it lacks the depth and clarity of glass; it’s also prone to yellowing and micro-scratching over time. Glass maintains that heavy, quality feel that belongs on a vintage steel fender and stands up to the rigors of the road without losing its luster.
Don’t overlook the physical dimensions of the unit. Many high-output LEDs feature bulky cooling fans or heat sinks that extend far beyond the original sealed beam’s footprint. This can lead to a frustrating discovery during installation where the unit hits the back of the factory headlight bucket. Always measure your available depth before ordering. On the plus side, switching to LED drastically reduces the load on your electrical system. While a pair of halogens might pull 10 to 12 amps, a modern LED setup often pulls less than half of that, giving your vintage alternator much-needed breathing room and potentially solving those annoying idle-speed dimming issues.
Color Temperature: 3000K Classic vs 5700K Modern
The color of your light, measured in Kelvin, dictates the psychological impact of your build. For a faithful restoration, seek out 3000K LEDs. These produce a warm, golden hue that mimics original incandescent bulbs while providing modern brightness. If you’re building a high-performance pro-touring machine, 5700K offers a crisp, daylight-white beam that looks right at home next to modern paint finishes. Avoid cheap bulbs in the 6500K range; these often cast a blue tint that actually reduces contrast and increases eye strain during long night drives. An SAE International study on LED bulb performance highlights how critical proper beam alignment and color are to maintaining road safety and preventing glare for oncoming traffic.
Heat Management: Fanless vs Active Cooling Designs
LEDs are sensitive to heat, and how they shed it determines their lifespan. You’ll choose between active cooling and passive cooling. Active fans are powerful but introduce a mechanical failure point; if the fan dies, the LED will likely burn out within minutes. Passive heat sinks, such as braided copper or aluminum fins, are more reliable for tight, enclosed spaces. Check your clearance inside the bucket carefully. If you’re planning a more extensive electrical overhaul, you can find expert advice on matching components in our recommended gear section. Understanding these thermal dynamics ensures your lighting remains as reliable as the rest of your build. If you want to master every aspect of your project, consider reviewing the Ultimate Restomod Guide for a complete roadmap to performance.
Navigating Fitment Sizes and DOT Compliance
Before you turn a single screw, you must identify the physical footprint of your lighting setup. Most vintage enthusiasts work with three standard sizes: the iconic 7-inch round unit, the smaller 5.75-inch round used in quad-headlight configurations, or the rectangular shapes common in late 70s and 80s designs. Identifying your specific type is the first step in a successful classic car led headlight conversion. You can usually find a part number cast directly into the glass of your current sealed beam. A number like H6024 points to a standard 7-inch round, while H5006 typically denotes the 5.75-inch high and low beam units. Matching these numbers to your new LED housing ensures that the physical mounting points will align with your factory retaining rings.
Compliance is where many builders stumble. It’s tempting to grab the most powerful unit available, but without a DOT or SAE stamp, you’re inviting trouble from both local law enforcement and state inspectors. These stamps signify that the manufacturer has met specific federal safety standards for light intensity and distribution. Choosing a unit with these markings ensures your upgrade is street-legal and safe for everyone on the road. You also need to decide between a projector-style housing and a multi-reflector design. Projectors offer a modern, tech-forward look with a very sharp light focus, while multi-reflectors use a faceted interior that more closely mimics the appearance of a traditional headlight. Think about the final personality of your build before making the choice.
Understanding Beam Patterns and Street Legality
A high-quality LED must have a distinct horizontal cutoff line. This sharp edge prevents light from bleeding upward into the eyes of oncoming drivers, a common issue with cheap, unbranded conversion kits. While flood patterns are excellent for off-road adventures, they’re dangerous on the street. You need a focused driving beam that puts light exactly where your tires are headed. DOT compliance serves as the definitive standard for ensuring your light distribution is both legal and effective.
Housing Depth and the Bucket Modification Dilemma
Be prepared for the extra physical depth that modern electronics require. While the face of the LED matches your original glass, the rear heat sinks can add an extra 1 to 2 inches of bulk. In some vehicles, this results in the headlight hitting the back of the metal bucket. If you encounter this, don’t panic. You can often perform non-destructive trimming of the bucket with a small rotary tool to create the necessary clearance. If you want to avoid cutting your vintage steel, check our recommended gear page to find shallow-fit LED options specifically engineered for tight spaces. Taking the time to measure twice will save you from an afternoon of frustration in the garage.
Step by Step Installation: From Dim Yellow to Brilliant White
Clear your workbench and prepare for a transformation that will fundamentally change how you experience your vehicle at night. Before you dive into the engine bay, gather your essentials: a Phillips head screwdriver, a set of non-marring plastic trim tools, and a can of high-quality electrical contact cleaner. These tools ensure you can work with precision without damaging your vintage chrome or paint. Safety is your first priority. Disconnect the negative battery terminal to eliminate the risk of accidental shorts while you’re manipulating the lighting circuit. It’s a simple habit that separates the amateur from the seasoned builder.
Start by carefully removing the headlight bezels or trim rings. Use your plastic pry tools to gently release any clips or tension points; these pieces are often brittle after decades of heat cycles. Once the bezel is clear, you’ll find the inner retaining ring held by small screws. Be careful not to confuse these with the spring-loaded adjustment screws used for aiming. Remove the retaining ring, pull the old sealed beam forward, and unplug the factory harness. This is the perfect moment to spray a bit of contact cleaner into the original plug to ensure your classic car led headlight conversion has a solid, low-resistance path for power.
The Wiring Reality: Why You Need a Relay Harness
Your factory headlight switch is likely a bottleneck. In most vintage systems, the full current for the lights travels from the battery, through the dash switch, and then out to the front of the car. Over forty years, those copper contacts build up internal resistance, which creates heat and drops voltage. This is the primary cause of the flickering or dimming often seen in poor quality LED swaps. To do it right, install a dedicated relay harness. This setup uses your factory switch as a low-voltage trigger to close a relay, which then pulls clean, fused power directly from the battery. It’s the only way to guarantee your new LEDs receive the steady voltage they need to perform at their peak.
Precision Aiming: Don’t Blind Oncoming Traffic
Once your new units are securely mounted, you must calibrate their throw. Park on a level surface exactly 25 feet away from a flat wall. Measure the distance from the ground to the center of your headlight lens, then mark that same height on the wall with a strip of painter’s tape. Turn on your low beams. The sharp horizontal cutoff line should sit roughly two inches below your tape mark. This ensures you’re casting light onto the pavement rather than into the eyes of other drivers. Remember that your vehicle’s stance dictates your light path; if you’ve modified your springs or shocks, your aim will change. You can find more details on how geometry affects your build in our guide on what is a restomod.
Mastering your lighting is just the beginning of a truly refined build. If you’re ready to move beyond basic upgrades and start a comprehensive vehicle transformation, get your copy of the Ultimate Restomod Guide to map out your entire project with professional precision.
Elevating Your Build with Modern Reliability and Safety
Completing a classic car led headlight conversion marks a pivotal moment in your project’s timeline. It signifies a transition from a vehicle that is merely a fair-weather weekend toy to a reliable machine capable of handling any environment. Beyond the immediate gain in lumens, you’ve introduced a level of durability that was unthinkable when your car first rolled off the assembly line. Modern LEDs often carry lifespans exceeding 30,000 to 50,000 hours. By moving away from the fragile, heat-stressed filaments of the past, you’re investing in a component that will likely outlive the engine under the hood. It’s a set-and-forget upgrade that pays dividends every time the sun dips below the horizon.
Before you consider the job finished, perform a meticulous final inspection. Cycle through your high and low beams multiple times to ensure the relay harness is switching cleanly without delay. Check your turn signals while the headlights are on; occasionally, the increased electrical activity or electromagnetic interference from cheaper LED drivers can cause hyper-flash or radio static. If everything is clear, take a moment to document the beam pattern. Snapping a photo of the light spread against a wall for your build book is a professional touch that adds value to your vehicle’s history. It proves that the work was done with precision rather than just thrown together.
Integrating Lighting into Your Total Restomod Roadmap
I always encourage builders to view lighting as one third of the essential safety trifecta: brakes, suspension, and lights. A car that can’t be seen or see properly is just as dangerous as one that can’t stop. If you’re just starting your journey, understanding what is a restomod will help you place this lighting upgrade within the context of a total vehicle transformation. This holistic approach ensures that every modern enhancement works in harmony with your car’s vintage soul. Don’t stop at the headlights; consider how this new reliability sets the stage for future electrical or performance upgrades.
The Satisfaction of the First Night Drive
The real reward isn’t found under the fluorescent lights of your garage. It’s found on a winding backroad at midnight. There is a profound psychological shift that happens when you can finally see the road clearly through a vintage windshield. The anxiety of outdriving your headlights vanishes, replaced by the pure thrill of the drive. This sense of confidence is exactly why we do what we do at Restomod Academy. You’ve moved from a passive admirer of classic style to an active creator of modern performance. When you’re ready to tackle the next phase of your build, Explore our Recommended Gear for your next lighting project to ensure you’re using the best tools for the job.
Take Command of the Road Ahead
Mastering your lighting is about more than just seeing the road; it’s about reclaiming the freedom to drive your machine whenever you choose. By executing a proper classic car led headlight conversion, you’ve successfully bridged the gap between vintage charm and modern safety. You now understand the importance of choosing glass lenses for authenticity, the critical role of relay harnesses in protecting your factory wiring, and the precision required for proper beam aiming. These technical hurdles are simply stepping stones toward a more reliable and enjoyable driving experience. Every adjustment you make in the garage translates directly to confidence behind the wheel.
Restomod Academy is here to support every turn of the wrench with authoritative guidance from Brook Walsh. We focus on DIY empowerment and provide comprehensive product reviews to ensure you’re always using the best parts for your heritage project. Lighting is just one piece of the puzzle. To see how these upgrades fit into a complete vehicle transformation, Download the Ultimate Restomod Guide to plan your full build. Your journey from a passive admirer to an active creator is well underway. Keep that momentum going and enjoy the clarity of the path ahead.
Expert Guidance: Frequently Asked Questions
Will LED headlights fit my classic car without modifications?
Most 7-inch and 5.75-inch units are direct replacements for factory sealed beams, but housing depth is the primary concern for the builder. High-output LEDs with large heat sinks or active cooling fans often require an extra inch or two of clearance behind the lens. Check the back of your headlight bucket for depth before starting your project. Some vehicles might require minor, non-destructive trimming of the metal bucket to seat the new housing properly.
Do I need a special wiring harness for classic car LED conversion?
You should install a dedicated relay harness to ensure your classic car led headlight conversion performs reliably over the long haul. Vintage headlight switches often suffer from internal resistance and voltage drop, which can starve modern electronics of necessary power. A relay harness pulls current directly from the battery and uses your factory switch only as a trigger. This simple addition prevents overheating your original dash wiring and guarantees maximum brightness.
Why are my new LED headlights flickering or not turning on?
Flickering is usually caused by insufficient voltage or a poor ground connection in your aging electrical system. If the lights don’t turn on at all, verify the pin configuration on your H4 or H13 connector immediately. Some older vehicles use a non-standard ground-switched circuit rather than the common positive-switched setup. Cleaning your electrical contacts and ensuring a solid chassis ground often resolves these frustrating technical hurdles without needing a professional.
Are LED headlight conversions legal for vintage cars on the street?
LED conversions are street-legal as long as the housing carries a visible DOT or SAE certification stamp on the lens. These markings indicate the unit meets federal safety standards for beam pattern and light distribution. Using unbranded, non-certified LEDs can lead to failed inspections or fines because they often lack the sharp horizontal cutoff required to prevent blinding oncoming traffic. Always prioritize safety and legal compliance when selecting your components.
What is the best color temperature for a classic car LED upgrade?
Choose 3000K for a warm, period-correct golden glow or 5700K for a modern, high-performance white beam. Avoid bulbs in the 6500K range, as the blue tint reduces contrast and causes significant eye strain during long night drives. 3000K is the gold standard for restorations that value heritage aesthetics, while 5700K suits aggressive pro-touring builds. Selecting the right Kelvin rating ensures your car’s personality remains intact while improving visibility.
Can I keep my original glass lenses and just change the bulb?
You cannot simply swap an LED bulb into an original sealed beam housing because the lens and reflector are a single, non-serviceable unit. You must replace the entire assembly with a dedicated LED housing designed for your vehicle’s specific dimensions. These modern units often feature real glass lenses that preserve your vehicle’s classic look while providing the advanced optical precision needed to focus the powerful light output of an LED chip.
How do I aim my new LED headlights correctly?
Park your car on a level surface 25 feet away from a flat wall to calibrate your beam path with precision. Measure the height from the ground to the center of your headlight and mark that same height on the wall with painter’s tape. Your low beam cutoff should sit roughly two inches below that mark. This prevents your lights from shining into the eyes of other drivers while providing a long, safe sightline on the road ahead.
Will LED headlights drain my classic cars old battery?
No, LED headlights actually pull significantly less current than your original halogen sealed beams. A standard pair of vintage headlights might draw 10 to 12 amps, while a modern classic car led headlight conversion typically draws less than 5 amps in total. This reduced electrical load is a massive benefit for old alternators and helps maintain a steady idle. It’s an efficient upgrade that preserves your battery’s health and overall system reliability.