
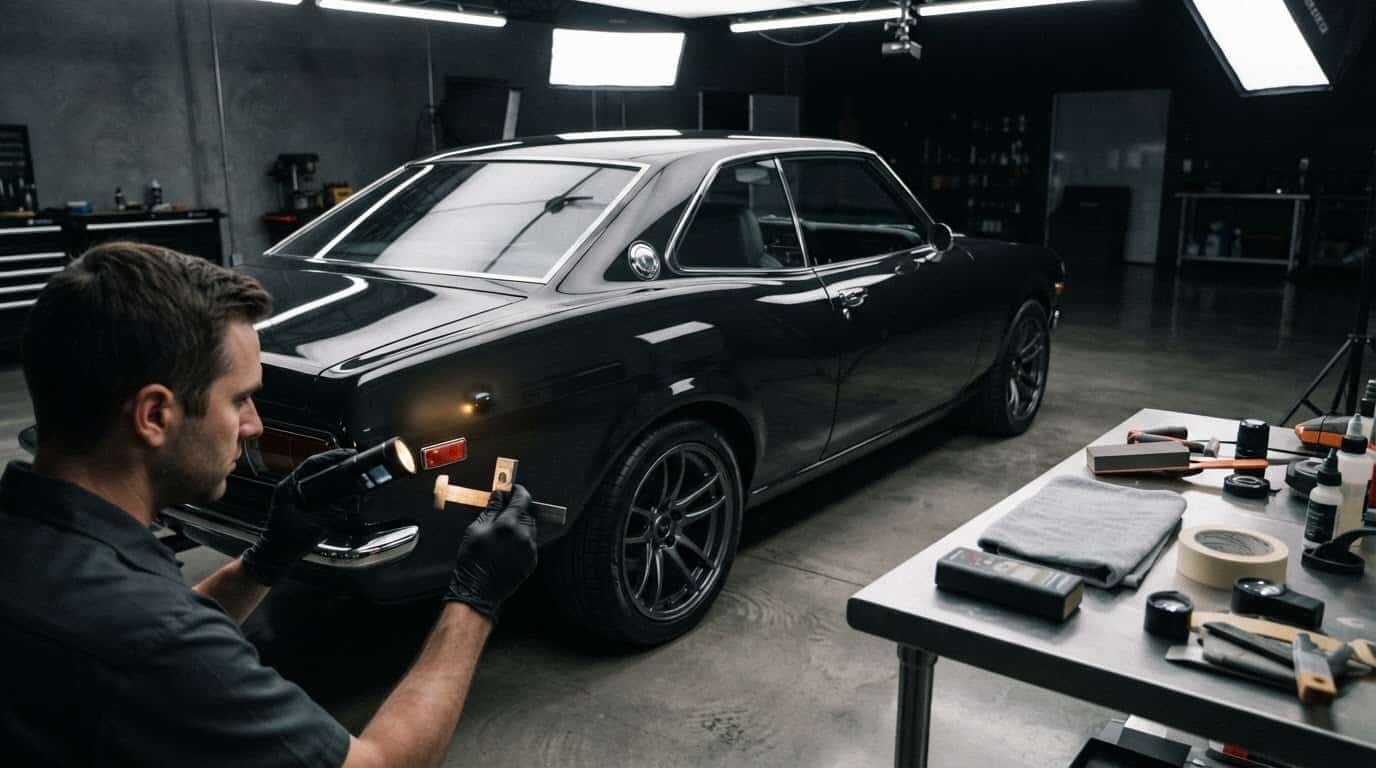
A fresh coat can look perfect in the booth and still develop bubbles later. Preventing paint bubbles and blisters starts before the spray gun comes out: the substrate must be clean and dry, and each layer needs the conditions required to bond and cure. Moisture, trapped air, contamination, and application choices can create similar-looking defects. Guessing at the cause can turn a small flaw into a much larger repaint.
If you’re worried that a blister means stripping the whole panel, first note where it appears and whether it’s isolated or part of a wider pattern. This guide covers common causes, preparation for the body and work area, and a measured repainting sequence. You’ll also learn how to tell a surface-level defect from a failure that may extend to the primer or substrate, so your repair decision is based on what you can observe.
Key Takeaways
- Similar-looking blisters can have different causes, so inspect the coating before choosing a repair.
- Check the substrate for moisture, contamination, and unstable old coatings before applying new paint.
- Preventing paint bubbles and blisters depends on following a careful sequence and allowing each stage to meet material instructions.
- Document defects, assess adhesion, and look for patterns before sanding or recoating.
- Use a brief check before each coating stage to help preserve the car’s character and support a durable finish.
What causes paint bubbles and blisters on classic cars?
A blister is a raised area where the paint film has lost adhesion beneath the visible surface. The coating may have lifted from primer, an older finish, or the body substrate. A bubble can look similar, but its appearance alone won’t show whether moisture, heat, contamination, trapped air, incompatible materials, or another issue caused it.
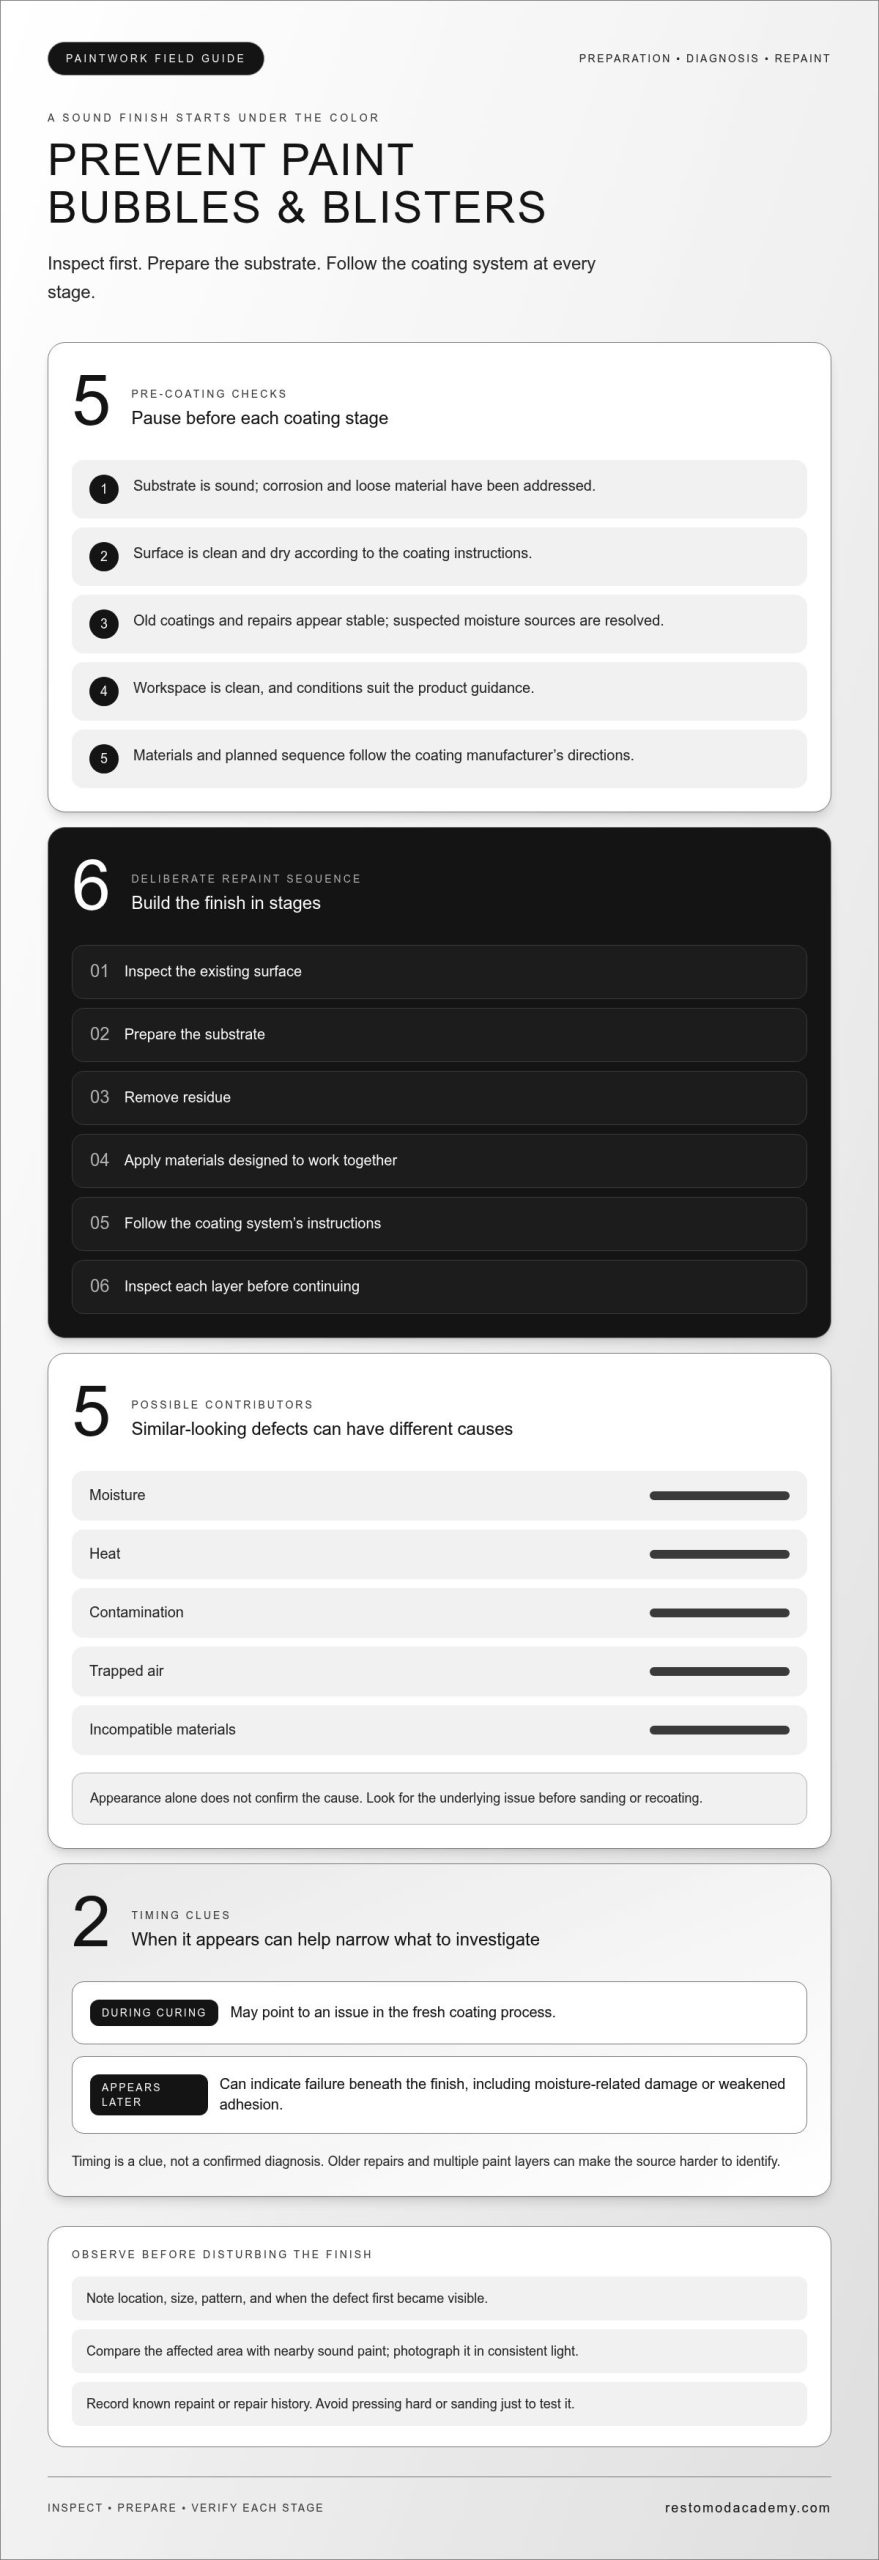
When the defect appears can help narrow the possibilities, but it doesn’t confirm a cause. A defect that develops while a new finish is curing may point to a problem in the fresh coating process. Blistering that appears later can indicate failure beneath the finish, including moisture-related damage or weakened adhesion. On a classic car, older repairs and multiple paint layers can make the source harder to identify.
Look for the underlying cause before sanding or recoating. A repair that addresses only the visible blister may hide the symptom while leaving the condition that caused it in place.
How moisture, heat, and adhesion problems affect a paint film
Moisture on a surface or within a coating stack can interfere with bonding. Heat can also affect a paint film as it dries and cures. Depending on the materials and conditions, it may contribute to trapped volatiles or stress between layers. A weak bond may not be visible right away; the coating can conceal it until curing progresses or conditions change.
These are general coating principles, not a diagnosis of a particular car. Automotive finishes contain multiple layers and substrates, so assess the full paint system rather than applying house-paint repair steps.
What a bubble’s appearance can, and cannot, tell you
Before touching the finish, note where the defect appears, whether it’s isolated or repeated, the size and pattern of the bubbles, and when they first became visible. Observe whether the coating seems loose, but don’t press hard or start sanding to test it. Photograph the area in consistent light and record any known repaint or repair history.
A cluster in one area may suggest a different place to investigate than scattered blisters across a panel, but neither pattern proves a specific cause. Compare affected areas with nearby sound paint and keep a record of what you observe. This helps you decide what to inspect next without disturbing the finish prematurely.
That measured approach suits a restomod, where preserving a classic car’s character goes hand in hand with thoughtful updates. For a broader look at the idea, explore what defines a restomod. Use the clues you’ve gathered to guide preparation rather than rushing to cover the defect.
Prepare the car and workspace to prevent paint blisters
A durable finish begins with what’s underneath it. Before opening any coating, assess the body, existing paint layers, and work area. Residual moisture, sanding dust, grease, or a poorly bonded old finish can interfere with adhesion. The resulting defects may not appear until later.
Inspect and prepare the substrate before coating
Work panel by panel. Look for corrosion, loose material, prior repairs, and coatings that appear cracked, lifted, or poorly bonded. A glossy surface can still be unsound underneath. Resolve suspected moisture sources and unstable layers before adding paint; coating over them can conceal trouble without correcting it.
Choose cleaning and surface-preparation methods suited to the substrate and coating system. Metal, filler, primer, and older paint may each need different preparation, so don’t use one method on every panel by default. For broader context on shaping and preparing panels, read this classic-car bodywork guide.
Control workshop conditions and follow coating guidance
Set up a clean, orderly work area and avoid application conditions the coating manufacturer identifies as unsuitable. Dust can settle on a prepared surface, and changing conditions can affect how a coating applies and cures. Follow the chosen system’s instructions for preparation, application, and time between stages. Don’t guess at drying times or assume two materials are compatible because they look similar.
The CarParts.com guide to paint bubbles discusses causes including osmotic blistering. Use general references to understand possible mechanisms, but base product-specific choices on the instructions for the materials you’re using. For a more orderly preparation setup, explore recommended workshop gear.
Before each coating stage, pause and check:
- The substrate is sound, with corrosion and loose material addressed.
- The surface is clean and dry according to the coating instructions.
- Old coatings and repairs appear stable, and suspected moisture sources are resolved.
- The workspace is clean, and conditions suit the product guidance.
- The materials and planned sequence follow the coating manufacturer’s directions.
This preparation is the practical foundation of preventing paint bubbles and blisters. Verify each condition before moving on to help protect both the finish and the character of the car.
How to prevent paint bubbles during a classic-car repaint
Build the finish in deliberate stages instead of trying to hide a weak spot under fresh color. A reliable sequence is to inspect the existing surface, prepare the substrate, remove residue, apply materials designed to work together, follow the coating system’s instructions, and inspect each layer before continuing. Checking your work between stages makes it easier to catch a problem while it’s still manageable.
Prevention depends on sound preparation and controlled application, not a cosmetic topcoat. Paint can’t reliably correct corrosion, loose old coatings, or contamination underneath it. If a panel has failing material, remove it or stabilize it with a method suited to the substrate and coating system before building the new finish.
Follow a deliberate prep-to-primer sequence
After addressing unstable material, prepare the surface as directed for the selected paint system. Keep tools and surfaces clean as you move through the stages, and remove preparation residue before coating. Primer’s role varies by system, so use the specified primer and apply it as its manufacturer directs. Don’t assume a familiar product or process suits every metal, repair, or existing finish.
Pause between stages and inspect the surface under good light. Look for missed defects, residue, or signs that a layer hasn’t formed as expected. Moving ahead too soon can trap contamination or cover a problem that would be easier to address before the next coat.
Apply and cure coatings without rushing
Follow the paint-system manufacturer’s guidance for application, flash-off, curing, and recoating. These directions are product-specific, so don’t borrow a drying time or compatibility rule from another system. Avoid application conditions the manufacturer identifies as unsuitable, and protect fresh coatings from moisture and contamination as instructed.
Between coats, check for visible changes such as uneven areas, debris, or emerging defects. If something looks wrong, stop and consult the coating instructions before adding another layer. Each new coat can make an underlying cause harder to inspect, so don’t rush past a problem.
- Inspect the surface and address failing material.
- Prepare and clean it according to the coating system.
- Use compatible materials as specified by their manufacturer.
- Respect application, flash-off, curing, and recoating guidance.
- Inspect between stages and stop if a defect appears.
This steady workflow is central to preventing paint bubbles and blisters while preserving the character of a classic car. For a broader, structured approach to planning a restomod project, explore Restomod Academy’s restoration resources.
How to diagnose paint blisters before attempting a repair
Pause before sanding, puncturing, or recoating a blister. First document the defect and map its extent. Photograph it in good light, note when it appeared, and record whether similar marks occur elsewhere. These details can help distinguish an isolated flaw from a pattern affecting a larger area or multiple layers of the coating system.
Assess the location and extent of the blistering
Note where the defects sit. A cluster near a repair, seam, or panel edge gives you a specific area to investigate. Blisters scattered across a broad panel suggest the issue may extend beyond one spot. Neither location nor timing proves the cause, but both help guide the next inspection.
Observe whether the coating appears lifted or loose, but don’t puncture it or aggressively sand an unknown defect. Disturbing the paint can erase useful evidence, spread damage, or expose underlying layers before you understand what failed. Compare affected areas with nearby sound paint and keep a simple record of what you see.
Choose a repair path only after identifying the cause
A localized repair may be appropriate when the defect is confined and the surrounding coating remains sound. If blistering is widespread, recurs across a panel, or involves several layers, inspect the broader coating system before deciding how much material to remove. Whether a repair requires repainting depends on the extent and depth of the damage.
Before refinishing, address the underlying issue, whether it involves moisture, contamination, or poor adhesion. Otherwise, new paint may cover the symptom while leaving the cause in place. Use the coating manufacturer’s technical information for system-specific inspection and repair guidance rather than applying household-paint fixes to automotive finishes.
- Document the location, pattern, and timing.
- Check whether the defect is isolated or part of a wider area.
- Avoid puncturing or sanding before you understand the failure.
- Identify and correct the underlying cause before refinishing.
- Use the coating system’s technical guidance to plan the repair.
Careful diagnosis helps reduce the risk of paint bubbles and blisters returning and supports a repair proportionate to the damage. For structured guidance as you plan your restoration, explore Restomod Academy’s project resources.
Make blister prevention part of your classic-car paint plan
Build paint checks into the restoration sequence, not just the moment before the spray gun comes out. Bodywork, repairs, and coating stages depend on one another. A panel that still needs metalwork or has unresolved surface concerns isn’t ready for a finish, however tempting it is to move ahead. Careful preparation helps preserve the car’s original character and creates a sound foundation for a repaint.
Use a repeatable pre-paint checklist
Before each major coating stage, pause and work through the same checks. A simple written record can help you spot changes and avoid covering a defect before you understand it.
- Confirm the substrate is sound, clean, and dry, with loose material and visible concerns addressed.
- Check that the selected materials, preparation method, and application conditions follow the coating manufacturer’s instructions.
- Inspect the surface between stages and record any new marks, lifting, or other changes before applying another layer.
- Keep the work area orderly and protect prepared surfaces from contamination as directed by the coating system.
This pause is part of preventing paint bubbles and blisters. It gives you a clear point to stop and investigate instead of sealing a developing problem beneath another coat.
Connect paint work to the wider build
Plan bodywork and paint alongside the rest of the restoration. Metal repairs, panel preparation, and the chosen finish all influence the work sequence, so identify what needs attention before committing to the final coating stages. A thoughtful project plan helps protect completed work and keep the finish aligned with the car’s intended character.
Paint is one part of a broader modernization project, not a separate cosmetic decision. Explore what defines a restomod to see how refreshed appearance can fit alongside updates to a classic car. Keep the checks practical: assess the panel, follow the coating guidance, and document changes before proceeding.
For a structured roadmap that supports the wider restoration journey, explore The Ultimate Restomod Guide. Let each stage earn the next. That patience helps a classic’s heritage lines and carefully built finish work together.
Build a Finish Worth Preserving
Protect a classic car’s finish by treating every coating stage as part of the restoration, not a shortcut to color. Moisture, contamination, weak adhesion, and application conditions can create similar-looking defects, so inspect before deciding what a blister means. Document the pattern, address the underlying issue, and follow the chosen paint system’s instructions before refinishing.
The foundation of preventing paint bubbles and blisters is steady preparation: confirm the substrate is sound, keep surfaces clean and dry, and inspect between stages. That patience helps preserve the car’s heritage lines while building a finish suited to the next chapter of its life.
Restomod Academy publishes educational guides and tutorials for classic-car restoration and modification. For a broader project roadmap, explore The Ultimate Restomod Guide, the platform’s primary educational offering. Take the build one thoughtful step at a time, and enjoy the satisfaction of bringing a classic back with care.
Frequently Asked Questions
What causes paint bubbles and blisters on a car?
Car paint bubbles and blisters form when part of the coating lifts or loses adhesion, but the visible shape doesn’t identify the cause by itself. Moisture, contamination, trapped air or solvents, incompatible layers, and application conditions can all contribute. On a classic car, previous repairs and older paint layers add complexity. Note where defects appear and when they developed before choosing a repair method.
How can I prevent paint blisters when repainting a classic car?
Preventing paint bubbles and blisters starts with a sound substrate and a controlled, methodical process. Address corrosion and loose coatings, prepare and clean surfaces according to the chosen paint system, and use materials specified to work together. Follow the manufacturer’s instructions for application, flash-off, curing, and recoating. Inspect between stages, and don’t cover a defect or rush ahead before the surface is ready.
Can moisture cause bubbles in automotive paint?
Yes, moisture can interfere with adhesion or contribute to blistering within an automotive coating system. It may be present on a surface or associated with underlying corrosion or contamination. A blister’s appearance alone can’t confirm moisture as the cause, so document the defect and inspect the surrounding finish before acting. Resolve suspected moisture sources and follow the coating manufacturer’s guidance before applying more paint.
Why is my fresh car paint bubbling?
Bubbling in fresh paint can result from several issues, including contamination, trapped air or solvents, an unstable underlying layer, or application conditions that don’t suit the coating. The timing is a useful clue, but it doesn’t prove what went wrong. Photograph the affected area, note when it appeared, and avoid sanding or recoating immediately. Check the paint system’s technical instructions before deciding how to proceed.
Can paint blisters be fixed without repainting the whole car?
Sometimes a localized defect can be addressed without refinishing the entire vehicle, but the right repair depends on how far the failure extends and which layers are affected. A small visible blister doesn’t guarantee the surrounding coating is sound. If defects repeat across a panel or appear in several areas, inspect the wider paint system. Correct the underlying cause before refinishing to reduce the risk of recurrence.
Should I pop or sand a paint bubble on my car?
Don’t pop or aggressively sand an unexplained paint bubble. Disturbing it can damage surrounding finish and remove clues that may help identify the failure. First photograph the defect, note its location and timing, and look for similar marks nearby. Assess whether the coating appears loose without pressing hard. Then use the coating manufacturer’s technical guidance to plan an inspection and repair suited to the paint system.
Does humidity affect automotive paint?
Humidity can affect how some coatings apply and cure, but the impact depends on the product and working conditions. Don’t rely on a general rule or assume every paint system responds the same way. Check the coating manufacturer’s instructions for suitable application conditions, and avoid proceeding when conditions fall outside its guidance. Keep the work area controlled and protect prepared surfaces and fresh paint from moisture and contamination as directed.
A fresh coat can look perfect in the booth and still develop bubbles later. Preventing paint bubbles and blisters starts before the spray gun comes out: the substrate must be clean and dry, and each layer needs the conditions required to bond and cure. Moisture, trapped air, contamination, and application choices can create similar-looking defects. Guessing at the cause can turn a small flaw into a much larger repaint.
If you’re worried that a blister means stripping the whole panel, first note where it appears and whether it’s isolated or part of a wider pattern. This guide covers common causes, preparation for the body and work area, and a measured repainting sequence. You’ll also learn how to tell a surface-level defect from a failure that may extend to the primer or substrate, so your repair decision is based on what you can observe.
Key Takeaways
- Similar-looking blisters can have different causes, so inspect the coating before choosing a repair.
- Check the substrate for moisture, contamination, and unstable old coatings before applying new paint.
- Preventing paint bubbles and blisters depends on following a careful sequence and allowing each stage to meet material instructions.
- Document defects, assess adhesion, and look for patterns before sanding or recoating.
- Use a brief check before each coating stage to help preserve the car’s character and support a durable finish.
What causes paint bubbles and blisters on classic cars?
A blister is a raised area where the paint film has lost adhesion beneath the visible surface. The coating may have lifted from primer, an older finish, or the body substrate. A bubble can look similar, but its appearance alone won’t show whether moisture, heat, contamination, trapped air, incompatible materials, or another issue caused it.
When the defect appears can help narrow the possibilities, but it doesn’t confirm a cause. A defect that develops while a new finish is curing may point to a problem in the fresh coating process. Blistering that appears later can indicate failure beneath the finish, including moisture-related damage or weakened adhesion. On a classic car, older repairs and multiple paint layers can make the source harder to identify.
Look for the underlying cause before sanding or recoating. A repair that addresses only the visible blister may hide the symptom while leaving the condition that caused it in place.
How moisture, heat, and adhesion problems affect a paint film
Moisture on a surface or within a coating stack can interfere with bonding. Heat can also affect a paint film as it dries and cures. Depending on the materials and conditions, it may contribute to trapped volatiles or stress between layers. A weak bond may not be visible right away; the coating can conceal it until curing progresses or conditions change.
These are general coating principles, not a diagnosis of a particular car. Automotive finishes contain multiple layers and substrates, so assess the full paint system rather than applying house-paint repair steps.
What a bubble’s appearance can, and cannot, tell you
Before touching the finish, note where the defect appears, whether it’s isolated or repeated, the size and pattern of the bubbles, and when they first became visible. Observe whether the coating seems loose, but don’t press hard or start sanding to test it. Photograph the area in consistent light and record any known repaint or repair history.
A cluster in one area may suggest a different place to investigate than scattered blisters across a panel, but neither pattern proves a specific cause. Compare affected areas with nearby sound paint and keep a record of what you observe. This helps you decide what to inspect next without disturbing the finish prematurely.
That measured approach suits a restomod, where preserving a classic car’s character goes hand in hand with thoughtful updates. For a broader look at the idea, explore what defines a restomod. Use the clues you’ve gathered to guide preparation rather than rushing to cover the defect.
Prepare the car and workspace to prevent paint blisters
A durable finish begins with what’s underneath it. Before opening any coating, assess the body, existing paint layers, and work area. Residual moisture, sanding dust, grease, or a poorly bonded old finish can interfere with adhesion. The resulting defects may not appear until later.
Inspect and prepare the substrate before coating
Work panel by panel. Look for corrosion, loose material, prior repairs, and coatings that appear cracked, lifted, or poorly bonded. A glossy surface can still be unsound underneath. Resolve suspected moisture sources and unstable layers before adding paint; coating over them can conceal trouble without correcting it.
Choose cleaning and surface-preparation methods suited to the substrate and coating system. Metal, filler, primer, and older paint may each need different preparation, so don’t use one method on every panel by default. For broader context on shaping and preparing panels, read this classic-car bodywork guide.
Control workshop conditions and follow coating guidance
Set up a clean, orderly work area and avoid application conditions the coating manufacturer identifies as unsuitable. Dust can settle on a prepared surface, and changing conditions can affect how a coating applies and cures. Follow the chosen system’s instructions for preparation, application, and time between stages. Don’t guess at drying times or assume two materials are compatible because they look similar.
The CarParts.com guide to paint bubbles discusses causes including osmotic blistering. Use general references to understand possible mechanisms, but base product-specific choices on the instructions for the materials you’re using. For a more orderly preparation setup, explore recommended workshop gear.
Before each coating stage, pause and check:
- The substrate is sound, with corrosion and loose material addressed.
- The surface is clean and dry according to the coating instructions.
- Old coatings and repairs appear stable, and suspected moisture sources are resolved.
- The workspace is clean, and conditions suit the product guidance.
- The materials and planned sequence follow the coating manufacturer’s directions.
This preparation is the practical foundation of preventing paint bubbles and blisters. Verify each condition before moving on to help protect both the finish and the character of the car.
How to prevent paint bubbles during a classic-car repaint
Build the finish in deliberate stages instead of trying to hide a weak spot under fresh color. A reliable sequence is to inspect the existing surface, prepare the substrate, remove residue, apply materials designed to work together, follow the coating system’s instructions, and inspect each layer before continuing. Checking your work between stages makes it easier to catch a problem while it’s still manageable.
Prevention depends on sound preparation and controlled application, not a cosmetic topcoat. Paint can’t reliably correct corrosion, loose old coatings, or contamination underneath it. If a panel has failing material, remove it or stabilize it with a method suited to the substrate and coating system before building the new finish.
Follow a deliberate prep-to-primer sequence
After addressing unstable material, prepare the surface as directed for the selected paint system. Keep tools and surfaces clean as you move through the stages, and remove preparation residue before coating. Primer’s role varies by system, so use the specified primer and apply it as its manufacturer directs. Don’t assume a familiar product or process suits every metal, repair, or existing finish.
Pause between stages and inspect the surface under good light. Look for missed defects, residue, or signs that a layer hasn’t formed as expected. Moving ahead too soon can trap contamination or cover a problem that would be easier to address before the next coat.
Apply and cure coatings without rushing
Follow the paint-system manufacturer’s guidance for application, flash-off, curing, and recoating. These directions are product-specific, so don’t borrow a drying time or compatibility rule from another system. Avoid application conditions the manufacturer identifies as unsuitable, and protect fresh coatings from moisture and contamination as instructed.
Between coats, check for visible changes such as uneven areas, debris, or emerging defects. If something looks wrong, stop and consult the coating instructions before adding another layer. Each new coat can make an underlying cause harder to inspect, so don’t rush past a problem.
- Inspect the surface and address failing material.
- Prepare and clean it according to the coating system.
- Use compatible materials as specified by their manufacturer.
- Respect application, flash-off, curing, and recoating guidance.
- Inspect between stages and stop if a defect appears.
This steady workflow is central to preventing paint bubbles and blisters while preserving the character of a classic car. For a broader, structured approach to planning a restomod project, explore Restomod Academy’s restoration resources.
How to diagnose paint blisters before attempting a repair
Pause before sanding, puncturing, or recoating a blister. First document the defect and map its extent. Photograph it in good light, note when it appeared, and record whether similar marks occur elsewhere. These details can help distinguish an isolated flaw from a pattern affecting a larger area or multiple layers of the coating system.
Assess the location and extent of the blistering
Note where the defects sit. A cluster near a repair, seam, or panel edge gives you a specific area to investigate. Blisters scattered across a broad panel suggest the issue may extend beyond one spot. Neither location nor timing proves the cause, but both help guide the next inspection.
Observe whether the coating appears lifted or loose, but don’t puncture it or aggressively sand an unknown defect. Disturbing the paint can erase useful evidence, spread damage, or expose underlying layers before you understand what failed. Compare affected areas with nearby sound paint and keep a simple record of what you see.
Choose a repair path only after identifying the cause
A localized repair may be appropriate when the defect is confined and the surrounding coating remains sound. If blistering is widespread, recurs across a panel, or involves several layers, inspect the broader coating system before deciding how much material to remove. Whether a repair requires repainting depends on the extent and depth of the damage.
Before refinishing, address the underlying issue, whether it involves moisture, contamination, or poor adhesion. Otherwise, new paint may cover the symptom while leaving the cause in place. Use the coating manufacturer’s technical information for system-specific inspection and repair guidance rather than applying household-paint fixes to automotive finishes.
- Document the location, pattern, and timing.
- Check whether the defect is isolated or part of a wider area.
- Avoid puncturing or sanding before you understand the failure.
- Identify and correct the underlying cause before refinishing.
- Use the coating system’s technical guidance to plan the repair.
Careful diagnosis helps reduce the risk of paint bubbles and blisters returning and supports a repair proportionate to the damage. For structured guidance as you plan your restoration, explore Restomod Academy’s project resources.
Make blister prevention part of your classic-car paint plan
Build paint checks into the restoration sequence, not just the moment before the spray gun comes out. Bodywork, repairs, and coating stages depend on one another. A panel that still needs metalwork or has unresolved surface concerns isn’t ready for a finish, however tempting it is to move ahead. Careful preparation helps preserve the car’s original character and creates a sound foundation for a repaint.
Use a repeatable pre-paint checklist
Before each major coating stage, pause and work through the same checks. A simple written record can help you spot changes and avoid covering a defect before you understand it.
- Confirm the substrate is sound, clean, and dry, with loose material and visible concerns addressed.
- Check that the selected materials, preparation method, and application conditions follow the coating manufacturer’s instructions.
- Inspect the surface between stages and record any new marks, lifting, or other changes before applying another layer.
- Keep the work area orderly and protect prepared surfaces from contamination as directed by the coating system.
This pause is part of preventing paint bubbles and blisters. It gives you a clear point to stop and investigate instead of sealing a developing problem beneath another coat.
Connect paint work to the wider build
Plan bodywork and paint alongside the rest of the restoration. Metal repairs, panel preparation, and the chosen finish all influence the work sequence, so identify what needs attention before committing to the final coating stages. A thoughtful project plan helps protect completed work and keep the finish aligned with the car’s intended character.
Paint is one part of a broader modernization project, not a separate cosmetic decision. Explore what defines a restomod to see how refreshed appearance can fit alongside updates to a classic car. Keep the checks practical: assess the panel, follow the coating guidance, and document changes before proceeding.
For a structured roadmap that supports the wider restoration journey, explore The Ultimate Restomod Guide. Let each stage earn the next. That patience helps a classic’s heritage lines and carefully built finish work together.
Build a Finish Worth Preserving
Protect a classic car’s finish by treating every coating stage as part of the restoration, not a shortcut to color. Moisture, contamination, weak adhesion, and application conditions can create similar-looking defects, so inspect before deciding what a blister means. Document the pattern, address the underlying issue, and follow the chosen paint system’s instructions before refinishing.
The foundation of preventing paint bubbles and blisters is steady preparation: confirm the substrate is sound, keep surfaces clean and dry, and inspect between stages. That patience helps preserve the car’s heritage lines while building a finish suited to the next chapter of its life.
Restomod Academy publishes educational guides and tutorials for classic-car restoration and modification. For a broader project roadmap, explore The Ultimate Restomod Guide, the platform’s primary educational offering. Take the build one thoughtful step at a time, and enjoy the satisfaction of bringing a classic back with care.
Frequently Asked Questions
What causes paint bubbles and blisters on a car?
Car paint bubbles and blisters form when part of the coating lifts or loses adhesion, but the visible shape doesn’t identify the cause by itself. Moisture, contamination, trapped air or solvents, incompatible layers, and application conditions can all contribute. On a classic car, previous repairs and older paint layers add complexity. Note where defects appear and when they developed before choosing a repair method.
How can I prevent paint blisters when repainting a classic car?
Preventing paint bubbles and blisters starts with a sound substrate and a controlled, methodical process. Address corrosion and loose coatings, prepare and clean surfaces according to the chosen paint system, and use materials specified to work together. Follow the manufacturer’s instructions for application, flash-off, curing, and recoating. Inspect between stages, and don’t cover a defect or rush ahead before the surface is ready.
Can moisture cause bubbles in automotive paint?
Yes, moisture can interfere with adhesion or contribute to blistering within an automotive coating system. It may be present on a surface or associated with underlying corrosion or contamination. A blister’s appearance alone can’t confirm moisture as the cause, so document the defect and inspect the surrounding finish before acting. Resolve suspected moisture sources and follow the coating manufacturer’s guidance before applying more paint.
Why is my fresh car paint bubbling?
Bubbling in fresh paint can result from several issues, including contamination, trapped air or solvents, an unstable underlying layer, or application conditions that don’t suit the coating. The timing is a useful clue, but it doesn’t prove what went wrong. Photograph the affected area, note when it appeared, and avoid sanding or recoating immediately. Check the paint system’s technical instructions before deciding how to proceed.
Can paint blisters be fixed without repainting the whole car?
Sometimes a localized defect can be addressed without refinishing the entire vehicle, but the right repair depends on how far the failure extends and which layers are affected. A small visible blister doesn’t guarantee the surrounding coating is sound. If defects repeat across a panel or appear in several areas, inspect the wider paint system. Correct the underlying cause before refinishing to reduce the risk of recurrence.
Should I pop or sand a paint bubble on my car?
Don’t pop or aggressively sand an unexplained paint bubble. Disturbing it can damage surrounding finish and remove clues that may help identify the failure. First photograph the defect, note its location and timing, and look for similar marks nearby. Assess whether the coating appears loose without pressing hard. Then use the coating manufacturer’s technical guidance to plan an inspection and repair suited to the paint system.
Does humidity affect automotive paint?
Humidity can affect how some coatings apply and cure, but the impact depends on the product and working conditions. Don’t rely on a general rule or assume every paint system responds the same way. Check the coating manufacturer’s instructions for suitable application conditions, and avoid proceeding when conditions fall outside its guidance. Keep the work area controlled and protect prepared surfaces and fresh paint from moisture and contamination as directed.