
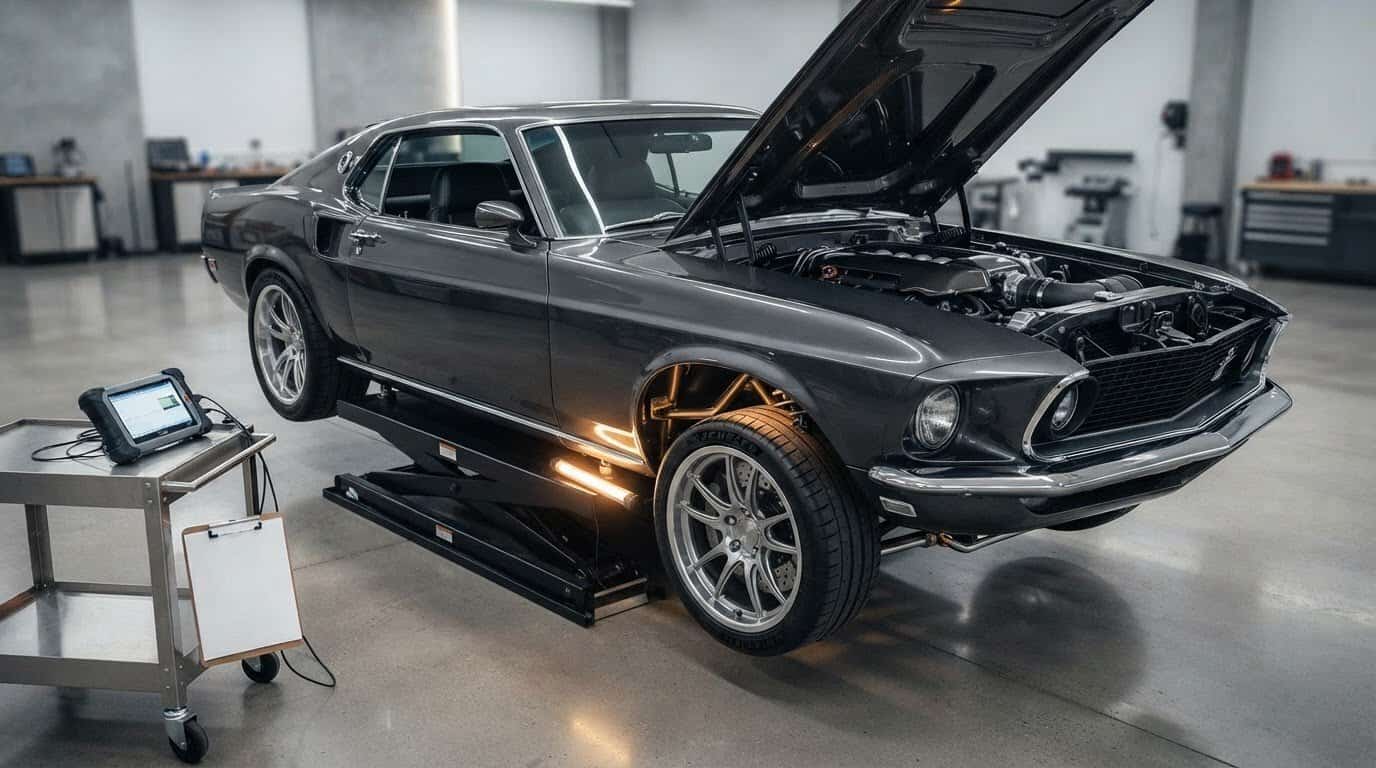
Yes, you can attend a restomod inspection if the seller and inspection facility allow access. Arrange it before the appointment. Use a pre-purchase inspection checklist for a restomod to follow the inspection and keep track of details that matter. Being there lets you see how the car behaves and ask informed questions as the inspector explains the findings.
It’s natural to want more than a polished walkaround before committing to a car that blends vintage character with modern hardware. Pay close attention to the body and frame, fuel delivery, and the fit and clearance of upgraded components. This checklist guides you through those checks and helps you know what to look for if you attend.
Work through each item methodically, noting concerns that could affect safety, drivability, or finish. A careful inspection gives you a clearer picture of the build beneath the shine, helping you decide whether it’s the right project for you.
Key Takeaways
- Look beyond paint and trim: assess frame condition, tire age and tread, wheel fit, and upholstery details to spot concerns hidden beneath a polished finish.
- Trace the fuel-delivery setup from tank to engine, and examine whether the EFI system’s components are suited to its pressure demands.
- Inspect custom welds, engine mounts, and firewall changes, then check that performance parts clear steering, road surfaces, and nearby components.
- Sort inspection findings by safety and likely repair impact so you can decide which issues deserve follow-up and how they should shape your offer.
Body, frame, tires, wheels, and interior
Start your pre-purchase inspection checklist for a restomod in daylight, when paint flaws, uneven gaps, and repairs are easier to spot. A restomod blends classic styling with modern modifications, so compare its finished design with the work beneath it, not factory originality alone. For context, learn what a restomod is before judging which changes suit the build.
- Inspect the frame rails, crossmembers, floor, and suspension mounting points for rust, cracks, distortion, and fresh coatings that could hide repairs. These areas help show whether the structure can support the car’s engine, transmission, steering, and braking upgrades.
- Look closely at reinforcement, including boxed frame rails or custom X-members, and examine welds for consistent, secure joins. Added structure can reduce torsional flex, but the workmanship and condition matter more than the presence of modifications alone.
- Check tire age and tread on all four wheels, and inspect sidewalls for damage or uneven wear. The checklist recommends at least 4/32 inches of tread and tires under 5 years old; 30% tread life remaining is a yellow-flag finding.
- Compare wheel fit and tire clearance at the front and rear, then look for rubbing marks near the body or suspension. Uneven stance or contact can affect steering response, braking, and a smooth drive.
- Inspect exterior panel gaps, paint transitions, and custom upholstery stitching, then open and close doors, hood, and trunk. Consistent gaps and finished seams help reveal careful assembly, while misalignment can point to body or structural work needing closer review.
Request build records, parts receipts, and invoices for structural, paint, suspension, and drivetrain work. These documents connect visible modifications to the work performed and help you review the vehicle’s history.
Walk around the car twice if possible, including once before finalizing the purchase. For a high-mileage vehicle, bring a trusted mechanic. Record each concern with a photo and location, such as rust at a frame mount or a tire contacting the wheel arch, so the findings are specific and useful.
Electronic fuel injection and fuel delivery
Trace the fuel system from tank to injectors, inspecting each connection. A high-pressure electronic fuel-injection setup needs a dedicated baffled fuel tank and high-grade stainless steel fuel lines. The baffle helps control fuel movement, while suitable lines carry fuel through the system. Look underneath for leaks, chafing, loose fittings, and unsupported sections.
During a test drive, note hard starting, hesitation, surging, or an uneven idle. These symptoms can point to fuel-delivery, sensor, wiring, or engine-calibration problems. Ask the inspector to observe how the engine responds as it warms up and accelerates. A smooth idle alone doesn’t show that the system works well under load.
- Inspect wiring looms for abrasion, heat exposure, loose connectors, and improvised splices.
- Check battery terminals, grounds, fuses, and relays for secure connections and corrosion.
- Test dashboard indicators, lighting, gauges, and any installed driver-assistance features.
- Confirm that added electronics operate without disrupting engine management or other vehicle systems.
Cooling deserves the same scrutiny as fuel delivery. A 600-horsepower engine is an example of a build requiring an upgraded cooling system. Check for a high-capacity aluminum radiator and dual electric fans controlled by the engine management system. During inspection, look for coolant leaks, damaged hoses, loose fan wiring, and signs of overheating. Ask the inspector to assess the system as the vehicle warms.
Check how added equipment sits alongside suspension components and wiring. A poorly routed harness can rub against moving parts or sit too close to heat. These faults can become expensive, particularly when electrical issues affect several systems. Inspect beneath the hood and dashboard, not just the exterior.
Before buying, record any warning lights or inconsistent electronics and have their cause explained in the inspection findings. If an LS conversion is part of the build, the LS engine swap guide can help you understand how the engine choice connects to the wider project.

Engine mounts, firewall modifications, and component clearance
Inspect the engine bay as a complete mechanical system, not a collection of upgrades. A 700-horsepower crate engine paired with a 60-year-old frame illustrates why mount strength and chassis condition matter together. Look for cracked mounts, uneven welds, shifting marks, or firewall changes that appear unfinished. Custom work should hold components securely without restricting service access.
Check clearances with the engine off, then observe movement during a controlled test drive. Long-tube headers must clear the steering linkage, and the oil pan needs protection from road debris. Look for polished contact marks, dents, or heat damage on nearby parts. Confirm hoses and wiring stay clear of belts, exhaust, and moving suspension components.
- Examine engine mounts and custom welds for cracks, separation, or visible distortion; these clues can point to movement under load.
- Inspect firewall modifications for sharp edges, loose panels, and wiring or hoses routed through unfinished openings.
- Check engine oil and coolant for leaks, unusual residue, or signs of contamination; record where fresh drips appear.
- Look over belts, hoses, and wiring for fraying, cracking, swelling, abrasion, or loose connections.
Ask for maintenance records covering timing-belt replacement and water-pump work. A used car’s timing belt often needs replacement between 60,000 and 100,000 miles, while a water pump often lasts 80,000 to 100,000 miles. Compare recorded work with the odometer, and note gaps before assessing the engine’s service needs.
During the drive, watch the temperature gauge and listen for knocks, rattles, or belt squeal. Check that acceleration feels consistent and the engine returns to a steady idle afterward. These observations add context to a static inspection. A mechanic can also examine hidden areas and assess whether modified components are aligned and secured properly.
Include both points in your final visual check: long-tube headers need clearance from the steering linkage, and the oil pan needs protection from road debris. These are essential details when evaluating component fit.
Pre-Purchase Inspection (PPI): Why It’s Non-Negotiable
According to Federal Trade Commission consumer advice, get an independent mechanical inspection before buying a used car. A restomod combines original structure with modified systems, so the inspection should assess how the completed vehicle functions, not just how it looks.
The inspection’s scope and the vehicle’s complexity affect the cost.
Use this pre-purchase inspection checklist for a restomod to organize findings by safety, function, and repair priority. Separate urgent defects from maintenance items, then request estimated repair costs for each yellow-flag issue. Subtract those estimates from your offer price when negotiating.
- Ask the inspector to explain each concern, its location, and its effect on operation.
- Compare the written findings with service records, receipts, and the seller’s description.
- Prioritize problems affecting braking, handling, steering, or reliable starting over cosmetic work.
- Use specific evidence, such as a leaking seal or weak battery, to support a revised offer.
Inspect the cabin controls during the same appointment. Test the windows, door locks, gauges, climate controls, switches, and seat adjustment. Check that the battery supports reliable starting and that warning lights behave consistently. Look for loose trim, worn upholstery, uneven stitching, and unfinished wiring that could affect function or point to rushed assembly.
Judge interior craftsmanship by panel fit and consistent seams, not material choice alone. A custom cabin can depart from factory style and still show precise work. During a drive, note rattles, delayed controls, and visibility issues. Record each point alongside the relevant inspection finding.
Attend if the seller and facility permit it, and ask the inspector to demonstrate notable issues. Restomod Consulting Services can help you interpret a complex build and plan your next steps; get guidance on your inspection findings.
Restomod Academy: The Ultimate Restomod Guide
Restomod Academy’s The Ultimate Restomod Guide helps buyers understand how classic foundations and modern upgrades come together. Build your knowledge before assessing a car, or revisit the guide when an inspection raises questions about its design and systems. For help thinking through a particular build or its inspection findings, Restomod Consulting Services offers a project-focused next step. Premium Project Blueprints can support you when you’re ready to shape a restomod project of your own. Each offering serves a different stage, from learning the fundamentals to evaluating decisions and planning a build. Keep your inspection notes and questions close as you decide what knowledge will help most. Visit restomodacademy.com to explore the guide and educational resources.
Make Your Next Move With Clarity
A careful inspection can shape more than a buying decision. It can show which parts of the build need attention, what questions to resolve before signing, and how the car might fit your plans as a driver or future builder. Keep your notes, inspection findings, and priorities together. This record gives you a practical starting point for weighing the car’s character against the work it may need.
Use a pre-purchase inspection checklist for a restomod to turn enthusiasm into informed action. If you want help thinking through the findings or planning what comes next, contact Restomod Academy for inspection advice. Bring your questions and take the next step with confidence, one considered decision at a time.
Frequently Asked Questions
Can I be present during the inspection?
Usually, yes, if the seller and inspection facility allow you to attend. Arrange access before the appointment, then let the inspector work without interruption. Note questions as findings arise and ask for explanations once each check is complete. If you can’t be there, request a written report with clear descriptions and photos so you can review specific concerns afterward.
What should a pre-purchase inspection checklist for a restomod include?
Include vehicle history, mileage, title status, and records alongside mechanical and structural checks. A professional used-car inspection may cover more than 100 individual points, but a restomod checklist should also reflect the car’s specific conversion. Record each finding, its location, and any estimated repair work. This creates a practical basis for comparing the inspection with the seller’s description and deciding what needs follow-up.
Should a restomod be inspected by a marque specialist, restoration shop, or general mechanic?
Choose an inspector whose experience matches the car’s modifications and underlying platform. A marque specialist may know model-specific weaknesses, while a restoration shop may be better equipped to assess fabrication and custom assembly. A general mechanic can assess routine mechanical condition, particularly on a straightforward build. For a heavily modified or high-mileage car, prioritize someone able to evaluate both the original vehicle and its modern systems.
Yes, you can attend a restomod inspection if the seller and inspection facility allow access. Arrange it before the appointment. Use a pre-purchase inspection checklist for a restomod to follow the inspection and keep track of details that matter. Being there lets you see how the car behaves and ask informed questions as the inspector explains the findings.
It’s natural to want more than a polished walkaround before committing to a car that blends vintage character with modern hardware. Pay close attention to the body and frame, fuel delivery, and the fit and clearance of upgraded components. This checklist guides you through those checks and helps you know what to look for if you attend.
Work through each item methodically, noting concerns that could affect safety, drivability, or finish. A careful inspection gives you a clearer picture of the build beneath the shine, helping you decide whether it’s the right project for you.
Key Takeaways
- Look beyond paint and trim: assess frame condition, tire age and tread, wheel fit, and upholstery details to spot concerns hidden beneath a polished finish.
- Trace the fuel-delivery setup from tank to engine, and examine whether the EFI system’s components are suited to its pressure demands.
- Inspect custom welds, engine mounts, and firewall changes, then check that performance parts clear steering, road surfaces, and nearby components.
- Sort inspection findings by safety and likely repair impact so you can decide which issues deserve follow-up and how they should shape your offer.
Body, frame, tires, wheels, and interior
Start your pre-purchase inspection checklist for a restomod in daylight, when paint flaws, uneven gaps, and repairs are easier to spot. A restomod blends classic styling with modern modifications, so compare its finished design with the work beneath it, not factory originality alone. For context, learn what a restomod is before judging which changes suit the build.
- Inspect the frame rails, crossmembers, floor, and suspension mounting points for rust, cracks, distortion, and fresh coatings that could hide repairs. These areas help show whether the structure can support the car’s engine, transmission, steering, and braking upgrades.
- Look closely at reinforcement, including boxed frame rails or custom X-members, and examine welds for consistent, secure joins. Added structure can reduce torsional flex, but the workmanship and condition matter more than the presence of modifications alone.
- Check tire age and tread on all four wheels, and inspect sidewalls for damage or uneven wear. The checklist recommends at least 4/32 inches of tread and tires under 5 years old; 30% tread life remaining is a yellow-flag finding.
- Compare wheel fit and tire clearance at the front and rear, then look for rubbing marks near the body or suspension. Uneven stance or contact can affect steering response, braking, and a smooth drive.
- Inspect exterior panel gaps, paint transitions, and custom upholstery stitching, then open and close doors, hood, and trunk. Consistent gaps and finished seams help reveal careful assembly, while misalignment can point to body or structural work needing closer review.
Request build records, parts receipts, and invoices for structural, paint, suspension, and drivetrain work. These documents connect visible modifications to the work performed and help you review the vehicle’s history.
Walk around the car twice if possible, including once before finalizing the purchase. For a high-mileage vehicle, bring a trusted mechanic. Record each concern with a photo and location, such as rust at a frame mount or a tire contacting the wheel arch, so the findings are specific and useful.
Electronic fuel injection and fuel delivery
Trace the fuel system from tank to injectors, inspecting each connection. A high-pressure electronic fuel-injection setup needs a dedicated baffled fuel tank and high-grade stainless steel fuel lines. The baffle helps control fuel movement, while suitable lines carry fuel through the system. Look underneath for leaks, chafing, loose fittings, and unsupported sections.
During a test drive, note hard starting, hesitation, surging, or an uneven idle. These symptoms can point to fuel-delivery, sensor, wiring, or engine-calibration problems. Ask the inspector to observe how the engine responds as it warms up and accelerates. A smooth idle alone doesn’t show that the system works well under load.
- Inspect wiring looms for abrasion, heat exposure, loose connectors, and improvised splices.
- Check battery terminals, grounds, fuses, and relays for secure connections and corrosion.
- Test dashboard indicators, lighting, gauges, and any installed driver-assistance features.
- Confirm that added electronics operate without disrupting engine management or other vehicle systems.
Cooling deserves the same scrutiny as fuel delivery. A 600-horsepower engine is an example of a build requiring an upgraded cooling system. Check for a high-capacity aluminum radiator and dual electric fans controlled by the engine management system. During inspection, look for coolant leaks, damaged hoses, loose fan wiring, and signs of overheating. Ask the inspector to assess the system as the vehicle warms.
Check how added equipment sits alongside suspension components and wiring. A poorly routed harness can rub against moving parts or sit too close to heat. These faults can become expensive, particularly when electrical issues affect several systems. Inspect beneath the hood and dashboard, not just the exterior.
Before buying, record any warning lights or inconsistent electronics and have their cause explained in the inspection findings. If an LS conversion is part of the build, the LS engine swap guide can help you understand how the engine choice connects to the wider project.
Engine mounts, firewall modifications, and component clearance
Inspect the engine bay as a complete mechanical system, not a collection of upgrades. A 700-horsepower crate engine paired with a 60-year-old frame illustrates why mount strength and chassis condition matter together. Look for cracked mounts, uneven welds, shifting marks, or firewall changes that appear unfinished. Custom work should hold components securely without restricting service access.
Check clearances with the engine off, then observe movement during a controlled test drive. Long-tube headers must clear the steering linkage, and the oil pan needs protection from road debris. Look for polished contact marks, dents, or heat damage on nearby parts. Confirm hoses and wiring stay clear of belts, exhaust, and moving suspension components.
- Examine engine mounts and custom welds for cracks, separation, or visible distortion; these clues can point to movement under load.
- Inspect firewall modifications for sharp edges, loose panels, and wiring or hoses routed through unfinished openings.
- Check engine oil and coolant for leaks, unusual residue, or signs of contamination; record where fresh drips appear.
- Look over belts, hoses, and wiring for fraying, cracking, swelling, abrasion, or loose connections.
Ask for maintenance records covering timing-belt replacement and water-pump work. A used car’s timing belt often needs replacement between 60,000 and 100,000 miles, while a water pump often lasts 80,000 to 100,000 miles. Compare recorded work with the odometer, and note gaps before assessing the engine’s service needs.
During the drive, watch the temperature gauge and listen for knocks, rattles, or belt squeal. Check that acceleration feels consistent and the engine returns to a steady idle afterward. These observations add context to a static inspection. A mechanic can also examine hidden areas and assess whether modified components are aligned and secured properly.
Include both points in your final visual check: long-tube headers need clearance from the steering linkage, and the oil pan needs protection from road debris. These are essential details when evaluating component fit.
Pre-Purchase Inspection (PPI): Why It’s Non-Negotiable
According to Federal Trade Commission consumer advice, get an independent mechanical inspection before buying a used car. A restomod combines original structure with modified systems, so the inspection should assess how the completed vehicle functions, not just how it looks.
The inspection’s scope and the vehicle’s complexity affect the cost.
Use this pre-purchase inspection checklist for a restomod to organize findings by safety, function, and repair priority. Separate urgent defects from maintenance items, then request estimated repair costs for each yellow-flag issue. Subtract those estimates from your offer price when negotiating.
- Ask the inspector to explain each concern, its location, and its effect on operation.
- Compare the written findings with service records, receipts, and the seller’s description.
- Prioritize problems affecting braking, handling, steering, or reliable starting over cosmetic work.
- Use specific evidence, such as a leaking seal or weak battery, to support a revised offer.
Inspect the cabin controls during the same appointment. Test the windows, door locks, gauges, climate controls, switches, and seat adjustment. Check that the battery supports reliable starting and that warning lights behave consistently. Look for loose trim, worn upholstery, uneven stitching, and unfinished wiring that could affect function or point to rushed assembly.
Judge interior craftsmanship by panel fit and consistent seams, not material choice alone. A custom cabin can depart from factory style and still show precise work. During a drive, note rattles, delayed controls, and visibility issues. Record each point alongside the relevant inspection finding.
Attend if the seller and facility permit it, and ask the inspector to demonstrate notable issues. Restomod Consulting Services can help you interpret a complex build and plan your next steps; get guidance on your inspection findings.
Restomod Academy: The Ultimate Restomod Guide
Restomod Academy’s The Ultimate Restomod Guide helps buyers understand how classic foundations and modern upgrades come together. Build your knowledge before assessing a car, or revisit the guide when an inspection raises questions about its design and systems. For help thinking through a particular build or its inspection findings, Restomod Consulting Services offers a project-focused next step. Premium Project Blueprints can support you when you’re ready to shape a restomod project of your own. Each offering serves a different stage, from learning the fundamentals to evaluating decisions and planning a build. Keep your inspection notes and questions close as you decide what knowledge will help most. Visit restomodacademy.com to explore the guide and educational resources.
Make Your Next Move With Clarity
A careful inspection can shape more than a buying decision. It can show which parts of the build need attention, what questions to resolve before signing, and how the car might fit your plans as a driver or future builder. Keep your notes, inspection findings, and priorities together. This record gives you a practical starting point for weighing the car’s character against the work it may need.
Use a pre-purchase inspection checklist for a restomod to turn enthusiasm into informed action. If you want help thinking through the findings or planning what comes next, contact Restomod Academy for inspection advice. Bring your questions and take the next step with confidence, one considered decision at a time.
Frequently Asked Questions
Can I be present during the inspection?
Usually, yes, if the seller and inspection facility allow you to attend. Arrange access before the appointment, then let the inspector work without interruption. Note questions as findings arise and ask for explanations once each check is complete. If you can’t be there, request a written report with clear descriptions and photos so you can review specific concerns afterward.
What should a pre-purchase inspection checklist for a restomod include?
Include vehicle history, mileage, title status, and records alongside mechanical and structural checks. A professional used-car inspection may cover more than 100 individual points, but a restomod checklist should also reflect the car’s specific conversion. Record each finding, its location, and any estimated repair work. This creates a practical basis for comparing the inspection with the seller’s description and deciding what needs follow-up.
Should a restomod be inspected by a marque specialist, restoration shop, or general mechanic?
Choose an inspector whose experience matches the car’s modifications and underlying platform. A marque specialist may know model-specific weaknesses, while a restoration shop may be better equipped to assess fabrication and custom assembly. A general mechanic can assess routine mechanical condition, particularly on a straightforward build. For a heavily modified or high-mileage car, prioritize someone able to evaluate both the original vehicle and its modern systems.