
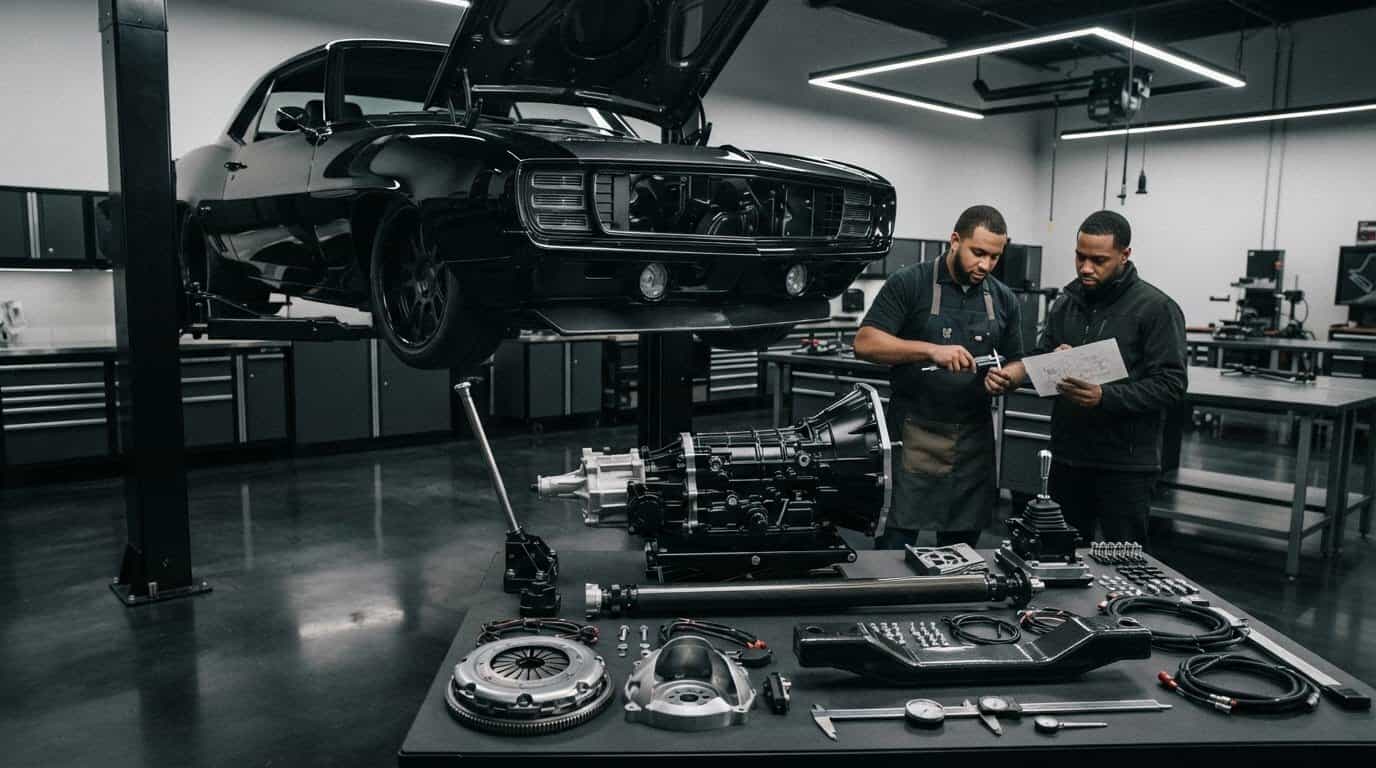
A T56 swap is a drivetrain integration project, not a bolt-in change. The right transmission can bring modern shifting character to a classic build, but a unit that doesn’t match your engine, chassis, and intended use can lead to costly fitment surprises. This t56 transmission swap guide helps you assess compatibility before buying parts and plan the work with confidence.
Before choosing a T56, identify the exact transmission and check how it will work with your engine, clutch, driveshaft, shifter, and wiring. Don’t treat the gearbox as an isolated component. Its original application can affect shifter placement and other fitment details, while your vehicle may call for changes to the crossmember, tunnel, or clutch setup.
This guide covers compatibility checks, supporting parts, installation decisions, and post-swap testing. Use the steps to catch potential conflicts early, verify specifications for your exact transmission and vehicle, and approach each stage as part of a complete restomod plan.
Key Takeaways
- Use this t56 transmission swap guide to build a compatibility checklist around your vehicle, engine, intended use, and exact transmission variant.
- Plan the bellhousing, clutch, flywheel, release mechanism, mount, crossmember, and shifter as connected parts of the same drivetrain.
- Document the existing setup and mock up the installation before final assembly to catch fitment conflicts early.
- Follow the exact component instructions and vehicle-specific specifications, and support the car safely throughout the installation.
- Treat difficult engagement, vibration, noise, or leaks as clues for systematic checks, not as diagnoses on their own.
T56 Transmission Swap Guide: What the Gearbox Changes in Your Build
A T56 swap replaces a vehicle’s existing transmission with a T56-family manual gearbox. That’s the simple definition. The build itself involves matching the transmission to the engine, clutch, chassis, and driveline.
Builders may choose a T56 for its manual shifting, gear selection, and, depending on the exact unit, overdrive for cruising. But a gearbox that can be positioned in the car isn’t automatically compatible with the engine or the rest of the drivetrain. Treat the swap as a system change, not a single-part upgrade.
See a T56 Magnum installation in action to get a visual sense of the work involved:
What does a T56 transmission swap involve?
The T56 name covers a family of manual transmissions, not one universal specification. Units from different applications can vary, so identify the exact transmission before planning around it. The gearbox connects to the engine through the bellhousing and clutch. The shifter provides the driver’s input, and the output connects through the driveshaft to the rest of the driveline. Each interface must suit the vehicle and selected components.
A transmission replacement doesn’t necessarily mean replacing the engine or converting the entire drivetrain. You may retain the existing engine and much of the vehicle while adapting the parts needed to make the new gearbox work. For background on the transmission’s history and applications, see the Borg-Warner T-56 transmission overview.
Which builders should consider a T56 swap?
Consider the conversion if your project calls for a manual driving experience, a different spread of gears, or a transmission that better suits your goals. A street-driven classic, a cruiser, and a performance-focused build may each have different priorities. Decide how you’ll use the car before settling on a unit. The right fit depends on the whole combination, not the gearbox name alone.
If you’re also changing engines, widen the planning lens. The classic-car LS engine swap guide can help you consider broader powertrain decisions alongside the transmission. This t56 transmission swap guide starts with the same principle: define the build, then match the parts to it.
Check T56 Compatibility Before You Buy the Transmission
Before spending money on a gearbox, write down the vehicle, engine, current transmission, intended use, and exact T56 you’re considering. “T56” identifies a transmission family, not a guarantee that every unit shares the same dimensions or interfaces. In this t56 transmission swap guide, compatibility means matching the specific gearbox to the engine and chassis, then confirming how it connects to the rest of the driveline.
How do you identify the right T56 variant?
Start with the transmission’s identification details, including its application and any identifying tags or markings. Compare those details with authoritative documentation for that exact unit rather than relying on a seller’s model name or a general fitment claim. Confirm the gear ratios, input and output details, and rated limits against the documentation. These specifications affect how the gearbox connects and whether it suits the engine and intended use.
Build a pre-purchase checklist before ordering parts:
- Vehicle year, model, chassis, engine, and current transmission
- Exact T56 identification and documented specifications
- Input-shaft dimensions and compatibility with the bellhousing and clutch
- Engine interface, bellhousing alignment, and clutch actuation requirements
- Shifter position, transmission tunnel clearance, and mounting location
- Driveshaft connection and any related driveline changes
Will a T56 fit your engine and chassis?
Check the engine-side connection first. The bellhousing must suit the engine and transmission, and the clutch, flywheel, and release mechanism must work as a matched combination. If you’re new to how the clutch, shifter, and gears work together, this explanation of how manual transmissions work provides useful background.
Next, measure the space around the gearbox. Compare the shifter location with the floor opening, and check tunnel clearance along the transmission’s path. A careful mock-up can reveal interference before you commit to final parts or modifications. Map the mount and crossmember position as well, since their fit affects how the transmission sits in the chassis. Don’t assume the donor vehicle’s original layout will transfer directly to your car.
If the project includes an engine change, plan the engine and transmission as one interface rather than as separate purchases. The classic-car LS engine swap guide offers a broader framework for powertrain planning. Verify fitment, fluid requirements, and installation details against documentation for your exact components before buying. A measured plan is far cheaper than discovering a mismatch mid-build.
Plan the T56 Swap Parts That Make the Drivetrain Work Together
A reliable swap depends on matching supporting parts to the exact transmission, engine, and recipient vehicle. Use this t56 transmission swap guide as a system-planning tool: list each connection, identify what must fit, then verify it against transmission documentation, vehicle service information, component instructions, or measurements from a mock-up.
| System | Purpose | Fitment question | What to verify |
|---|---|---|---|
| Bellhousing | Joins the engine and transmission | Does it match both interfaces and align correctly? | Engine and transmission documentation |
| Clutch and flywheel | Transfer engine torque through the clutch | Do dimensions and interfaces suit the engine, bellhousing, and gearbox? | Component specifications and instructions |
| Release mechanism | Disengages the clutch for shifting | Does the actuation design work with the clutch and available space? | Clutch and release-system instructions |
| Mount and crossmember | Support the transmission in the chassis | Do the mounting points place it correctly? | Vehicle measurements and mock-up |
| Shifter | Connect the driver to the gearbox | Does the position line up with the cabin opening? | Transmission dimensions and in-car mock-up |
| Driveshaft and output | Connect the transmission to the driveline | Does the output connection match, and is the shaft length suitable? | Exact transmission details and measurements after mock-up |
| Wiring | Support applicable speed-signal and reverse-lockout functions | What signals and connections does this unit use? | Transmission wiring information and vehicle diagrams |
Which clutch, bellhousing, and shifter details matter?
Confirm the engine-to-bellhousing-to-gearbox interface as one chain. A clutch that fits the engine alone may not suit the selected transmission or release mechanism. Check clutch and flywheel dimensions, input interface, and release-system design against documentation for the exact components. The drivetrain principles covered in Automotive Technology: Principles, Diagnosis, and Service offer useful context for understanding how these systems work together.
Mock up the transmission before final assembly. Confirm that the shifter clears the tunnel and sits where you can use it comfortably. A different shifter position can affect the cabin work even if the gearbox fits beneath the car.
How do you account for mounts, driveshaft, and wiring?
Measure the transmission’s position in the chassis before deciding whether the mount or crossmember needs adjustment. Establish driveshaft length and output connection after the gearbox is positioned, not from assumptions based on another vehicle. Then trace the speed-signal and reverse-lockout requirements for the specific unit. Wiring needs can vary by transmission and vehicle. Record each answer alongside the relevant component so small interface decisions don’t get lost during assembly.
For a wider framework to organize the whole build, explore Restomod Academy’s project-planning resources.

Install a T56 Transmission in a Controlled, Testable Sequence
Work methodically, treating each stage as a checkpoint. Before removing anything, photograph the existing setup and record how the clutch linkage, wiring, mount, shifter, and driveshaft are arranged. Keep fasteners and components organized, and have the exact transmission and vehicle instructions on hand. Support the car securely with equipment suited to the job, use appropriate lifting gear, and never rely on a jack alone to hold a vehicle.
What should you check during mock-up and assembly?
Mock-up is where your parts plan meets the real chassis. Position the gearbox and bellhousing, then confirm that the transmission seats correctly and the interfaces align without force. Check clearance around the tunnel, shifter, mount, crossmember, and exhaust. Confirm the output connection and driveline position, and measure the driveshaft only after the transmission sits in its intended location.
Pause before final tightening. If a component won’t align or the gearbox won’t seat as expected, stop and find the cause rather than using fasteners to pull parts together. Check the routing of wiring and clutch components, and make sure nothing is pinched or contacting moving parts. Follow the service information for the exact vehicle and the instructions for each component when checking fasteners, adjustments, and assembly specifications. Don’t substitute a universal torque value or procedure for the one specified for your combination.
How do you test the swap before regular driving?
After assembly, use the relevant service procedures to check fluid type and level, clutch operation, shifter linkage, wiring connections, and potential leaks. With the vehicle safely supported and the area clear, confirm basic operation cautiously. Then test gear engagement and driveline behavior in a controlled setting, following the transmission and vehicle instructions. Don’t rush straight into regular driving.
- Check for leaks and loose or contacting components.
- Confirm clutch release and gear engagement without forcing the shifter.
- Listen for unusual noise and watch for vibration or unexpected resistance.
- Reinspect installation points after initial operation, using the applicable service information.
Stop and investigate any abnormal noise, resistance, or fluid loss before continuing. A careful sequence makes the first test more informative and helps separate installation issues from adjustments that need attention. Use the Ultimate Restomod Guide to organize the wider project plan, while relying on exact component documentation for installation specifications.
Troubleshoot T56 Swap Problems and Plan Your Next Build Step
A new noise or shifting issue calls for a calm, systematic check, not a quick guess. Several faults can produce similar symptoms, so treat each one as a clue. Begin with basic visual inspections and your installation records, then use service information for the exact transmission and vehicle when adjustment or repair goes beyond those checks.
What should you investigate when a T56 swap has problems?
Use the symptom to organize your first checks, not to settle on a diagnosis. If engagement is difficult, inspect clutch release and linkage operation, then revisit whether the clutch, release mechanism, and transmission are compatible. Don’t force the shifter. If adjustment or internal inspection may be needed, follow the unit-specific service procedure.
- Vibration: Review transmission alignment, mount condition, driveline angles, and driveshaft fit or balance, as applicable. Note when the vibration occurs and whether it changes with vehicle speed or engine load.
- Unusual noise: Record when it happens, such as during clutch operation, in a particular gear, or while the vehicle is moving. Check fluid specification and level using the applicable procedure, then inspect relevant interfaces before assuming the gearbox itself is at fault.
- Leaks: Identify where fluid appears to originate and inspect nearby connections and installation interfaces. Clean the area and recheck it to distinguish an active leak from residue left during assembly.
Stop operating the car if a symptom worsens or you can’t establish a safe cause. A qualified mechanical assessment may be appropriate for persistent noise, internal concerns, or problems that require specialized measurement. One symptom alone rarely identifies the failed or mismatched part.
How can you keep the restomod project moving?
Keep a clear record of the transmission identification, verified specifications, parts used, measurements, adjustments, and installation changes. Note when a symptom appears and what you’ve already inspected. That history helps you compare the setup with service information and avoid repeating checks without a reason.
Before moving on, use this checklist:
- Document the exact transmission and supporting components.
- Record the completed fitment changes and wiring connections.
- Resolve abnormal engagement, vibration, noise, or leaks before regular use.
- Update the project plan so later drivetrain and chassis work accounts for the swap.
A T56 conversion affects more than one component, so use the lessons from this t56 transmission swap guide to coordinate your next upgrade. Explore The Ultimate Restomod Guide for a broader framework to plan interconnected improvements while keeping vehicle-specific specifications at the center of each decision.
Plan Your Next Upgrade With Confidence
A T56 swap rewards careful planning as much as hands-on skill. Start by identifying the exact transmission and checking its interfaces against your engine and chassis. Then map the supporting parts, mock up the installation to catch fitment issues, and follow the documentation for assembly and testing. If a symptom appears after the swap, use it to guide a systematic inspection rather than jumping to a single diagnosis.
Keep your specifications, measurements, parts, and changes together in one project record. That history will help you troubleshoot the transmission and coordinate future upgrades. This t56 transmission swap guide gives you a sound starting point, while vehicle-specific instructions remain essential for the details of your build.
Restomod Academy shares educational guides for classic-car restoration and modification, including planning resources for interconnected upgrades. Explore The Ultimate Restomod Guide to plan how each upgrade fits into the wider project, or explore Restomod Academy’s consulting services for support with your build plan. Take your time, verify each connection, and enjoy the process of building a classic that feels true to its roots.
Frequently Asked Questions
Can you put a T56 transmission in any classic car?
No, a T56 isn’t a universal bolt-in swap for every classic car. Fit depends on the exact transmission, engine interface, clutch arrangement, chassis space, shifter position, mount, and driveline. Some combinations may need supporting parts or fabrication. Identify the gearbox and recipient vehicle first, then verify dimensions and requirements in reliable documentation before buying components or beginning disassembly. A careful compatibility check can reveal fitment challenges while you still have options.
What parts do you need for a T56 swap?
The required parts depend on the exact transmission, engine, and vehicle combination. A planning list commonly includes a compatible bellhousing, clutch and release system, mounting hardware, shifter, and driveshaft connection. Wiring or speed-signal components may also be needed for a particular unit. Build your list from verified fitment information rather than assuming a kit or parts list suits every application. The supporting parts must work together as a system.
How do you identify which T56 transmission you have?
Start with the identification marks, tags, or other identifying details on the transmission, then compare them with authoritative documentation. The T56 name alone doesn’t establish every specification, and versions can differ in details that matter to a swap. Confirm the interfaces and operating requirements for your exact unit before choosing a clutch, bellhousing, driveshaft components, or fluid. Record the verified information so it stays with your build notes.
Does a T56 swap require tunnel modification?
Not always. Tunnel modification depends on the specific transmission, shifter location, and recipient vehicle. The gearbox or shifter may encounter clearance limits, but no general guide can determine fit for every chassis. Measure available space and mock up the parts before making irreversible changes. Check clearance around the tunnel, mount, driveline, and nearby systems in the planned installation, then use those measurements to decide whether adjustments are needed.
Can you use the original driveshaft with a T56?
Don’t assume the original driveshaft will fit. The transmission’s output connection, final gearbox position, mount location, and vehicle setup all affect the required shaft dimensions and components. Position the transmission during mock-up, then verify driveshaft length and connection requirements for that exact combination. If vibration appears after installation, include alignment, driveline angles, and driveshaft balance in your checks rather than treating the shaft as the only possible cause.
What causes difficult shifting after a T56 swap?
Difficult shifting can have several causes, so treat it as a symptom, not a diagnosis. Check clutch release and adjustment, shifter and linkage fitment, and compatibility among the installed components. Consult service information for the exact transmission and vehicle, and don’t force the gearbox into gear. This t56 transmission swap guide emphasizes investigating the cause before regular driving, especially if shifting problems persist or worsen after initial checks.
What fluid does a T56 transmission use?
The correct fluid depends on the specific transmission version and its requirements. Don’t choose fluid based only on the T56 name or on a recommendation for another unit. Identify the gearbox, then consult authoritative documentation for its fluid specification, capacity, and service procedure. If you’re unsure which transmission you have, resolve its identification before filling or operating it. Follow the unit-specific instructions rather than relying on a general rule.
A T56 swap is a drivetrain integration project, not a bolt-in change. The right transmission can bring modern shifting character to a classic build, but a unit that doesn’t match your engine, chassis, and intended use can lead to costly fitment surprises. This t56 transmission swap guide helps you assess compatibility before buying parts and plan the work with confidence.
Before choosing a T56, identify the exact transmission and check how it will work with your engine, clutch, driveshaft, shifter, and wiring. Don’t treat the gearbox as an isolated component. Its original application can affect shifter placement and other fitment details, while your vehicle may call for changes to the crossmember, tunnel, or clutch setup.
This guide covers compatibility checks, supporting parts, installation decisions, and post-swap testing. Use the steps to catch potential conflicts early, verify specifications for your exact transmission and vehicle, and approach each stage as part of a complete restomod plan.
Key Takeaways
- Use this t56 transmission swap guide to build a compatibility checklist around your vehicle, engine, intended use, and exact transmission variant.
- Plan the bellhousing, clutch, flywheel, release mechanism, mount, crossmember, and shifter as connected parts of the same drivetrain.
- Document the existing setup and mock up the installation before final assembly to catch fitment conflicts early.
- Follow the exact component instructions and vehicle-specific specifications, and support the car safely throughout the installation.
- Treat difficult engagement, vibration, noise, or leaks as clues for systematic checks, not as diagnoses on their own.
T56 Transmission Swap Guide: What the Gearbox Changes in Your Build
A T56 swap replaces a vehicle’s existing transmission with a T56-family manual gearbox. That’s the simple definition. The build itself involves matching the transmission to the engine, clutch, chassis, and driveline.
Builders may choose a T56 for its manual shifting, gear selection, and, depending on the exact unit, overdrive for cruising. But a gearbox that can be positioned in the car isn’t automatically compatible with the engine or the rest of the drivetrain. Treat the swap as a system change, not a single-part upgrade.
See a T56 Magnum installation in action to get a visual sense of the work involved:
What does a T56 transmission swap involve?
The T56 name covers a family of manual transmissions, not one universal specification. Units from different applications can vary, so identify the exact transmission before planning around it. The gearbox connects to the engine through the bellhousing and clutch. The shifter provides the driver’s input, and the output connects through the driveshaft to the rest of the driveline. Each interface must suit the vehicle and selected components.
A transmission replacement doesn’t necessarily mean replacing the engine or converting the entire drivetrain. You may retain the existing engine and much of the vehicle while adapting the parts needed to make the new gearbox work. For background on the transmission’s history and applications, see the Borg-Warner T-56 transmission overview.
Which builders should consider a T56 swap?
Consider the conversion if your project calls for a manual driving experience, a different spread of gears, or a transmission that better suits your goals. A street-driven classic, a cruiser, and a performance-focused build may each have different priorities. Decide how you’ll use the car before settling on a unit. The right fit depends on the whole combination, not the gearbox name alone.
If you’re also changing engines, widen the planning lens. The classic-car LS engine swap guide can help you consider broader powertrain decisions alongside the transmission. This t56 transmission swap guide starts with the same principle: define the build, then match the parts to it.
Check T56 Compatibility Before You Buy the Transmission
Before spending money on a gearbox, write down the vehicle, engine, current transmission, intended use, and exact T56 you’re considering. “T56” identifies a transmission family, not a guarantee that every unit shares the same dimensions or interfaces. In this t56 transmission swap guide, compatibility means matching the specific gearbox to the engine and chassis, then confirming how it connects to the rest of the driveline.
How do you identify the right T56 variant?
Start with the transmission’s identification details, including its application and any identifying tags or markings. Compare those details with authoritative documentation for that exact unit rather than relying on a seller’s model name or a general fitment claim. Confirm the gear ratios, input and output details, and rated limits against the documentation. These specifications affect how the gearbox connects and whether it suits the engine and intended use.
Build a pre-purchase checklist before ordering parts:
- Vehicle year, model, chassis, engine, and current transmission
- Exact T56 identification and documented specifications
- Input-shaft dimensions and compatibility with the bellhousing and clutch
- Engine interface, bellhousing alignment, and clutch actuation requirements
- Shifter position, transmission tunnel clearance, and mounting location
- Driveshaft connection and any related driveline changes
Will a T56 fit your engine and chassis?
Check the engine-side connection first. The bellhousing must suit the engine and transmission, and the clutch, flywheel, and release mechanism must work as a matched combination. If you’re new to how the clutch, shifter, and gears work together, this explanation of how manual transmissions work provides useful background.
Next, measure the space around the gearbox. Compare the shifter location with the floor opening, and check tunnel clearance along the transmission’s path. A careful mock-up can reveal interference before you commit to final parts or modifications. Map the mount and crossmember position as well, since their fit affects how the transmission sits in the chassis. Don’t assume the donor vehicle’s original layout will transfer directly to your car.
If the project includes an engine change, plan the engine and transmission as one interface rather than as separate purchases. The classic-car LS engine swap guide offers a broader framework for powertrain planning. Verify fitment, fluid requirements, and installation details against documentation for your exact components before buying. A measured plan is far cheaper than discovering a mismatch mid-build.
Plan the T56 Swap Parts That Make the Drivetrain Work Together
A reliable swap depends on matching supporting parts to the exact transmission, engine, and recipient vehicle. Use this t56 transmission swap guide as a system-planning tool: list each connection, identify what must fit, then verify it against transmission documentation, vehicle service information, component instructions, or measurements from a mock-up.
| System | Purpose | Fitment question | What to verify |
|---|---|---|---|
| Bellhousing | Joins the engine and transmission | Does it match both interfaces and align correctly? | Engine and transmission documentation |
| Clutch and flywheel | Transfer engine torque through the clutch | Do dimensions and interfaces suit the engine, bellhousing, and gearbox? | Component specifications and instructions |
| Release mechanism | Disengages the clutch for shifting | Does the actuation design work with the clutch and available space? | Clutch and release-system instructions |
| Mount and crossmember | Support the transmission in the chassis | Do the mounting points place it correctly? | Vehicle measurements and mock-up |
| Shifter | Connect the driver to the gearbox | Does the position line up with the cabin opening? | Transmission dimensions and in-car mock-up |
| Driveshaft and output | Connect the transmission to the driveline | Does the output connection match, and is the shaft length suitable? | Exact transmission details and measurements after mock-up |
| Wiring | Support applicable speed-signal and reverse-lockout functions | What signals and connections does this unit use? | Transmission wiring information and vehicle diagrams |
Which clutch, bellhousing, and shifter details matter?
Confirm the engine-to-bellhousing-to-gearbox interface as one chain. A clutch that fits the engine alone may not suit the selected transmission or release mechanism. Check clutch and flywheel dimensions, input interface, and release-system design against documentation for the exact components. The drivetrain principles covered in Automotive Technology: Principles, Diagnosis, and Service offer useful context for understanding how these systems work together.
Mock up the transmission before final assembly. Confirm that the shifter clears the tunnel and sits where you can use it comfortably. A different shifter position can affect the cabin work even if the gearbox fits beneath the car.
How do you account for mounts, driveshaft, and wiring?
Measure the transmission’s position in the chassis before deciding whether the mount or crossmember needs adjustment. Establish driveshaft length and output connection after the gearbox is positioned, not from assumptions based on another vehicle. Then trace the speed-signal and reverse-lockout requirements for the specific unit. Wiring needs can vary by transmission and vehicle. Record each answer alongside the relevant component so small interface decisions don’t get lost during assembly.
For a wider framework to organize the whole build, explore Restomod Academy’s project-planning resources.
Install a T56 Transmission in a Controlled, Testable Sequence
Work methodically, treating each stage as a checkpoint. Before removing anything, photograph the existing setup and record how the clutch linkage, wiring, mount, shifter, and driveshaft are arranged. Keep fasteners and components organized, and have the exact transmission and vehicle instructions on hand. Support the car securely with equipment suited to the job, use appropriate lifting gear, and never rely on a jack alone to hold a vehicle.
What should you check during mock-up and assembly?
Mock-up is where your parts plan meets the real chassis. Position the gearbox and bellhousing, then confirm that the transmission seats correctly and the interfaces align without force. Check clearance around the tunnel, shifter, mount, crossmember, and exhaust. Confirm the output connection and driveline position, and measure the driveshaft only after the transmission sits in its intended location.
Pause before final tightening. If a component won’t align or the gearbox won’t seat as expected, stop and find the cause rather than using fasteners to pull parts together. Check the routing of wiring and clutch components, and make sure nothing is pinched or contacting moving parts. Follow the service information for the exact vehicle and the instructions for each component when checking fasteners, adjustments, and assembly specifications. Don’t substitute a universal torque value or procedure for the one specified for your combination.
How do you test the swap before regular driving?
After assembly, use the relevant service procedures to check fluid type and level, clutch operation, shifter linkage, wiring connections, and potential leaks. With the vehicle safely supported and the area clear, confirm basic operation cautiously. Then test gear engagement and driveline behavior in a controlled setting, following the transmission and vehicle instructions. Don’t rush straight into regular driving.
- Check for leaks and loose or contacting components.
- Confirm clutch release and gear engagement without forcing the shifter.
- Listen for unusual noise and watch for vibration or unexpected resistance.
- Reinspect installation points after initial operation, using the applicable service information.
Stop and investigate any abnormal noise, resistance, or fluid loss before continuing. A careful sequence makes the first test more informative and helps separate installation issues from adjustments that need attention. Use the Ultimate Restomod Guide to organize the wider project plan, while relying on exact component documentation for installation specifications.
Troubleshoot T56 Swap Problems and Plan Your Next Build Step
A new noise or shifting issue calls for a calm, systematic check, not a quick guess. Several faults can produce similar symptoms, so treat each one as a clue. Begin with basic visual inspections and your installation records, then use service information for the exact transmission and vehicle when adjustment or repair goes beyond those checks.
What should you investigate when a T56 swap has problems?
Use the symptom to organize your first checks, not to settle on a diagnosis. If engagement is difficult, inspect clutch release and linkage operation, then revisit whether the clutch, release mechanism, and transmission are compatible. Don’t force the shifter. If adjustment or internal inspection may be needed, follow the unit-specific service procedure.
- Vibration: Review transmission alignment, mount condition, driveline angles, and driveshaft fit or balance, as applicable. Note when the vibration occurs and whether it changes with vehicle speed or engine load.
- Unusual noise: Record when it happens, such as during clutch operation, in a particular gear, or while the vehicle is moving. Check fluid specification and level using the applicable procedure, then inspect relevant interfaces before assuming the gearbox itself is at fault.
- Leaks: Identify where fluid appears to originate and inspect nearby connections and installation interfaces. Clean the area and recheck it to distinguish an active leak from residue left during assembly.
Stop operating the car if a symptom worsens or you can’t establish a safe cause. A qualified mechanical assessment may be appropriate for persistent noise, internal concerns, or problems that require specialized measurement. One symptom alone rarely identifies the failed or mismatched part.
How can you keep the restomod project moving?
Keep a clear record of the transmission identification, verified specifications, parts used, measurements, adjustments, and installation changes. Note when a symptom appears and what you’ve already inspected. That history helps you compare the setup with service information and avoid repeating checks without a reason.
Before moving on, use this checklist:
- Document the exact transmission and supporting components.
- Record the completed fitment changes and wiring connections.
- Resolve abnormal engagement, vibration, noise, or leaks before regular use.
- Update the project plan so later drivetrain and chassis work accounts for the swap.
A T56 conversion affects more than one component, so use the lessons from this t56 transmission swap guide to coordinate your next upgrade. Explore The Ultimate Restomod Guide for a broader framework to plan interconnected improvements while keeping vehicle-specific specifications at the center of each decision.
Plan Your Next Upgrade With Confidence
A T56 swap rewards careful planning as much as hands-on skill. Start by identifying the exact transmission and checking its interfaces against your engine and chassis. Then map the supporting parts, mock up the installation to catch fitment issues, and follow the documentation for assembly and testing. If a symptom appears after the swap, use it to guide a systematic inspection rather than jumping to a single diagnosis.
Keep your specifications, measurements, parts, and changes together in one project record. That history will help you troubleshoot the transmission and coordinate future upgrades. This t56 transmission swap guide gives you a sound starting point, while vehicle-specific instructions remain essential for the details of your build.
Restomod Academy shares educational guides for classic-car restoration and modification, including planning resources for interconnected upgrades. Explore The Ultimate Restomod Guide to plan how each upgrade fits into the wider project, or explore Restomod Academy’s consulting services for support with your build plan. Take your time, verify each connection, and enjoy the process of building a classic that feels true to its roots.
Frequently Asked Questions
Can you put a T56 transmission in any classic car?
No, a T56 isn’t a universal bolt-in swap for every classic car. Fit depends on the exact transmission, engine interface, clutch arrangement, chassis space, shifter position, mount, and driveline. Some combinations may need supporting parts or fabrication. Identify the gearbox and recipient vehicle first, then verify dimensions and requirements in reliable documentation before buying components or beginning disassembly. A careful compatibility check can reveal fitment challenges while you still have options.
What parts do you need for a T56 swap?
The required parts depend on the exact transmission, engine, and vehicle combination. A planning list commonly includes a compatible bellhousing, clutch and release system, mounting hardware, shifter, and driveshaft connection. Wiring or speed-signal components may also be needed for a particular unit. Build your list from verified fitment information rather than assuming a kit or parts list suits every application. The supporting parts must work together as a system.
How do you identify which T56 transmission you have?
Start with the identification marks, tags, or other identifying details on the transmission, then compare them with authoritative documentation. The T56 name alone doesn’t establish every specification, and versions can differ in details that matter to a swap. Confirm the interfaces and operating requirements for your exact unit before choosing a clutch, bellhousing, driveshaft components, or fluid. Record the verified information so it stays with your build notes.
Does a T56 swap require tunnel modification?
Not always. Tunnel modification depends on the specific transmission, shifter location, and recipient vehicle. The gearbox or shifter may encounter clearance limits, but no general guide can determine fit for every chassis. Measure available space and mock up the parts before making irreversible changes. Check clearance around the tunnel, mount, driveline, and nearby systems in the planned installation, then use those measurements to decide whether adjustments are needed.
Can you use the original driveshaft with a T56?
Don’t assume the original driveshaft will fit. The transmission’s output connection, final gearbox position, mount location, and vehicle setup all affect the required shaft dimensions and components. Position the transmission during mock-up, then verify driveshaft length and connection requirements for that exact combination. If vibration appears after installation, include alignment, driveline angles, and driveshaft balance in your checks rather than treating the shaft as the only possible cause.
What causes difficult shifting after a T56 swap?
Difficult shifting can have several causes, so treat it as a symptom, not a diagnosis. Check clutch release and adjustment, shifter and linkage fitment, and compatibility among the installed components. Consult service information for the exact transmission and vehicle, and don’t force the gearbox into gear. This t56 transmission swap guide emphasizes investigating the cause before regular driving, especially if shifting problems persist or worsen after initial checks.
What fluid does a T56 transmission use?
The correct fluid depends on the specific transmission version and its requirements. Don’t choose fluid based only on the T56 name or on a recommendation for another unit. Identify the gearbox, then consult authoritative documentation for its fluid specification, capacity, and service procedure. If you’re unsure which transmission you have, resolve its identification before filling or operating it. Follow the unit-specific instructions rather than relying on a general rule.