
You can build a high-performance engine and apply a flawless paint job, but if your cabin feels like a vibrating tin can at highway speeds, the restoration isn’t truly complete. I know the frustration of an exhaust drone that makes long drives tiring and thin floorboards that radiate engine heat directly into your feet. It’s a common hurdle in the restomod world, yet identifying the best sound deadening material for classic cars is often the most overlooked step in achieving a professional finish.
This guide is designed to empower you to take control of your interior environment using methodical, proven techniques. You’ll learn how to apply a strategic layering system of vibration dampers and acoustic barriers to eliminate rattles, improve audio clarity, and lower cabin temperatures. I will walk you through the precise application of materials like constrained layer dampers and closed-cell foam to ensure your project reaches its full potential in 2026. By the time we’re done, your vintage pride and joy will have the refined, quiet feel of a modern luxury cruiser while maintaining its iconic heritage.
Key Takeaways
- Master the tactical layering of damping, blocking, and absorbing materials to effectively manage noise, vibration, and harshness within your cabin.
- Apply the 25 percent coverage rule for constrained layer dampers to significantly reduce panel resonance without adding unnecessary weight to your project.
- Identify the best sound deadening material for classic cars by matching specific product types to the thermal and acoustic needs of your floorboards, doors, and firewall.
- Execute a professional-grade installation by prioritizing thorough metal preparation and precise templating to ensure maximum adhesion and material efficiency.
- Create a refined interior sanctuary that allows high-end audio systems and modern climate control kits to perform at their absolute peak.
The Science of Silence: Why Your Classic Car Needs Sound Treatment
To build a truly world-class machine, you must look beyond the horsepower and the paint. You have to address Noise, Vibration, and Harshness (NVH). In the technical landscape of what is a restomod, sound deadening is the invisible layer that separates a budget project from a professional-grade build. Classic cars are inherently noisy because they were stamped from thin-gauge metal with minimal factory insulation. This raw steel creates a perfect environment for structure-borne noise, where mechanical vibrations travel through the frame and body panels. At the same time, airborne noise like wind whistling through old seals or the roar of a performance exhaust penetrates the cabin with ease.
Think of your car body as a giant bell. Every time a tire hits a bump or a piston fires, that bell rings. When you research the best sound deadening material for classic cars, you’ll find that the goal isn’t just to add weight, but to change the resonant frequency of the metal itself. Effective sound treatment is the foundation of a high-end interior. It ensures that the only thing you hear is what you intend to hear, whether that is the crisp notes of a modern stereo or the purposeful growl of a well-tuned engine.
The Psychology of a Quality Build
A quiet cabin does more than just lower the volume; it changes how you perceive the entire vehicle. Think about the heavy, solid thud of a door on a modern luxury sedan. That sensation of quality is a direct result of acoustic engineering. When you invest time in finding the best sound deadening material for classic cars, you’re adding that same sense of solidity to your vintage shell. Reducing the auditory clutter also significantly cuts down on driver fatigue. Long-distance touring becomes a pleasure rather than a chore when you aren’t fighting a constant 90-decibel drone. It’s the ultimate intersection of heritage aesthetics and the refined comfort of 2026 technology.
Identifying Your Noise Enemies
Your restomod likely has a few built-in noise generators. High-lift cams, long-tube headers, and modern low-profile tires all contribute to a chaotic cabin environment. Large, flat metal panels like the roof or floorboards act like speakers, amplifying every road vibration into a resonant hum. Understanding The Science of Silence helps you realize that even a small reduction in decibels can feel like a massive improvement. Because the decibel scale is logarithmic, a 3 dB drop represents a 50 percent reduction in sound energy. By targeting these specific noise enemies, you create the foundation for a precision-built machine that rewards your senses every time you turn the key.
The Three Pillars of Automotive Sound Treatment
Stop thinking of soundproofing as a race to cover every square inch of metal with heavy mats. That’s a brute-force approach that adds unnecessary weight without proportional gain. Instead, adopt a tactical layering strategy: Damping, Blocking, and Absorbing. Each pillar serves a specific mechanical purpose, and understanding the difference is what separates a novice effort from a precision build. You can achieve professional results by applying the 25 percent coverage rule for vibration damping, focusing on the center of large metal panels. This philosophy of precision over brute force ensures your car remains light and nimble while becoming significantly quieter.
Layer 1: Vibration Damping (CLD)
Constrained Layer Dampers (CLD) are your first line of defense. These materials use a viscoelastic layer, typically butyl rubber, to convert kinetic energy from panel vibrations into low-grade heat. Choosing the best sound deadening material for classic cars starts with avoiding cheap asphalt-based products; they off-gas unpleasant odors and can lose adhesion in the 2026 summer heat. CLD is a mass-loading material specifically engineered to stop panel resonance by lowering the vibration frequency of the sheet metal. Apply these in small rectangles to the middle of flat panels to kill the “ringing” effect instantly.
Layer 2: Sound Blocking (Mass Loaded Vinyl)
While damping stops the vibration, Mass Loaded Vinyl (MLV) acts as a literal wall for airborne sound. It is a dense, flexible barrier designed to block external noise from the engine and tires from entering the cabin. Unlike damping, MLV requires 100 percent coverage to be effective. Even a small gap can allow sound to leak through, much like a cracked window. Always use a decoupling layer between the metal and the MLV to prevent sound flanking, ensuring the barrier remains acoustically isolated from the vehicle body. Modern acoustic engineering often goes Beyond the Mats to manage noise, but a solid MLV floor is your strongest defense.
Layer 3: Sound Absorption (Closed Cell Foam)
The final pillar is absorption. Closed-cell foam (CCF) serves as a decoupler for your MLV and absorbs high-frequency reflections inside the cabin. I always recommend closed-cell over open-cell foam because it doesn’t hold moisture. This is vital for preventing rust in vintage door cavities and headliners where water can sometimes migrate. If you’re ready to select your supplies, check out our recommended gear to find the best sound deadening material for classic cars currently on the market. By layering these three pillars, you’ll create a sanctuary that honors the heritage of your machine while providing modern comfort.
Identifying Hot Spots: Where to Apply Materials for Maximum Impact
Identifying where the noise enters your cabin is half the battle. You can’t just throw mats at every surface and hope for the best; that’s an inefficient use of your budget and adds unnecessary weight. To achieve a precision-built interior, you must rank your target zones by their contribution to the chaos. The firewall is your front line, but the trunk often acts as a megaphone for exhaust drone, and the roof can be a major source of wind noise and heat soak. Understanding The science of soundproofing allows you to see your car as a collection of resonant chambers rather than a single unit.
The Firewall and Transmission Tunnel
These areas are the primary entry points for engine roar and mechanical vibration. If you’re following the definitive guide to an LS engine swap, you know that modern high-performance engines generate significant heat. You need a solution that blocks both decibels and BTUs. The best sound deadening material for classic cars in this zone is often a combination of a heavy vibration damper and a specialized thermal barrier. Don’t skip the tunnel; it’s right next to your shifting hand and can radiate enough heat to ruin a long summer cruise in 2026.
Doors and Quarter Panels
Nothing says quality build like a door that closes with a heavy, modern thud. To get there, you need to apply material directly to the inside of the outer door skin. This stops the thin metal from vibrating like a drum. It also creates a better acoustic environment for your speakers. If you’re installing a high-end sound system, treating the doors is non-negotiable. It prevents the mid-bass from turning your door panels into rattling distractions, ensuring your audio remains crisp and clear.
Floor Pans and Wheel Wells
Road noise and tire hum come directly through the floor. Before you lay down a single sheet, inspect your metal for rust. It’s a critical step; covering up rot with permanent mats is a recipe for disaster. Once the metal is clean and prepped, focus your coverage on the wheel wells. These are high-impact areas where road debris and tire resonance are loudest. Using the best sound deadening material for classic cars here will transform the driving experience, making the cabin feel like a solid, unified sanctuary that’s ready for any road trip.

The Builder’s Blueprint: A Step-by-Step Installation Guide
Strip the interior down to the bare sheet metal. This is the moment to verify the integrity of your project and ensure you’re starting with a solid foundation. If you haven’t yet secured your supplies, consult our recommended gear list to ensure you have the best sound deadening material for classic cars on hand for the job. Wear heavy gloves throughout the process; the aluminum foil on many damping sheets is razor-sharp. You should also use a cardboard template for complex areas like wheel wells to reduce material waste and ensure a professional, tight fit.
Preparation and Surface Degreasing
Adhesion is everything. Use denatured alcohol or a high-quality wax and silicone remover to strip every trace of factory seam sealer, dust, and oils from the metal. If the surface isn’t surgically clean, even the most expensive butyl sheets will peel away over time, especially in the 2026 summer heat. Work in a temperature-controlled environment if possible. Most adhesives bond best between 65 and 80 degrees Fahrenheit. If the metal is too cold, the material won’t conform properly to the complex curves of your floor pans, leading to future failures.
Application Techniques for CLD and MLV
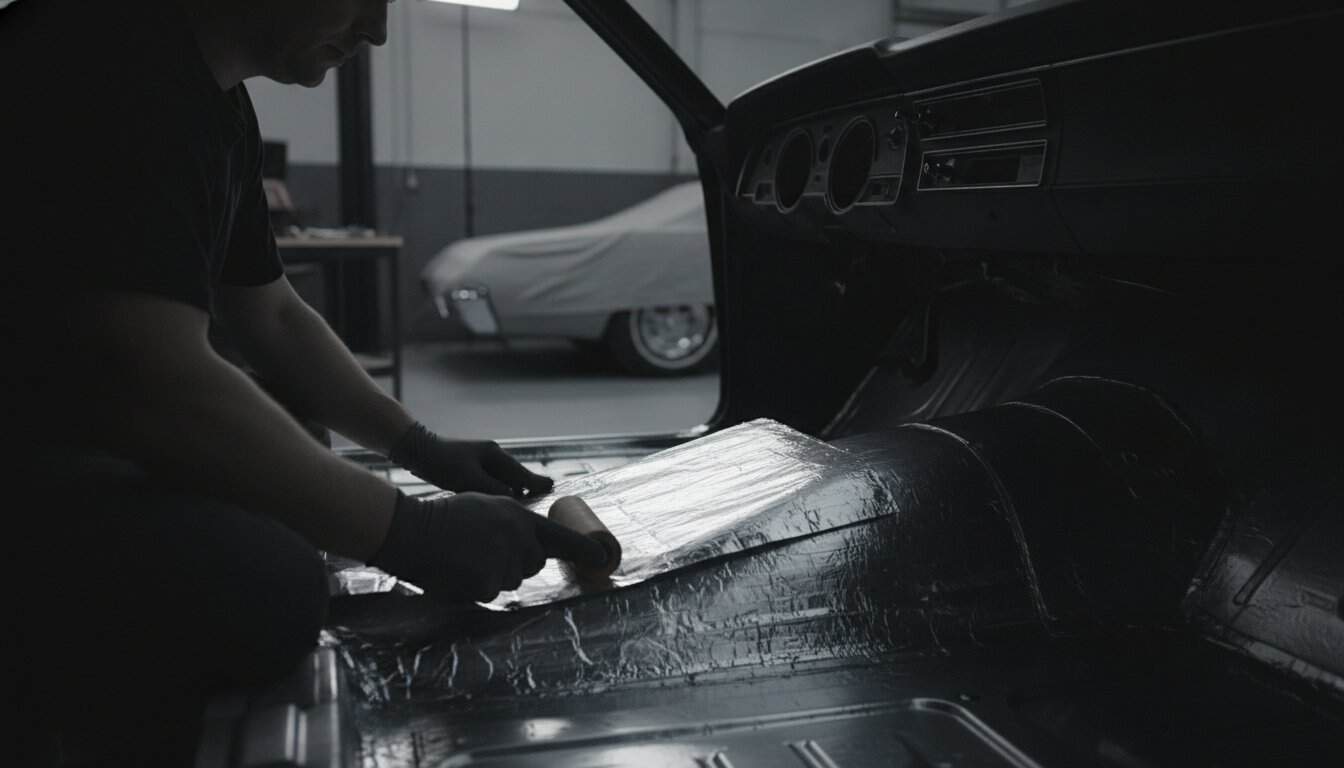
Start in the center of each panel and work your way outward with a heavy-duty roller. This technique prevents air pockets from forming beneath the material. A 100 percent bond is the only way to ensure the damping sheet effectively converts vibration into heat. When moving to the Mass Loaded Vinyl layer, remember that air gaps in the barrier layer act as sound leaks. Use vinyl tape to bridge every seam and overlap the material where possible. If you want to ensure your project follows a professional roadmap, consider our Premium Project Blueprints to guide your entire build.
Final Inspection and Reassembly
Before you lay down the carpet, mark every seat bolt hole and wiring harness clip. It’s incredibly frustrating to search for a hidden bolt hole through three layers of fresh insulation. Check for interference with moving parts like seat belt retractors and window regulators. Ensure your wiring is routed cleanly over the new material to avoid pinching. This methodical approach ensures that your interior reassembly is as smooth as the new, quiet ride you’ve just created. Once the insulation is in place, you’re ready to move toward the creative rewards of modern upholstery and custom seating.
Beyond the Mats: Integrating Sound Control into Your Project
Think of your sound treatment as the silent partner to every other upgrade in your vehicle. It is a long-term investment in drivability that pays dividends every time you get behind the wheel. While previous sections focused on the technical application, this final stage is about the integration of comfort and performance. By choosing the best sound deadening material for classic cars, you are creating a platform where modern air conditioning kits can maintain cabin temperatures effortlessly. This synergy between thermal insulation and acoustic management is what transforms a vintage machine into a reliable, precision-built sanctuary.
Audio System Optimization
Your high-end audio components deserve a studio-quality environment. When you eliminate the resonance from your floor and doors, you allow for a much tighter mid-bass response from your speakers. You should always decouple speakers from the metal door frame using foam rings or specialized baffles. This prevents the speaker energy from turning the door panel into a rattling distraction. In the pursuit of what is a restomod, a quiet interior is the only way to hear the true fidelity of modern audio hardware without interference from the road.
The Weight vs. Comfort Tradeoff
Finding the sweet spot between weight and comfort is the hallmark of a seasoned builder. For most enthusiasts, achieving approximately 60 percent coverage provides the best balance of value and performance. If you are building a racing-inspired machine where every ounce counts, you can still achieve a significant reduction in noise by focusing on precision. Premium 2026 products are achieving up to a 19.75 dB reduction in panel resonance with thinner, more efficient materials than ever before. You don’t need to blanket the entire car to see results; focus on high-impact areas to keep the car light and agile.
At the Academy, we believe in the philosophy of blending heritage style with modern performance. This guide is just the beginning of your journey from passive admirer to active creator. Whether you are troubleshooting an electrical gremlin or planning your next suspension overhaul, we are here to offer a guiding hand. If you need personalized advice on your specific project, our Restomod Consulting Services can help you navigate the complexities of a full-scale restoration. Precision is a journey, and with the right mentor, no mechanical hurdle is too great to overcome.
Build Your Modern Sanctuary
Transforming a rattle-prone vintage cabin into a refined sanctuary is a hallmark of a precision restomod. You now have the tactical blueprint to manage noise, vibration, and harshness through strategic layering. By prioritizing high-impact zones like the firewall and using the best sound deadening material for classic cars, you ensure that every mile driven in 2026 is defined by comfort rather than fatigue. This meticulous attention to detail is what separates a standard restoration from a world-class build.
Our community of DIY builders relies on these professional standards to bridge the gap between heritage aesthetics and modern performance. With expert guidance from Brook Walsh and our comprehensive project blueprints, you have the resources to overcome any mechanical hurdle. Take the next step in your restoration journey today. Download The Ultimate Restomod Guide to master your interior build and start creating the precision-built machine you’ve always envisioned. The shop floor is waiting. The rewards of a quiet, solid ride are well within your reach.
Frequently Asked Questions
Does sound deadening actually work for classic cars?
Sound deadening works exceptionally well to modernize the feel of a vintage vehicle. By managing the resonance of thin-gauge sheet metal, you eliminate the tinny, hollow sound common in older cars. This treatment creates a solid, refined cabin environment that rivals modern luxury vehicles. You’ll notice an immediate difference in the perceived quality of your build, as doors close with a heavy thud and road noise is significantly muted during highway cruising.
How much weight will sound deadening add to my car?
A full treatment typically adds between 50 and 100 pounds to your vehicle, depending on the thickness of the barriers used. However, you can manage this weight by following the 25 percent coverage rule for vibration damping. By focusing on the center of large panels rather than covering every square inch of metal, you maximize acoustic gains while keeping your restomod light and nimble. Modern 2026 materials are specifically engineered to provide high density without excessive bulk.
Can I install sound deadening over existing rust?
Never install sound deadening materials over rust. Applying mats over oxidation traps moisture against the metal, which will accelerate the rotting process and eventually destroy your floorboards or doors. You must strip the interior, treat any surface rust, and ensure the substrate is surgically clean before application. This preparation ensures a lifetime bond and protects the structural integrity of your machine, allowing the adhesive to perform exactly as the manufacturer intended.
What is the best material for car sound deadening in 2026?
The best sound deadening material for classic cars in 2026 is a strategic combination of butyl-based damping sheets and mass loaded vinyl. While single-layer products exist, a multi-stage approach is the only way to block airborne noise while simultaneously stopping structure-borne vibrations. Look for high-quality butyl rubber that remains stable in high temperatures, as this ensures your insulation won’t off-gas or lose its grip when the transmission tunnel heats up during spirited driving sessions.
Do I need to cover 100 percent of the metal with damping mats?
You do not need 100 percent coverage for vibration damping mats. Covering just 25 to 30 percent of a panel’s surface area is usually enough to stop it from ringing like a bell. However, if you are applying a sound barrier like mass loaded vinyl to block exhaust or road noise, you must achieve 100 percent coverage. Even a small gap in your barrier layer acts as a sound leak, significantly reducing the effectiveness of your entire installation.
Will sound deadening make my car interior cooler?
Sound deadening will absolutely make your interior cooler. Most high-quality damping mats and closed-cell foams double as thermal insulators, blocking the heat that radiates from your engine bay and exhaust system. This is particularly vital if you’ve performed a modern engine swap, as high-performance powerplants generate substantial BTUs. By treating the firewall and transmission tunnel, you’ll find that your air conditioning system doesn’t have to work nearly as hard to maintain a comfortable cabin.
Is it possible to soundproof a car yourself as a beginner?
Soundproofing a car is one of the most accessible DIY tasks for a beginner restomod builder. It doesn’t require specialized mechanical knowledge or expensive machinery; instead, it demands patience and a methodical approach to preparation. By following a clear instructional flow and taking the time to template your pieces, you can achieve a result that looks and performs like a professional installation. It is a great way to gain confidence before tackling more complex restoration phases.
What tools do I need for a professional sound deadening installation?
You only need a few basic tools to complete a professional installation. Start with a heavy-duty roller to ensure a perfect bond with the metal and a sharp utility knife for precise cuts. You’ll also need denatured alcohol for surface degreasing. Use cardboard to create templates for complex areas and a marking pen to identify bolt holes before they are covered. These simple tools allow you to execute a clean, effective build without specialized equipment.
You can build a high-performance engine and apply a flawless paint job, but if your cabin feels like a vibrating tin can at highway speeds, the restoration isn’t truly complete. I know the frustration of an exhaust drone that makes long drives tiring and thin floorboards that radiate engine heat directly into your feet. It’s a common hurdle in the restomod world, yet identifying the best sound deadening material for classic cars is often the most overlooked step in achieving a professional finish.
This guide is designed to empower you to take control of your interior environment using methodical, proven techniques. You’ll learn how to apply a strategic layering system of vibration dampers and acoustic barriers to eliminate rattles, improve audio clarity, and lower cabin temperatures. I will walk you through the precise application of materials like constrained layer dampers and closed-cell foam to ensure your project reaches its full potential in 2026. By the time we’re done, your vintage pride and joy will have the refined, quiet feel of a modern luxury cruiser while maintaining its iconic heritage.
Key Takeaways
- Master the tactical layering of damping, blocking, and absorbing materials to effectively manage noise, vibration, and harshness within your cabin.
- Apply the 25 percent coverage rule for constrained layer dampers to significantly reduce panel resonance without adding unnecessary weight to your project.
- Identify the best sound deadening material for classic cars by matching specific product types to the thermal and acoustic needs of your floorboards, doors, and firewall.
- Execute a professional-grade installation by prioritizing thorough metal preparation and precise templating to ensure maximum adhesion and material efficiency.
- Create a refined interior sanctuary that allows high-end audio systems and modern climate control kits to perform at their absolute peak.
The Science of Silence: Why Your Classic Car Needs Sound Treatment
To build a truly world-class machine, you must look beyond the horsepower and the paint. You have to address Noise, Vibration, and Harshness (NVH). In the technical landscape of what is a restomod, sound deadening is the invisible layer that separates a budget project from a professional-grade build. Classic cars are inherently noisy because they were stamped from thin-gauge metal with minimal factory insulation. This raw steel creates a perfect environment for structure-borne noise, where mechanical vibrations travel through the frame and body panels. At the same time, airborne noise like wind whistling through old seals or the roar of a performance exhaust penetrates the cabin with ease.
Think of your car body as a giant bell. Every time a tire hits a bump or a piston fires, that bell rings. When you research the best sound deadening material for classic cars, you’ll find that the goal isn’t just to add weight, but to change the resonant frequency of the metal itself. Effective sound treatment is the foundation of a high-end interior. It ensures that the only thing you hear is what you intend to hear, whether that is the crisp notes of a modern stereo or the purposeful growl of a well-tuned engine.
The Psychology of a Quality Build
A quiet cabin does more than just lower the volume; it changes how you perceive the entire vehicle. Think about the heavy, solid thud of a door on a modern luxury sedan. That sensation of quality is a direct result of acoustic engineering. When you invest time in finding the best sound deadening material for classic cars, you’re adding that same sense of solidity to your vintage shell. Reducing the auditory clutter also significantly cuts down on driver fatigue. Long-distance touring becomes a pleasure rather than a chore when you aren’t fighting a constant 90-decibel drone. It’s the ultimate intersection of heritage aesthetics and the refined comfort of 2026 technology.
Identifying Your Noise Enemies
Your restomod likely has a few built-in noise generators. High-lift cams, long-tube headers, and modern low-profile tires all contribute to a chaotic cabin environment. Large, flat metal panels like the roof or floorboards act like speakers, amplifying every road vibration into a resonant hum. Understanding The Science of Silence helps you realize that even a small reduction in decibels can feel like a massive improvement. Because the decibel scale is logarithmic, a 3 dB drop represents a 50 percent reduction in sound energy. By targeting these specific noise enemies, you create the foundation for a precision-built machine that rewards your senses every time you turn the key.
The Three Pillars of Automotive Sound Treatment
Stop thinking of soundproofing as a race to cover every square inch of metal with heavy mats. That’s a brute-force approach that adds unnecessary weight without proportional gain. Instead, adopt a tactical layering strategy: Damping, Blocking, and Absorbing. Each pillar serves a specific mechanical purpose, and understanding the difference is what separates a novice effort from a precision build. You can achieve professional results by applying the 25 percent coverage rule for vibration damping, focusing on the center of large metal panels. This philosophy of precision over brute force ensures your car remains light and nimble while becoming significantly quieter.
Layer 1: Vibration Damping (CLD)
Constrained Layer Dampers (CLD) are your first line of defense. These materials use a viscoelastic layer, typically butyl rubber, to convert kinetic energy from panel vibrations into low-grade heat. Choosing the best sound deadening material for classic cars starts with avoiding cheap asphalt-based products; they off-gas unpleasant odors and can lose adhesion in the 2026 summer heat. CLD is a mass-loading material specifically engineered to stop panel resonance by lowering the vibration frequency of the sheet metal. Apply these in small rectangles to the middle of flat panels to kill the “ringing” effect instantly.
Layer 2: Sound Blocking (Mass Loaded Vinyl)
While damping stops the vibration, Mass Loaded Vinyl (MLV) acts as a literal wall for airborne sound. It is a dense, flexible barrier designed to block external noise from the engine and tires from entering the cabin. Unlike damping, MLV requires 100 percent coverage to be effective. Even a small gap can allow sound to leak through, much like a cracked window. Always use a decoupling layer between the metal and the MLV to prevent sound flanking, ensuring the barrier remains acoustically isolated from the vehicle body. Modern acoustic engineering often goes Beyond the Mats to manage noise, but a solid MLV floor is your strongest defense.
Layer 3: Sound Absorption (Closed Cell Foam)
The final pillar is absorption. Closed-cell foam (CCF) serves as a decoupler for your MLV and absorbs high-frequency reflections inside the cabin. I always recommend closed-cell over open-cell foam because it doesn’t hold moisture. This is vital for preventing rust in vintage door cavities and headliners where water can sometimes migrate. If you’re ready to select your supplies, check out our recommended gear to find the best sound deadening material for classic cars currently on the market. By layering these three pillars, you’ll create a sanctuary that honors the heritage of your machine while providing modern comfort.
Identifying Hot Spots: Where to Apply Materials for Maximum Impact
Identifying where the noise enters your cabin is half the battle. You can’t just throw mats at every surface and hope for the best; that’s an inefficient use of your budget and adds unnecessary weight. To achieve a precision-built interior, you must rank your target zones by their contribution to the chaos. The firewall is your front line, but the trunk often acts as a megaphone for exhaust drone, and the roof can be a major source of wind noise and heat soak. Understanding The science of soundproofing allows you to see your car as a collection of resonant chambers rather than a single unit.
The Firewall and Transmission Tunnel
These areas are the primary entry points for engine roar and mechanical vibration. If you’re following the definitive guide to an LS engine swap, you know that modern high-performance engines generate significant heat. You need a solution that blocks both decibels and BTUs. The best sound deadening material for classic cars in this zone is often a combination of a heavy vibration damper and a specialized thermal barrier. Don’t skip the tunnel; it’s right next to your shifting hand and can radiate enough heat to ruin a long summer cruise in 2026.
Doors and Quarter Panels
Nothing says quality build like a door that closes with a heavy, modern thud. To get there, you need to apply material directly to the inside of the outer door skin. This stops the thin metal from vibrating like a drum. It also creates a better acoustic environment for your speakers. If you’re installing a high-end sound system, treating the doors is non-negotiable. It prevents the mid-bass from turning your door panels into rattling distractions, ensuring your audio remains crisp and clear.
Floor Pans and Wheel Wells
Road noise and tire hum come directly through the floor. Before you lay down a single sheet, inspect your metal for rust. It’s a critical step; covering up rot with permanent mats is a recipe for disaster. Once the metal is clean and prepped, focus your coverage on the wheel wells. These are high-impact areas where road debris and tire resonance are loudest. Using the best sound deadening material for classic cars here will transform the driving experience, making the cabin feel like a solid, unified sanctuary that’s ready for any road trip.
The Builder’s Blueprint: A Step-by-Step Installation Guide
Strip the interior down to the bare sheet metal. This is the moment to verify the integrity of your project and ensure you’re starting with a solid foundation. If you haven’t yet secured your supplies, consult our recommended gear list to ensure you have the best sound deadening material for classic cars on hand for the job. Wear heavy gloves throughout the process; the aluminum foil on many damping sheets is razor-sharp. You should also use a cardboard template for complex areas like wheel wells to reduce material waste and ensure a professional, tight fit.
Preparation and Surface Degreasing
Adhesion is everything. Use denatured alcohol or a high-quality wax and silicone remover to strip every trace of factory seam sealer, dust, and oils from the metal. If the surface isn’t surgically clean, even the most expensive butyl sheets will peel away over time, especially in the 2026 summer heat. Work in a temperature-controlled environment if possible. Most adhesives bond best between 65 and 80 degrees Fahrenheit. If the metal is too cold, the material won’t conform properly to the complex curves of your floor pans, leading to future failures.
Application Techniques for CLD and MLV
Start in the center of each panel and work your way outward with a heavy-duty roller. This technique prevents air pockets from forming beneath the material. A 100 percent bond is the only way to ensure the damping sheet effectively converts vibration into heat. When moving to the Mass Loaded Vinyl layer, remember that air gaps in the barrier layer act as sound leaks. Use vinyl tape to bridge every seam and overlap the material where possible. If you want to ensure your project follows a professional roadmap, consider our Premium Project Blueprints to guide your entire build.
Final Inspection and Reassembly
Before you lay down the carpet, mark every seat bolt hole and wiring harness clip. It’s incredibly frustrating to search for a hidden bolt hole through three layers of fresh insulation. Check for interference with moving parts like seat belt retractors and window regulators. Ensure your wiring is routed cleanly over the new material to avoid pinching. This methodical approach ensures that your interior reassembly is as smooth as the new, quiet ride you’ve just created. Once the insulation is in place, you’re ready to move toward the creative rewards of modern upholstery and custom seating.
Beyond the Mats: Integrating Sound Control into Your Project
Think of your sound treatment as the silent partner to every other upgrade in your vehicle. It is a long-term investment in drivability that pays dividends every time you get behind the wheel. While previous sections focused on the technical application, this final stage is about the integration of comfort and performance. By choosing the best sound deadening material for classic cars, you are creating a platform where modern air conditioning kits can maintain cabin temperatures effortlessly. This synergy between thermal insulation and acoustic management is what transforms a vintage machine into a reliable, precision-built sanctuary.
Audio System Optimization
Your high-end audio components deserve a studio-quality environment. When you eliminate the resonance from your floor and doors, you allow for a much tighter mid-bass response from your speakers. You should always decouple speakers from the metal door frame using foam rings or specialized baffles. This prevents the speaker energy from turning the door panel into a rattling distraction. In the pursuit of what is a restomod, a quiet interior is the only way to hear the true fidelity of modern audio hardware without interference from the road.
The Weight vs. Comfort Tradeoff
Finding the sweet spot between weight and comfort is the hallmark of a seasoned builder. For most enthusiasts, achieving approximately 60 percent coverage provides the best balance of value and performance. If you are building a racing-inspired machine where every ounce counts, you can still achieve a significant reduction in noise by focusing on precision. Premium 2026 products are achieving up to a 19.75 dB reduction in panel resonance with thinner, more efficient materials than ever before. You don’t need to blanket the entire car to see results; focus on high-impact areas to keep the car light and agile.
At the Academy, we believe in the philosophy of blending heritage style with modern performance. This guide is just the beginning of your journey from passive admirer to active creator. Whether you are troubleshooting an electrical gremlin or planning your next suspension overhaul, we are here to offer a guiding hand. If you need personalized advice on your specific project, our Restomod Consulting Services can help you navigate the complexities of a full-scale restoration. Precision is a journey, and with the right mentor, no mechanical hurdle is too great to overcome.
Build Your Modern Sanctuary
Transforming a rattle-prone vintage cabin into a refined sanctuary is a hallmark of a precision restomod. You now have the tactical blueprint to manage noise, vibration, and harshness through strategic layering. By prioritizing high-impact zones like the firewall and using the best sound deadening material for classic cars, you ensure that every mile driven in 2026 is defined by comfort rather than fatigue. This meticulous attention to detail is what separates a standard restoration from a world-class build.
Our community of DIY builders relies on these professional standards to bridge the gap between heritage aesthetics and modern performance. With expert guidance from Brook Walsh and our comprehensive project blueprints, you have the resources to overcome any mechanical hurdle. Take the next step in your restoration journey today. Download The Ultimate Restomod Guide to master your interior build and start creating the precision-built machine you’ve always envisioned. The shop floor is waiting. The rewards of a quiet, solid ride are well within your reach.
Frequently Asked Questions
Does sound deadening actually work for classic cars?
Sound deadening works exceptionally well to modernize the feel of a vintage vehicle. By managing the resonance of thin-gauge sheet metal, you eliminate the tinny, hollow sound common in older cars. This treatment creates a solid, refined cabin environment that rivals modern luxury vehicles. You’ll notice an immediate difference in the perceived quality of your build, as doors close with a heavy thud and road noise is significantly muted during highway cruising.
How much weight will sound deadening add to my car?
A full treatment typically adds between 50 and 100 pounds to your vehicle, depending on the thickness of the barriers used. However, you can manage this weight by following the 25 percent coverage rule for vibration damping. By focusing on the center of large panels rather than covering every square inch of metal, you maximize acoustic gains while keeping your restomod light and nimble. Modern 2026 materials are specifically engineered to provide high density without excessive bulk.
Can I install sound deadening over existing rust?
Never install sound deadening materials over rust. Applying mats over oxidation traps moisture against the metal, which will accelerate the rotting process and eventually destroy your floorboards or doors. You must strip the interior, treat any surface rust, and ensure the substrate is surgically clean before application. This preparation ensures a lifetime bond and protects the structural integrity of your machine, allowing the adhesive to perform exactly as the manufacturer intended.
What is the best material for car sound deadening in 2026?
The best sound deadening material for classic cars in 2026 is a strategic combination of butyl-based damping sheets and mass loaded vinyl. While single-layer products exist, a multi-stage approach is the only way to block airborne noise while simultaneously stopping structure-borne vibrations. Look for high-quality butyl rubber that remains stable in high temperatures, as this ensures your insulation won’t off-gas or lose its grip when the transmission tunnel heats up during spirited driving sessions.
Do I need to cover 100 percent of the metal with damping mats?
You do not need 100 percent coverage for vibration damping mats. Covering just 25 to 30 percent of a panel’s surface area is usually enough to stop it from ringing like a bell. However, if you are applying a sound barrier like mass loaded vinyl to block exhaust or road noise, you must achieve 100 percent coverage. Even a small gap in your barrier layer acts as a sound leak, significantly reducing the effectiveness of your entire installation.
Will sound deadening make my car interior cooler?
Sound deadening will absolutely make your interior cooler. Most high-quality damping mats and closed-cell foams double as thermal insulators, blocking the heat that radiates from your engine bay and exhaust system. This is particularly vital if you’ve performed a modern engine swap, as high-performance powerplants generate substantial BTUs. By treating the firewall and transmission tunnel, you’ll find that your air conditioning system doesn’t have to work nearly as hard to maintain a comfortable cabin.
Is it possible to soundproof a car yourself as a beginner?
Soundproofing a car is one of the most accessible DIY tasks for a beginner restomod builder. It doesn’t require specialized mechanical knowledge or expensive machinery; instead, it demands patience and a methodical approach to preparation. By following a clear instructional flow and taking the time to template your pieces, you can achieve a result that looks and performs like a professional installation. It is a great way to gain confidence before tackling more complex restoration phases.
What tools do I need for a professional sound deadening installation?
You only need a few basic tools to complete a professional installation. Start with a heavy-duty roller to ensure a perfect bond with the metal and a sharp utility knife for precise cuts. You’ll also need denatured alcohol for surface degreasing. Use cardboard to create templates for complex areas and a marking pen to identify bolt holes before they are covered. These simple tools allow you to execute a clean, effective build without specialized equipment.