
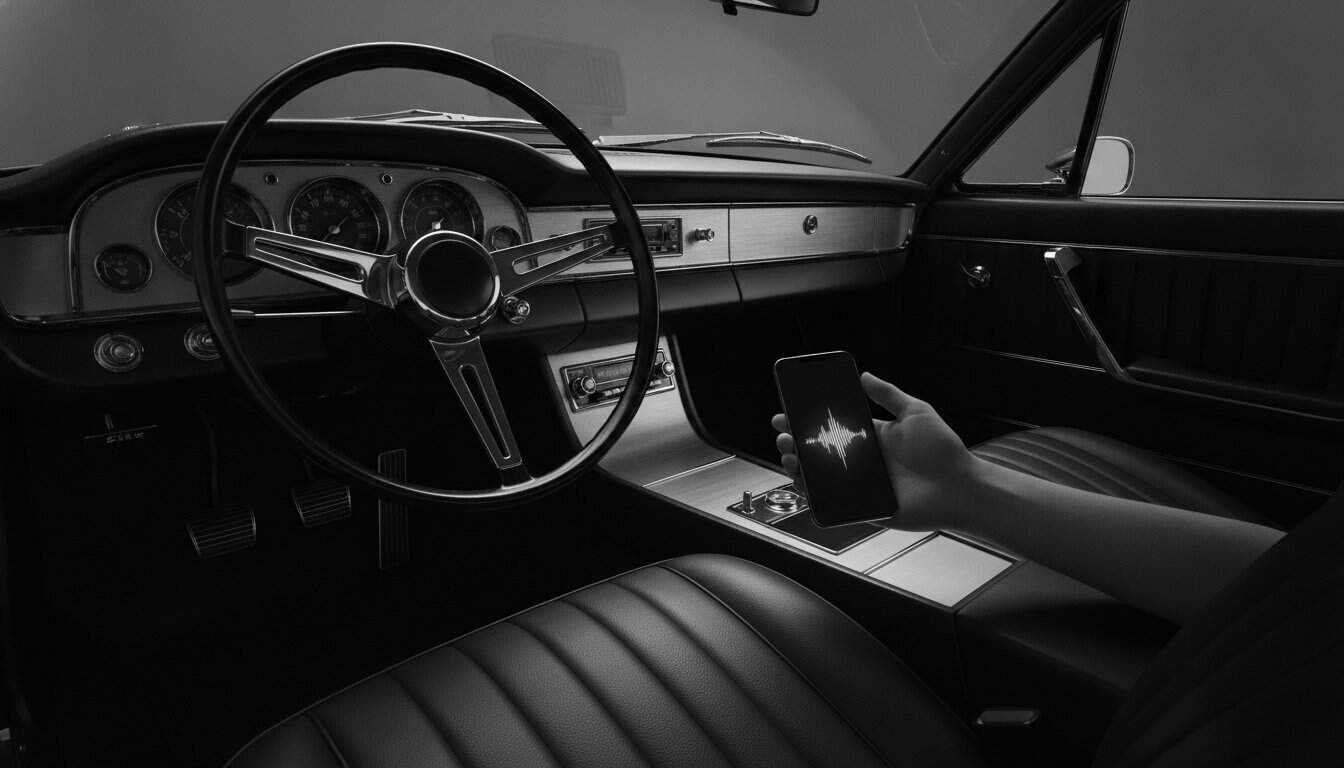
You shouldn’t have to choose between the visceral roar of a vintage V8 and the crystal-clear fidelity of your favorite playlist. Most of us know the anxiety of staring at a pristine, factory-correct dashboard while holding a modern head unit that simply doesn’t belong in a cabin from the sixties. You want the connectivity of Bluetooth and the deep punch of a subwoofer, but you refuse to compromise the soul of your interior with cheap plastic knobs or glowing LED screens. It’s a frustrating trade-off that often leaves enthusiasts settling for thin, distorted sound just to keep their dash intact.
This guide will empower you to engineer a hidden car audio system classic owners can be proud of, delivering high-fidelity performance without a single visible wire or a sacrificial cut to your original metal. You’ll learn how to bridge the gap between heritage aesthetics and modern reliability using components that stay completely out of sight. We’ll walk through the technical steps of selecting hideaway receivers, strategically placing speakers for maximum impact, and using advanced sound deadening to silence the road noise and rattles that often plague older machines. Get ready to transform your driving experience into a private concert hall that respects the history of your build.
Key Takeaways
- Master the art of the restomod audio approach to deliver modern frequency response without altering your vehicle’s iconic interior lines.
- Discover how to install a hidden car audio system classic enthusiasts will never see, utilizing Bluetooth controllers and hideaway units that keep your factory radio functional.
- Learn why high-quality sound deadening is your most critical investment for neutralizing cabin resonance and engine vibration.
- Follow a methodical signal path and grounding strategy to ensure a crystal-clear output free from alternator whine or electrical interference.
- Build a realistic project budget and implement a rigorous testing phase before you reinstall your interior to guarantee long-term reliability.
Defining the Modern Classic Car Audio System
Think of your car’s interior as a time capsule. While a standard restoration aims to freeze that capsule in a specific year, the restomod approach treats it as a living machine that must perform in the modern world. The most glaring weakness in any stock cabin is the audio. Original paper-cone speakers were designed for narrow-band AM radio broadcasts, not the high-bitrate, wide-frequency demands of today’s digital music. These vintage components lack the excursion and material rigidity needed to reproduce deep bass or crisp highs, often resulting in a muddy, thin sound that gets drowned out by wind and engine noise. Understanding the history of vehicle audio helps you appreciate how far we’ve come and why an upgrade is essential for any serious driver.
The Restomod Philosophy of Sound
Preserving the visual soul of your machine is the first rule of technical restoration. You don’t have to sacrifice your aesthetic standards to gain modern performance. In fact, cutting an original metal dashboard to fit a modern double-DIN head unit is one of the most common ways to permanently devalue a vintage vehicle. As your mentor in this process, I always advise enthusiasts to look for non-destructive solutions first. This philosophy is a core part of what is a restomod, focusing on upgrades that enhance the experience without erasing the history. You have three primary paths to explore: installing an OEM-look radio with modern guts, building a hidden car audio system classic in design that remains invisible, or investing in custom fabrication that blends into the existing interior panels.
Modern Features Every Vintage Ride Needs
Don’t let the vintage knobs fool you. Your system needs 21st-century connectivity to be truly functional. Start with Bluetooth 5.0 integration. It provides a stable, high-fidelity connection for wireless streaming and essential hands-free calling. You should also plan for hidden USB ports. These allow for smartphone charging and direct digital playback without cluttering your chrome-trimmed console. The real magic happens with Digital Signal Processing (DSP). Modern DSP units allow you to tune the audio to the specific, often challenging acoustics of a classic cabin. By hiding these components under a seat or behind a kick panel, you create a hidden car audio system classic owners will envy, combining the tactile joy of an old-school cockpit with the precision of a modern recording studio.
Core Components of a High-Fidelity Restomod Setup
Selecting the right hardware for your project requires a balance of electrical engineering and creative problem-solving. You aren’t just buying parts; you’re building a signal chain that must survive the harsh environment of a vintage cabin. Modern Class D amplifiers are the cornerstone of this transformation. These units are incredibly efficient and compact, allowing you to hide them in places that would’ve been impossible a decade ago, such as behind the glove box or inside a kick panel. They offer the punch you need without the massive heat sinks or heavy power draws of older analog technology.
Speaker technology has also leaped forward. Neodymium magnets provide massive motor strength in a fraction of the size of traditional ferrite magnets, making them perfect for shallow doors or original dash locations. If you’re looking for the best performance while keeping your interior stock, check out our recommended gear list for specific component types that fit these tight spaces.
Head Units: Visuals vs. Functionality
The brain of your system defines your daily interaction with the machine. You can choose a retro-style unit that fits your factory dash opening while housing Bluetooth and digital tuners, or you can opt for a completely hidden car audio system classic setup. In a stealth configuration, your smartphone becomes the primary interface, sending signals directly to a hidden car audio system classic receiver tucked away in the trunk or under the dash. Pay close attention to preamp output voltage. A higher signal voltage, such as 4V or 5V, ensures a cleaner signal reaches your amp, which is vital for overcoming the inherent challenges of vehicle acoustics in an uninsulated steel cabin.
Speakers and Subwoofers for Tight Cabins
Placement is everything when you’re working with limited real estate. For trucks and coupes with single dash speakers, dual-voice coil units allow you to play both stereo channels from a single factory location. However, for a true stereo image, kick panel pods are the gold standard. They angle the sound toward your ears rather than your feet. If you need low-end depth but don’t want to lose your trunk to a massive enclosure, look at under-seat active subwoofers. These self-contained units provide the necessary punch while remaining entirely out of sight. Be cautious with rear deck configurations. While they offer great space, vintage parcel shelves are prone to sun damage and vibration, so ensure your mounts are reinforced and your speakers are UV-rated.
Designing these layouts can get complex, especially in rare or custom interiors. If you’re stuck on a specific layout, our restomod consulting services can help you map out a custom blueprint for your build.
Acoustic Engineering: The Secret to Studio Sound
You can spend thousands on high-end drivers, but they’ll sound like a tin can if you don’t address the metal surrounding them. Vintage cabins are essentially large resonance chambers. Every time your engine revs or your tires hit a seam in the pavement, that energy translates into vibration through the floor pans and door skins. If you’re building a hidden car audio system classic in style but modern in performance, your first priority must be managing these vibrations. Without proper acoustic treatment, your mid-bass will be muddy and your high frequencies will be lost in a sea of mechanical noise.
Target the big three noise zones to get the most out of your labor. The floor pans pick up road and exhaust noise; the doors act as the cabinet for your speakers; and the firewall transmits engine heat and high-frequency whine. By treating these areas, you create a controlled environment where your audio components can actually perform. High-quality sound deadening can lead to a noticeable reduction in cabin noise, often making a muscle car feel as composed as a modern luxury sedan at highway speeds. This is the foundation upon which every successful audio project is built.
Stopping the Rattle: Vibration Dampening
Don’t fall into the trap of thinking you need to cover every square inch of your interior with heavy material. Effective vibration dampening relies on mass loading. Use butyl-based dampers to target the center of large, flat metal panels. I recommend the 25 percent rule; covering just a quarter of a panel’s surface area is often enough to stop it from ringing like a bell. This approach keeps your build light while still killing the structural resonance that ruins audio clarity. For more inspiration on how to execute these upgrades, explore our restomod interior ideas to see how we blend comfort with heritage style.
Thermal and Acoustic Barriers
Once you’ve stopped the panels from vibrating, you need to block the airborne noise. This is where closed-cell foam and mass-loaded vinyl come into play. These layers act as a decoupling barrier between the exterior world and your cabin. When you’re installing a hidden car audio system classic enthusiasts will appreciate, sealing the door cavities is a game-changer. Use a solid dampening material to cover the access holes in the inner door skin. This turns the entire door into a sealed enclosure, dramatically improving the punch and accuracy of your mid-bass speakers. It also has the added benefit of keeping out drafts and managing heat, making your long-distance cruises much more enjoyable.

Installation Strategies for the DIY Builder
Electrical System Readiness
Your vintage electrical system was never designed to power a modern high-fidelity setup. A stock 35-amp or 60-amp alternator will struggle to maintain voltage when a 1000-watt amplifier starts drawing current, leading to dimming headlights and potential ignition failure. If you’re running a high-output system, an upgrade to a 100-amp or 140-amp unit is a mandatory safety step. You can find detailed advice on charging system upgrades in our classic car modern engine swap guide. Always install a dedicated fuse block for your new tech. This isolates your audio gear from the factory harness, protecting your original wiring from overloads and making troubleshooting significantly easier.
Mounting and Fabrication Tips
Respect the original metal of your machine by adopting a strict no-cut rule. Use existing factory holes for mounting brackets and create custom speaker baffles from ABS plastic or MDF to adapt modern drivers to vintage locations. These spacers allow you to achieve the necessary mounting depth without trimming your door panels or dashboard. To keep your hidden car audio system classic and completely invisible, mount your amplifiers on a custom board under the front seats or behind a trunk trim panel. Ensure you provide adequate ventilation to prevent thermal shutdown during long summer cruises. When routing wires, avoid the ignition coil and spark plug wires; these are notorious sources of the dreaded alternator whine that can ruin an otherwise perfect audio experience.
If you’re ready to take the next step in your project, explore our Premium Project Blueprints to see exact wiring diagrams and mounting templates for popular classic models.
Mastering Your Restomod Audio Project
Finishing a project of this magnitude requires a shift in mindset from builder to technician. You’ve done the heavy lifting of routing wires and mounting hardware, but the final ten percent of the build determines whether your hidden car audio system classic setup sounds like a professional studio—much like the high-end production environments at Starsound Studios—or a cluttered workshop. Start by setting a realistic budget that accounts for the hidden costs of installation, such as high-quality connectors, shielding, and the acoustic treatments we discussed earlier. A common mistake is spending the entire budget on the head unit and speakers while neglecting the signal chain that feeds them.
Before you bolt the seats back down and snap the door panels into place, perform a comprehensive system test. Check every speaker for phase consistency and listen for any rattles or buzzes at high volume. This is also the time to tune your Digital Signal Processor (DSP). Classic cabins have unique acoustic signatures due to their glass to metal ratios and small interior volumes. Use your DSP to correct for time alignment, ensuring the sound from the passenger side kick panel reaches your ears at the exact same moment as the driver side. Once the sound is dialed in, document your wiring with clear labels and a simple diagram. This small act of discipline will save you hours of frustration during future troubleshooting or upgrades.
- Phase 1: Focus on the foundation. Complete your sound deadening and ensure your electrical system is capable of handling the new current demands.
- Phase 2: Perform a mock-up of all components. Verify clearances for speakers and ensure your hidden receivers have adequate signal reception before final mounting.
- Phase 3: Execute the final installation and acoustic tuning. This is where you use your DSP to bridge the gap between vintage aesthetics and modern performance.
Level Up Your Build Skills
A structured plan beats a weekend impulse buy every time. Precision takes patience, and having the right tools on your bench makes the difference between a clean install and a hacked up harness. Explore our recommended gear for the best installation tools to ensure your workshop is ready for the task. The pride of a finished project comes from knowing the work was done correctly and safely. Don’t rush the journey; the satisfaction of achieving precision is the real reward of the creative process. Ready to build? Take the first step toward your dream build with The Ultimate Restomod Guide. This resource acts as your essential roadmap, guiding you through every mechanical and aesthetic hurdle on the path to creating a machine that is truly your own.
Build Your Invisible Symphony
You’ve now seen that achieving studio-quality sound doesn’t require a single cut to your factory dash. By prioritizing structural acoustic engineering and selecting high-efficiency components, you’ve laid the groundwork for a hidden car audio system classic in appearance but modern in power. The pride of this project comes from the meticulous labor behind the panels, where every ground wire and sound-deadening mat contributes to a rattle-free, immersive experience. You’ve transitioned from an admirer of vintage style to an active creator of a sophisticated, modern machine.
The journey doesn’t end with a finished wiring harness. It continues through the shared knowledge of a passionate community of DIY builders who value precision as much as you do. Whether you need expert-led tutorials for all skill levels or comprehensive blueprints for complex swaps, we have the resources to guide your hands. Take the first step toward your dream build with The Ultimate Restomod Guide. Your classic deserves a soundtrack as legendary as its engine note. Pick up your tools, trust your new knowledge, and start building the machine you’ve always imagined.
Frequently Asked Questions
Can I install a modern classic car audio system in a 6-volt vehicle?
Modern audio components require a 12-volt negative ground system to operate correctly. If your classic still runs on its original 6-volt setup, you’ll need to install a dedicated voltage converter for the audio circuit or perform a complete 12-volt conversion on the vehicle. Attempting to run modern gear on 6 volts will result in immediate equipment failure. Always verify your ground polarity before connecting any new electronic components to avoid short circuits.
What is the best way to add Bluetooth to a classic car without changing the radio?
Install a hidden Bluetooth controller that connects directly to a hidden car audio system classic amplifier. This setup allows you to stream high-fidelity music and handle calls from your smartphone while your factory radio remains in the dash for aesthetic purposes. You can tuck the receiver behind the dashboard or inside the glove box. It bypasses the old radio entirely, delivering modern sound quality without disturbing your car’s period-correct interior lines.
Do I need to upgrade my alternator for a modern car stereo?
You’ll likely need an upgrade if you’re installing high-powered amplifiers. Most vintage alternators produce between 35 and 60 amps, which is barely enough for factory lights and ignition. A modern 1000-watt system can pull significant current, leading to voltage drops and poor performance. Switching to a high-output 100-amp or 140-amp alternator ensures your hidden car audio system classic has the steady power it needs to play clearly during long cruises.
How do I hide a subwoofer in a classic car with a small trunk?
Use a compact, active under-seat subwoofer to save your limited trunk space. These units combine an amplifier and a shallow-mount driver into one slim enclosure that fits under most classic car bucket seats. If under-seat placement isn’t an option, consider a custom fiberglass enclosure tucked into a rear quarter panel or the spare tire well. These strategies provide the low-end punch you want without sacrificing your valuable cargo area or original floor mats.
Why is my classic car radio making a buzzing sound when I accelerate?
This is typically alternator whine caused by a ground loop or poor wire routing. Ensure your audio system has a solid, clean ground point on the chassis, stripped of all paint and rust. You should also verify that your RCA signal cables are routed far away from high-current power wires and ignition components. Interference from the engine’s electrical field often bleeds into the signal path if cables are bundled too closely together.
What are the best speakers for a vintage car with limited mounting depth?
Look for shallow-mount speakers that utilize neodymium magnets. Neodymium is much stronger than traditional ferrite, allowing manufacturers to build powerful motors with a significantly slimmer profile. These drivers are perfect for original door locations or kick panels where space behind the mounting surface is tight. They offer the frequency response of a full-sized speaker without requiring you to cut into the original metal or use bulky, unsightly spacers.
Can I use modern speakers with my original factory radio?
You can use modern speakers, but you must match the impedance requirements of your factory radio. Many vintage radios were designed for 8-ohm or 10-ohm speakers, while most modern car speakers are 4 ohms. Running a lower impedance speaker on an old radio can cause the internal transformer to overheat and fail. Always check the stamped rating on your original equipment before connecting new drivers to ensure a safe and reliable electrical match.
How much does a professional restomod audio installation cost?
Professional labor rates vary significantly based on your geographic location and the complexity of the custom fabrication required. A basic hidden installation might take a few hours, while a full-cabin acoustic treatment with custom-molded panels can span several days of meticulous work. Instead of focusing on a single number, consider the quality of the components and the precision of the wiring. Investing in expert guidance can often save you from expensive installation mistakes.
You shouldn’t have to choose between the visceral roar of a vintage V8 and the crystal-clear fidelity of your favorite playlist. Most of us know the anxiety of staring at a pristine, factory-correct dashboard while holding a modern head unit that simply doesn’t belong in a cabin from the sixties. You want the connectivity of Bluetooth and the deep punch of a subwoofer, but you refuse to compromise the soul of your interior with cheap plastic knobs or glowing LED screens. It’s a frustrating trade-off that often leaves enthusiasts settling for thin, distorted sound just to keep their dash intact.
This guide will empower you to engineer a hidden car audio system classic owners can be proud of, delivering high-fidelity performance without a single visible wire or a sacrificial cut to your original metal. You’ll learn how to bridge the gap between heritage aesthetics and modern reliability using components that stay completely out of sight. We’ll walk through the technical steps of selecting hideaway receivers, strategically placing speakers for maximum impact, and using advanced sound deadening to silence the road noise and rattles that often plague older machines. Get ready to transform your driving experience into a private concert hall that respects the history of your build.
Key Takeaways
- Master the art of the restomod audio approach to deliver modern frequency response without altering your vehicle’s iconic interior lines.
- Discover how to install a hidden car audio system classic enthusiasts will never see, utilizing Bluetooth controllers and hideaway units that keep your factory radio functional.
- Learn why high-quality sound deadening is your most critical investment for neutralizing cabin resonance and engine vibration.
- Follow a methodical signal path and grounding strategy to ensure a crystal-clear output free from alternator whine or electrical interference.
- Build a realistic project budget and implement a rigorous testing phase before you reinstall your interior to guarantee long-term reliability.
Defining the Modern Classic Car Audio System
Think of your car’s interior as a time capsule. While a standard restoration aims to freeze that capsule in a specific year, the restomod approach treats it as a living machine that must perform in the modern world. The most glaring weakness in any stock cabin is the audio. Original paper-cone speakers were designed for narrow-band AM radio broadcasts, not the high-bitrate, wide-frequency demands of today’s digital music. These vintage components lack the excursion and material rigidity needed to reproduce deep bass or crisp highs, often resulting in a muddy, thin sound that gets drowned out by wind and engine noise. Understanding the history of vehicle audio helps you appreciate how far we’ve come and why an upgrade is essential for any serious driver.
The Restomod Philosophy of Sound
Preserving the visual soul of your machine is the first rule of technical restoration. You don’t have to sacrifice your aesthetic standards to gain modern performance. In fact, cutting an original metal dashboard to fit a modern double-DIN head unit is one of the most common ways to permanently devalue a vintage vehicle. As your mentor in this process, I always advise enthusiasts to look for non-destructive solutions first. This philosophy is a core part of what is a restomod, focusing on upgrades that enhance the experience without erasing the history. You have three primary paths to explore: installing an OEM-look radio with modern guts, building a hidden car audio system classic in design that remains invisible, or investing in custom fabrication that blends into the existing interior panels.
Modern Features Every Vintage Ride Needs
Don’t let the vintage knobs fool you. Your system needs 21st-century connectivity to be truly functional. Start with Bluetooth 5.0 integration. It provides a stable, high-fidelity connection for wireless streaming and essential hands-free calling. You should also plan for hidden USB ports. These allow for smartphone charging and direct digital playback without cluttering your chrome-trimmed console. The real magic happens with Digital Signal Processing (DSP). Modern DSP units allow you to tune the audio to the specific, often challenging acoustics of a classic cabin. By hiding these components under a seat or behind a kick panel, you create a hidden car audio system classic owners will envy, combining the tactile joy of an old-school cockpit with the precision of a modern recording studio.
Core Components of a High-Fidelity Restomod Setup
Selecting the right hardware for your project requires a balance of electrical engineering and creative problem-solving. You aren’t just buying parts; you’re building a signal chain that must survive the harsh environment of a vintage cabin. Modern Class D amplifiers are the cornerstone of this transformation. These units are incredibly efficient and compact, allowing you to hide them in places that would’ve been impossible a decade ago, such as behind the glove box or inside a kick panel. They offer the punch you need without the massive heat sinks or heavy power draws of older analog technology.
Speaker technology has also leaped forward. Neodymium magnets provide massive motor strength in a fraction of the size of traditional ferrite magnets, making them perfect for shallow doors or original dash locations. If you’re looking for the best performance while keeping your interior stock, check out our recommended gear list for specific component types that fit these tight spaces.
Head Units: Visuals vs. Functionality
The brain of your system defines your daily interaction with the machine. You can choose a retro-style unit that fits your factory dash opening while housing Bluetooth and digital tuners, or you can opt for a completely hidden car audio system classic setup. In a stealth configuration, your smartphone becomes the primary interface, sending signals directly to a hidden car audio system classic receiver tucked away in the trunk or under the dash. Pay close attention to preamp output voltage. A higher signal voltage, such as 4V or 5V, ensures a cleaner signal reaches your amp, which is vital for overcoming the inherent challenges of vehicle acoustics in an uninsulated steel cabin.
Speakers and Subwoofers for Tight Cabins
Placement is everything when you’re working with limited real estate. For trucks and coupes with single dash speakers, dual-voice coil units allow you to play both stereo channels from a single factory location. However, for a true stereo image, kick panel pods are the gold standard. They angle the sound toward your ears rather than your feet. If you need low-end depth but don’t want to lose your trunk to a massive enclosure, look at under-seat active subwoofers. These self-contained units provide the necessary punch while remaining entirely out of sight. Be cautious with rear deck configurations. While they offer great space, vintage parcel shelves are prone to sun damage and vibration, so ensure your mounts are reinforced and your speakers are UV-rated.
Designing these layouts can get complex, especially in rare or custom interiors. If you’re stuck on a specific layout, our restomod consulting services can help you map out a custom blueprint for your build.
Acoustic Engineering: The Secret to Studio Sound
You can spend thousands on high-end drivers, but they’ll sound like a tin can if you don’t address the metal surrounding them. Vintage cabins are essentially large resonance chambers. Every time your engine revs or your tires hit a seam in the pavement, that energy translates into vibration through the floor pans and door skins. If you’re building a hidden car audio system classic in style but modern in performance, your first priority must be managing these vibrations. Without proper acoustic treatment, your mid-bass will be muddy and your high frequencies will be lost in a sea of mechanical noise.
Target the big three noise zones to get the most out of your labor. The floor pans pick up road and exhaust noise; the doors act as the cabinet for your speakers; and the firewall transmits engine heat and high-frequency whine. By treating these areas, you create a controlled environment where your audio components can actually perform. High-quality sound deadening can lead to a noticeable reduction in cabin noise, often making a muscle car feel as composed as a modern luxury sedan at highway speeds. This is the foundation upon which every successful audio project is built.
Stopping the Rattle: Vibration Dampening
Don’t fall into the trap of thinking you need to cover every square inch of your interior with heavy material. Effective vibration dampening relies on mass loading. Use butyl-based dampers to target the center of large, flat metal panels. I recommend the 25 percent rule; covering just a quarter of a panel’s surface area is often enough to stop it from ringing like a bell. This approach keeps your build light while still killing the structural resonance that ruins audio clarity. For more inspiration on how to execute these upgrades, explore our restomod interior ideas to see how we blend comfort with heritage style.
Thermal and Acoustic Barriers
Once you’ve stopped the panels from vibrating, you need to block the airborne noise. This is where closed-cell foam and mass-loaded vinyl come into play. These layers act as a decoupling barrier between the exterior world and your cabin. When you’re installing a hidden car audio system classic enthusiasts will appreciate, sealing the door cavities is a game-changer. Use a solid dampening material to cover the access holes in the inner door skin. This turns the entire door into a sealed enclosure, dramatically improving the punch and accuracy of your mid-bass speakers. It also has the added benefit of keeping out drafts and managing heat, making your long-distance cruises much more enjoyable.
Installation Strategies for the DIY Builder
Success in a technical restoration isn’t about how much you spend; it’s about the precision of your execution. Before you pull a single wire, map out your signal path from the source unit to the amplifiers and finally to the speakers. This methodical approach prevents the logistical nightmare of realizing your RCA cables are six inches too short after the carpet is already glued down. When building a hidden car audio system classic in design, you must treat the electrical architecture with the same respect you give the mechanical systems. Use high-quality, oxygen-free copper wiring and ensure your power and signal cables are routed on opposite sides of the transmission tunnel to eliminate electromagnetic interference.
Electrical System Readiness
Your vintage electrical system was never designed to power a modern high-fidelity setup. A stock 35-amp or 60-amp alternator will struggle to maintain voltage when a 1000-watt amplifier starts drawing current, leading to dimming headlights and potential ignition failure. If you’re running a high-output system, an upgrade to a 100-amp or 140-amp unit is a mandatory safety step. You can find detailed advice on charging system upgrades in our classic car modern engine swap guide. Always install a dedicated fuse block for your new tech. This isolates your audio gear from the factory harness, protecting your original wiring from overloads and making troubleshooting significantly easier.
Mounting and Fabrication Tips
Respect the original metal of your machine by adopting a strict no-cut rule. Use existing factory holes for mounting brackets and create custom speaker baffles from ABS plastic or MDF to adapt modern drivers to vintage locations. These spacers allow you to achieve the necessary mounting depth without trimming your door panels or dashboard. To keep your hidden car audio system classic and completely invisible, mount your amplifiers on a custom board under the front seats or behind a trunk trim panel. Ensure you provide adequate ventilation to prevent thermal shutdown during long summer cruises. When routing wires, avoid the ignition coil and spark plug wires; these are notorious sources of the dreaded alternator whine that can ruin an otherwise perfect audio experience.
If you’re ready to take the next step in your project, explore our Premium Project Blueprints to see exact wiring diagrams and mounting templates for popular classic models.
Mastering Your Restomod Audio Project
Finishing a project of this magnitude requires a shift in mindset from builder to technician. You’ve done the heavy lifting of routing wires and mounting hardware, but the final ten percent of the build determines whether your hidden car audio system classic setup sounds like a professional studio or a cluttered workshop. Start by setting a realistic budget that accounts for the hidden costs of installation, such as high-quality connectors, shielding, and the acoustic treatments we discussed earlier. A common mistake is spending the entire budget on the head unit and speakers while neglecting the signal chain that feeds them.
Before you bolt the seats back down and snap the door panels into place, perform a comprehensive system test. Check every speaker for phase consistency and listen for any rattles or buzzes at high volume. This is also the time to tune your Digital Signal Processor (DSP). Classic cabins have unique acoustic signatures due to their glass to metal ratios and small interior volumes. Use your DSP to correct for time alignment, ensuring the sound from the passenger side kick panel reaches your ears at the exact same moment as the driver side. Once the sound is dialed in, document your wiring with clear labels and a simple diagram. This small act of discipline will save you hours of frustration during future troubleshooting or upgrades.
The Roadmap to Sonic Perfection
- Phase 1: Focus on the foundation. Complete your sound deadening and ensure your electrical system is capable of handling the new current demands.
- Phase 2: Perform a mock-up of all components. Verify clearances for speakers and ensure your hidden receivers have adequate signal reception before final mounting.
- Phase 3: Execute the final installation and acoustic tuning. This is where you use your DSP to bridge the gap between vintage aesthetics and modern performance.
Level Up Your Build Skills
A structured plan beats a weekend impulse buy every time. Precision takes patience, and having the right tools on your bench makes the difference between a clean install and a hacked up harness. Explore our recommended gear for the best installation tools to ensure your workshop is ready for the task. The pride of a finished project comes from knowing the work was done correctly and safely. Don’t rush the journey; the satisfaction of achieving precision is the real reward of the creative process. Ready to build? Take the first step toward your dream build with The Ultimate Restomod Guide. This resource acts as your essential roadmap, guiding you through every mechanical and aesthetic hurdle on the path to creating a machine that is truly your own.
Build Your Invisible Symphony
You’ve now seen that achieving studio-quality sound doesn’t require a single cut to your factory dash. By prioritizing structural acoustic engineering and selecting high-efficiency components, you’ve laid the groundwork for a hidden car audio system classic in appearance but modern in power. The pride of this project comes from the meticulous labor behind the panels, where every ground wire and sound-deadening mat contributes to a rattle-free, immersive experience. You’ve transitioned from an admirer of vintage style to an active creator of a sophisticated, modern machine.
The journey doesn’t end with a finished wiring harness. It continues through the shared knowledge of a passionate community of DIY builders who value precision as much as you do. Whether you need expert-led tutorials for all skill levels or comprehensive blueprints for complex swaps, we have the resources to guide your hands. Take the first step toward your dream build with The Ultimate Restomod Guide. Your classic deserves a soundtrack as legendary as its engine note. Pick up your tools, trust your new knowledge, and start building the machine you’ve always imagined.
Frequently Asked Questions
Can I install a modern classic car audio system in a 6-volt vehicle?
Modern audio components require a 12-volt negative ground system to operate correctly. If your classic still runs on its original 6-volt setup, you’ll need to install a dedicated voltage converter for the audio circuit or perform a complete 12-volt conversion on the vehicle. Attempting to run modern gear on 6 volts will result in immediate equipment failure. Always verify your ground polarity before connecting any new electronic components to avoid short circuits.
What is the best way to add Bluetooth to a classic car without changing the radio?
Install a hidden Bluetooth controller that connects directly to a hidden car audio system classic amplifier. This setup allows you to stream high-fidelity music and handle calls from your smartphone while your factory radio remains in the dash for aesthetic purposes. You can tuck the receiver behind the dashboard or inside the glove box. It bypasses the old radio entirely, delivering modern sound quality without disturbing your car’s period-correct interior lines.
Do I need to upgrade my alternator for a modern car stereo?
You’ll likely need an upgrade if you’re installing high-powered amplifiers. Most vintage alternators produce between 35 and 60 amps, which is barely enough for factory lights and ignition. A modern 1000-watt system can pull significant current, leading to voltage drops and poor performance. Switching to a high-output 100-amp or 140-amp alternator ensures your hidden car audio system classic has the steady power it needs to play clearly during long cruises.
How do I hide a subwoofer in a classic car with a small trunk?
Use a compact, active under-seat subwoofer to save your limited trunk space. These units combine an amplifier and a shallow-mount driver into one slim enclosure that fits under most classic car bucket seats. If under-seat placement isn’t an option, consider a custom fiberglass enclosure tucked into a rear quarter panel or the spare tire well. These strategies provide the low-end punch you want without sacrificing your valuable cargo area or original floor mats.
Why is my classic car radio making a buzzing sound when I accelerate?
This is typically alternator whine caused by a ground loop or poor wire routing. Ensure your audio system has a solid, clean ground point on the chassis, stripped of all paint and rust. You should also verify that your RCA signal cables are routed far away from high-current power wires and ignition components. Interference from the engine’s electrical field often bleeds into the signal path if cables are bundled too closely together.
What are the best speakers for a vintage car with limited mounting depth?
Look for shallow-mount speakers that utilize neodymium magnets. Neodymium is much stronger than traditional ferrite, allowing manufacturers to build powerful motors with a significantly slimmer profile. These drivers are perfect for original door locations or kick panels where space behind the mounting surface is tight. They offer the frequency response of a full-sized speaker without requiring you to cut into the original metal or use bulky, unsightly spacers.
Can I use modern speakers with my original factory radio?
You can use modern speakers, but you must match the impedance requirements of your factory radio. Many vintage radios were designed for 8-ohm or 10-ohm speakers, while most modern car speakers are 4 ohms. Running a lower impedance speaker on an old radio can cause the internal transformer to overheat and fail. Always check the stamped rating on your original equipment before connecting new drivers to ensure a safe and reliable electrical match.
How much does a professional restomod audio installation cost?
Professional labor rates vary significantly based on your geographic location and the complexity of the custom fabrication required. A basic hidden installation might take a few hours, while a full-cabin acoustic treatment with custom-molded panels can span several days of meticulous work. Instead of focusing on a single number, consider the quality of the components and the precision of the wiring. Investing in expert guidance can often save you from expensive installation mistakes.