That $500 junkyard 5.3L might look like a bargain, but without a precise roadmap, it’s just a heavy paperweight taking up space in your garage. A successful swap ls engine project isn’t a simple weekend bolt-on; it’s a high-stakes heart transplant that demands a systematic approach to electronics and fuel integration. You want the soul of a vintage classic with the turn-key reliability of a modern daily driver, yet the fear of tangled wiring harnesses and hidden costs often keeps the hood closed. It’s understandable to feel overwhelmed by the choice between a budget $3,000 DIY build or a $14,000 professional-grade installation.
This 2026 Master Manual is designed to turn that hesitation into action. We’ll show you exactly how to master your build by navigating the latest industry shifts, including the February 12, 2026, EPA repeal of federal greenhouse gas standards. You’ll learn to select the right generation of small-block power, manage “criteria” pollutant compliance, and source affordable modern tech like the ZF 8HP transmission. We are moving from the planning phase to the first roar of the exhaust, ensuring your restomod legacy is built on a foundation of professional-grade craftsmanship.
Key Takeaways
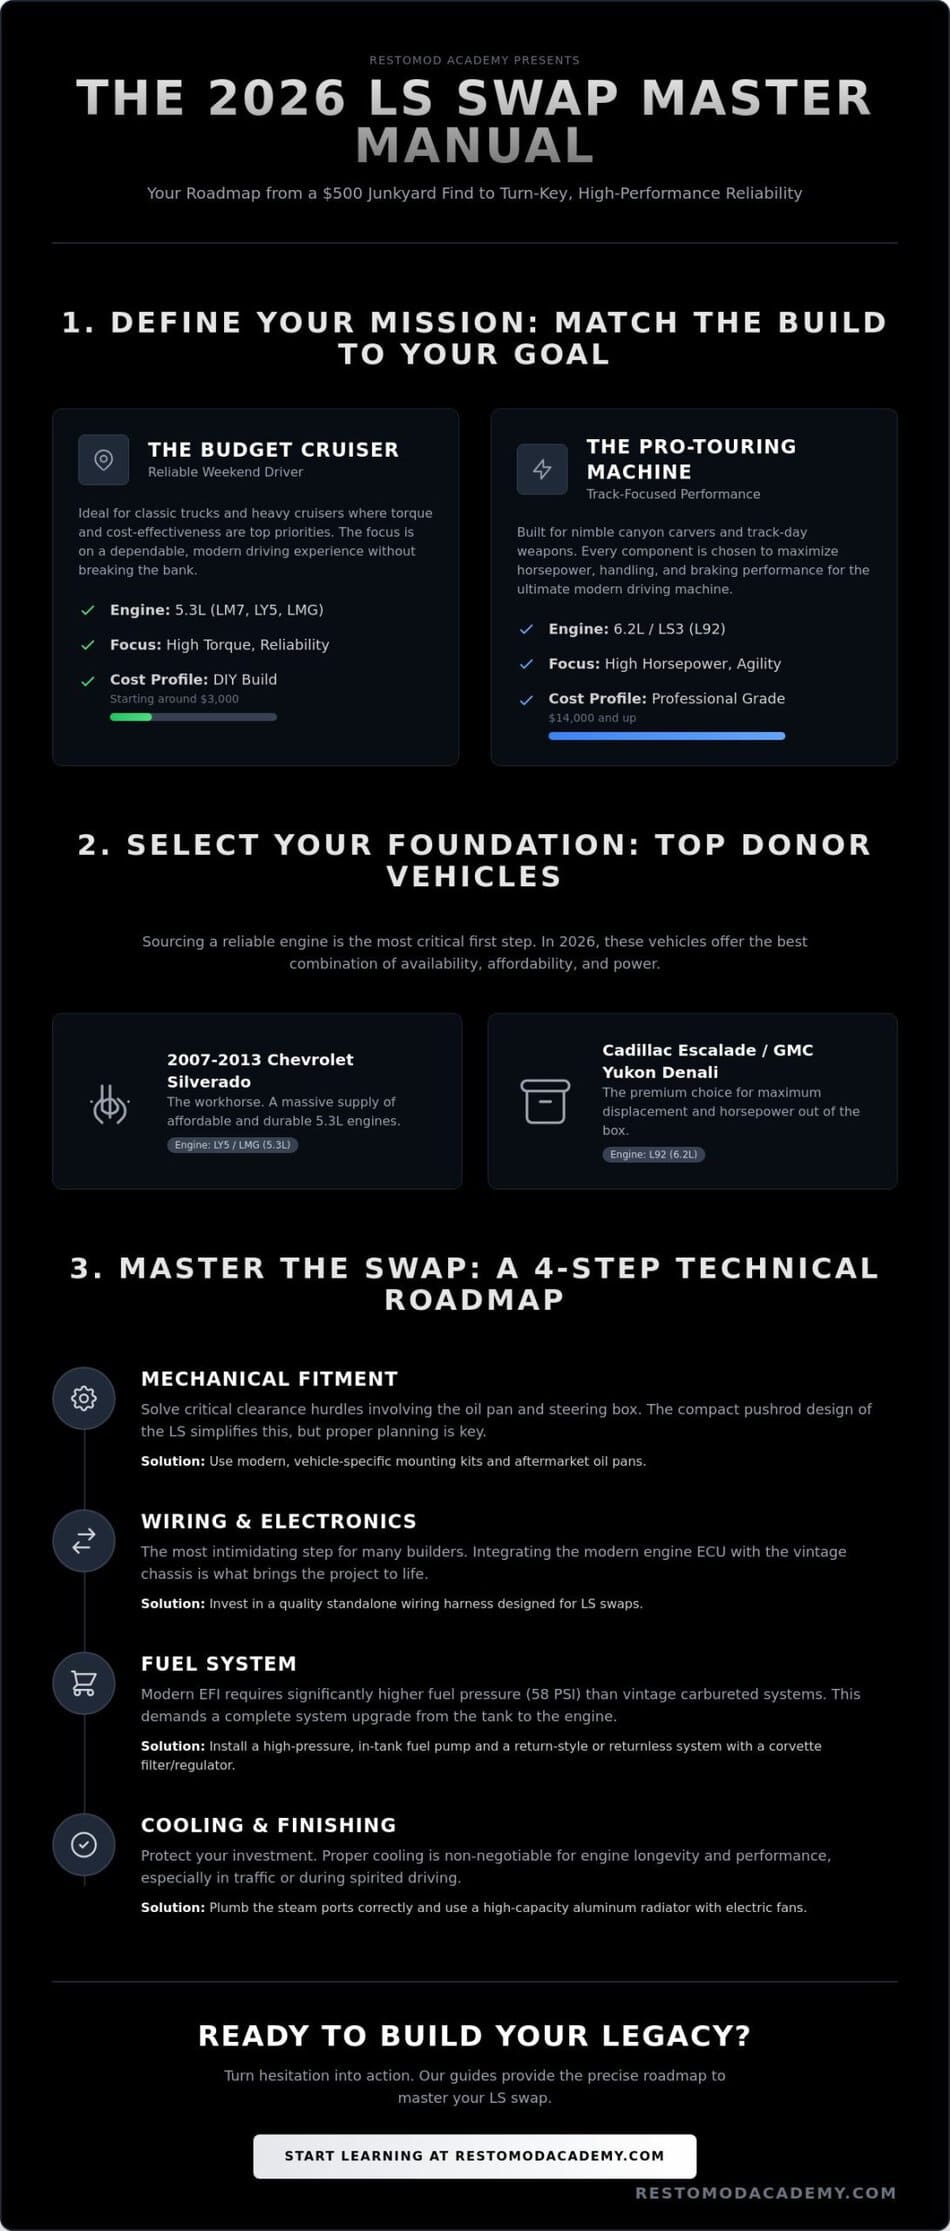
- Define your build goals early to choose between a budget-friendly 5.3L cruiser or a high-performance LS3 pro-touring machine.
- Identify the most reliable 2026 donor vehicles like Silverados and Escalades to ensure your project starts with a solid foundation.
- Navigate the complexities of a swap ls engine project by mastering the integration of modern standalone wiring harnesses and high-pressure fuel systems.
- Solve critical clearance hurdles involving the oil pan and steering box with proven fabrication techniques and modern mounting kits.
- Protect your investment by implementing essential cooling strategies like steam port plumbing to maintain peak performance during daily driving.
Why the LS Engine is the Gold Standard for Modern Restomods
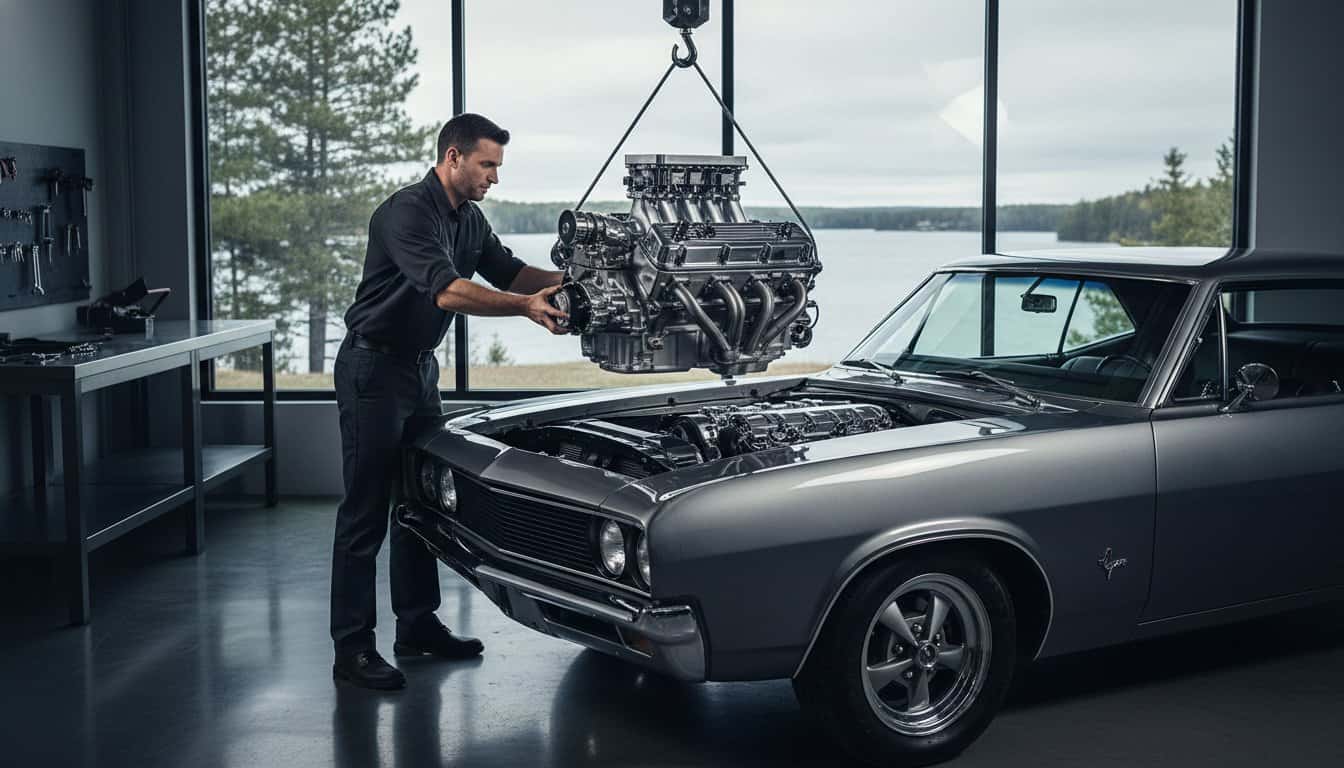
The LS swap is more than just a trend; it’s the definitive heart transplant for the modern era of automotive restoration. At its core, this process involves retrofitting a GM Gen III, IV, or V V8 engine into a vehicle that was never originally designed to house it. This transition allows you to bridge the gap between the aesthetic soul of a vintage machine and the relentless performance of 21st-century engineering. Whether you’re resurrecting a neglected C10 pickup or giving a second life to a classic Nova, a swap ls engine project offers a path to power that was once reserved for professional race teams.
What truly sets this platform apart is the remarkable size-to-power ratio. Because of its compact, cam-in-block pushrod design, the LS-based small-block engine occupies a significantly smaller footprint than modern overhead-cam competitors. It fits into tight engine bays where a Ford Coyote or a Mopar Hemi would require extensive, costly firewall surgery. You get the benefit of massive displacement and high-flow cylinder heads without sacrificing the weight balance of your classic chassis. It’s a miracle of packaging that makes 400 to 600 horsepower an achievable reality for the home builder.
To better understand the fundamentals of this mechanical transition, watch this helpful video:
Beyond the physical dimensions, the success of your swap ls engine project relies on the most robust aftermarket support in history. Every bracket, oil pan, and wiring solution has already been engineered, tested, and refined by thousands of builders before you. This isn’t just about raw speed; it’s about the confidence that comes from using a platform that is documented down to the last bolt. You aren’t just building a car; you’re joining a community of craftsmen who value the “built, not bought” philosophy.
The Evolution of the LS Platform
Understanding the lineage of these engines is crucial for your planning. The Gen III architecture, featuring the legendary LS1 and the workhorse LM7, laid the foundation with its cathedral-port heads. The Gen IV blocks, like the LS3 and LY6, introduced rectangular ports and stronger rotating assemblies. In 2026, parts availability for these older blocks remains at an all-time high, making them more practical than the traditional Small Block Chevy. The LS has surpassed its predecessor by offering superior oiling systems and a much stronger six-bolt main bearing design that handles boost and high RPM with ease.
Reliability: The Core of the Restomod Identity
Choosing a modern powertrain is about more than just numbers on a dyno sheet; it’s about the peace of mind that comes with turn-key reliability. Electronic Fuel Injection (EFI) eliminates the morning ritual of pumping the gas and praying the carburettor doesn’t flood. You gain a car that starts in the freezing cold and idles perfectly in summer traffic. This shift toward modernising classics significantly boosts the resale value of your project. A well-executed LS swap transforms a temperamental weekend toy into a reliable, high-performance daily driver that retains its vintage charm while embracing modern efficiency.
Planning Your LS Swap: Choosing the Right Block and Donor
Your project begins with a vision, not a wrench. Before you browse the local classifieds for a donor, define your mission clearly. Is this a budget-friendly weekend cruiser designed for reliability, or a track-focused pro-touring monster? This decision dictates every component you purchase. A successful swap ls engine project relies on matching the power plant to the intended use of the car. If you’re building a heavy cruiser, the extra torque of a truck engine is ideal. For a nimble canyon carver, every pound you save on the front end counts toward your ultimate goal.
In 2026, the 2007 to 2013 Chevrolet Silverado remains the primary source for affordable 5.3L engines like the LY5 or LMG. If your budget allows for more displacement, the Cadillac Escalade and GMC Yukon Denali offer the 6.2L L92, which provides a massive performance jump out of the box. You must also weigh the “Junkyard Gem” against a new crate engine. A used 5.3L currently costs between $500 and $1,500, while a used 6.0L typically fetches $1,500 to $3,500. Contrast this with a new LS3 crate engine, which commands between $7,000 and $10,000. For a deep dive into these engine families, the Ultimate Guide to GM LS Engines offers excellent technical specifications.
Accessory drives are another critical planning hurdle. Truck accessories sit high and far forward, which often causes hood clearance issues in classic cars. Corvette and Camaro drives are much tighter to the block, providing the clearance needed for low-slung vintage engine bays. If you’re unsure which configuration fits your specific chassis, our Restomod Consulting Services can help you map out the perfect fitment strategy before you spend a dime.
Iron vs. Aluminum: The Weight and Strength Debate
The choice between an iron or aluminum block is the first major fork in the road. Iron blocks are incredibly durable and handle high-boost applications with ease, but they add roughly 100 pounds to the nose of your car. This extra weight can negatively impact your suspension geometry and braking performance. Aluminum blocks, while more expensive, offer superior heat dissipation and keep the car’s weight balance closer to its original design.
| Block Material | Best Use Case | Primary Advantage |
|---|---|---|
| Cast Iron | Trucks, Drag Cars, Budget Builds | Low cost; handles 1,000+ HP easily. |
| Aluminum | Road Racing, Autocross, High-End Restomods | Weight savings; improved handling. |
Identifying Your Engine: Casting Numbers and Sensors
Don’t take a seller’s word for it when buying a used engine. You need to verify the displacement and generation yourself. Look for the “5.3L” or “6.0L” markings cast directly into the block, usually located behind the power steering pump or on the rear of the block. You must also identify the reluctor wheel. A 24x wheel uses a black crank sensor, while a 58x wheel uses a gray sensor. This determines which ECU you’ll need to run the engine. As a pro-tip, check the valley cover for signs of Displacement on Demand (DoD) hardware. These systems often require a delete kit to ensure long-term reliability in a swap ls engine application.
The Mechanical Roadmap: Mounting, Clearance, and Drivetrain
Dropping the engine into the bay is the moment your vision takes physical shape, but it’s also where the most frustrating hurdles emerge. Successfully executing a swap ls engine project requires you to respect the physical limits of your vintage chassis. You’ll need to master the “Big Three” of fitment: oil pan clearance, steering box interference, and the firewall gap. If you ignore these early on, you’ll find yourself pulling the engine back out to massage the tunnel with a sledgehammer. For many first-time builders, a “Swap-in-a-Box” kit is the safest bet because it provides a pre-engineered solution where the mounts, headers, and oil pan are designed to work in harmony.
Your choice of transmission defines the character of your restomod. If you want a reliable cruiser, a used 4L60E ($500 to $1,500) or the beefier 4L80E ($1,000 to $2,500) are the standard automatic choices. For those who crave total control, a T56 manual remains the gold standard, though it carries a premium price tag of $2,500 to $5,000. Regardless of your choice, don’t overlook the driveline. A custom driveshaft, which typically costs between $600 and $1,000, is essential to handle the immediate torque delivery of a modern V8. You can find more technical specifications on these pairings in Holley’s Ultimate Guide to LS Engines.
Engine Mounts and Positioning
Choose your mounting strategy carefully. Adjustable slider mounts allow you to move the engine forward or backward to clear the firewall or heater core. Fixed position plates are simpler but offer no room for error. Pay close attention to the engine tilt, as it directly affects your pinion angle and can lead to nasty driveshaft vibrations. Driveline angle is the crucial factor for high-speed stability.
Oil Pan and Header Selection
The stock truck oil pan is usually too deep for classic cars, often hanging two inches below the crossmember where it’s vulnerable to speed bumps. You’ll likely need a low-profile pan to clear your steering rack and keep the sump protected. When it comes to headers, long-tubes offer the best performance gains but can be a nightmare to fit around steering shafts. Shorty headers are much easier to install and provide plenty of clearance for most vintage frames.
Mastering the LS Swap Harness and Fuel System
Wiring is often the stage where momentum dies and projects gather dust. The sight of a factory “spaghetti mess” of wires draped over a classic fender is enough to intimidate anyone. You have two primary paths to resolve this: thinning out a factory harness or investing in a standalone aftermarket unit. While a factory harness is cost-effective, it requires hours of meticulous pinning and depinning to remove unnecessary circuits like emissions and security. A standalone wiring harness, typically priced between $400 and $800, offers a plug-and-play experience that saves dozens of hours. This is where system integration becomes vital, as your electronics must speak the same language as your fuel and cooling systems to ensure a reliable start.
Your fuel system must be up to the task of supporting modern fuel injection. Unlike classic carbureted setups that run on 5 to 7 PSI, a swap ls engine requires a constant, high-pressure supply of 58 PSI. The most efficient way to achieve this without complex plumbing is the “Corvette Filter/Regulator” trick. By using a 1999 to 2004 Corvette filter, you gain a built-in regulator that returns excess fuel to the tank early in the line. This simplifies your plumbing by requiring only a single high-pressure line to run forward to the engine rail. It’s an elegant solution that keeps your engine bay clean and functional.
The Standalone ECU Revolution
The transition from an OEM PCM to a modern standalone system like the Holley Terminator X has changed the game for DIY builders. While factory computers are reliable, they often require expensive proprietary software and a professional tuner to make even minor changes. Standalone systems offer “self-learning” fuel maps that adjust in real-time as you drive, allowing you to get on the road faster. If you’re ready to dive deeper into electrical schematics and pinouts, study The Definitive Guide to an LS Engine Swap. For those who want a proven layout before they start cutting wires, our Premium Project Blueprints provide the exact roadmap you need.
Fuel System Plumbing for EFI
You must decide between an in-tank fuel pump and an external inline pump. In-tank pumps are the superior choice for a daily driver because the fuel keeps the pump cool and muffles the noise. When plumbing the system, use AN fittings and PTFE-lined hoses. Standard rubber hoses will eventually weep fuel vapors, leading to a persistent raw gas smell in your garage. Once your lines are tight, follow this sequence to prime the system safely:
- Inspect every fitting and crimp for physical tightness and alignment.
- Cycle the ignition to the “on” position to run the pump for 5 seconds, then turn it off.
- Depress the Schrader valve on the fuel rail to bleed trapped air from the lines.
- Repeat the cycle until you have a steady stream of fuel and no audible air bubbles.
Finishing the Build: Cooling, Exhaust, and Tuning
The final assembly of your swap ls engine project is where the magic of system integration truly happens. Many builders make the mistake of reusing a fifty-year-old radiator, but an LS engine manages heat differently than an old small-block. You must address the steam port plumbing, which is the most frequently overlooked step in the entire cooling process. These ports, located on the top of the cylinder heads, allow trapped air to escape the cooling system. Without a proper ICT Billet steam kit or similar plumbing routed back to the radiator or water pump, air pockets will form. These pockets lead to localized hotspots and can cause catastrophic head gasket failure during your first spirited drive.
A high-flow aluminum radiator is mandatory to keep your modern V8 within its optimal operating temperature. Pair this with dual electric brushless fans, which in 2026 typically cost between $400 and $600. These fans provide consistent airflow regardless of engine RPM, unlike a traditional mechanical fan that relies on the belt drive. For your exhaust, don’t choke your new power plant with restrictive pipes. A 2.5-inch dual system is the minimum requirement for a 5.3L build, while a 6.0L or 6.2L monster requires a 3-inch dual system to breathe effectively and reach its full horsepower potential.
Before you turn the key for the first time, follow a strict “First Start” protocol. Remove the spark plugs and the fuel pump relay, then crank the engine in ten-second intervals until you see oil pressure register on your gauge. This ensures that every bearing is lubricated before the engine actually fires. Verify all sensor readings through your ECU software to confirm that the MAP, TPS, and coolant temp sensors are reporting accurate data. This meticulous verification prevents a lean condition or an overheat during those first critical minutes of operation.
Cooling a High-Performance V8
The LS water pump features a specific thermostat housing angle that often interferes with your frame or steering box. You might need an adjustable swivel housing to route your lower radiator hose safely away from moving parts. Integration is key; wire your electric fan relays directly to the ECU. This allows the computer to trigger the fans based on precise temperature thresholds, ensuring your car stays cool even in heavy summer traffic. You can find proven cooling solutions and radiator brands in our Recommended Gear section.
The Road Test and Final Tuning
Once the engine is running, the work of a craftsman continues with a proper break-in procedure. For a junkyard engine, perform three heat cycles and change the oil after the first 50 miles to catch any microscopic debris. Use a modern OBD-II scanner to monitor your vitals. Even in a fifty-year-old shell, you now have the power to track fuel trims and ignition timing in real-time. There is no greater reward than that first successful road test, knowing your vision has become a reliable, high-performance reality. You’ve earned the pride of a project that was built, not bought.
Ignite Your Restomod Legacy
Your journey from a dusty garage to the open road depends on the precision of your planning. We’ve covered why selecting the right block and donor vehicle is the foundation of every swap ls engine project. You’ve learned that mastering the physical fitment hurdles and integrating a modern high-pressure fuel system are the steps that separate a reliable daily driver from a permanent project. This process isn’t just about raw horsepower; it’s about the craftsmanship and vision required to fuse two different eras of automotive history into one seamless machine.
Ready to blueprint your build? Download The Ultimate Restomod Guide now. Our academy resources are trusted by thousands of DIY builders. We provide expert-vetted mechanical blueprints and comprehensive 2026 parts compatibility lists to ensure your project stays on track and on budget.
The path to a finished restomod is methodical and demanding, but the reward is a car with a modern heart and a classic soul. Pick up your tools, trust your process, and get to work on your masterpiece. We’ll be here to guide you every step of the way.
Frequently Asked Questions
How much does a swap LS engine project typically cost in 2026?
A high-quality swap ls engine project in 2026 typically costs between $10,000 and $14,000 for parts, plus a 20 to 30 percent buffer for fittings and fluids. While a budget DIY build can be achieved for as little as $3,000 using used components, a new LS3 crate engine alone ranges from $7,000 to $10,000. These figures include the engine, transmission, and the essential standalone wiring required for a reliable daily driver.
Which LS engine is the easiest to swap into a classic car?
The iron block 5.3L engines, such as the LM7 or LY5, are widely considered the easiest to swap due to their massive availability and lower entry cost. These engines are found in millions of Silverados and Sierras, meaning every clearance hurdle has already been solved by the aftermarket. Their simple architecture and robust design make them a perfect learning platform for builders transitioning from traditional small blocks to modern fuel injection.
Do I need to change my transmission when doing an LS swap?
You don’t strictly have to change your transmission, but using a modern electronic unit like a 4L60E or a ZF 8HP70 is highly recommended for full system integration. While adapters exist for older TH350 or 700R4 gearboxes, they lack the overdrive and precise shift control offered by an ECU managed transmission. A used 4L80E typically costs between $1,000 and $2,500 and provides the strength needed for high horsepower restomod builds.
What is the difference between a drive-by-wire and drive-by-cable throttle body?
A drive-by-cable throttle uses a traditional mechanical linkage, while drive-by-wire relies on an electronic pedal and an electric motor to open the butterfly valve. Most Gen III engines used cables, but Gen IV and V engines transitioned to electronic control for better cruise control and traction management integration. Choosing drive-by-wire simplifies your interior fabrication by eliminating the need to route a physical cable through the firewall.
Can I keep my original gauges with a modern LS engine?
Yes, you can keep your original vintage gauges by using mechanical-to-electronic signal converters or simple brass adapters for your sensors. Most builders use an ICT Billet adapter to fit the original 1/8 inch NPT oil pressure and temperature senders into the LS block metric ports. For the speedometer, a cable-drive box can convert the electronic signal from a modern transmission into a physical rotation for your classic needle.
Is it better to buy a complete donor car or just the engine and harness?
Buying a complete donor car is almost always better because it provides the thousands of small parts, like bolts, brackets, and sensors, that quickly inflate a budget. Having the entire vehicle allows you to verify the engine runs before pulling it and gives you a source for the gas pedal and cooling fans. If you buy a standalone dropout unit, ensure it includes the ECU and all front-end accessories to avoid hidden costs.
What is a “VATS” delete and why is it necessary for my swap?
VATS stands for Vehicle Anti-Theft System, and it is a security feature that prevents the engine from running without the original key and body control module. In a swap ls engine application, the ECU will shut down the fuel injectors after two seconds if it doesn’t receive a handshake signal. You must perform a VATS delete through a PCM reflash or a standalone harness to ensure your engine starts and stays running in your classic chassis.
How long does a typical LS swap take for a DIY builder?
A typical LS swap takes a dedicated DIY builder between 60 and 100 hours of actual labor, depending on the complexity of the fuel and electrical systems. This timeline assumes you have all your parts staged and ready for installation. While the physical mounting of the engine might only take a weekend, the meticulous work of plumbing lines and routing the wiring harness accounts for 70 percent of the total project duration.