
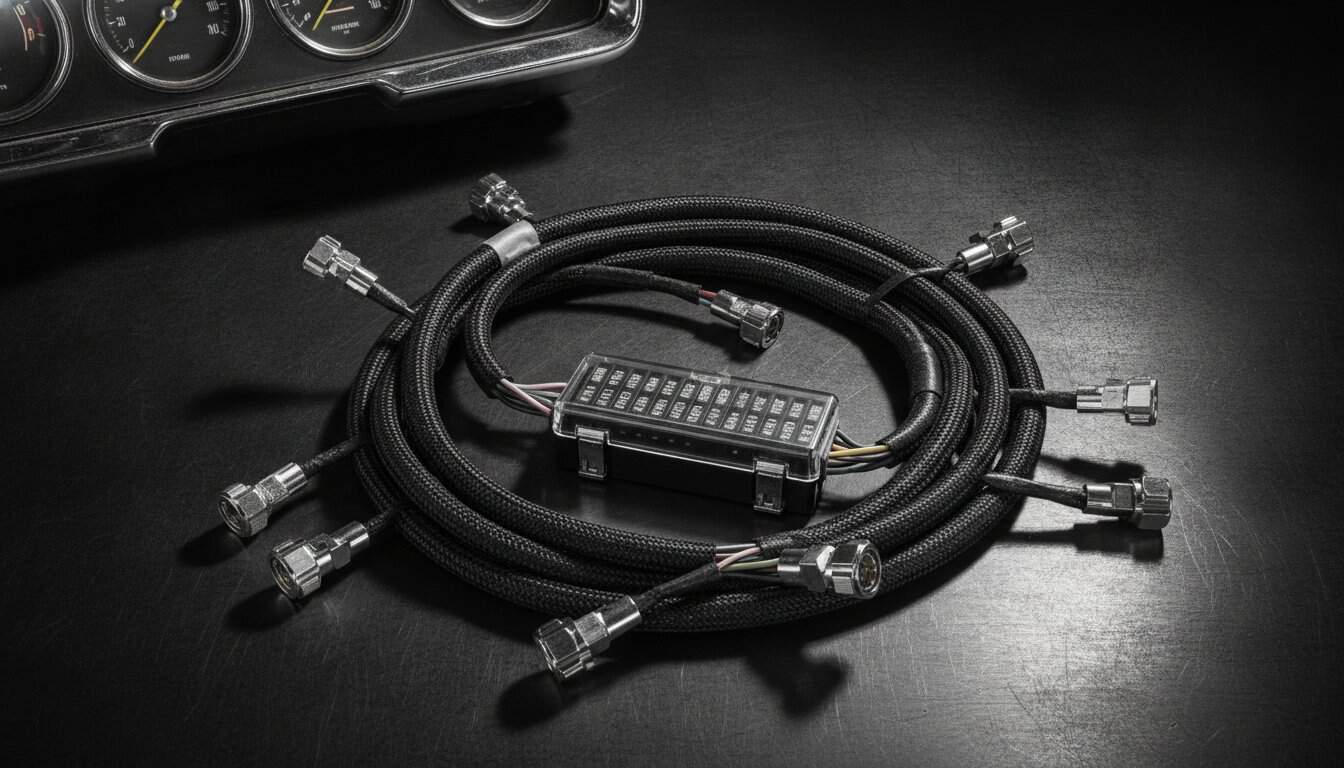
What if the most dangerous part of your vintage ride isn’t the rusted floorboards or the worn brakes, but the invisible copper veins hidden behind your dashboard? Decades of heat cycles and brittle insulation turn original electrical systems into ticking time bombs. Embarking on a classic car wiring harness upgrade is about more than just avoiding a fire; it’s the fundamental step to transforming a temperamental relic into a reliable machine. You deserve a car that starts on the first turn every single time, whether you’re heading to a local show or a cross-country tour.
I understand how overwhelming it feels to stare at a tangled nest of wires or a complex EFI diagram. It’s easy to feel defeated by a previous owner’s hack jobs and the sheer volume of modern connections required for A/C and power windows. This mentor-led guide serves as your 2026 restomod roadmap, giving you the confidence to choose the right system and execute a clean installation. We’ll break down the selection process, explain how to integrate modern technology safely, and show you how to achieve a professional engine bay that looks as good as it performs.
Key Takeaways
- Identify the hidden dangers of brittle insulation and replace outdated fuse blocks to eliminate the primary causes of vintage electrical failure.
- Select a circuit system that accounts for both your current needs and future performance additions like modern fuel injection or climate control.
- Evaluate the differences between direct fit and universal kits to determine the best path for your classic car wiring harness upgrade.
- Adopt a methodical installation workflow that begins at the fuse block and moves outward to ensure a clean engine bay and organized interior.
- Execute a systematic power up sequence to verify every circuit and resolve grounding issues before you finalize the build.
The Electrical Foundation: Why Your Classic Needs a Modern Nervous System
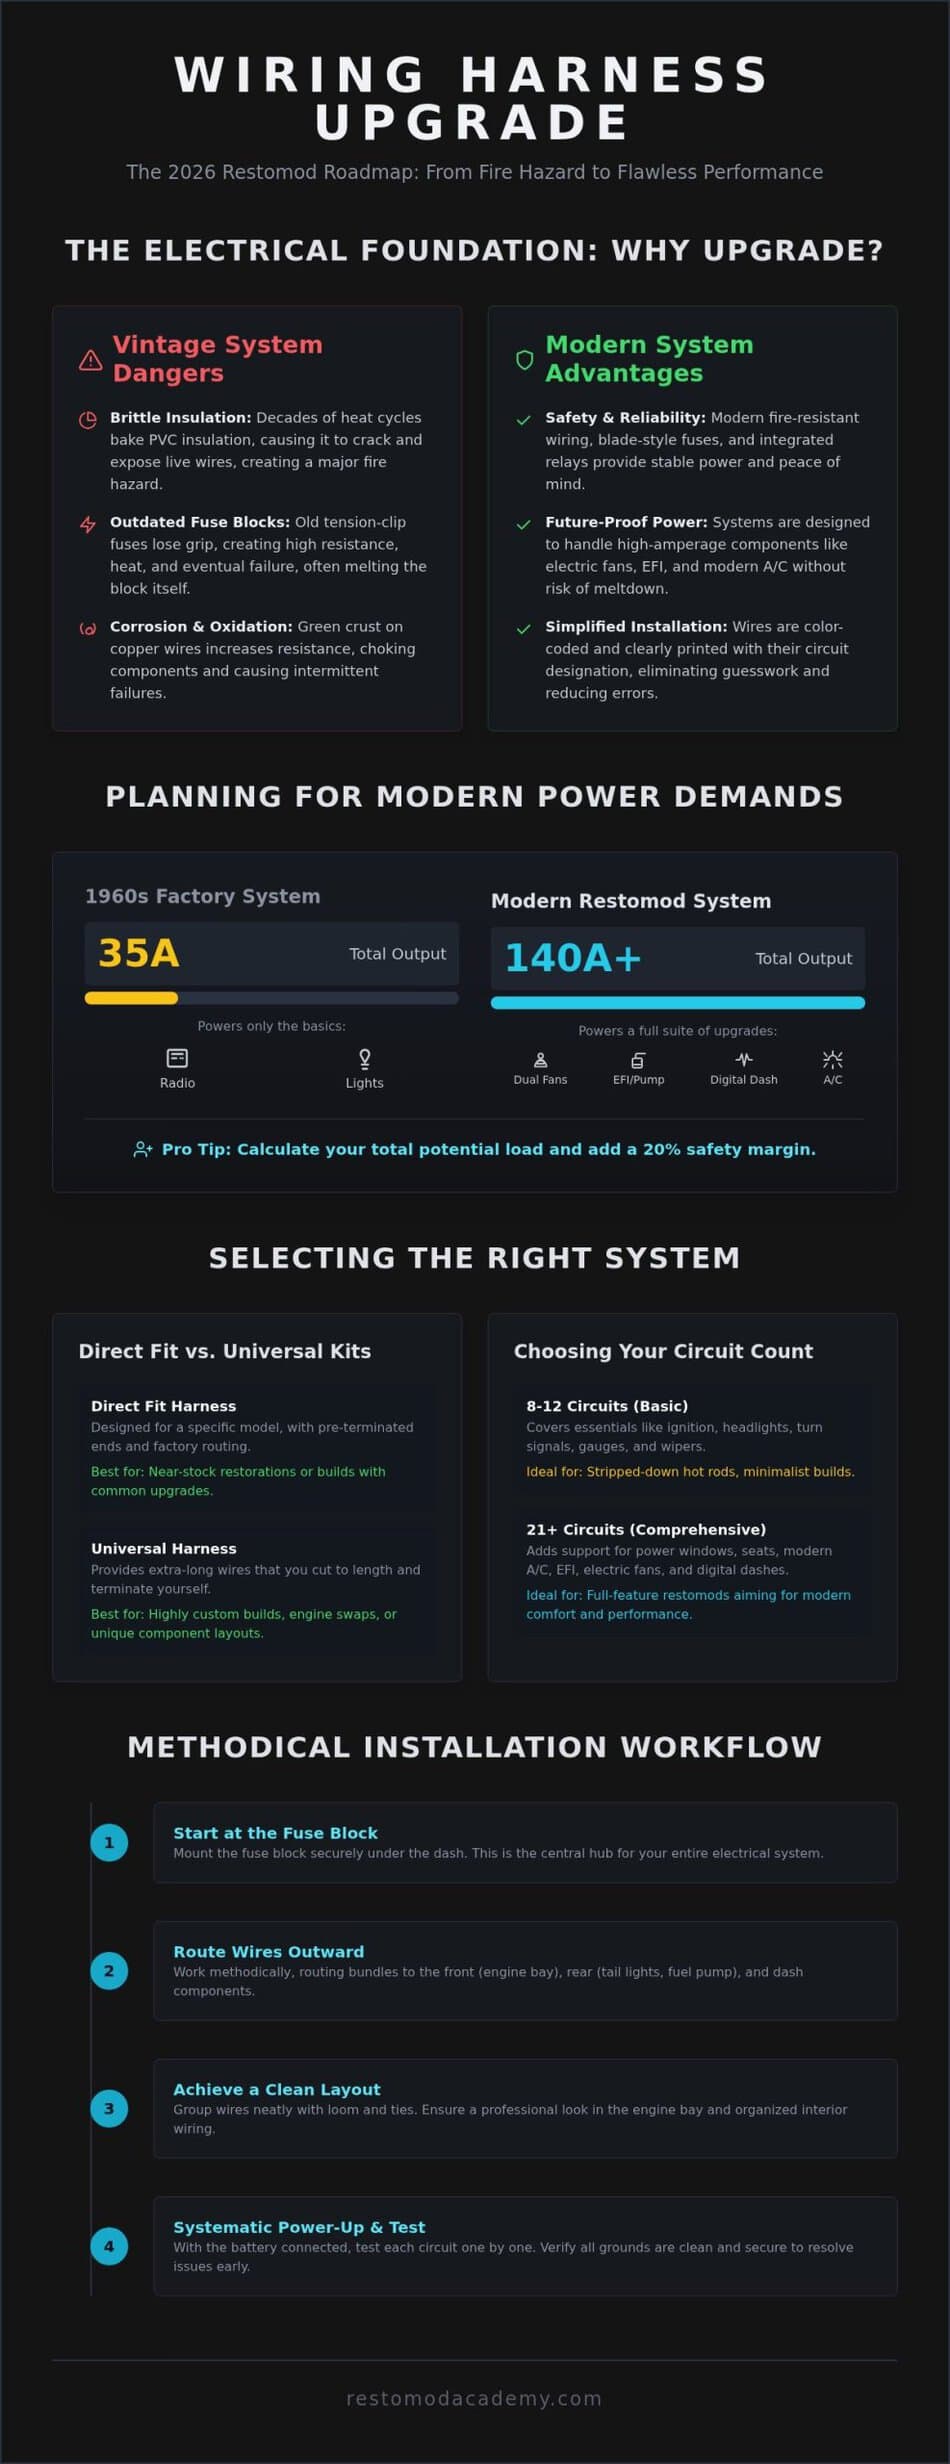
Strip away the chrome and the paint, and you’ll find the most neglected component of any project car: the wiring. Think of your electrical system as the nervous system of your vehicle. If the signals don’t reach the heart, the machine stays dead. Embarking on a classic car wiring harness upgrade isn’t just about convenience; it’s a safety imperative. Most factory harnesses were designed for a 10-year lifespan, yet we’re asking them to perform 50 or 60 years later. Understanding What is a Wiring Harness? helps clarify why these bundles of copper and plastic are so critical to your build’s integrity. When you’re learning what is a restomod, you quickly realize that reliability is the cornerstone of the entire movement.
Examine the back of your factory fuse block. You’ll likely see melted plastic or discoloration around the heater or headlight circuits. These vintage blocks are the primary failure point because they rely on tension clips that lose their spring over time. This creates high resistance, which generates heat and eventually leads to failure. A modern system replaces this archaic technology with blade-style fuses and integrated relays, moving the heavy electrical load away from your sensitive dash switches and into a controlled environment.
Assessing the Risks of Vintage Insulation
Heat cycles are the enemy of vintage electronics. Over five decades, the engine bay’s temperature swings bake the original PVC insulation until it becomes as brittle as dry pasta. If you can’t bend a wire without the insulation cracking, you’re driving a fire hazard. Look for green crust on exposed copper tips; this oxidation increases resistance and chokes your components of the voltage they need. Installing a modern, fire-resistant harness provides the peace of mind that your hard work won’t go up in smoke during a Sunday cruise. It’s the first step in transitioning from a passive owner to an active creator who understands every inch of their machine.
Planning for Modern Power Demands
Original wiring was never intended to handle the appetite of 21st-century technology. In the 1960s, a 35-amp generator was plenty for a radio and some incandescent bulbs. Today, a high-performance restomod might feature a 140-amp alternator to power dual electric fans, high-pressure fuel pumps, and modern climate control. If you try to pull that much current through a factory 10-gauge wire, you’ll melt the harness. The mentor approach to a classic car wiring harness upgrade involves calculating your total potential load and building in a 20 percent safety margin. This foresight ensures your electrical system remains stable even if you add more upgrades down the road, such as a high-end audio system or digital gauges.
Decoding the Harness: Circuits Wire Gauges and Modern Fuse Technology
Before you pull a single wire through the firewall, you must master the language of modern circuitry. Think of the harness as a technical blueprint where every color and number serves a specific purpose. A successful classic car wiring harness upgrade relies on your ability to decode these systems before they’re installed. Modern kits offer a massive leap forward from factory equipment, utilizing standardized color coding and wires with printed designations every few inches. This eliminates the guesswork that often leads to short circuits and frustration during the assembly process.
Modern fuse technology has shifted entirely toward reliable blade fuses. Unlike the glass tubes found in vintage fuse boxes, blade fuses offer a larger contact surface area and are much more resistant to vibration. This shift is part of a broader commitment to safety and precision. Adhering to the guidelines set by Wiring Standards Organizations ensures your project meets modern industrial benchmarks for heat resistance and conductivity. It’s about building a system that doesn’t just work, but lasts for another fifty years.
Choosing the Right Circuit Count for Your Build
You’ll typically choose between kits ranging from 8 to 28 circuits. An 8-circuit system is perfect for a stripped-down hot rod with just the essentials: ignition, headlights, turn signals, and wipers. However, most modern builds require more. If you plan to add power windows, electric fans, a digital dash, or an EFI system, you’ll need at least a 21-circuit harness. Always choose a kit with two or three more circuits than you currently need. This strategic move provides the flexibility to add a high-end audio system or seat heaters later without tearing the car apart again. If you’re feeling overwhelmed by the planning stage, The Ultimate Restomod Guide provides the structured framework you need to map out your entire electrical system.
Wire Gauge and Material Standards
Wire gauge refers to the thickness of the copper conductor. A lower gauge number means a thicker wire capable of carrying more amperage. For example, your main battery feed might be a 6-gauge cable, while a simple dash light only needs 18-gauge wire. Never compromise on material quality. High-quality kits use cross-linked polyethylene (XLPE) insulation, which can withstand temperatures up to 275 degrees Fahrenheit. This is far superior to the standard PVC insulation used in cheaper kits. Always verify that you’re using pure copper wire rather than aluminum-clad alternatives, as copper provides superior conductivity and long-term durability in a vibrating automotive environment.
Selecting the Right System: Direct Fit vs Universal vs EFI Integration
Choosing the specific architecture for your electrical system is the most consequential decision you’ll make during your build. It’s the pivot point between a project that flows smoothly and one that stalls in a sea of mismatched connectors. When you’re planning a classic car wiring harness upgrade, you must decide whether you want a system tailored to your car’s factory layout or a blank canvas that allows for total creative freedom. This choice dictates your routing strategy, your tool requirements, and the next hundred hours of your labor.
Direct Fit vs Universal Chassis Harnesses
Direct fit harnesses are engineered for specific vehicle years and models. These kits typically include factory-style connectors for your original headlight switch, ignition switch, and steering column. If you intend to keep your stock dashboard and original component locations, a direct fit “Classic Update” style kit is your fastest route to a reliable machine. It eliminates the need for tedious crimping on complex multi-pin connectors, allowing you to focus on the precision of your wire routing rather than terminal assembly.
Universal chassis harnesses offer the ultimate flexibility for the custom builder. If you’ve shaved your firewall, relocated the battery to the trunk, or installed a custom digital dash, a direct fit kit will only frustrate you with wires that are too short or connectors you don’t need. Universal kits provide extra-long wire leads that you cut to the exact length required for your specific layout. While this adds significant time to the installation, the result is a much cleaner engine bay with no coiled-up “service loops” hidden behind the fenders. It’s the preferred path for those who view the car’s electrical layout as a work of art.
The Critical Role of Standalone EFI Harnesses
Modern performance demands a sophisticated brain. When you’re executing a high-tech engine swap, you’re essentially installing two separate electrical systems that must learn to speak the same language. As detailed in the definitive guide to an LS engine swap, your engine control unit (ECU) requires a dedicated standalone harness to manage injectors, sensors, and ignition coils. Do not attempt to power these sensitive electronics through your main chassis fuse block.
Your classic car wiring harness upgrade must integrate with this engine nervous system at three primary points: the battery, the fuel pump, and the ignition-run signal. The mentor’s secret to a reliable EFI swap is isolation. Run your EFI power and ground wires directly to the battery terminals to avoid electrical “noise” from the alternator or starter. This prevents the phantom stalling and tuning glitches that plague many DIY builds. By treating the engine harness as a separate, high-priority system, you ensure that your modern power plant receives the clean signal it needs to perform at its peak.
Master the Installation: A Methodical Workflow for the DIY Builder
Mount your new fuse block before you even think about uncoiling the rest of the harness. This component serves as your anchor; every wire will radiate from this central point like spokes on a wheel. Adopting a methodical workflow is the only way to survive a classic car wiring harness upgrade without losing your mind. Work on one section of the car at a time, such as the headlight group or the dash cluster, and complete those connections fully before moving to the next area. This hub and spoke approach prevents the overwhelming feeling of a thousand loose ends hanging from your chassis at once.
Reliability in a moving vehicle comes down to the quality of your connections. While many builders from the previous generation swear by solder, modern automotive engineering favors high quality mechanical crimps. Solder creates a rigid point in the wire that can crack under the constant vibration of a high performance engine. A proper crimp allows the wire to remain flexible while maintaining 100 percent electrical contact. Achieving this level of precision requires patience and the right technique, ensuring your project remains roadworthy for decades to come.
Essential Tools for Precision Wiring
You cannot execute a professional level installation with a pair of cheap, stamped steel wire strippers. High quality ratcheting crimpers are a non-negotiable requirement for any serious builder. These tools ensure that every terminal is compressed with the exact amount of force needed to create a cold weld between the wire and the connector. Once the connection is made, protect it with adhesive-lined heat shrink to keep moisture and oxygen away from the copper. If you want to see the specific kit I use to achieve these results, check out my list of recommended gear for electrical work. Using the right tools transforms a daunting task into a satisfying exercise in craftsmanship.
Routing and Management for a Clean Engine Bay
Plan your wire paths to avoid heat sources like headers and moving parts like steering shafts. The goal is to make the harness disappear into the architecture of the car. Use bulkheads and rubber grommets to pass through the firewall safely; never run a wire through a raw metal hole that can chafe and cause a short circuit. As you route the wires, use plastic zip ties to hold the shape of the bundle, but don’t tighten them fully until the entire car is tested. The ultimate discipline is labeling every wire at both ends before you apply the final wrap or loom. This simple step saves hours of troubleshooting if you ever need to add a circuit or repair a component in the future. For those who want to master every aspect of their build, Restomod Academy offers the consulting services needed to push through the most complex technical hurdles.
Beyond the Installation: Testing Tuning and Long-Term Reliability
The moment of truth arrives when you finally reach for the battery cables. After weeks of meticulous routing and crimping, it’s tempting to simply clamp the terminals and turn the key. Resist that urge. A successful classic car wiring harness upgrade concludes with a disciplined testing phase that ensures your hard work remains safe and reliable. This is where you transition from a builder to a technician, verifying every connection before the first spark of life. You’ve built the nervous system; now you must ensure the signals are clear and the pathways are secure.
Grounding issues account for the vast majority of electrical gremlins in classic vehicles. In a vintage metal body, the chassis serves as the return path for every electron. If you’ve recently painted your frame or body, you’ve essentially insulated your grounds. Every ground point must be stripped to bare, shiny metal to ensure a low-resistance path. Use star washers to bite through any future oxidation, and consider running dedicated ground wires for high-draw components like electric fans or high-intensity headlights. These small steps prevent the flickering lights and erratic gauge readings that plague many DIY builds.
This phase of the build is just one part of your larger vision. Integrating your electrical work into the broader scope of the car requires careful coordination. You can find more on this in our guide on restomod project planning, which helps you synchronize your wiring with engine and interior milestones. Finalize your work by protecting the harness with high-quality split-braid loom and creating archival-quality documentation. A binder containing your specific wiring diagrams and custom circuit notes is a gift to your future self when it’s time for maintenance.
The First Power-Up: A Systematic Safety Check
Start by using a multimeter to verify continuity between your main ground points and the negative battery cable before you ever make a live connection. Once you’re confident, connect the battery through a low-amperage circuit breaker or a test light to identify any major shorts without blowing your new fuses. Test each function one by one: headlights, turn signals, brake lights, and dash illumination. This methodical approach allows you to isolate and resolve small errors before they become catastrophic failures. It’s about patience and precision, ensuring the safety of both your investment and your life.
Professional Consulting for Complex Electrical Hurdles
Even the most seasoned builders occasionally hit a technical wall, especially when integrating modern digital controllers with vintage switches. There is no shame in seeking a second set of eyes on a complex custom harness. Professional consulting can provide the clarity needed to bridge the gap between mechanical assembly and electronic tuning. If you’re ready to master the rest of your build with the same level of detail, Download The Ultimate Restomod Guide for your project. This resource serves as your mentor-led roadmap, taking you from a bare chassis to a high-performance machine that feels as reliable as a modern daily driver.
Ignite the Future of Your Build
You’ve moved from the fear of brittle insulation to the precision of a modern electrical blueprint. By choosing the right circuit count and mastering the methodical workflow of a classic car wiring harness upgrade, you’ve laid the foundation for a machine that is as dependable as it is beautiful. This isn’t just about making the lights work; it’s about the confidence to drive anywhere, anytime, without the shadow of a breakdown hanging over your journey. You’ve transitioned from a passive admirer to an active creator who understands the pulse of their machine.
Realizing this level of precision requires more than just tools; it requires a structured education. Brook Walsh founded Restomod Academy to provide the expert guidance and comprehensive project blueprints necessary to blend modern reliability with heritage aesthetics. You don’t have to navigate these technical waters alone. Start your build with The Ultimate Restomod Guide and transform your project into a professional grade masterpiece. Your workshop is ready, and your vision is within reach. Take that first step today and bring your vintage machine into the modern era with total confidence.
Frequently Asked Questions
How long does it take to rewire a classic car?
Expect to spend 40 to 60 hours on a full rewire if you are a focused DIY builder. This timeline includes the careful removal of the old harness, mounting the new fuse block, and routing wires to every corner of the chassis. Complex projects involving modern fuel injection or advanced audio systems will likely require additional time for integration. Don’t rush the process; methodical precision in the workshop prevents frustrating troubleshooting on the road later.
What is the difference between a chassis harness and an engine harness?
A chassis harness manages the vehicle’s body electronics, such as headlights, tail lights, and wipers. In contrast, an engine harness acts as a dedicated nervous system for the power plant, controlling fuel injectors, sensors, and ignition coils. For a successful classic car wiring harness upgrade, you must ensure these two systems communicate correctly at the ignition switch and fuel pump relay while keeping their primary power sources isolated to prevent electrical noise.
Can I use a universal harness for my specific model?
Yes, you can use a universal harness, but it requires significantly more labor than a direct fit kit. Universal systems provide extra long wire leads that you must cut and terminate yourself, offering the flexibility to hide wires or relocate components like the battery. While model specific kits save time by using factory style connectors, universal kits are the superior choice for custom builds with modified firewalls or non original dashboards where standard routing no longer applies.
Why should I avoid reusing my original 50-year-old wiring?
Original wiring suffers from decades of heat cycles that turn PVC insulation brittle and prone to cracking. Once the insulation fails, exposed copper can short against the chassis, leading to catastrophic electrical fires. Additionally, vintage copper develops internal corrosion that increases resistance, preventing your components from receiving full voltage. Replacing the old system is the only way to guarantee the reliability and safety required for modern driving conditions and high draw accessories.
How many circuits do I actually need for a restomod?
Most modern restomods require at least a 21-circuit harness to handle the increased load of contemporary upgrades. While a basic 12-circuit kit covers essentials like ignition and lighting, it won’t leave room for electric cooling fans, power seats, or a modern audio system. Always choose a harness with a few spare circuits beyond your current needs. This strategy ensures you can add future performance enhancements without having to tear into your carefully wrapped bundles again.
Do I need special tools for crimping and soldering?
Invest in a high quality ratcheting crimper rather than relying on inexpensive stamped steel tools. Ratcheting crimpers apply consistent, calibrated pressure to create a cold weld between the terminal and the wire, which is vital for automotive reliability. Avoid soldering large wire bundles, as solder creates a brittle point that can crack under constant vibration. Use adhesive lined heat shrink on every connection to seal out moisture and prevent oxygen from corroding the copper strands.
How do I integrate a modern ECU with a classic dash?
Integration requires matching the ECU output signals with your dashboard input requirements. Most modern engine computers provide digital signals for tachometers and speedometers, which may require a signal converter to drive original mechanical or early electronic gauges. Alternatively, many builders opt for a full digital dash that plugs directly into the ECU diagnostic port. This approach simplifies the wiring and provides much more accurate data than vintage analog equipment from the previous century.
Will a new wiring harness improve my car performance?
A new harness improves performance by delivering consistent, full voltage to your ignition system and fuel pump. Old, high resistance wiring often causes weak sparks or sluggish pump speeds, which can lead to poor throttle response and engine stumbling. By executing a classic car wiring harness upgrade, you ensure that every modern component operates at its peak designed efficiency. It is the difference between a car that merely runs and one that truly performs with precision.
What if the most dangerous part of your vintage ride isn’t the rusted floorboards or the worn brakes, but the invisible copper veins hidden behind your dashboard? Decades of heat cycles and brittle insulation turn original electrical systems into ticking time bombs. Embarking on a classic car wiring harness upgrade is about more than just avoiding a fire; it’s the fundamental step to transforming a temperamental relic into a reliable machine. You deserve a car that starts on the first turn every single time, whether you’re heading to a local show or a cross-country tour.
I understand how overwhelming it feels to stare at a tangled nest of wires or a complex EFI diagram. It’s easy to feel defeated by a previous owner’s hack jobs and the sheer volume of modern connections required for A/C and power windows. This mentor-led guide serves as your 2026 restomod roadmap, giving you the confidence to choose the right system and execute a clean installation. We’ll break down the selection process, explain how to integrate modern technology safely, and show you how to achieve a professional engine bay that looks as good as it performs.
Key Takeaways
- Identify the hidden dangers of brittle insulation and replace outdated fuse blocks to eliminate the primary causes of vintage electrical failure.
- Select a circuit system that accounts for both your current needs and future performance additions like modern fuel injection or climate control.
- Evaluate the differences between direct fit and universal kits to determine the best path for your classic car wiring harness upgrade.
- Adopt a methodical installation workflow that begins at the fuse block and moves outward to ensure a clean engine bay and organized interior.
- Execute a systematic power up sequence to verify every circuit and resolve grounding issues before you finalize the build.
The Electrical Foundation: Why Your Classic Needs a Modern Nervous System
Strip away the chrome and the paint, and you’ll find the most neglected component of any project car: the wiring. Think of your electrical system as the nervous system of your vehicle. If the signals don’t reach the heart, the machine stays dead. Embarking on a classic car wiring harness upgrade isn’t just about convenience; it’s a safety imperative. Most factory harnesses were designed for a 10-year lifespan, yet we’re asking them to perform 50 or 60 years later. Understanding What is a Wiring Harness? helps clarify why these bundles of copper and plastic are so critical to your build’s integrity. When you’re learning what is a restomod, you quickly realize that reliability is the cornerstone of the entire movement.
Examine the back of your factory fuse block. You’ll likely see melted plastic or discoloration around the heater or headlight circuits. These vintage blocks are the primary failure point because they rely on tension clips that lose their spring over time. This creates high resistance, which generates heat and eventually leads to failure. A modern system replaces this archaic technology with blade-style fuses and integrated relays, moving the heavy electrical load away from your sensitive dash switches and into a controlled environment.
Assessing the Risks of Vintage Insulation
Heat cycles are the enemy of vintage electronics. Over five decades, the engine bay’s temperature swings bake the original PVC insulation until it becomes as brittle as dry pasta. If you can’t bend a wire without the insulation cracking, you’re driving a fire hazard. Look for green crust on exposed copper tips; this oxidation increases resistance and chokes your components of the voltage they need. Installing a modern, fire-resistant harness provides the peace of mind that your hard work won’t go up in smoke during a Sunday cruise. It’s the first step in transitioning from a passive owner to an active creator who understands every inch of their machine.
Planning for Modern Power Demands
Original wiring was never intended to handle the appetite of 21st-century technology. In the 1960s, a 35-amp generator was plenty for a radio and some incandescent bulbs. Today, a high-performance restomod might feature a 140-amp alternator to power dual electric fans, high-pressure fuel pumps, and modern climate control. If you try to pull that much current through a factory 10-gauge wire, you’ll melt the harness. The mentor approach to a classic car wiring harness upgrade involves calculating your total potential load and building in a 20 percent safety margin. This foresight ensures your electrical system remains stable even if you add more upgrades down the road, such as a high-end audio system or digital gauges.
Decoding the Harness: Circuits Wire Gauges and Modern Fuse Technology
Before you pull a single wire through the firewall, you must master the language of modern circuitry. Think of the harness as a technical blueprint where every color and number serves a specific purpose. A successful classic car wiring harness upgrade relies on your ability to decode these systems before they’re installed. Modern kits offer a massive leap forward from factory equipment, utilizing standardized color coding and wires with printed designations every few inches. This eliminates the guesswork that often leads to short circuits and frustration during the assembly process.
Modern fuse technology has shifted entirely toward reliable blade fuses. Unlike the glass tubes found in vintage fuse boxes, blade fuses offer a larger contact surface area and are much more resistant to vibration. This shift is part of a broader commitment to safety and precision. Adhering to the guidelines set by Wiring Standards Organizations ensures your project meets modern industrial benchmarks for heat resistance and conductivity. It’s about building a system that doesn’t just work, but lasts for another fifty years.
Choosing the Right Circuit Count for Your Build
You’ll typically choose between kits ranging from 8 to 28 circuits. An 8-circuit system is perfect for a stripped-down hot rod with just the essentials: ignition, headlights, turn signals, and wipers. However, most modern builds require more. If you plan to add power windows, electric fans, a digital dash, or an EFI system, you’ll need at least a 21-circuit harness. Always choose a kit with two or three more circuits than you currently need. This strategic move provides the flexibility to add a high-end audio system or seat heaters later without tearing the car apart again. If you’re feeling overwhelmed by the planning stage, The Ultimate Restomod Guide provides the structured framework you need to map out your entire electrical system.
Wire Gauge and Material Standards
Wire gauge refers to the thickness of the copper conductor. A lower gauge number means a thicker wire capable of carrying more amperage. For example, your main battery feed might be a 6-gauge cable, while a simple dash light only needs 18-gauge wire. Never compromise on material quality. High-quality kits use cross-linked polyethylene (XLPE) insulation, which can withstand temperatures up to 275 degrees Fahrenheit. This is far superior to the standard PVC insulation used in cheaper kits. Always verify that you’re using pure copper wire rather than aluminum-clad alternatives, as copper provides superior conductivity and long-term durability in a vibrating automotive environment.
Selecting the Right System: Direct Fit vs Universal vs EFI Integration
Choosing the specific architecture for your electrical system is the most consequential decision you’ll make during your build. It’s the pivot point between a project that flows smoothly and one that stalls in a sea of mismatched connectors. When you’re planning a classic car wiring harness upgrade, you must decide whether you want a system tailored to your car’s factory layout or a blank canvas that allows for total creative freedom. This choice dictates your routing strategy, your tool requirements, and the next hundred hours of your labor.
Direct Fit vs Universal Chassis Harnesses
Direct fit harnesses are engineered for specific vehicle years and models. These kits typically include factory-style connectors for your original headlight switch, ignition switch, and steering column. If you intend to keep your stock dashboard and original component locations, a direct fit “Classic Update” style kit is your fastest route to a reliable machine. It eliminates the need for tedious crimping on complex multi-pin connectors, allowing you to focus on the precision of your wire routing rather than terminal assembly.
Universal chassis harnesses offer the ultimate flexibility for the custom builder. If you’ve shaved your firewall, relocated the battery to the trunk, or installed a custom digital dash, a direct fit kit will only frustrate you with wires that are too short or connectors you don’t need. Universal kits provide extra-long wire leads that you cut to the exact length required for your specific layout. While this adds significant time to the installation, the result is a much cleaner engine bay with no coiled-up “service loops” hidden behind the fenders. It’s the preferred path for those who view the car’s electrical layout as a work of art.
The Critical Role of Standalone EFI Harnesses
Modern performance demands a sophisticated brain. When you’re executing a high-tech engine swap, you’re essentially installing two separate electrical systems that must learn to speak the same language. As detailed in the definitive guide to an LS engine swap, your engine control unit (ECU) requires a dedicated standalone harness to manage injectors, sensors, and ignition coils. Do not attempt to power these sensitive electronics through your main chassis fuse block.
Your classic car wiring harness upgrade must integrate with this engine nervous system at three primary points: the battery, the fuel pump, and the ignition-run signal. The mentor’s secret to a reliable EFI swap is isolation. Run your EFI power and ground wires directly to the battery terminals to avoid electrical “noise” from the alternator or starter. This prevents the phantom stalling and tuning glitches that plague many DIY builds. By treating the engine harness as a separate, high-priority system, you ensure that your modern power plant receives the clean signal it needs to perform at its peak.
Master the Installation: A Methodical Workflow for the DIY Builder
Mount your new fuse block before you even think about uncoiling the rest of the harness. This component serves as your anchor; every wire will radiate from this central point like spokes on a wheel. Adopting a methodical workflow is the only way to survive a classic car wiring harness upgrade without losing your mind. Work on one section of the car at a time, such as the headlight group or the dash cluster, and complete those connections fully before moving to the next area. This hub and spoke approach prevents the overwhelming feeling of a thousand loose ends hanging from your chassis at once.
Reliability in a moving vehicle comes down to the quality of your connections. While many builders from the previous generation swear by solder, modern automotive engineering favors high quality mechanical crimps. Solder creates a rigid point in the wire that can crack under the constant vibration of a high performance engine. A proper crimp allows the wire to remain flexible while maintaining 100 percent electrical contact. Achieving this level of precision requires patience and the right technique, ensuring your project remains roadworthy for decades to come.
Essential Tools for Precision Wiring
You cannot execute a professional level installation with a pair of cheap, stamped steel wire strippers. High quality ratcheting crimpers are a non-negotiable requirement for any serious builder. These tools ensure that every terminal is compressed with the exact amount of force needed to create a cold weld between the wire and the connector. Once the connection is made, protect it with adhesive-lined heat shrink to keep moisture and oxygen away from the copper. If you want to see the specific kit I use to achieve these results, check out my list of recommended gear for electrical work. Using the right tools transforms a daunting task into a satisfying exercise in craftsmanship.
Routing and Management for a Clean Engine Bay
Plan your wire paths to avoid heat sources like headers and moving parts like steering shafts. The goal is to make the harness disappear into the architecture of the car. Use bulkheads and rubber grommets to pass through the firewall safely; never run a wire through a raw metal hole that can chafe and cause a short circuit. As you route the wires, use plastic zip ties to hold the shape of the bundle, but don’t tighten them fully until the entire car is tested. The ultimate discipline is labeling every wire at both ends before you apply the final wrap or loom. This simple step saves hours of troubleshooting if you ever need to add a circuit or repair a component in the future. For those who want to master every aspect of their build, Restomod Academy offers the consulting services needed to push through the most complex technical hurdles.
Beyond the Installation: Testing Tuning and Long-Term Reliability
The moment of truth arrives when you finally reach for the battery cables. After weeks of meticulous routing and crimping, it’s tempting to simply clamp the terminals and turn the key. Resist that urge. A successful classic car wiring harness upgrade concludes with a disciplined testing phase that ensures your hard work remains safe and reliable. This is where you transition from a builder to a technician, verifying every connection before the first spark of life. You’ve built the nervous system; now you must ensure the signals are clear and the pathways are secure.
Grounding issues account for the vast majority of electrical gremlins in classic vehicles. In a vintage metal body, the chassis serves as the return path for every electron. If you’ve recently painted your frame or body, you’ve essentially insulated your grounds. Every ground point must be stripped to bare, shiny metal to ensure a low-resistance path. Use star washers to bite through any future oxidation, and consider running dedicated ground wires for high-draw components like electric fans or high-intensity headlights. These small steps prevent the flickering lights and erratic gauge readings that plague many DIY builds.
This phase of the build is just one part of your larger vision. Integrating your electrical work into the broader scope of the car requires careful coordination. You can find more on this in our guide on restomod project planning, which helps you synchronize your wiring with engine and interior milestones. Finalize your work by protecting the harness with high-quality split-braid loom and creating archival-quality documentation. A binder containing your specific wiring diagrams and custom circuit notes is a gift to your future self when it’s time for maintenance.
The First Power-Up: A Systematic Safety Check
Start by using a multimeter to verify continuity between your main ground points and the negative battery cable before you ever make a live connection. Once you’re confident, connect the battery through a low-amperage circuit breaker or a test light to identify any major shorts without blowing your new fuses. Test each function one by one: headlights, turn signals, brake lights, and dash illumination. This methodical approach allows you to isolate and resolve small errors before they become catastrophic failures. It’s about patience and precision, ensuring the safety of both your investment and your life.
Professional Consulting for Complex Electrical Hurdles
Even the most seasoned builders occasionally hit a technical wall, especially when integrating modern digital controllers with vintage switches. There is no shame in seeking a second set of eyes on a complex custom harness. Professional consulting can provide the clarity needed to bridge the gap between mechanical assembly and electronic tuning. If you’re ready to master the rest of your build with the same level of detail, Download The Ultimate Restomod Guide for your project. This resource serves as your mentor-led roadmap, taking you from a bare chassis to a high-performance machine that feels as reliable as a modern daily driver.
Ignite the Future of Your Build
You’ve moved from the fear of brittle insulation to the precision of a modern electrical blueprint. By choosing the right circuit count and mastering the methodical workflow of a classic car wiring harness upgrade, you’ve laid the foundation for a machine that is as dependable as it is beautiful. This isn’t just about making the lights work; it’s about the confidence to drive anywhere, anytime, without the shadow of a breakdown hanging over your journey. You’ve transitioned from a passive admirer to an active creator who understands the pulse of their machine.
Realizing this level of precision requires more than just tools; it requires a structured education. Brook Walsh founded Restomod Academy to provide the expert guidance and comprehensive project blueprints necessary to blend modern reliability with heritage aesthetics. You don’t have to navigate these technical waters alone. Start your build with The Ultimate Restomod Guide and transform your project into a professional grade masterpiece. Your workshop is ready, and your vision is within reach. Take that first step today and bring your vintage machine into the modern era with total confidence.
Frequently Asked Questions
How long does it take to rewire a classic car?
Expect to spend 40 to 60 hours on a full rewire if you are a focused DIY builder. This timeline includes the careful removal of the old harness, mounting the new fuse block, and routing wires to every corner of the chassis. Complex projects involving modern fuel injection or advanced audio systems will likely require additional time for integration. Don’t rush the process; methodical precision in the workshop prevents frustrating troubleshooting on the road later.
What is the difference between a chassis harness and an engine harness?
A chassis harness manages the vehicle’s body electronics, such as headlights, tail lights, and wipers. In contrast, an engine harness acts as a dedicated nervous system for the power plant, controlling fuel injectors, sensors, and ignition coils. For a successful classic car wiring harness upgrade, you must ensure these two systems communicate correctly at the ignition switch and fuel pump relay while keeping their primary power sources isolated to prevent electrical noise.
Can I use a universal harness for my specific model?
Yes, you can use a universal harness, but it requires significantly more labor than a direct fit kit. Universal systems provide extra long wire leads that you must cut and terminate yourself, offering the flexibility to hide wires or relocate components like the battery. While model specific kits save time by using factory style connectors, universal kits are the superior choice for custom builds with modified firewalls or non original dashboards where standard routing no longer applies.
Why should I avoid reusing my original 50-year-old wiring?
Original wiring suffers from decades of heat cycles that turn PVC insulation brittle and prone to cracking. Once the insulation fails, exposed copper can short against the chassis, leading to catastrophic electrical fires. Additionally, vintage copper develops internal corrosion that increases resistance, preventing your components from receiving full voltage. Replacing the old system is the only way to guarantee the reliability and safety required for modern driving conditions and high draw accessories.
How many circuits do I actually need for a restomod?
Most modern restomods require at least a 21-circuit harness to handle the increased load of contemporary upgrades. While a basic 12-circuit kit covers essentials like ignition and lighting, it won’t leave room for electric cooling fans, power seats, or a modern audio system. Always choose a harness with a few spare circuits beyond your current needs. This strategy ensures you can add future performance enhancements without having to tear into your carefully wrapped bundles again.
Do I need special tools for crimping and soldering?
Invest in a high quality ratcheting crimper rather than relying on inexpensive stamped steel tools. Ratcheting crimpers apply consistent, calibrated pressure to create a cold weld between the terminal and the wire, which is vital for automotive reliability. Avoid soldering large wire bundles, as solder creates a brittle point that can crack under constant vibration. Use adhesive lined heat shrink on every connection to seal out moisture and prevent oxygen from corroding the copper strands.
How do I integrate a modern ECU with a classic dash?
Integration requires matching the ECU output signals with your dashboard input requirements. Most modern engine computers provide digital signals for tachometers and speedometers, which may require a signal converter to drive original mechanical or early electronic gauges. Alternatively, many builders opt for a full digital dash that plugs directly into the ECU diagnostic port. This approach simplifies the wiring and provides much more accurate data than vintage analog equipment from the previous century.
Will a new wiring harness improve my car performance?
A new harness improves performance by delivering consistent, full voltage to your ignition system and fuel pump. Old, high resistance wiring often causes weak sparks or sluggish pump speeds, which can lead to poor throttle response and engine stumbling. By executing a classic car wiring harness upgrade, you ensure that every modern component operates at its peak designed efficiency. It is the difference between a car that merely runs and one that truly performs with precision.