
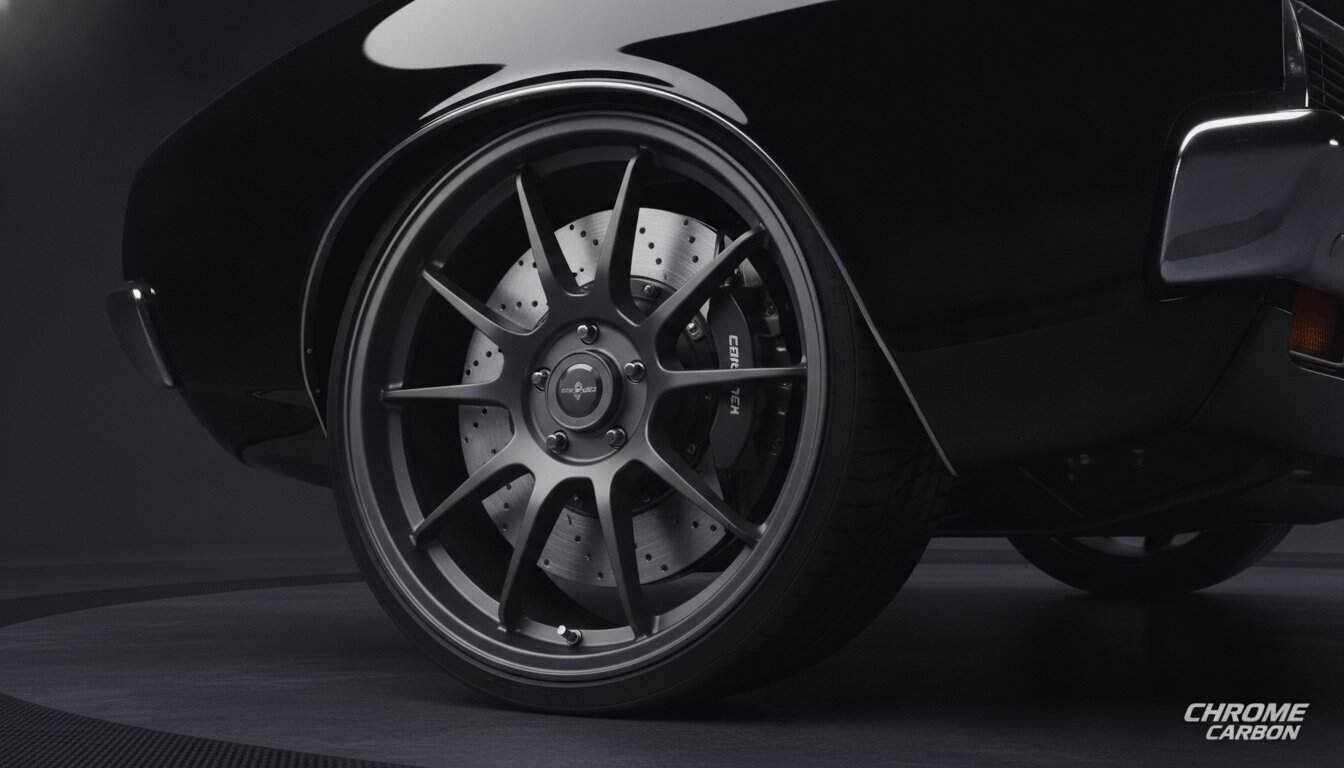
Picture yourself descending a winding mountain pass in your prized 1967 Camaro, only to feel the brake pedal grow soft and unresponsive as heat soaks into the vintage drums. It’s a moment where nostalgia meets a cold, hard reality; your heritage machine is carrying 21st-century speed on 1960s safety technology. You deserve to drive with the confidence that your car will stop as fast as it goes. We agree that the thrill of the open road shouldn’t be overshadowed by the fear of brake fade or the uncertainty of an old single-circuit system.
This guide empowers you to master the technical landscape of big brake kits for classic cars, ensuring you achieve modern, supercar-level stopping power without compromising your build’s character. You’ll learn to navigate the critical 17-inch wheel clearance requirements and understand why a matched master cylinder is the heartbeat of your hydraulic system. We’re going to walk through the meticulous process of selecting a complete kit that turns your restoration project into a high-performance masterpiece that’s as safe as it is beautiful.
Key Takeaways
- Discover why original drum brake systems are a liability in modern traffic and how to transition your vintage ride to a safe, dual-circuit hydraulic setup.
- Evaluate the engineering advantages of multi-piston calipers and vented rotors when selecting big brake kits for classic cars to ensure fade-free performance.
- Learn to use physical templates to verify wheel spoke clearance and understand why 17-inch wheels are often the entry point for modern stopping power.
- Master the relationship between master cylinder bore size and pedal effort to achieve a firm, confidence-inspiring feel that matches your new hardware.
- Follow professional installation protocols including bench bleeding and the critical bedding-in process to guarantee your project’s longevity and safety.
The Necessity of Modern Stopping Power: Why Factory Brakes Fail
Your vintage machine was built for a world that no longer exists. In the 1960s, highway speeds were lower, traffic was sparse, and a single-circuit drum brake system was considered adequate. Today, you are sharing the road with distracted drivers in modern SUVs that can stop on a dime. Relying on fifty year old technology in this environment isn’t just a nostalgic quirk; it’s a genuine safety risk. When you press that pedal, you need to know that your car will react with the same precision as a contemporary performance vehicle.
Upgrading to big brake kits for classic cars is about more than just a simple disc conversion. While a basic swap might give you better initial bite, a true big brake system is an engineered solution designed to manage massive amounts of kinetic energy. It replaces small, thin rotors and single-piston calipers with high-capacity components that can withstand repeated hard stops without protest. This is the foundation of any serious build, ensuring that your car’s ability to stop always exceeds its ability to go.
To better understand this concept, watch this helpful video:
If you have followed the definitive guide to an LS engine swap, you’ve likely doubled your car’s original horsepower. This increase in speed demands a proportional increase in braking force. You cannot expect a braking system designed for 200 horsepower to safely manage the velocity generated by a modern 500 horsepower power plant. Physics is unforgiving, and every additional mile per hour requires exponentially more effort to scrub away.
Kinetic Energy and Heat Dissipation
The primary job of your brakes is to turn motion into heat. Heavy classic steel carries immense momentum, and small factory rotors quickly reach their thermal limits. To appreciate the engineering involved, it helps to understand how disc brakes work at a fundamental level. Larger rotors provide a greater surface area, which acts as a heat sink to draw warmth away from the pads. Thermal soak occurs when the rotor’s mass can no longer absorb or dissipate the heat generated by friction, leading to a dangerous loss of stopping power known as brake fade.
Modern Traffic Demands on Vintage Hardware
Research shows that tailgating is a factor in over 33% of all car crashes in the U.S. In a classic car with original drums, your stopping distance is significantly longer than the car in front of you. By installing big brake kits for classic cars, you close that performance gap. Beyond the raw data, there is a massive psychological benefit to a firm, predictable brake pedal. It transforms the driving experience from a stressful exercise in distance management into a confident, spirited adventure where you are always in total control of your machine.
Anatomy of a Big Brake Kit: Calipers, Rotors, and Pads
Understanding the individual components of big brake kits for classic cars is essential for any builder who values precision over guesswork. A well engineered kit is a symphony of parts working in unison to provide repeatable, high performance stopping power. When you move beyond the basic disc conversion, you are looking at specialized hardware designed to handle the thermal loads of spirited driving. To fully appreciate these advancements, one should look at the evolution of brake technology over the last few decades.
The caliper is the most visible part of the upgrade, but its beauty is secondary to its function. Multi-piston designs, typically featuring 4 or 6 pistons, distribute pressure evenly across the brake pad surface. This eliminates the uneven wear and tapering common in older, single-piston designs. By spreading the clamping force over a larger area, you achieve a more immediate and consistent bite. If you are feeling overwhelmed by the technical specs, checking out our recommended gear can help simplify your selection process.
Fixed vs Floating Calipers
High end restomods almost exclusively utilize fixed multi-piston calipers rather than the floating versions found on factory cars. In a fixed design, the caliper body is bolted directly to the spindle, and pistons on both sides of the rotor squeeze the pads simultaneously. This setup provides superior pedal feel and eliminates the flex associated with sliding pins. High strength bridge bolts significantly increase caliper stiffness by preventing the housing from spreading under extreme hydraulic pressure. When you calculate piston area, remember that larger bores increase clamping force but also require more fluid volume from your master cylinder.
Rotor Metallurgy and Design
Your choice of rotors dictates how effectively your system handles heat. While standard cast iron is common, high carbon rotors offer better thermal stability and resistance to cracking under stress. Examine the internal cooling vanes; directional vanes act like a centrifugal pump, pulling cool air through the center of the rotor as it spins. For those looking to reduce unsprung weight, two-piece rotors feature an aluminum center hat bolted to a cast iron friction ring. This design saves several pounds per corner, which improves both suspension response and acceleration.
Don’t overlook the smaller details like brake pads and flex lines. Modern ceramic or semi-metallic compounds allow you to balance a quiet street ride with the aggressive bite needed for the track. Swapping your old rubber hoses for stainless steel braided lines is a mandatory step. These lines do not expand under pressure, which effectively eliminates that spongy pedal feel. Integrating these high performance components into your build ensures that your big brake kits for classic cars deliver on their promise of modern safety and control.
Fitment and Clearance: The 17-Inch Wheel Requirement
You’ve selected your hardware, but now comes the moment of truth: will it actually fit inside your wheels? One of the most common hurdles when installing big brake kits for classic cars is the physical space required for modern multi-piston calipers. While your factory 14-inch or 15-inch steelies look great for a period-correct restoration, they simply don’t have the internal diameter to house a high-performance rotor and caliper assembly. Moving to 17-inch wheels is often a mandatory step to unlock modern stopping power and ensure the safety of your build.
Before you click “buy,” you must verify two types of clearance: radial and lateral. Radial clearance is the distance from the center of the hub to the outer edge of the caliper. Lateral clearance is the overhang, or how far the caliper sticks out toward the back of the wheel spokes. Even if a wheel has a large enough diameter, the spokes might still hit the face of a 6-piston caliper. This is where engineering principles found in professional texts like Brake Design and Safety become essential shop floor knowledge for the serious builder.
The Rotor Size vs Wheel Diameter Chart
Use these general guidelines as a starting point, but always check the specific manufacturer’s template for your chosen big brake kits for classic cars:
- 11-inch rotors: Usually fit inside most 15-inch wheels.
- 12.19-inch to 13-inch rotors: Typically require a minimum of a 17-inch wheel.
- 14-inch rotors and larger: Expect to run 18-inch or 19-inch wheels to clear the massive caliper bridge.
Measuring Caliper Overhang
Don’t rely on your eyes alone. Most reputable manufacturers provide a 1:1 scale paper template. Print it out, glue it to a piece of cardboard, and place it against the mounting surface of your wheel. This simple step reveals exactly where the caliper will sit in relation to the spokes. If you find your spokes are too close, you may need a wheel with a different offset or a more aggressive backspacing. While spacers are an option for some, choosing a wheel designed for big brake clearance is always the safer, more professional route. Seeing a set of high-carbon rotors behind a set of open-spoke 17-inch wheels doesn’t just improve safety; it creates an aggressive, purposeful aesthetic that defines a high-quality restomod.
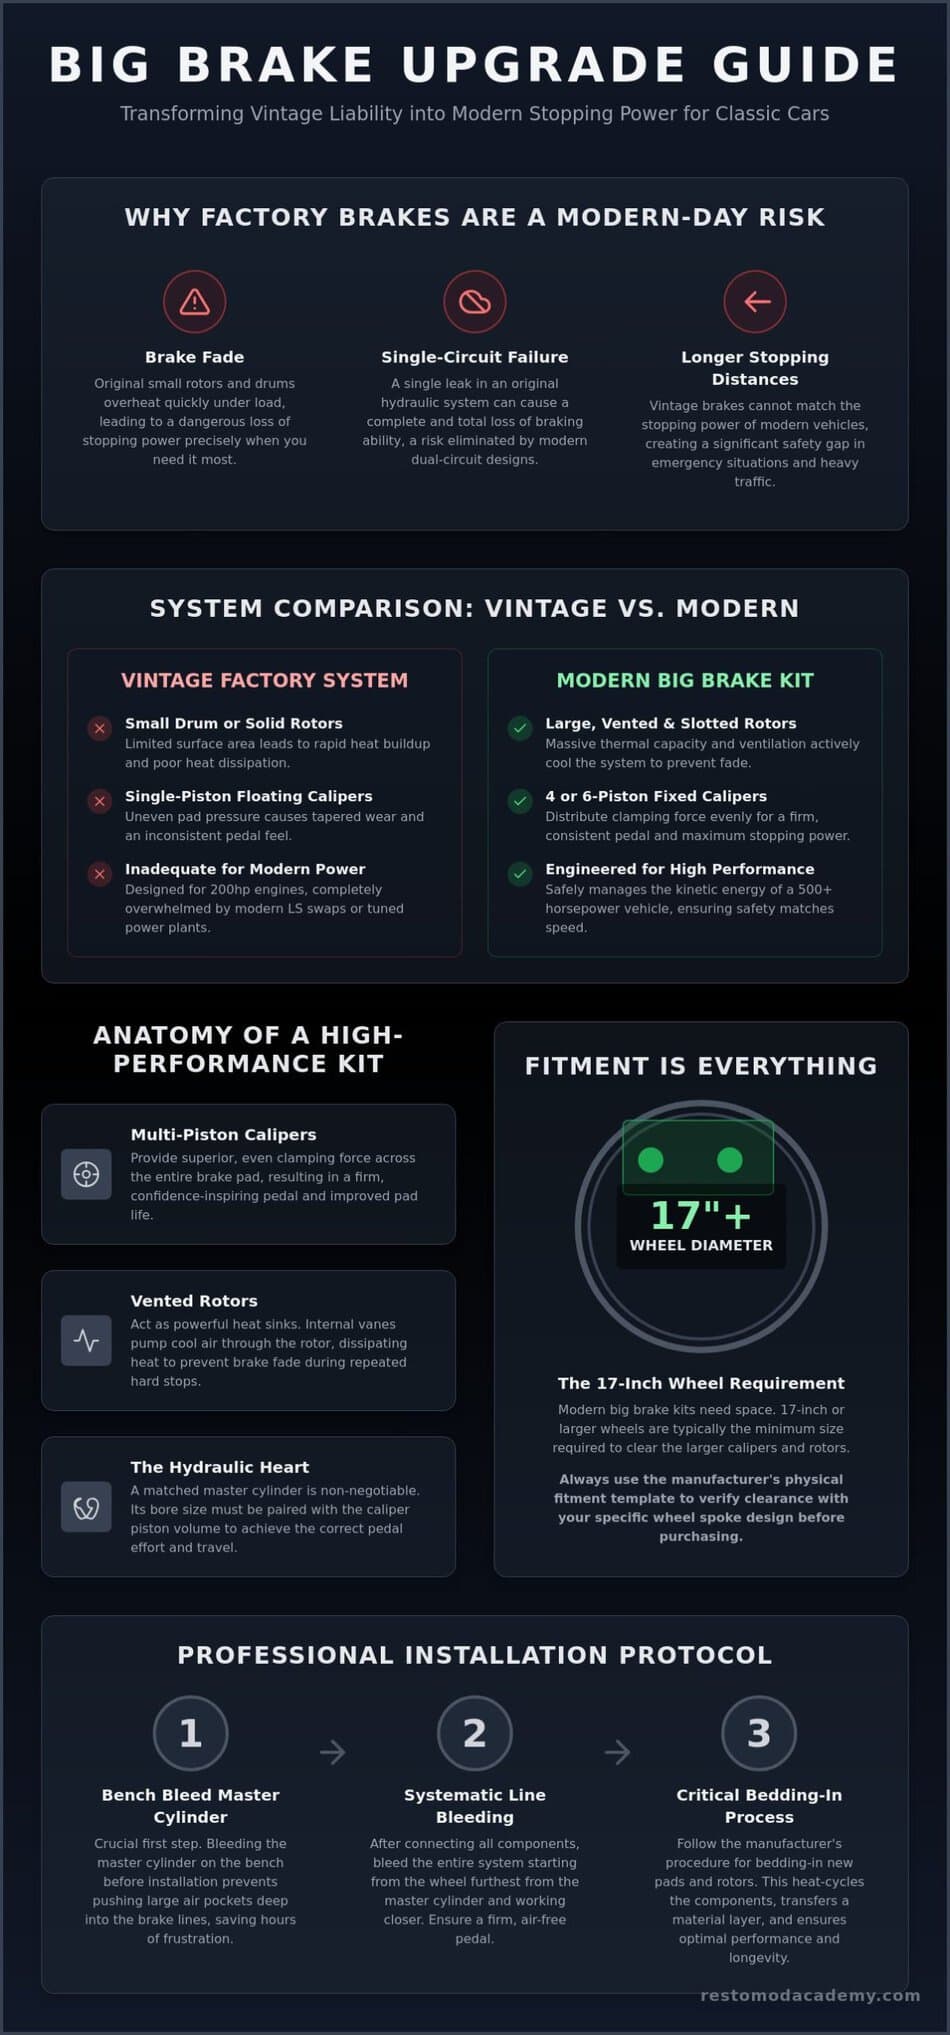
The Hydraulic Heart: Master Cylinders and Proportioning Valves
Think of your master cylinder as the conductor of a high-performance orchestra. You can install the most expensive big brake kits for classic cars on the market, but if the hydraulic volume doesn’t match the caliper requirements, the performance will be discordant and dangerous. Your factory master cylinder was designed to move a specific amount of fluid to small wheel cylinders or single-piston calipers. When you switch to 4-piston or 6-piston units, the volume of fluid required to move those pistons increases significantly. If you don’t account for this, you’ll end up with a pedal that either feels like a brick or sinks uselessly to the floor.
Bore size math is where many builders stumble. It’s a delicate game of leverage and volume that dictates your entire driving experience. Consider these two paths:
- Smaller bore sizes, such as 7/8-inch, increase line pressure and reduce leg effort but result in a longer pedal stroke.
- Larger bore sizes, like 1-1/8-inch, move more fluid with a shorter stroke but require significantly more physical force to stop the car.
For a manual brake setup, a 15/16-inch bore is typically the sweet spot for most enthusiasts. If you are running a power booster, you might move up to a 1-inch or 1-1/8-inch bore to maintain a firm, modern pedal feel. Precision here is the difference between a car that stops with a light touch and one that requires both feet on the pedal during a panic stop.
Tandem Master Cylinders and Safety
If your classic car still relies on a single-reservoir master cylinder, stop what you are doing and prioritize this upgrade immediately. A single-circuit system means that one leak in a wheel cylinder or a rusted brake line can result in total hydraulic failure. Upgrading to a tandem, dual-reservoir master cylinder ensures that your front and rear systems operate independently. If one side fails, the other remains functional to bring you to a stop. This is a foundational pillar of safety that we discuss extensively in the definitive guide to an LS engine swap, especially since modern high-performance engines often change the vacuum profile available for power assist.
Proportioning and Residual Valves
Achieving perfect balance is vital when integrating big brake kits for classic cars into a vintage chassis. Since most of your stopping power comes from the front, you must prevent the rear wheels from locking up prematurely, which can lead to a dangerous spin. An adjustable proportioning valve allows you to fine-tune the pressure sent to the rear, tailoring the bias to your car’s specific weight distribution. If your master cylinder is mounted below the level of the calipers, such as on a frame rail, you must also install residual pressure valves. These simple components maintain a small amount of pressure in the lines to prevent fluid from draining back into the master cylinder, ensuring your pedal is always ready to act.
For a complete roadmap of your build’s hydraulic needs, explore our Premium Project Blueprints.
Installation Strategy: From Bench Bleeding to Bedding In
Grab your torque wrench and clear your workbench; it is time to transition from theory to the tangible labor of the workshop. Installing big brake kits for classic cars is a rewarding process that demands a high level of precision. Begin by stripping your factory components down to the bare spindle. This is your foundation, so inspect it for any signs of fatigue or casting flaws. Use a wire brush to remove decades of road grime and rust, ensuring a perfectly flat mating surface for the new caliper brackets. If your spindle isn’t clean and true, your caliper alignment will be off from the start.
Before you even think about bolting the master cylinder to the firewall, you must perform a thorough bench bleed. This process involves cycling fluid through the master cylinder while it is secured in a vise, purging every last bubble of air from the internal bores. If you skip this step, you will likely spend hours chasing a spongy pedal that never quite firms up. When it comes to plumbing, take your time with new hard lines. Use a high-quality double-flaring tool to create leak-free connections. Precision in these small details ensures the modern reliability that defines a true restomod project.
Spindle and Bracket Alignment
Proper alignment is where many DIY projects encounter hurdles. Once the bracket is installed, verify that the caliper is perfectly centered over the rotor. Most kits include shims for this exact purpose; use them to achieve a symmetrical gap on both sides of the rotor. You must also check for steering linkage interference. Turn the steering wheel to full lock in both directions to ensure that the calipers or flex lines do not contact the frame or suspension arms. This level of scrutiny is what separates a professional build from a dangerous one, and it is a core principle we advocate for in our what is a restomod philosophy.
The Bedding-In Process
The final step in your journey is the bedding-in procedure, which is critical for transferring a uniform layer of friction material from the pads to the rotors. Find a safe, secluded stretch of road and perform a series of approximately ten deceleration cycles from 60 mph down to 10 mph using moderate pressure. It is imperative that you never come to a complete stop during these cycles, as doing so can leave uneven deposits on the hot rotor and cause future vibrations. After the cycles are complete, drive for several miles without using the brakes to allow the system to cool gradually. A successfully bedded rotor will often exhibit a distinct blue-grey tint, signaling that your machine is ready to deliver the modern stopping power you’ve worked so hard to achieve.
Take Command of Your Restoration Journey
Modernizing your vintage ride is more than just a hobby; it’s a commitment to precision engineering and safety. By integrating big brake kits for classic cars, you’ve bridged the gap between heritage aesthetics and 21st-century performance. You now understand that stopping power isn’t just about a flashy caliper. It’s a system-wide calculation involving wheel clearance, hydraulic volume, and the meticulous art of bedding in your hardware. These steps ensure that your car remains a joy to drive and a safe legacy for years to come.
The transition from a passive admirer to an active creator requires a reliable roadmap. Under the mentor-led instruction of Brook Walsh, you can master every pillar of your build with a system-wide approach to safety. Our DIY restomod community values the pride of personal labor and the precision of a well-executed project. To ensure your next upgrade is as seamless as your last, download The Ultimate Restomod Guide to plan your complete safety and performance overhaul. It’s time to step back into the workshop and turn your vision into a high-performance reality. Your machine is waiting.
Frequently Asked Questions
Do I really need a big brake kit for a street-driven classic car?
Yes, especially if you’ve increased horsepower or frequently drive in modern traffic. While factory brakes were adequate for the sparse roads of the 1960s, today’s SUVs can stop much faster than a vintage drum system. A big brake kit provides the repeatable stopping power and heat management needed to avoid collisions in stop and go highway environments. It ensures your car’s safety profile matches its performance potential.
Will a big brake kit fit under my original 15-inch Rally wheels?
Generally, you will find that most big brake kits for classic cars require at least a 17-inch wheel. The larger diameter is necessary to clear the increased rotor size and the bulk of multi-piston calipers. While some specialized 11-inch kits exist for smaller wheels, they don’t offer the same thermal capacity as larger systems. Always use the manufacturer’s paper template to verify both radial and lateral clearance before purchasing wheels.
Can I install a front big brake kit while keeping drum brakes in the rear?
You can certainly start with the front, but it requires careful hydraulic balancing. Since the front brakes perform roughly 70 percent of the stopping work, upgrading them provides the most immediate safety benefit. You must install an adjustable proportioning valve to fine-tune the pressure and prevent the rear drums from locking up prematurely. For the best results, plan for a full four-wheel disc conversion as your project evolves.
What is the difference between a 4-piston and a 6-piston caliper?
The primary difference lies in clamping force distribution and pad surface area. A 6-piston caliper uses three pairs of pistons to apply pressure more evenly across a longer brake pad, which reduces pad taper and improves pedal feel. While 4-piston units are excellent for most street applications, 6-piston designs offer superior heat management for heavier vehicles. Choosing the right count depends on your vehicle’s weight and intended driving style.
Do I need to upgrade my master cylinder when installing a big brake kit?
Yes, this is a critical step that you shouldn’t skip. Modern multi-piston calipers have a much larger internal fluid volume than factory wheel cylinders or single-piston units. Your stock master cylinder won’t move enough fluid to fully engage the new pistons, leading to a dangerously long pedal stroke. Upgrading to a tandem master cylinder with a bore size matched to your new calipers is essential for proper hydraulic leverage.
How much of a difference does a big brake kit make in stopping distance?
The difference is often dramatic and can shave dozens of feet off your 60-to-0 mph stopping distance. More importantly, big brake kits for classic cars provide consistency that factory parts cannot match. While original drums might stop well once, they quickly fade after repeated use as heat builds up. Modern kits maintain their performance stop after stop, giving you predictable control during spirited drives or emergency situations.
Are drilled and slotted rotors better than plain rotors for a restomod?
Drilled and slotted rotors offer distinct advantages for high-performance builds by venting the gases and dust that build up between the pad and rotor. Slots help maintain a clean friction surface, while cross-drilling increases the surface area available for cooling. For most restomods, these rotors also provide a purposeful, aggressive aesthetic that looks fantastic behind modern wheels. They signal that your build is engineered for more than just show.
Is it difficult to install a big brake kit myself at home?
If you are comfortable with basic suspension work and bleeding hydraulic lines, you can successfully complete this installation. Most kits are engineered as bolt-on upgrades that utilize your factory spindles. The most time-consuming aspects are plumbing new hard lines and ensuring the master cylinder is properly bench-bled before it hits the firewall. Take a methodical approach, follow the instructions closely, and always prioritize precision over speed.
Picture yourself descending a winding mountain pass in your prized 1967 Camaro, only to feel the brake pedal grow soft and unresponsive as heat soaks into the vintage drums. It’s a moment where nostalgia meets a cold, hard reality; your heritage machine is carrying 21st-century speed on 1960s safety technology. You deserve to drive with the confidence that your car will stop as fast as it goes. We agree that the thrill of the open road shouldn’t be overshadowed by the fear of brake fade or the uncertainty of an old single-circuit system.
This guide empowers you to master the technical landscape of big brake kits for classic cars, ensuring you achieve modern, supercar-level stopping power without compromising your build’s character. You’ll learn to navigate the critical 17-inch wheel clearance requirements and understand why a matched master cylinder is the heartbeat of your hydraulic system. We’re going to walk through the meticulous process of selecting a complete kit that turns your restoration project into a high-performance masterpiece that’s as safe as it is beautiful.
Key Takeaways
- Discover why original drum brake systems are a liability in modern traffic and how to transition your vintage ride to a safe, dual-circuit hydraulic setup.
- Evaluate the engineering advantages of multi-piston calipers and vented rotors when selecting big brake kits for classic cars to ensure fade-free performance.
- Learn to use physical templates to verify wheel spoke clearance and understand why 17-inch wheels are often the entry point for modern stopping power.
- Master the relationship between master cylinder bore size and pedal effort to achieve a firm, confidence-inspiring feel that matches your new hardware.
- Follow professional installation protocols including bench bleeding and the critical bedding-in process to guarantee your project’s longevity and safety.
The Necessity of Modern Stopping Power: Why Factory Brakes Fail
Your vintage machine was built for a world that no longer exists. In the 1960s, highway speeds were lower, traffic was sparse, and a single-circuit drum brake system was considered adequate. Today, you are sharing the road with distracted drivers in modern SUVs that can stop on a dime. Relying on fifty year old technology in this environment isn’t just a nostalgic quirk; it’s a genuine safety risk. When you press that pedal, you need to know that your car will react with the same precision as a contemporary performance vehicle.
Upgrading to big brake kits for classic cars is about more than just a simple disc conversion. While a basic swap might give you better initial bite, a true big brake system is an engineered solution designed to manage massive amounts of kinetic energy. It replaces small, thin rotors and single-piston calipers with high-capacity components that can withstand repeated hard stops without protest. This is the foundation of any serious build, ensuring that your car’s ability to stop always exceeds its ability to go.
To better understand this concept, watch this helpful video:
If you have followed the definitive guide to an LS engine swap, you’ve likely doubled your car’s original horsepower. This increase in speed demands a proportional increase in braking force. You cannot expect a braking system designed for 200 horsepower to safely manage the velocity generated by a modern 500 horsepower power plant. Physics is unforgiving, and every additional mile per hour requires exponentially more effort to scrub away.
Kinetic Energy and Heat Dissipation
The primary job of your brakes is to turn motion into heat. Heavy classic steel carries immense momentum, and small factory rotors quickly reach their thermal limits. To appreciate the engineering involved, it helps to understand how disc brakes work at a fundamental level. Larger rotors provide a greater surface area, which acts as a heat sink to draw warmth away from the pads. Thermal soak occurs when the rotor’s mass can no longer absorb or dissipate the heat generated by friction, leading to a dangerous loss of stopping power known as brake fade.
Modern Traffic Demands on Vintage Hardware
Research shows that tailgating is a factor in over 33% of all car crashes in the U.S. In a classic car with original drums, your stopping distance is significantly longer than the car in front of you. By installing big brake kits for classic cars, you close that performance gap. Beyond the raw data, there is a massive psychological benefit to a firm, predictable brake pedal. It transforms the driving experience from a stressful exercise in distance management into a confident, spirited adventure where you are always in total control of your machine.
Anatomy of a Big Brake Kit: Calipers, Rotors, and Pads
Understanding the individual components of big brake kits for classic cars is essential for any builder who values precision over guesswork. A well engineered kit is a symphony of parts working in unison to provide repeatable, high performance stopping power. When you move beyond the basic disc conversion, you are looking at specialized hardware designed to handle the thermal loads of spirited driving. To fully appreciate these advancements, one should look at the evolution of brake technology over the last few decades.
The caliper is the most visible part of the upgrade, but its beauty is secondary to its function. Multi-piston designs, typically featuring 4 or 6 pistons, distribute pressure evenly across the brake pad surface. This eliminates the uneven wear and tapering common in older, single-piston designs. By spreading the clamping force over a larger area, you achieve a more immediate and consistent bite. If you are feeling overwhelmed by the technical specs, checking out our recommended gear can help simplify your selection process.
Fixed vs Floating Calipers
High end restomods almost exclusively utilize fixed multi-piston calipers rather than the floating versions found on factory cars. In a fixed design, the caliper body is bolted directly to the spindle, and pistons on both sides of the rotor squeeze the pads simultaneously. This setup provides superior pedal feel and eliminates the flex associated with sliding pins. High strength bridge bolts significantly increase caliper stiffness by preventing the housing from spreading under extreme hydraulic pressure. When you calculate piston area, remember that larger bores increase clamping force but also require more fluid volume from your master cylinder.
Rotor Metallurgy and Design
Your choice of rotors dictates how effectively your system handles heat. While standard cast iron is common, high carbon rotors offer better thermal stability and resistance to cracking under stress. Examine the internal cooling vanes; directional vanes act like a centrifugal pump, pulling cool air through the center of the rotor as it spins. For those looking to reduce unsprung weight, two-piece rotors feature an aluminum center hat bolted to a cast iron friction ring. This design saves several pounds per corner, which improves both suspension response and acceleration.
Don’t overlook the smaller details like brake pads and flex lines. Modern ceramic or semi-metallic compounds allow you to balance a quiet street ride with the aggressive bite needed for the track. Swapping your old rubber hoses for stainless steel braided lines is a mandatory step. These lines do not expand under pressure, which effectively eliminates that spongy pedal feel. Integrating these high performance components into your build ensures that your big brake kits for classic cars deliver on their promise of modern safety and control.
Fitment and Clearance: The 17-Inch Wheel Requirement
You’ve selected your hardware, but now comes the moment of truth: will it actually fit inside your wheels? One of the most common hurdles when installing big brake kits for classic cars is the physical space required for modern multi-piston calipers. While your factory 14-inch or 15-inch steelies look great for a period-correct restoration, they simply don’t have the internal diameter to house a high-performance rotor and caliper assembly. Moving to 17-inch wheels is often a mandatory step to unlock modern stopping power and ensure the safety of your build.
Before you click “buy,” you must verify two types of clearance: radial and lateral. Radial clearance is the distance from the center of the hub to the outer edge of the caliper. Lateral clearance is the overhang, or how far the caliper sticks out toward the back of the wheel spokes. Even if a wheel has a large enough diameter, the spokes might still hit the face of a 6-piston caliper. This is where engineering principles found in professional texts like Brake Design and Safety become essential shop floor knowledge for the serious builder.
The Rotor Size vs Wheel Diameter Chart
Use these general guidelines as a starting point, but always check the specific manufacturer’s template for your chosen big brake kits for classic cars:
- 11-inch rotors: Usually fit inside most 15-inch wheels.
- 12.19-inch to 13-inch rotors: Typically require a minimum of a 17-inch wheel.
- 14-inch rotors and larger: Expect to run 18-inch or 19-inch wheels to clear the massive caliper bridge.
Measuring Caliper Overhang
Don’t rely on your eyes alone. Most reputable manufacturers provide a 1:1 scale paper template. Print it out, glue it to a piece of cardboard, and place it against the mounting surface of your wheel. This simple step reveals exactly where the caliper will sit in relation to the spokes. If you find your spokes are too close, you may need a wheel with a different offset or a more aggressive backspacing. While spacers are an option for some, choosing a wheel designed for big brake clearance is always the safer, more professional route. Seeing a set of high-carbon rotors behind a set of open-spoke 17-inch wheels doesn’t just improve safety; it creates an aggressive, purposeful aesthetic that defines a high-quality restomod.
The Hydraulic Heart: Master Cylinders and Proportioning Valves
Think of your master cylinder as the conductor of a high-performance orchestra. You can install the most expensive big brake kits for classic cars on the market, but if the hydraulic volume doesn’t match the caliper requirements, the performance will be discordant and dangerous. Your factory master cylinder was designed to move a specific amount of fluid to small wheel cylinders or single-piston calipers. When you switch to 4-piston or 6-piston units, the volume of fluid required to move those pistons increases significantly. If you don’t account for this, you’ll end up with a pedal that either feels like a brick or sinks uselessly to the floor.
Bore size math is where many builders stumble. It’s a delicate game of leverage and volume that dictates your entire driving experience. Consider these two paths:
- Smaller bore sizes, such as 7/8-inch, increase line pressure and reduce leg effort but result in a longer pedal stroke.
- Larger bore sizes, like 1-1/8-inch, move more fluid with a shorter stroke but require significantly more physical force to stop the car.
For a manual brake setup, a 15/16-inch bore is typically the sweet spot for most enthusiasts. If you are running a power booster, you might move up to a 1-inch or 1-1/8-inch bore to maintain a firm, modern pedal feel. Precision here is the difference between a car that stops with a light touch and one that requires both feet on the pedal during a panic stop.
Tandem Master Cylinders and Safety
If your classic car still relies on a single-reservoir master cylinder, stop what you are doing and prioritize this upgrade immediately. A single-circuit system means that one leak in a wheel cylinder or a rusted brake line can result in total hydraulic failure. Upgrading to a tandem, dual-reservoir master cylinder ensures that your front and rear systems operate independently. If one side fails, the other remains functional to bring you to a stop. This is a foundational pillar of safety that we discuss extensively in the definitive guide to an LS engine swap, especially since modern high-performance engines often change the vacuum profile available for power assist.
Proportioning and Residual Valves
Achieving perfect balance is vital when integrating big brake kits for classic cars into a vintage chassis. Since most of your stopping power comes from the front, you must prevent the rear wheels from locking up prematurely, which can lead to a dangerous spin. An adjustable proportioning valve allows you to fine-tune the pressure sent to the rear, tailoring the bias to your car’s specific weight distribution. If your master cylinder is mounted below the level of the calipers, such as on a frame rail, you must also install residual pressure valves. These simple components maintain a small amount of pressure in the lines to prevent fluid from draining back into the master cylinder, ensuring your pedal is always ready to act.
For a complete roadmap of your build’s hydraulic needs, explore our Premium Project Blueprints.
Installation Strategy: From Bench Bleeding to Bedding In
Grab your torque wrench and clear your workbench; it is time to transition from theory to the tangible labor of the workshop. Installing big brake kits for classic cars is a rewarding process that demands a high level of precision. Begin by stripping your factory components down to the bare spindle. This is your foundation, so inspect it for any signs of fatigue or casting flaws. Use a wire brush to remove decades of road grime and rust, ensuring a perfectly flat mating surface for the new caliper brackets. If your spindle isn’t clean and true, your caliper alignment will be off from the start.
Before you even think about bolting the master cylinder to the firewall, you must perform a thorough bench bleed. This process involves cycling fluid through the master cylinder while it is secured in a vise, purging every last bubble of air from the internal bores. If you skip this step, you will likely spend hours chasing a spongy pedal that never quite firms up. When it comes to plumbing, take your time with new hard lines. Use a high-quality double-flaring tool to create leak-free connections. Precision in these small details ensures the modern reliability that defines a true restomod project.
Spindle and Bracket Alignment
Proper alignment is where many DIY projects encounter hurdles. Once the bracket is installed, verify that the caliper is perfectly centered over the rotor. Most kits include shims for this exact purpose; use them to achieve a symmetrical gap on both sides of the rotor. You must also check for steering linkage interference. Turn the steering wheel to full lock in both directions to ensure that the calipers or flex lines do not contact the frame or suspension arms. This level of scrutiny is what separates a professional build from a dangerous one, and it is a core principle we advocate for in our what is a restomod philosophy.
The Bedding-In Process
The final step in your journey is the bedding-in procedure, which is critical for transferring a uniform layer of friction material from the pads to the rotors. Find a safe, secluded stretch of road and perform a series of approximately ten deceleration cycles from 60 mph down to 10 mph using moderate pressure. It is imperative that you never come to a complete stop during these cycles, as doing so can leave uneven deposits on the hot rotor and cause future vibrations. After the cycles are complete, drive for several miles without using the brakes to allow the system to cool gradually. A successfully bedded rotor will often exhibit a distinct blue-grey tint, signaling that your machine is ready to deliver the modern stopping power you’ve worked so hard to achieve.
Take Command of Your Restoration Journey
Modernizing your vintage ride is more than just a hobby; it’s a commitment to precision engineering and safety. By integrating big brake kits for classic cars, you’ve bridged the gap between heritage aesthetics and 21st-century performance. You now understand that stopping power isn’t just about a flashy caliper. It’s a system-wide calculation involving wheel clearance, hydraulic volume, and the meticulous art of bedding in your hardware. These steps ensure that your car remains a joy to drive and a safe legacy for years to come.
The transition from a passive admirer to an active creator requires a reliable roadmap. Under the mentor-led instruction of Brook Walsh, you can master every pillar of your build with a system-wide approach to safety. Our DIY restomod community values the pride of personal labor and the precision of a well-executed project. To ensure your next upgrade is as seamless as your last, download The Ultimate Restomod Guide to plan your complete safety and performance overhaul. It’s time to step back into the workshop and turn your vision into a high-performance reality. Your machine is waiting.
Frequently Asked Questions
Do I really need a big brake kit for a street-driven classic car?
Yes, especially if you’ve increased horsepower or frequently drive in modern traffic. While factory brakes were adequate for the sparse roads of the 1960s, today’s SUVs can stop much faster than a vintage drum system. A big brake kit provides the repeatable stopping power and heat management needed to avoid collisions in stop and go highway environments. It ensures your car’s safety profile matches its performance potential.
Will a big brake kit fit under my original 15-inch Rally wheels?
Generally, you will find that most big brake kits for classic cars require at least a 17-inch wheel. The larger diameter is necessary to clear the increased rotor size and the bulk of multi-piston calipers. While some specialized 11-inch kits exist for smaller wheels, they don’t offer the same thermal capacity as larger systems. Always use the manufacturer’s paper template to verify both radial and lateral clearance before purchasing wheels.
Can I install a front big brake kit while keeping drum brakes in the rear?
You can certainly start with the front, but it requires careful hydraulic balancing. Since the front brakes perform roughly 70 percent of the stopping work, upgrading them provides the most immediate safety benefit. You must install an adjustable proportioning valve to fine-tune the pressure and prevent the rear drums from locking up prematurely. For the best results, plan for a full four-wheel disc conversion as your project evolves.
What is the difference between a 4-piston and a 6-piston caliper?
The primary difference lies in clamping force distribution and pad surface area. A 6-piston caliper uses three pairs of pistons to apply pressure more evenly across a longer brake pad, which reduces pad taper and improves pedal feel. While 4-piston units are excellent for most street applications, 6-piston designs offer superior heat management for heavier vehicles. Choosing the right count depends on your vehicle’s weight and intended driving style.
Do I need to upgrade my master cylinder when installing a big brake kit?
Yes, this is a critical step that you shouldn’t skip. Modern multi-piston calipers have a much larger internal fluid volume than factory wheel cylinders or single-piston units. Your stock master cylinder won’t move enough fluid to fully engage the new pistons, leading to a dangerously long pedal stroke. Upgrading to a tandem master cylinder with a bore size matched to your new calipers is essential for proper hydraulic leverage.
How much of a difference does a big brake kit make in stopping distance?
The difference is often dramatic and can shave dozens of feet off your 60-to-0 mph stopping distance. More importantly, big brake kits for classic cars provide consistency that factory parts cannot match. While original drums might stop well once, they quickly fade after repeated use as heat builds up. Modern kits maintain their performance stop after stop, giving you predictable control during spirited drives or emergency situations.
Are drilled and slotted rotors better than plain rotors for a restomod?
Drilled and slotted rotors offer distinct advantages for high-performance builds by venting the gases and dust that build up between the pad and rotor. Slots help maintain a clean friction surface, while cross-drilling increases the surface area available for cooling. For most restomods, these rotors also provide a purposeful, aggressive aesthetic that looks fantastic behind modern wheels. They signal that your build is engineered for more than just show.
Is it difficult to install a big brake kit myself at home?
If you are comfortable with basic suspension work and bleeding hydraulic lines, you can successfully complete this installation. Most kits are engineered as bolt-on upgrades that utilize your factory spindles. The most time-consuming aspects are plumbing new hard lines and ensuring the master cylinder is properly bench-bled before it hits the firewall. Take a methodical approach, follow the instructions closely, and always prioritize precision over speed.