
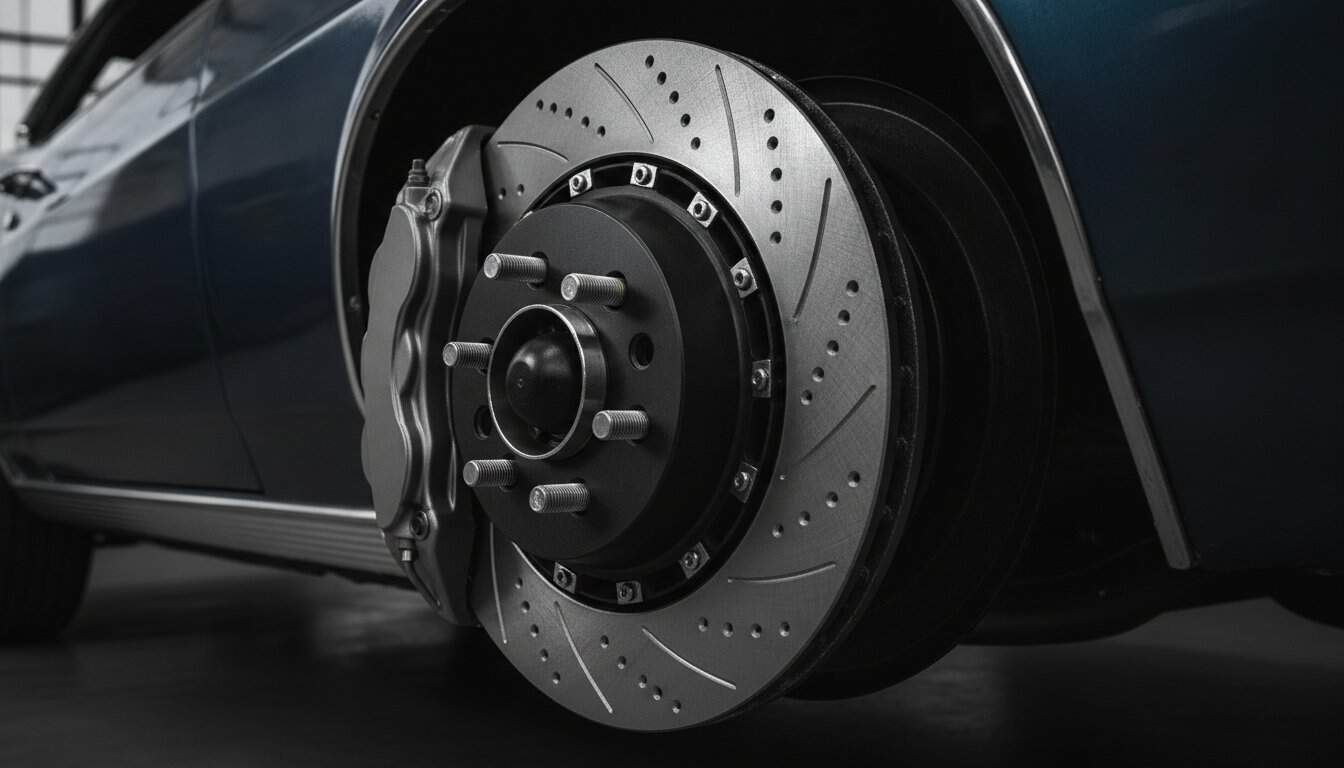
Imagine barreling down a winding road in your prized 1960s muscle car, only to feel the heart-sinking sensation of brake fade as you approach a sharp corner. It’s a terrifying reality because vintage drum systems simply weren’t designed for the aggressive pace of 2026 traffic. You deserve to feel confident every time you settle into the driver’s seat. Mastering how to install big brakes on a classic car is the most vital safety upgrade you can perform; it bridges the gap between nostalgic heritage and contemporary performance.
Dismiss the hesitation that often comes with upgrading a legend. You might worry about wheel clearance or feel confused by the sea of piston counts available, but these hurdles are simply steps in the creative process. This guide, drawing from the technical frameworks in The Ultimate Restomod Guide, promises to clear that fog. We’ll provide a methodical roadmap to transition from dangerous vintage drums to modern stopping power, breaking down fitment requirements to help you achieve a predictable pedal feel that matches the beauty of your high-end wheels.
Key Takeaways
- Understand why original drum brakes fail in 2026 traffic and how modern multi-piston calipers provide the necessary clamping force for high-horsepower builds.
- Master the technical phases of how to install big brakes on a classic car, from preparing spindles to plumbing the system with performance-grade lines.
- Solve the puzzle of wheel clearance by learning how to accurately measure offset and rotor diameter for a perfect fitment every time.
- Discover how to integrate your braking system into a complete project roadmap, ensuring your stopping power works in perfect harmony with modern suspension and engine swaps.
Why Your Classic Car Needs a Big Brake Kit Upgrade
Stop treating your brakes as an afterthought. Many builders prioritize the roar of a new engine while ignoring the hardware required to bring that power to a halt. In 2026, the delta between vintage capabilities and modern traffic demands is wider than ever. A big brake kit isn’t just a flashy accessory for your wheels; it’s a fundamental safety requirement. While a standard disc conversion replaces drums with basic rotors, a true big brake kit utilizes oversized rotors and multi-piston calipers to maximize surface area and clamping force. Understanding the anatomy of disc brakes is the first step toward appreciating why these systems are superior to the factory equipment your car wore decades ago.
The Limits of Vintage Braking Technology
Vintage drums suffer from heat soak, a condition where the braking components absorb more thermal energy than they can dissipate. This leads to brake fade, leaving you with a spongy, unresponsive pedal exactly when you need it most. Original single-reservoir master cylinders represent another critical failure point; if one line leaks, the entire system fails. Modern performance tires also play a role. Today’s rubber offers far more grip than the bias-ply tires of the 1960s, which puts immense mechanical stress on aging spindles and small rotors. Knowing how to install big brakes on a classic car allows you to leverage this modern grip without overwhelming your hardware.
Safety as the Core of the Restomod Philosophy
Safety sits at the heart of every successful build. If you’ve followed the definitive guide to an ls engine swap, you’ve likely doubled or tripled your car’s original horsepower. You cannot expect 1960s engineering to manage 2026 performance levels. We view brakes as the essential companion to every powertrain upgrade. This shift in perspective transforms your driving experience. Instead of white-knuckling every stop, you gain a predictable, firm pedal feel that inspires confidence. This psychological shift turns a stressful commute into a rewarding journey, proving that true craftsmanship prioritizes control as much as speed.
Learning how to install big brakes on a classic car ensures your project is built on a foundation of reliability. It allows you to enjoy the thrill of the road without compromise, bridging the gap between heritage aesthetics and modern safety standards. By making brakes your first priority after a power upgrade, you honor the car’s history while preparing it for a high-performance future.
The Technical Anatomy of Modern Performance Braking Systems
Think of your braking system as a high-performance ecosystem where every component must work in perfect synergy. It’s a common mistake to focus solely on the shiny calipers while ignoring the hydraulic backbone that powers them. When you are learning how to install big brakes on a classic car, you must consider the entire path from your foot to the pavement. This includes the master cylinder, proportioning valve, and the specific metallurgy of your rotors. Master this technical anatomy, and you’ll transform your vintage machine into a precision instrument.
Calipers and Piston Count Explained
Fixed calipers are the hallmark of modern performance. Unlike the floating units found on most factory cars, fixed calipers use pistons on both sides of the rotor to provide immediate, balanced clamping force. Moving to a 4-piston or 6-piston setup isn’t just about bragging rights. These designs distribute pressure across a larger pad surface area. This prevents pad taper and ensures the friction material stays flat against the rotor during aggressive stops. Beyond performance, the aesthetic value of powder-coated calipers provides that high-end finish that defines a professional 2026 restomod build.
Rotors: Size, Heat Dissipation, and Metallurgy
The rotor is your primary heat sink. Increasing the diameter provides greater mechanical leverage, which effectively amplifies your stopping power without requiring more leg effort. While cross-drilled rotors offer a classic high-performance look, they can be prone to stress cracks under extreme heat. Slotted rotors are often the superior choice for a driven restomod. They provide a path for gas and dust to escape without compromising the rotor’s structural integrity. Modern rotors often utilize advanced iron alloys that resist warping, allowing you to maintain a classic wheel style while benefiting from contemporary metallurgy.
Your master cylinder acts as the heart of this system. If the bore size doesn’t match your new caliper’s piston volume, you’ll end up with a pedal that’s either dangerously soft or rock-hard. Pair your master cylinder with an adjustable proportioning valve to fine-tune the front-to-rear bias, ensuring your rear wheels don’t lock up prematurely. Finally, choose your pad compound based on your driving environment. Ceramic pads are excellent for street-driven cars because they’re quiet and produce minimal dust, whereas semi-metallic pads offer the aggressive bite needed for spirited canyon runs. If you find the technical specs of hydraulic matching daunting, our Restomod Consulting Services can help you dial in the perfect combination for your specific build.
Evaluating Performance: How to Choose the Right Big Brake Kit
Selecting the right hardware requires a clear-eyed assessment of your driving goals. Don’t buy a track-ready system if you only plan to cruise to local shows. Conversely, don’t underspecify a car that will see spirited canyon runs or autocross duty. Learning how to install big brakes on a classic car starts with ensuring the parts actually fit your chassis and your vision. Brakes are a foundational expense in any build. Allocate a significant portion of your budget here; it’s better to delay a cosmetic upgrade than to compromise on your stopping power.
Decide between manual and power-assisted systems early in the planning phase. Manual brakes provide an unfiltered, mechanical connection to the road that many purists crave for maximum feedback. However, most 2026 restomod projects lean toward vacuum or hydraulic assistance. These power-assisted setups provide the effortless, predictable pedal feel that modern drivers expect. If you are still defining the personality of your project, explore our guide on what is a restomod to help align your components with your build’s identity.
The Wheel Clearance Challenge
Clearance is the most common hurdle in technical restoration. As a general rule, 11 inch rotors can often fit inside 15 inch wheels, but moving to high-performance 13 inch rotors typically requires at least 17 inch wheels. If you step up to 14 inch rotors, prepare to run 18 inch wheels or larger. Always download and print fitment templates from the manufacturer before purchasing. These paper guides allow you to physically check the radial clearance and the space between the caliper face and the wheel spokes. Many vintage-style aftermarket wheels have thick centers that can interfere with modern multi-piston calipers even if the diameter is technically large enough.
Pro-Touring vs. Daily Driver Setups
Begin your installation by thoroughly cleaning every mounting surface. Any grit or old paint remaining on the spindles can cause the caliper bracket to sit at a slight angle, which leads to uneven pad wear and a vibrating pedal. Scrub these surfaces with a wire brush until you reach bare metal. Mastering how to install big brakes on a classic car requires this level of meticulous preparation. When you move to plumbing, replace aged rubber hoses with stainless steel braided lines. These lines eliminate the expansion, or ballooning, that occurs under pressure, resulting in a significantly firmer pedal feel. For the hardlines, always use a dedicated double-flare tool to ensure leak-free connections at every union.
Bench bleeding the master cylinder is a non-negotiable step in the process. Secure the master cylinder in a vise and cycle the piston until every air bubble vanishes from the clear return tubes. This prevents air from entering your new calipers, which is the primary cause of a spongy pedal. Once the system is sealed, adjust your proportioning valve. Start with a heavy front bias and gradually increase rear pressure during controlled testing until the car stops flat without the rear wheels locking prematurely. If you need a step-by-step roadmap for these technical milestones, our recommended gear list provides the specialized tools you need to achieve professional results.
Hydraulic System Essentials
Matching the master cylinder bore size to your caliper’s total piston area is critical for success. A bore that is too large creates a rock-hard pedal with very little modulation, while a bore that is too small won’t move enough fluid to fully engage the pistons. Consider integrating a hydroboost system if your modern engine swap doesn’t produce enough vacuum for a traditional booster. This setup uses power steering pressure to provide effortless stopping power even in high-performance applications. Always use a high-quality DOT 4 fluid to handle the increased thermal loads of 2026 performance driving.
Post-Installation Bedding and Testing
Bedding in your new pads is the final act of the installation. Perform a series of controlled decelerations from 45 mph down to 10 mph to transfer an even layer of friction material onto the rotors. Avoid coming to a complete stop during this heat cycle to prevent pad imprinting, which causes permanent brake pulsation. Finally, cycle the suspension through its full range of motion. Check that your new lines do not rub against the tires or frame at full steering lock. A professional alignment is the finishing touch, as the added weight and geometry changes of large calipers can subtly shift your front-end settings.

Integrating Your Brake Upgrade into a Complete Restomod Build
View your brake upgrade as the final piece of a high-performance puzzle. If you have already followed the definitive guide to an ls engine swap, you have transformed your car’s acceleration. It is only logical that your stopping power matches that new velocity. High-horsepower builds demand a system that can handle repeated, high-stress decelerations without breaking a sweat. By prioritizing this synergy, you ensure that your project is not just fast, but balanced and safe for the realities of 2026 driving.
Harmony between your suspension and braking system is vital. When you apply the massive clamping force of a 6-piston caliper, the front end of your car experiences significant weight transfer. If your springs are too soft or your bushings are perished, the car will dive and wander, undermining the precision of your new hardware. A successful restomod treats these systems as a single unit. This holistic approach significantly boosts the resale value of your vehicle. Discerning buyers look for builds where every component was chosen with intent, preferring a documented safety system over a collection of mismatched parts.
The Holistic Performance Approach
Coordinate your brake choice with your wheel and tire selection to achieve a cohesive aesthetic. Large rotors look best when they fill the void behind a modern wheel, creating a high-end, engineered appearance. Beyond looks, maintain a detailed log of your build. Document the specific caliper models, rotor diameters, and pad compounds you used. This makes future maintenance and parts sourcing a simple task rather than a guessing game. If you are still gathering the necessary hardware, consult our recommended gear for the specialized tools that make the technical labor of restoration more efficient.
Finalizing Your Build Roadmap
Your journey does not end with a single installation. Mastering how to install big brakes on a classic car is a major milestone, but it is just one chapter in your technical education. Use our Premium Project Blueprints to visualize how every system, from the electrical harness to the drivetrain, integrates into a finished masterpiece. These roadmaps are designed to remove the guesswork, allowing you to focus on the artistry of the build. If you encounter a unique engineering challenge or a complex fitment question, our Restomod Consulting Services offer the expert mentorship needed to keep your project moving forward. Share your progress with our community of creators and take pride in the fact that you are no longer just an admirer of classic metal; you are a builder of modern legends.
Take Command of Your Classic’s Stopping Power
Transforming your vintage machine into a modern performer is a journey of precision and foresight. You’ve explored how the technical anatomy of multi-piston calipers and oversized rotors provides the clamping force needed for 2026 driving standards. By mastering how to install big brakes on a classic car, you move beyond simple aesthetic upgrades and embrace a safety-first engineering philosophy. This project ensures your vehicle handles the raw power of a modern engine swap with grace and predictable control.
Don’t let technical uncertainty or complex fitment templates stall your progress. Whether you’re navigating wheel clearance hurdles or plumbing high-pressure hydraulic lines, expert mentorship is always within reach. Under the guidance of founder Brook Walsh, you can transition from a passive admirer to a confident creator. Download The Ultimate Restomod Guide to plan your safety upgrades and gain access to the comprehensive blueprints required for DIY success. Your classic deserves the reliability of contemporary technology. Pick up your tools and start building the legend you’ve always envisioned.
Frequently Asked Questions
Is a big brake kit necessary if I only drive my classic on weekends?
Yes, because modern traffic environments in 2026 are faster and more congested than when your car was built. Weekend drives often involve highway speeds or mountainous roads where vintage drums can fade rapidly. Upgrading ensures that your rare leisure time isn’t ruined by a mechanical failure or a close call. Safety is a full-time requirement, regardless of how often the odometer turns on your project.
Can I install a big brake kit and keep my original 15-inch wheels?
Usually not, as most high-performance kits require a minimum of 17-inch or 18-inch wheels to clear the larger rotor diameter and multi-piston calipers. While some specific 11-inch disc conversions might fit 15-inch wheels, true big brake kits are designed for larger wheel diameters. Always check the manufacturer’s fitment template against your wheel’s internal dimensions before committing to the upgrade. Precision measurements prevent costly mistakes.
How much does a professional big brake kit installation typically cost?
Labor costs for this installation vary significantly based on your region and the complexity of your chassis modifications. Some shops charge a flat rate for a standard swap, while others bill hourly for custom bracket fabrication or hydraulic plumbing. We recommend consulting with a local specialist to get a quote tailored to your specific vehicle. Doing the work yourself using our educational blueprints can help you manage these professional labor costs effectively.
What is the difference between a 4-piston and a 6-piston caliper?
The primary difference lies in clamping force distribution and pad surface area. A 6-piston caliper uses three pistons on each side to apply pressure more evenly across a longer brake pad, which helps prevent pad taper and provides more consistent stopping power. While 4-piston units are excellent for most street-driven restomods, 6-piston setups offer the ultimate thermal management for high-horsepower builds or heavy track use during your spirited runs.
Do I need to upgrade my master cylinder when installing a big brake kit?
Yes, upgrading is almost always necessary to ensure the hydraulic volume matches the requirements of your new multi-piston calipers. If you keep a small-bore factory master cylinder, the pedal will likely travel too far before the brakes engage. Learning how to install big brakes on a classic car involves matching the master cylinder bore size to the total piston area of your new calipers for a firm, responsive pedal feel.
What happens if I do not use a proportioning valve with my disc conversion?
Without a proportioning valve, your rear brakes may receive too much pressure, causing the rear wheels to lock up prematurely during hard stops. This creates a dangerous situation where the back of the car can swing out, leading to a loss of control. An adjustable valve allows you to fine-tune the front-to-rear bias, ensuring the entire system works in harmony for maximum deceleration and stability on the modern road.
Is it possible to retain a classic look with modern big brakes?
You can maintain a heritage aesthetic by choosing calipers with subtle finishes like clear-coat aluminum or classic black instead of bright red or yellow. Some builders even hide modern hardware behind wheels that mimic vintage designs but have the larger diameters needed for clearance. This approach allows you to enjoy 2026 performance levels while honoring the original design language and character of your vintage machine without compromising its visual soul.
Can I use my original brake lines with a high-performance kit?
No, you should never reuse aged rubber lines with a modern performance system. Old lines can degrade internally or balloon under the higher pressures generated by a big brake kit, resulting in a spongy pedal and reduced efficiency. When you are figuring out how to install big brakes on a classic car, always include new stainless steel braided hoses. These provide the durability and pressure resistance required for a high-performance hydraulic system today.
Imagine barreling down a winding road in your prized 1960s muscle car, only to feel the heart-sinking sensation of brake fade as you approach a sharp corner. It’s a terrifying reality because vintage drum systems simply weren’t designed for the aggressive pace of 2026 traffic. You deserve to feel confident every time you settle into the driver’s seat. Mastering how to install big brakes on a classic car is the most vital safety upgrade you can perform; it bridges the gap between nostalgic heritage and contemporary performance.
Dismiss the hesitation that often comes with upgrading a legend. You might worry about wheel clearance or feel confused by the sea of piston counts available, but these hurdles are simply steps in the creative process. This guide, drawing from the technical frameworks in The Ultimate Restomod Guide, promises to clear that fog. We’ll provide a methodical roadmap to transition from dangerous vintage drums to modern stopping power, breaking down fitment requirements to help you achieve a predictable pedal feel that matches the beauty of your high-end wheels.
Key Takeaways
- Understand why original drum brakes fail in 2026 traffic and how modern multi-piston calipers provide the necessary clamping force for high-horsepower builds.
- Master the technical phases of how to install big brakes on a classic car, from preparing spindles to plumbing the system with performance-grade lines.
- Solve the puzzle of wheel clearance by learning how to accurately measure offset and rotor diameter for a perfect fitment every time.
- Discover how to integrate your braking system into a complete project roadmap, ensuring your stopping power works in perfect harmony with modern suspension and engine swaps.
Why Your Classic Car Needs a Big Brake Kit Upgrade
Stop treating your brakes as an afterthought. Many builders prioritize the roar of a new engine while ignoring the hardware required to bring that power to a halt. In 2026, the delta between vintage capabilities and modern traffic demands is wider than ever. A big brake kit isn’t just a flashy accessory for your wheels; it’s a fundamental safety requirement. While a standard disc conversion replaces drums with basic rotors, a true big brake kit utilizes oversized rotors and multi-piston calipers to maximize surface area and clamping force. Understanding the anatomy of disc brakes is the first step toward appreciating why these systems are superior to the factory equipment your car wore decades ago.
The Limits of Vintage Braking Technology
Vintage drums suffer from heat soak, a condition where the braking components absorb more thermal energy than they can dissipate. This leads to brake fade, leaving you with a spongy, unresponsive pedal exactly when you need it most. Original single-reservoir master cylinders represent another critical failure point; if one line leaks, the entire system fails. Modern performance tires also play a role. Today’s rubber offers far more grip than the bias-ply tires of the 1960s, which puts immense mechanical stress on aging spindles and small rotors. Knowing how to install big brakes on a classic car allows you to leverage this modern grip without overwhelming your hardware.
Safety as the Core of the Restomod Philosophy
Safety sits at the heart of every successful build. If you’ve followed the definitive guide to an ls engine swap, you’ve likely doubled or tripled your car’s original horsepower. You cannot expect 1960s engineering to manage 2026 performance levels. We view brakes as the essential companion to every powertrain upgrade. This shift in perspective transforms your driving experience. Instead of white-knuckling every stop, you gain a predictable, firm pedal feel that inspires confidence. This psychological shift turns a stressful commute into a rewarding journey, proving that true craftsmanship prioritizes control as much as speed.
Learning how to install big brakes on a classic car ensures your project is built on a foundation of reliability. It allows you to enjoy the thrill of the road without compromise, bridging the gap between heritage aesthetics and modern safety standards. By making brakes your first priority after a power upgrade, you honor the car’s history while preparing it for a high-performance future.
The Technical Anatomy of Modern Performance Braking Systems
Think of your braking system as a high-performance ecosystem where every component must work in perfect synergy. It’s a common mistake to focus solely on the shiny calipers while ignoring the hydraulic backbone that powers them. When you are learning how to install big brakes on a classic car, you must consider the entire path from your foot to the pavement. This includes the master cylinder, proportioning valve, and the specific metallurgy of your rotors. Master this technical anatomy, and you’ll transform your vintage machine into a precision instrument.
Calipers and Piston Count Explained
Fixed calipers are the hallmark of modern performance. Unlike the floating units found on most factory cars, fixed calipers use pistons on both sides of the rotor to provide immediate, balanced clamping force. Moving to a 4-piston or 6-piston setup isn’t just about bragging rights. These designs distribute pressure across a larger pad surface area. This prevents pad taper and ensures the friction material stays flat against the rotor during aggressive stops. Beyond performance, the aesthetic value of powder-coated calipers provides that high-end finish that defines a professional 2026 restomod build.
Rotors: Size, Heat Dissipation, and Metallurgy
The rotor is your primary heat sink. Increasing the diameter provides greater mechanical leverage, which effectively amplifies your stopping power without requiring more leg effort. While cross-drilled rotors offer a classic high-performance look, they can be prone to stress cracks under extreme heat. Slotted rotors are often the superior choice for a driven restomod. They provide a path for gas and dust to escape without compromising the rotor’s structural integrity. Modern rotors often utilize advanced iron alloys that resist warping, allowing you to maintain a classic wheel style while benefiting from contemporary metallurgy.
Your master cylinder acts as the heart of this system. If the bore size doesn’t match your new caliper’s piston volume, you’ll end up with a pedal that’s either dangerously soft or rock-hard. Pair your master cylinder with an adjustable proportioning valve to fine-tune the front-to-rear bias, ensuring your rear wheels don’t lock up prematurely. Finally, choose your pad compound based on your driving environment. Ceramic pads are excellent for street-driven cars because they’re quiet and produce minimal dust, whereas semi-metallic pads offer the aggressive bite needed for spirited canyon runs. If you find the technical specs of hydraulic matching daunting, our Restomod Consulting Services can help you dial in the perfect combination for your specific build.
Evaluating Performance: How to Choose the Right Big Brake Kit
Selecting the right hardware requires a clear-eyed assessment of your driving goals. Don’t buy a track-ready system if you only plan to cruise to local shows. Conversely, don’t underspecify a car that will see spirited canyon runs or autocross duty. Learning how to install big brakes on a classic car starts with ensuring the parts actually fit your chassis and your vision. Brakes are a foundational expense in any build. Allocate a significant portion of your budget here; it’s better to delay a cosmetic upgrade than to compromise on your stopping power.
Decide between manual and power-assisted systems early in the planning phase. Manual brakes provide an unfiltered, mechanical connection to the road that many purists crave for maximum feedback. However, most 2026 restomod projects lean toward vacuum or hydraulic assistance. These power-assisted setups provide the effortless, predictable pedal feel that modern drivers expect. If you are still defining the personality of your project, explore our guide on what is a restomod to help align your components with your build’s identity.
The Wheel Clearance Challenge
Clearance is the most common hurdle in technical restoration. As a general rule, 11 inch rotors can often fit inside 15 inch wheels, but moving to high-performance 13 inch rotors typically requires at least 17 inch wheels. If you step up to 14 inch rotors, prepare to run 18 inch wheels or larger. Always download and print fitment templates from the manufacturer before purchasing. These paper guides allow you to physically check the radial clearance and the space between the caliper face and the wheel spokes. Many vintage-style aftermarket wheels have thick centers that can interfere with modern multi-piston calipers even if the diameter is technically large enough.
Pro-Touring vs. Daily Driver Setups
Pro-Touring builds demand aggressive thermal management for repeated high-speed stops. These setups benefit from the largest possible rotors and race-spec pad compounds. For a daily driver, prioritize streetability and quiet operation. Over-specifying your brakes can lead to “grabby” performance that makes smooth stops difficult in stop-and-go traffic. Remember that your suspension and brakes must work in harmony. High-performance calipers will immediately expose worn bushings or weak front springs during hard deceleration. Building a balanced machine is the hallmark of a seasoned creator, ensuring that every component supports the precision of the others.
Professional Installation Tips for a Flawless Brake Conversion
Begin your installation by thoroughly cleaning every mounting surface. Any grit or old paint remaining on the spindles can cause the caliper bracket to sit at a slight angle, which leads to uneven pad wear and a vibrating pedal. Scrub these surfaces with a wire brush until you reach bare metal. Mastering how to install big brakes on a classic car requires this level of meticulous preparation. When you move to plumbing, replace aged rubber hoses with stainless steel braided lines. These lines eliminate the expansion, or ballooning, that occurs under pressure, resulting in a significantly firmer pedal feel. For the hardlines, always use a dedicated double-flare tool to ensure leak-free connections at every union.
Bench bleeding the master cylinder is a non-negotiable step in the process. Secure the master cylinder in a vise and cycle the piston until every air bubble vanishes from the clear return tubes. This prevents air from entering your new calipers, which is the primary cause of a spongy pedal. Once the system is sealed, adjust your proportioning valve. Start with a heavy front bias and gradually increase rear pressure during controlled testing until the car stops flat without the rear wheels locking prematurely. If you need a step-by-step roadmap for these technical milestones, our recommended gear list provides the specialized tools you need to achieve professional results.
Hydraulic System Essentials
Matching the master cylinder bore size to your caliper’s total piston area is critical for success. A bore that is too large creates a rock-hard pedal with very little modulation, while a bore that is too small won’t move enough fluid to fully engage the pistons. Consider integrating a hydroboost system if your modern engine swap doesn’t produce enough vacuum for a traditional booster. This setup uses power steering pressure to provide effortless stopping power even in high-performance applications. Always use a high-quality DOT 4 fluid to handle the increased thermal loads of 2026 performance driving.
Post-Installation Bedding and Testing
Bedding in your new pads is the final act of the installation. Perform a series of controlled decelerations from 45 mph down to 10 mph to transfer an even layer of friction material onto the rotors. Avoid coming to a complete stop during this heat cycle to prevent pad imprinting, which causes permanent brake pulsation. Finally, cycle the suspension through its full range of motion. Check that your new lines do not rub against the tires or frame at full steering lock. A professional alignment is the finishing touch, as the added weight and geometry changes of large calipers can subtly shift your front-end settings.
Integrating Your Brake Upgrade into a Complete Restomod Build
View your brake upgrade as the final piece of a high-performance puzzle. If you have already followed the definitive guide to an ls engine swap, you have transformed your car’s acceleration. It is only logical that your stopping power matches that new velocity. High-horsepower builds demand a system that can handle repeated, high-stress decelerations without breaking a sweat. By prioritizing this synergy, you ensure that your project is not just fast, but balanced and safe for the realities of 2026 driving.
Harmony between your suspension and braking system is vital. When you apply the massive clamping force of a 6-piston caliper, the front end of your car experiences significant weight transfer. If your springs are too soft or your bushings are perished, the car will dive and wander, undermining the precision of your new hardware. A successful restomod treats these systems as a single unit. This holistic approach significantly boosts the resale value of your vehicle. Discerning buyers look for builds where every component was chosen with intent, preferring a documented safety system over a collection of mismatched parts.
The Holistic Performance Approach
Coordinate your brake choice with your wheel and tire selection to achieve a cohesive aesthetic. Large rotors look best when they fill the void behind a modern wheel, creating a high-end, engineered appearance. Beyond looks, maintain a detailed log of your build. Document the specific caliper models, rotor diameters, and pad compounds you used. This makes future maintenance and parts sourcing a simple task rather than a guessing game. If you are still gathering the necessary hardware, consult our recommended gear for the specialized tools that make the technical labor of restoration more efficient.
Finalizing Your Build Roadmap
Your journey does not end with a single installation. Mastering how to install big brakes on a classic car is a major milestone, but it is just one chapter in your technical education. Use our Premium Project Blueprints to visualize how every system, from the electrical harness to the drivetrain, integrates into a finished masterpiece. These roadmaps are designed to remove the guesswork, allowing you to focus on the artistry of the build. If you encounter a unique engineering challenge or a complex fitment question, our Restomod Consulting Services offer the expert mentorship needed to keep your project moving forward. Share your progress with our community of creators and take pride in the fact that you are no longer just an admirer of classic metal; you are a builder of modern legends.
Take Command of Your Classic’s Stopping Power
Transforming your vintage machine into a modern performer is a journey of precision and foresight. You’ve explored how the technical anatomy of multi-piston calipers and oversized rotors provides the clamping force needed for 2026 driving standards. By mastering how to install big brakes on a classic car, you move beyond simple aesthetic upgrades and embrace a safety-first engineering philosophy. This project ensures your vehicle handles the raw power of a modern engine swap with grace and predictable control.
Don’t let technical uncertainty or complex fitment templates stall your progress. Whether you’re navigating wheel clearance hurdles or plumbing high-pressure hydraulic lines, expert mentorship is always within reach. Under the guidance of founder Brook Walsh, you can transition from a passive admirer to a confident creator. Download The Ultimate Restomod Guide to plan your safety upgrades and gain access to the comprehensive blueprints required for DIY success. Your classic deserves the reliability of contemporary technology. Pick up your tools and start building the legend you’ve always envisioned.
Frequently Asked Questions
Is a big brake kit necessary if I only drive my classic on weekends?
Yes, because modern traffic environments in 2026 are faster and more congested than when your car was built. Weekend drives often involve highway speeds or mountainous roads where vintage drums can fade rapidly. Upgrading ensures that your rare leisure time isn’t ruined by a mechanical failure or a close call. Safety is a full-time requirement, regardless of how often the odometer turns on your project.
Can I install a big brake kit and keep my original 15-inch wheels?
Usually not, as most high-performance kits require a minimum of 17-inch or 18-inch wheels to clear the larger rotor diameter and multi-piston calipers. While some specific 11-inch disc conversions might fit 15-inch wheels, true big brake kits are designed for larger wheel diameters. Always check the manufacturer’s fitment template against your wheel’s internal dimensions before committing to the upgrade. Precision measurements prevent costly mistakes.
How much does a professional big brake kit installation typically cost?
Labor costs for this installation vary significantly based on your region and the complexity of your chassis modifications. Some shops charge a flat rate for a standard swap, while others bill hourly for custom bracket fabrication or hydraulic plumbing. We recommend consulting with a local specialist to get a quote tailored to your specific vehicle. Doing the work yourself using our educational blueprints can help you manage these professional labor costs effectively.
What is the difference between a 4-piston and a 6-piston caliper?
The primary difference lies in clamping force distribution and pad surface area. A 6-piston caliper uses three pistons on each side to apply pressure more evenly across a longer brake pad, which helps prevent pad taper and provides more consistent stopping power. While 4-piston units are excellent for most street-driven restomods, 6-piston setups offer the ultimate thermal management for high-horsepower builds or heavy track use during your spirited runs.
Do I need to upgrade my master cylinder when installing a big brake kit?
Yes, upgrading is almost always necessary to ensure the hydraulic volume matches the requirements of your new multi-piston calipers. If you keep a small-bore factory master cylinder, the pedal will likely travel too far before the brakes engage. Learning how to install big brakes on a classic car involves matching the master cylinder bore size to the total piston area of your new calipers for a firm, responsive pedal feel.
What happens if I do not use a proportioning valve with my disc conversion?
Without a proportioning valve, your rear brakes may receive too much pressure, causing the rear wheels to lock up prematurely during hard stops. This creates a dangerous situation where the back of the car can swing out, leading to a loss of control. An adjustable valve allows you to fine-tune the front-to-rear bias, ensuring the entire system works in harmony for maximum deceleration and stability on the modern road.
Is it possible to retain a classic look with modern big brakes?
You can maintain a heritage aesthetic by choosing calipers with subtle finishes like clear-coat aluminum or classic black instead of bright red or yellow. Some builders even hide modern hardware behind wheels that mimic vintage designs but have the larger diameters needed for clearance. This approach allows you to enjoy 2026 performance levels while honoring the original design language and character of your vintage machine without compromising its visual soul.
Can I use my original brake lines with a high-performance kit?
No, you should never reuse aged rubber lines with a modern performance system. Old lines can degrade internally or balloon under the higher pressures generated by a big brake kit, resulting in a spongy pedal and reduced efficiency. When you are figuring out how to install big brakes on a classic car, always include new stainless steel braided hoses. These provide the durability and pressure resistance required for a high-performance hydraulic system today.