
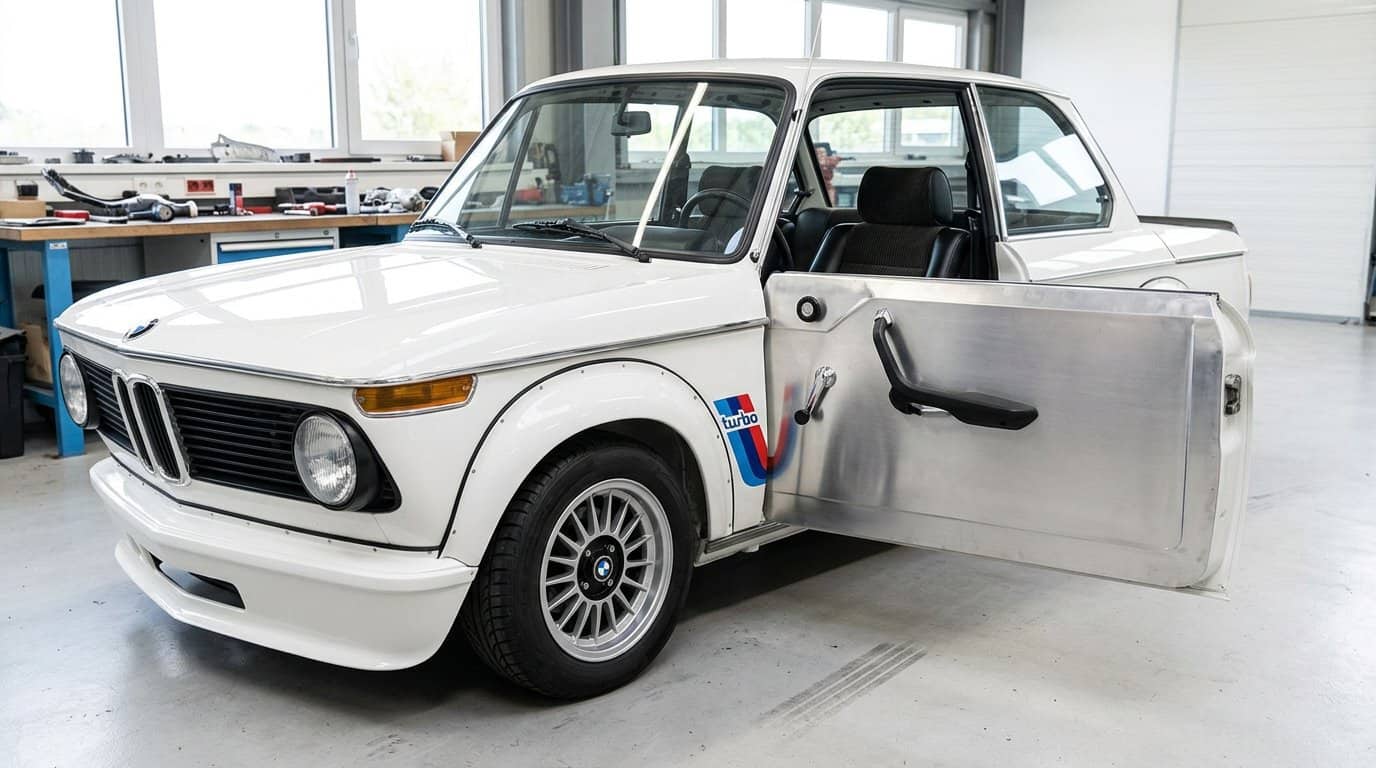
A strong BMW 2002 restomod project plan balances heritage styling with dependable modern upgrades, while treating rust prevention and interior weight as part of the build from the start. The clearest examples work in stages: refresh the body, address corrosion, choose upgrades that suit the car’s purpose, then shape a lighter cabin without losing its vintage character.
It’s easy to focus on paint, flares, and power, but the details beneath the finish matter just as much. A car can look tidy outside and still hide interior problems or evidence of poorly fitted parts, so a careful assessment helps set priorities before work begins. Plan the cabin with the same care: one example uses thin 5052 aluminum sheet for its rear interior and door panels, giving the classic cockpit a pared-back feel.
Here, you’ll see how different BMW 2002 builds approach refreshed bodywork, rust prevention, modern mechanical upgrades, and retro-style interiors. Use their choices as a practical guide, then adapt the sequence and details to your own car, driving goals, and taste.
Key Takeaways
- Plan bodywork around the car’s intended character, balancing classic paint and racing-inspired details with careful preparation and rust prevention.
- Clean and inspect the engine compartment before refinishing it, so corrosion and previous workmanship can shape the restoration priorities.
- Choose modern brake, suspension, and drivetrain upgrades to suit how you want the BMW 2002 to drive, while keeping the build cohesive.
- Explore lightweight aluminum panels and retro-style seats to create a simpler cabin that preserves the car’s vintage feel.
Bodywork, paint color, and racing-inspired graphics
Start with the shell, not the paint. In one BMW 2002 restomod example, the owner wanted a reliable, fast, fun car with a modern twist, inspired by a modernized BMW “Singer” 2002. The owner leaned toward the SoC look and wanted front and rear bumpers for protection. That choice shaped the bodywork before paint or graphics could define the finished character. Treat the build as a coordinated design: bumper fit, wheel clearance, panel alignment, and paint scheme need to work together.
Common rust inspection points include the wheel arches, lower body panels, floor, seams, and edges of the engine bay. Inspect both sides, lift loose trim where possible, and look for bubbling paint, soft metal, or repairs that may conceal corrosion. A clean exterior is not enough: this project looked acceptable from the outside but had hidden interior issues and poorly executed parts. Document damage and previous repairs before choosing paint, because sound metal and careful surface preparation affect the durability of the finish.
Test-fit body additions before committing to paint. In this example, turbo-style flares added a couple of inches of width on each side. This changes the car’s visual balance and how the wheels sit under the arches, so check clearances with the intended wheel and suspension setup. Front and rear bumpers should also align with the body rather than look like afterthoughts. Make these decisions while repairs are still accessible.
Keep graphics restrained enough to support the BMW 2002’s shape. A racing-inspired stripe or period-style detail can strengthen the SoC direction, but placement should follow the body’s lines and avoid disguising uneven panel gaps. Choose the base color only after the shell repairs and surface preparation are complete. A considered restomod approach connects heritage styling with purposeful updates. Finish the bodywork in sequence: inspect, repair corrosion, align panels, test-fit additions, prepare surfaces, then apply paint and graphics. That order keeps the visual result tied to the structure beneath it.
Engine-compartment cleanup and rust prevention
Before cleaning the engine bay, photograph the wiring, hoses, brackets, and fasteners. Label connections before removing components, then clear away grease and dirt so seams and previous repairs are visible. Check around the battery tray, inner fenders, firewall, and frame rails for corrosion or trapped moisture. Remove loose paint and rust down to sound material, repair damaged metal, and protect prepared surfaces before reinstalling components. Keep drain paths open: coating over debris can hide problems instead of solving them.
In the United States, emissions, inspection, and registration rules vary by state and may depend on the vehicle and engine-swap details. State requirements determine which emissions equipment or inspection steps affect registration, so establish the criteria that apply before choosing an engine.
For the engine itself, separate cleanup from rebuilding. A 1976 BMW 2002 project used a bored-out 2.0-liter inline-four with an Ireland Engineering 292 camshaft. That combination gives a useful example of an upgrade plan, but the cylinder head still needs a careful inspection. Check valve condition, guides, sealing surfaces, and oil passages during disassembly. Clean parts methodically, keep components organized, and measure wear before deciding what needs machining or replacement.
Another BMW 2002 build had an estimated 150 to 160 hp, but it had not been dyno tested when filmed. Treat that figure as an estimate, not a verified result. Rebuild the drivetrain as a connected system: inspect the clutch, gearbox, driveshaft, and differential alongside engine work. The stock engine produced roughly 100 hp, so added output makes compatibility and condition important planning factors.
Ireland Engineering is a named source in the example, which used its 292 camshaft. For BMW 2002 restoration and performance parts, match supplier listings to the engine configuration and intended use; confirm fitment details before assembly. A careful sequence, clean, inspect, measure, rebuild, then protect, leaves fewer hidden faults beneath the finished engine bay.
Original restoration and modern upgrades
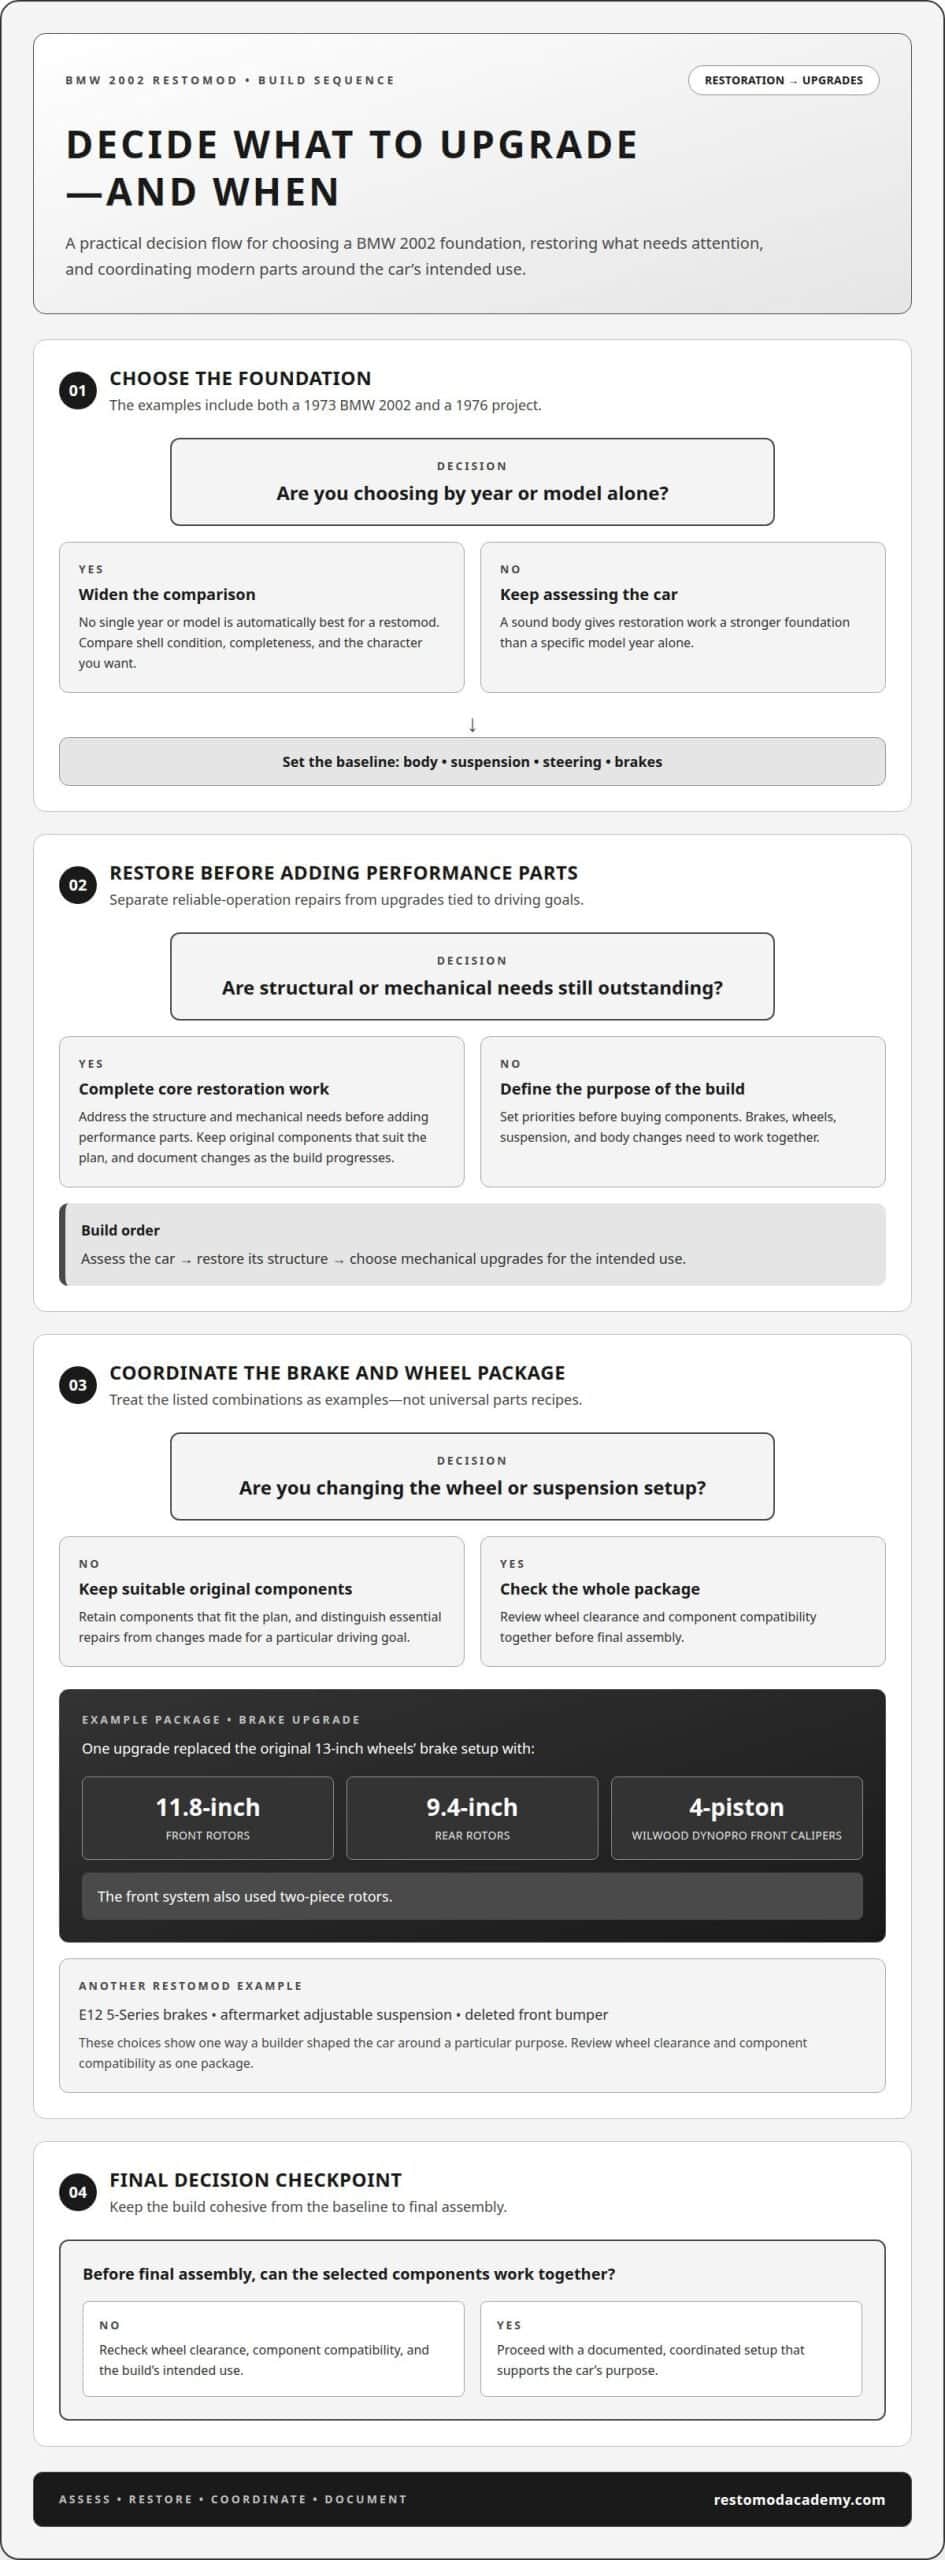
No single BMW 2002 year or model is automatically best for a restomod. The examples include a 1973 BMW 2002 and a 1976 project, so choose by shell condition, completeness, and the character you want. A sound body gives restoration work a stronger foundation than a specific model year alone.
Plan the build in stages: assess the car, restore its structure, and then choose mechanical upgrades for its intended use. Set priorities before buying components, since brakes, wheels, suspension, and body changes need to work together.
- Establish the baseline. Record the condition of the BMW 2002’s body, suspension, steering, and brakes. Separate repairs needed for reliable operation from upgrades that reflect your driving goals.
- Complete core restoration work. Address structural and mechanical needs before adding performance parts. Keep original components that suit your plan, and document changes as the build progresses.
- Match brakes to the wheel package. One BMW 2002 upgrade replaced the original 13-inch wheels’ brake setup with 11.8-inch front rotors, 9.4-inch rear rotors, and four-piston Wilwood Dynopro front calipers. The front system also used two-piece rotors. Treat that as one example, not a universal parts recipe.
- Coordinate suspension and braking. Another BMW 2002 restomod used E12 5-Series brakes, aftermarket adjustable suspension, and a deleted front bumper. Those choices show how a builder can shape the car around a particular purpose. Review wheel clearance and component compatibility as one package before final assembly.
For a road-focused build, prioritize predictable braking and suspension behavior alongside the engine plan. For a competition-inspired direction, define the requirements first, then select compatible components. A staged approach lets each decision support the next, preserving the BMW 2002’s character while bringing the driving experience in line with your goals.
Lightweight interior panels and retro-style seats
Start the cabin plan with the panels, then fit the seats around them. One BMW 2002 project used 5052 aluminum sheet for its rear interior panels, with a thickness of .040 inches. Its door panels used the same alloy at .063 inches. Those different thicknesses are specific choices from one build, not universal specifications. Use the existing panels as templates, marking mounting points and openings before cutting replacement sheets.
Test each panel in the car before finishing its edges. Check that it follows the door or rear-quarter contour and clears the handles, trim, and nearby hardware. Mark fastener locations using the original mounting points, then remove the panel for cutting and finishing. Smooth the edges and check the fit again before upholstery or final installation. This sequence helps maintain a tidy, purposeful appearance while preserving access to the hardware behind the panel.
Seat choice affects both driving position and cabin character. In this project, the Corbeau seat-bottom cushions were trimmed by about one inch to suit the installation. Treat this as a fit-specific modification, not a measurement to copy automatically. Position each seat, assess cushion support and pedal reach, and make adjustments deliberately. Keep the period-inspired look cohesive with the aluminum panels by using restrained colors and simple trim details.
Before final assembly, verify that panels sit securely and seats move or adjust as intended. Keep the panel templates and note each change, so later repairs or upholstery work can follow the same fit. Pair a lighter, cleaner cabin with the BMW 2002’s classic shape rather than adding modern details that compete with it. For structured guidance on coordinating interior choices with the wider build, use The Ultimate Restomod Guide.
Restomod Academy: Premium Project Blueprints
Restomod Academy’s Premium Project Blueprints are a natural next step when you’re ready to turn ideas into a structured build plan. Use them to bring decisions about bodywork, mechanical upgrades, and interior direction into one project framework. If you’re still shaping your overall approach, The Ultimate Restomod Guide offers broader educational support. Restomod Consulting Services can suit builders who want guidance as they work through project-specific decisions.
Choose the resource that matches your current stage: a blueprint for planning, the guide for learning, or consulting for focused direction. A clear plan helps keep each modification connected to the BMW 2002’s intended character.
Contact Restomod Academy to discuss your project.
Shape the Next Stage of Your Build
A BMW 2002 restomod project plan should remain a working guide, not a rigid script. As decisions take shape, record why each change belongs in the build and how it supports the way you want to drive. That simple discipline makes it easier to protect the car’s character while keeping new choices aligned with your original intent.
Before your next workshop session, choose one decision that needs clarity. Define the outcome you want, note the constraints that matter, and settle the sequence before committing to parts or finish details. A deliberate next step keeps the project moving without turning it into a collection of disconnected upgrades.
If you’re ready to refine your direction, connect with Restomod Academy and explore a path that fits your build. Keep learning, make each choice with purpose, and enjoy creating a BMW 2002 that feels unmistakably yours.
Frequently Asked Questions
What is a typical BMW 2002 restomod project plan and build timeline?
A typical plan moves from inspection and repairs to mechanical work, upgrades, and final assembly, but duration depends on scope and available workshop time. One Bangkok project had been underway for about 1.5 years when introduced to a forum; another owner described a project in America lasting about 10 years. Treat these as examples, not a schedule. Parts sourcing, hidden repairs, and DIY hours all affect progress.
How much does a BMW 2002 restomod cost in the United States?
The total depends on the starting car, restoration scope, parts, fabrication, and how much labor you complete at home. A shell needing structural repairs calls for a different plan from a sound, complete car. Engine choices, interior materials, paintwork, and specialist labor also shape spending. In the United States, location, dealer, and individual vehicle condition can affect purchase-related expenses, so keep those costs separate from the build budget.
Which engine swaps and upgrades work best in a BMW 2002 restomod?
The right engine depends on whether you value period character, simpler integration, or a more extensive performance conversion. A rebuilt BMW engine can preserve the car’s original layout; a swap adds decisions about mounts, transmission, cooling, wiring, and driveline compatibility. Set a realistic power goal first, then plan the supporting systems together. The right engine is one the chassis and brakes can support and that suits the car’s intended use.
What suspension, brake, and steering upgrades fit a BMW 2002?
Choose suspension, brakes, and steering as a coordinated package rather than as isolated upgrades. Match wheel clearance and tire fitment to the brake hardware, then consider how spring and damper choices affect handling. Inspect steering joints and mounts before tuning the suspension; worn components can undermine precision. Define whether the car is intended for road use or a competition-inspired build, and make sure each change supports that purpose.
What are the main risks and common cost overruns in a BMW 2002 restomod?
Hidden repairs, incompatible parts, and expanding scope are common sources of budget overruns. Replacing one component, for example, may reveal that a related bracket, fastener, or connection also needs attention. Reduce surprises by documenting the car’s condition, recording part numbers, and checking fit before finishing or assembly. Keep a written scope and separate essential repairs from optional upgrades so new ideas do not quietly reshape the entire build.
What parts suppliers specialize in BMW 2002 restoration and performance?
Ireland Engineering is named in the examples and supplied a 292 camshaft. Match supplier listings to the engine configuration and intended use, and confirm fitment before assembly.
A strong BMW 2002 restomod project plan balances heritage styling with dependable modern upgrades, while treating rust prevention and interior weight as part of the build from the start. The clearest examples work in stages: refresh the body, address corrosion, choose upgrades that suit the car’s purpose, then shape a lighter cabin without losing its vintage character.
It’s easy to focus on paint, flares, and power, but the details beneath the finish matter just as much. A car can look tidy outside and still hide interior problems or evidence of poorly fitted parts, so a careful assessment helps set priorities before work begins. Plan the cabin with the same care: one example uses thin 5052 aluminum sheet for its rear interior and door panels, giving the classic cockpit a pared-back feel.
Here, you’ll see how different BMW 2002 builds approach refreshed bodywork, rust prevention, modern mechanical upgrades, and retro-style interiors. Use their choices as a practical guide, then adapt the sequence and details to your own car, driving goals, and taste.
Key Takeaways
- Plan bodywork around the car’s intended character, balancing classic paint and racing-inspired details with careful preparation and rust prevention.
- Clean and inspect the engine compartment before refinishing it, so corrosion and previous workmanship can shape the restoration priorities.
- Choose modern brake, suspension, and drivetrain upgrades to suit how you want the BMW 2002 to drive, while keeping the build cohesive.
- Explore lightweight aluminum panels and retro-style seats to create a simpler cabin that preserves the car’s vintage feel.
Bodywork, paint color, and racing-inspired graphics
Start with the shell, not the paint. In one BMW 2002 restomod example, the owner wanted a reliable, fast, fun car with a modern twist, inspired by a modernized BMW “Singer” 2002. The owner leaned toward the SoC look and wanted front and rear bumpers for protection. That choice shaped the bodywork before paint or graphics could define the finished character. Treat the build as a coordinated design: bumper fit, wheel clearance, panel alignment, and paint scheme need to work together.
Common rust inspection points include the wheel arches, lower body panels, floor, seams, and edges of the engine bay. Inspect both sides, lift loose trim where possible, and look for bubbling paint, soft metal, or repairs that may conceal corrosion. A clean exterior is not enough: this project looked acceptable from the outside but had hidden interior issues and poorly executed parts. Document damage and previous repairs before choosing paint, because sound metal and careful surface preparation affect the durability of the finish.
Test-fit body additions before committing to paint. In this example, turbo-style flares added a couple of inches of width on each side. This changes the car’s visual balance and how the wheels sit under the arches, so check clearances with the intended wheel and suspension setup. Front and rear bumpers should also align with the body rather than look like afterthoughts. Make these decisions while repairs are still accessible.
Keep graphics restrained enough to support the BMW 2002’s shape. A racing-inspired stripe or period-style detail can strengthen the SoC direction, but placement should follow the body’s lines and avoid disguising uneven panel gaps. Choose the base color only after the shell repairs and surface preparation are complete. A considered restomod approach connects heritage styling with purposeful updates. Finish the bodywork in sequence: inspect, repair corrosion, align panels, test-fit additions, prepare surfaces, then apply paint and graphics. That order keeps the visual result tied to the structure beneath it.
Engine-compartment cleanup and rust prevention
Before cleaning the engine bay, photograph the wiring, hoses, brackets, and fasteners. Label connections before removing components, then clear away grease and dirt so seams and previous repairs are visible. Check around the battery tray, inner fenders, firewall, and frame rails for corrosion or trapped moisture. Remove loose paint and rust down to sound material, repair damaged metal, and protect prepared surfaces before reinstalling components. Keep drain paths open: coating over debris can hide problems instead of solving them.
In the United States, emissions, inspection, and registration rules vary by state and may depend on the vehicle and engine-swap details. State requirements determine which emissions equipment or inspection steps affect registration, so establish the criteria that apply before choosing an engine.
For the engine itself, separate cleanup from rebuilding. A 1976 BMW 2002 project used a bored-out 2.0-liter inline-four with an Ireland Engineering 292 camshaft. That combination gives a useful example of an upgrade plan, but the cylinder head still needs a careful inspection. Check valve condition, guides, sealing surfaces, and oil passages during disassembly. Clean parts methodically, keep components organized, and measure wear before deciding what needs machining or replacement.
Another BMW 2002 build had an estimated 150 to 160 hp, but it had not been dyno tested when filmed. Treat that figure as an estimate, not a verified result. Rebuild the drivetrain as a connected system: inspect the clutch, gearbox, driveshaft, and differential alongside engine work. The stock engine produced roughly 100 hp, so added output makes compatibility and condition important planning factors.
Ireland Engineering is a named source in the example, which used its 292 camshaft. For BMW 2002 restoration and performance parts, match supplier listings to the engine configuration and intended use; confirm fitment details before assembly. A careful sequence, clean, inspect, measure, rebuild, then protect, leaves fewer hidden faults beneath the finished engine bay.
Original restoration and modern upgrades
No single BMW 2002 year or model is automatically best for a restomod. The examples include a 1973 BMW 2002 and a 1976 project, so choose by shell condition, completeness, and the character you want. A sound body gives restoration work a stronger foundation than a specific model year alone.
Plan the build in stages: assess the car, restore its structure, and then choose mechanical upgrades for its intended use. Set priorities before buying components, since brakes, wheels, suspension, and body changes need to work together.
- Establish the baseline. Record the condition of the BMW 2002’s body, suspension, steering, and brakes. Separate repairs needed for reliable operation from upgrades that reflect your driving goals.
- Complete core restoration work. Address structural and mechanical needs before adding performance parts. Keep original components that suit your plan, and document changes as the build progresses.
- Match brakes to the wheel package. One BMW 2002 upgrade replaced the original 13-inch wheels’ brake setup with 11.8-inch front rotors, 9.4-inch rear rotors, and four-piston Wilwood Dynopro front calipers. The front system also used two-piece rotors. Treat that as one example, not a universal parts recipe.
- Coordinate suspension and braking. Another BMW 2002 restomod used E12 5-Series brakes, aftermarket adjustable suspension, and a deleted front bumper. Those choices show how a builder can shape the car around a particular purpose. Review wheel clearance and component compatibility as one package before final assembly.
For a road-focused build, prioritize predictable braking and suspension behavior alongside the engine plan. For a competition-inspired direction, define the requirements first, then select compatible components. A staged approach lets each decision support the next, preserving the BMW 2002’s character while bringing the driving experience in line with your goals.
Lightweight interior panels and retro-style seats
Start the cabin plan with the panels, then fit the seats around them. One BMW 2002 project used 5052 aluminum sheet for its rear interior panels, with a thickness of .040 inches. Its door panels used the same alloy at .063 inches. Those different thicknesses are specific choices from one build, not universal specifications. Use the existing panels as templates, marking mounting points and openings before cutting replacement sheets.
Test each panel in the car before finishing its edges. Check that it follows the door or rear-quarter contour and clears the handles, trim, and nearby hardware. Mark fastener locations using the original mounting points, then remove the panel for cutting and finishing. Smooth the edges and check the fit again before upholstery or final installation. This sequence helps maintain a tidy, purposeful appearance while preserving access to the hardware behind the panel.
Seat choice affects both driving position and cabin character. In this project, the Corbeau seat-bottom cushions were trimmed by about one inch to suit the installation. Treat this as a fit-specific modification, not a measurement to copy automatically. Position each seat, assess cushion support and pedal reach, and make adjustments deliberately. Keep the period-inspired look cohesive with the aluminum panels by using restrained colors and simple trim details.
Before final assembly, verify that panels sit securely and seats move or adjust as intended. Keep the panel templates and note each change, so later repairs or upholstery work can follow the same fit. Pair a lighter, cleaner cabin with the BMW 2002’s classic shape rather than adding modern details that compete with it. For structured guidance on coordinating interior choices with the wider build, use The Ultimate Restomod Guide.
Restomod Academy: Premium Project Blueprints
Restomod Academy’s Premium Project Blueprints are a natural next step when you’re ready to turn ideas into a structured build plan. Use them to bring decisions about bodywork, mechanical upgrades, and interior direction into one project framework. If you’re still shaping your overall approach, The Ultimate Restomod Guide offers broader educational support. Restomod Consulting Services can suit builders who want guidance as they work through project-specific decisions.
Choose the resource that matches your current stage: a blueprint for planning, the guide for learning, or consulting for focused direction. A clear plan helps keep each modification connected to the BMW 2002’s intended character.
Contact Restomod Academy to discuss your project.
Shape the Next Stage of Your Build
A BMW 2002 restomod project plan should remain a working guide, not a rigid script. As decisions take shape, record why each change belongs in the build and how it supports the way you want to drive. That simple discipline makes it easier to protect the car’s character while keeping new choices aligned with your original intent.
Before your next workshop session, choose one decision that needs clarity. Define the outcome you want, note the constraints that matter, and settle the sequence before committing to parts or finish details. A deliberate next step keeps the project moving without turning it into a collection of disconnected upgrades.
If you’re ready to refine your direction, connect with Restomod Academy and explore a path that fits your build. Keep learning, make each choice with purpose, and enjoy creating a BMW 2002 that feels unmistakably yours.
Frequently Asked Questions
What is a typical BMW 2002 restomod project plan and build timeline?
A typical plan moves from inspection and repairs to mechanical work, upgrades, and final assembly, but duration depends on scope and available workshop time. One Bangkok project had been underway for about 1.5 years when introduced to a forum; another owner described a project in America lasting about 10 years. Treat these as examples, not a schedule. Parts sourcing, hidden repairs, and DIY hours all affect progress.
How much does a BMW 2002 restomod cost in the United States?
The total depends on the starting car, restoration scope, parts, fabrication, and how much labor you complete at home. A shell needing structural repairs calls for a different plan from a sound, complete car. Engine choices, interior materials, paintwork, and specialist labor also shape spending. In the United States, location, dealer, and individual vehicle condition can affect purchase-related expenses, so keep those costs separate from the build budget.
Which engine swaps and upgrades work best in a BMW 2002 restomod?
The right engine depends on whether you value period character, simpler integration, or a more extensive performance conversion. A rebuilt BMW engine can preserve the car’s original layout; a swap adds decisions about mounts, transmission, cooling, wiring, and driveline compatibility. Set a realistic power goal first, then plan the supporting systems together. The right engine is one the chassis and brakes can support and that suits the car’s intended use.
What suspension, brake, and steering upgrades fit a BMW 2002?
Choose suspension, brakes, and steering as a coordinated package rather than as isolated upgrades. Match wheel clearance and tire fitment to the brake hardware, then consider how spring and damper choices affect handling. Inspect steering joints and mounts before tuning the suspension; worn components can undermine precision. Define whether the car is intended for road use or a competition-inspired build, and make sure each change supports that purpose.
What are the main risks and common cost overruns in a BMW 2002 restomod?
Hidden repairs, incompatible parts, and expanding scope are common sources of budget overruns. Replacing one component, for example, may reveal that a related bracket, fastener, or connection also needs attention. Reduce surprises by documenting the car’s condition, recording part numbers, and checking fit before finishing or assembly. Keep a written scope and separate essential repairs from optional upgrades so new ideas do not quietly reshape the entire build.
What parts suppliers specialize in BMW 2002 restoration and performance?
Ireland Engineering is named in the examples and supplied a 292 camshaft. Match supplier listings to the engine configuration and intended use, and confirm fitment before assembly.