
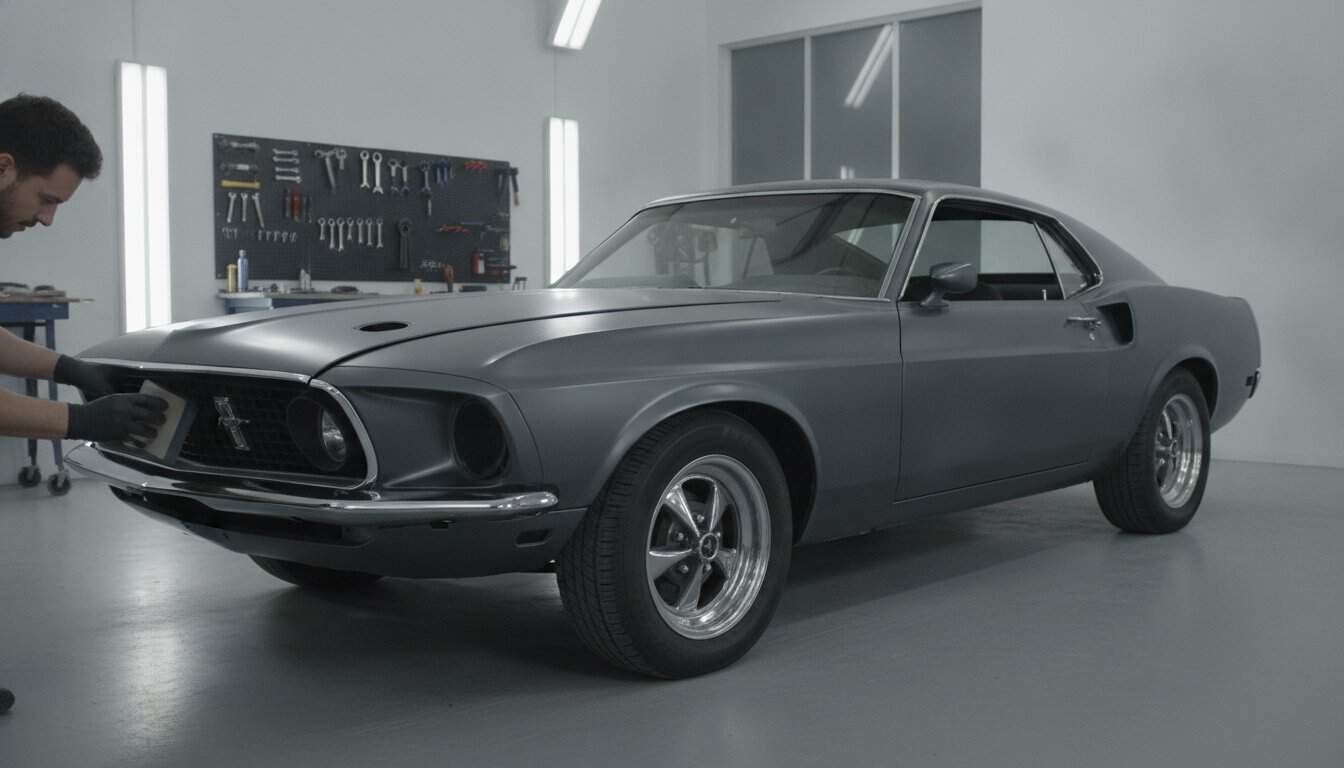
What if the most critical component of your high-performance build isn’t the engine, but the vintage steel it sits in? You’ve likely felt that surge of excitement when looking at a classic project, quickly followed by the sinking feeling of discovering hidden rust in the rocker panels. It’s daunting to think about cutting into original metal, especially when you need to make room for modern suspension and wider tires. This classic car bodywork guide serves as your roadmap to overcoming those hurdles with the precision of a master craftsman.
We understand that your goal is a solid, rust-free chassis with perfect panel gaps that can handle the stress of contemporary power. You’re about to learn how to master the art of transforming vintage steel into a precision-crafted foundation for your modern performance machine. We’ll walk through the essential steps of identifying structural weaknesses, perfecting body lines, and modifying wheel wells for modern upgrades. By the end of this guide, you’ll have the confidence to transition from a passive admirer to an active creator, ensuring your project is built with both heritage and durability in mind.
Key Takeaways
- Understand why structural rigidity is non-negotiable when dropping modern horsepower into vintage frames and how to identify high-stress zones.
- Use this classic car bodywork guide to navigate the hierarchy of rust removal and ensure your foundation is free of hidden corrosion.
- Discover how to modernize your car’s silhouette by shaving drip rails and narrowing bumpers for a tighter, more cohesive look.
- Perfect your finish by implementing methodical block sanding and guide coat techniques that reveal and eliminate even the smallest surface imperfections.
The Restomod Bodywork Philosophy: Reimagining Vintage Steel
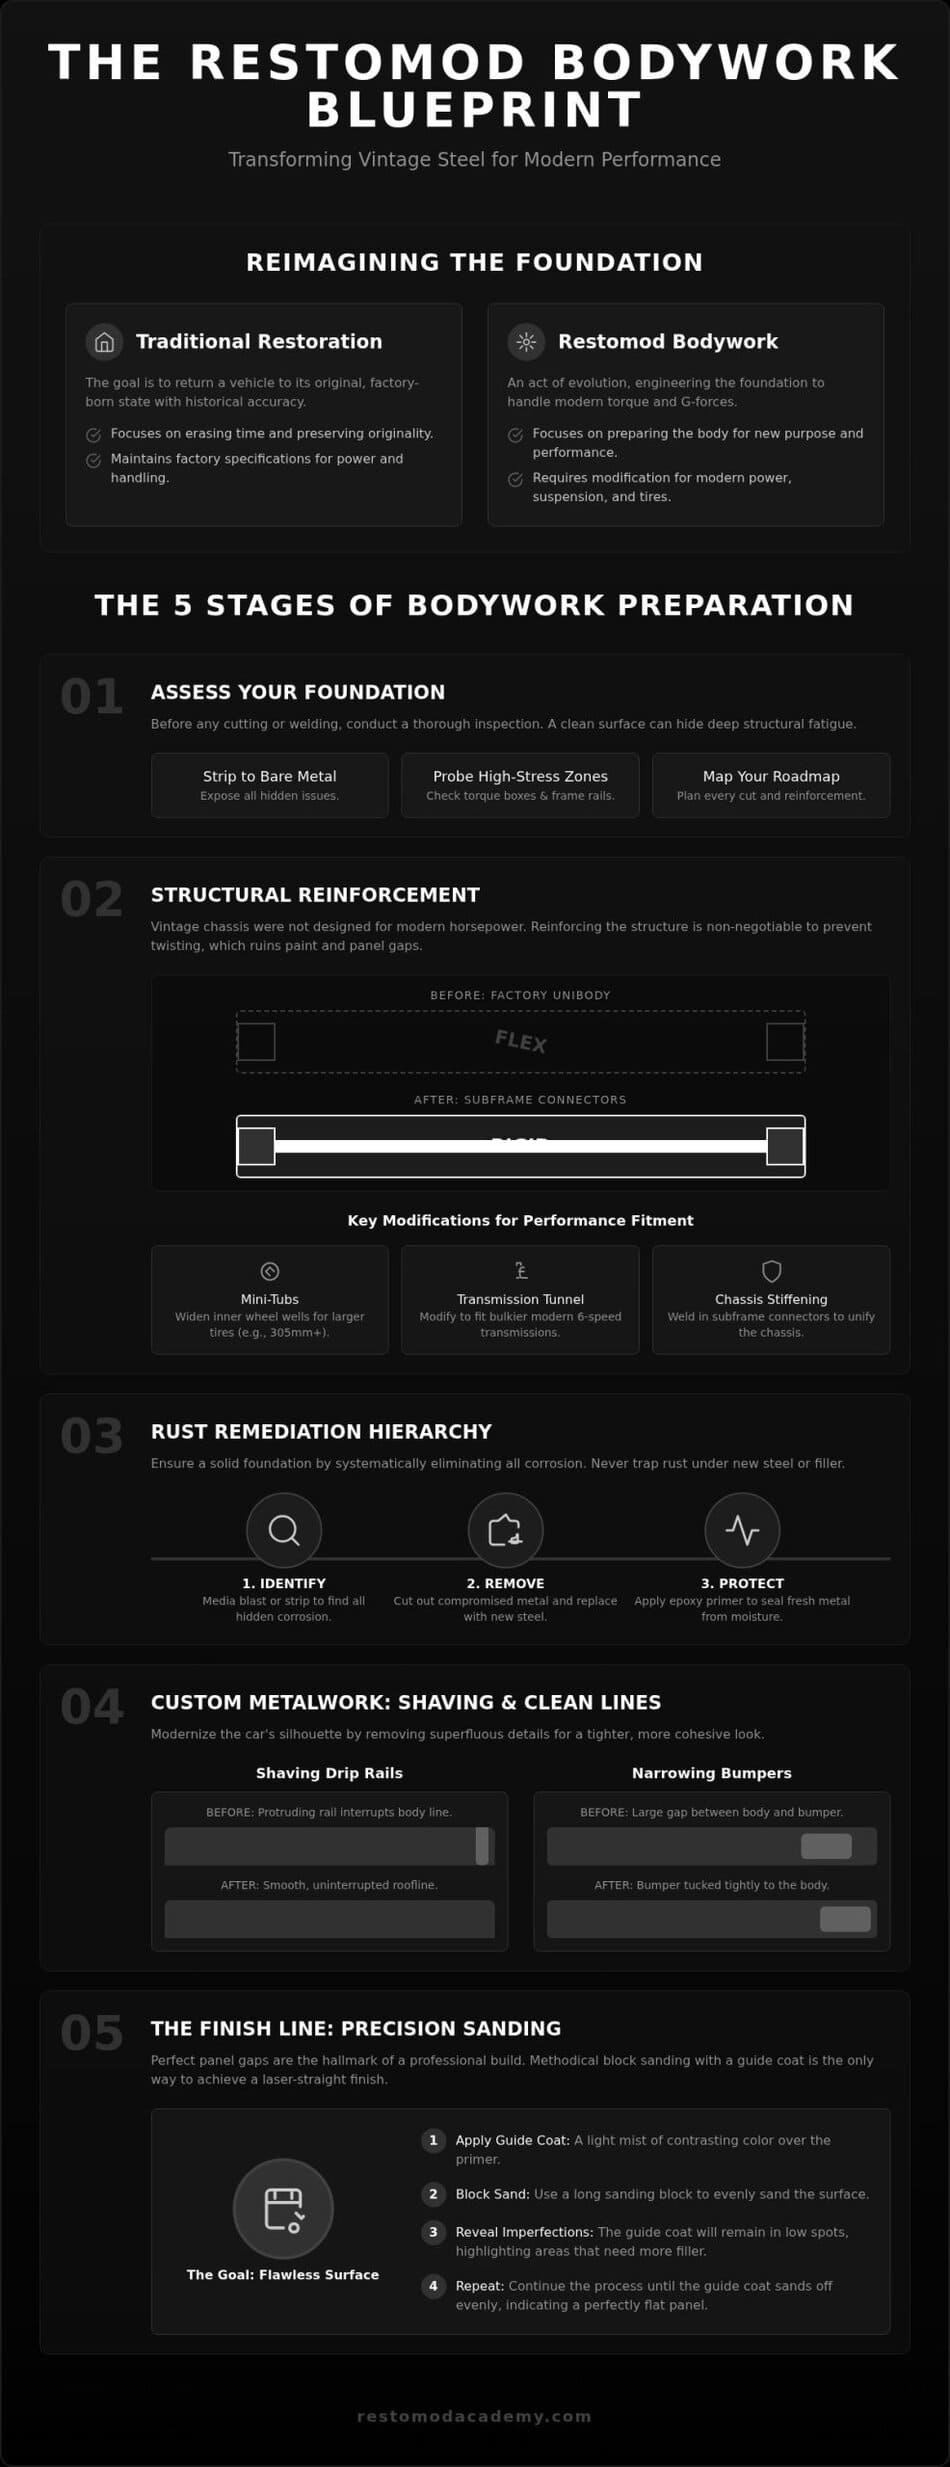
Restomodding is a deliberate act of evolution. While traditional automotive restoration focuses on returning a vehicle to its factory-born state, restomod bodywork demands a more aggressive vision. You aren’t just erasing time; you’re engineering a foundation that can handle modern torque and lateral G-forces. This classic car bodywork guide begins with a fundamental truth: the metal must serve the machine’s new purpose. You must look at a panel not just for what it was in 1969, but for what it needs to be to support a modern performance engine.
For your first build, aim for a driver-level restoration. This approach prioritizes a clean, reliable finish over the obsessive perfection of a concours show car. It allows you to actually drive the vehicle without fearing every pebble on the asphalt. Before you strike the first spark, decide on your aesthetic direction. Do you want a sleeper that hides its modern soul under a factory-original skin, or an aggressive custom profile that screams performance? This choice dictates every cut you make. Embracing this mental shift is vital. Cutting into original panels can feel like sacrilege, but it’s often the only way to accommodate the wider tires and modern suspension needed for a truly capable performance machine. Using a classic car bodywork guide helps you make these decisions with confidence rather than hesitation.
Assessing Your Foundation: Survivor vs. Project Car
Strip the car to its bones before making any assumptions. A survivor might look clean on the surface but hide decades of structural fatigue in the torque boxes or frame rails. Use a pick tool and a high-intensity light to probe for thin spots or pinholes that indicate internal rot. When you find damage, ask yourself if the original steel is worth the labor of patching. Often, modern reproduction steel is the smarter, safer choice for structural integrity, especially when you plan to double the factory horsepower. Always map out your bodywork roadmap in detail. Knowing exactly where you’ll reinforce the chassis before you pick up a grinder prevents costly backtracking later.
The Blueprint for a Clean Aesthetic
Every classic has a character line that defines its soul. Your job is to accentuate that line while integrating modern requirements. Check out our deep dive on what is a restomod to understand how these design choices impact the final build. Balancing classic proportions with modern ground clearance requires foresight. You might need to stretch wheel arches or modify floor pans to keep the car’s iconic silhouette while making room for a modern drivetrain. It’s a delicate dance between honoring the past and demanding more from the future. Focus on the gaps; tight, uniform panel gaps are the hallmark of a professional-grade restomod build.
Structural Reinforcement: Preparing the Chassis for Modern Power
Dropping a modern crate engine into a fifty year old unibody is a recipe for disaster if you haven’t reinforced the structure. Factory engineers never intended for these chassis to handle the torque of a contemporary performance powerplant. This classic car bodywork guide prioritizes structural rigidity because a twisting frame will eventually crack your fresh paint and ruin your panel gaps. Focus your attention on the torque boxes and frame rails. These are the high-stress points where the suspension transfers energy into the body. By installing subframe connectors, you effectively tie the front and rear of the car together, creating a unified platform that stays true under heavy acceleration.
Before you weld in reinforcements, ensure you have followed proper Rust Remediation and Surface Preparation Strategies to avoid trapping rot under new steel. Clean metal is the only acceptable surface for structural welding. If you’re feeling overwhelmed by the structural demands of your build, our Restomod Consulting Services can help you blueprint your chassis modifications with precision. Taking the time to stiffen the skeleton now ensures that your bodywork remains laser-straight for decades to come.
Modifying for Performance Fitment
Modern performance requires modern footprints. To fit the 305mm or wider tires common on today’s performance machines, you will likely need to perform a mini-tub. This involves widening the inner wheel wells toward the frame rails. It’s a surgical process that requires careful measurement to keep the exterior lines untouched. Similarly, modern six-speed transmissions are significantly bulkier than vintage four-speeds. You should expect to modify the transmission tunnel and potentially the firewall to achieve the correct drivetrain angle. For a detailed look at managing these clearances during a modern heart transplant, refer to our definitive guide to an LS engine swap.
Essential Gear for Metal Fabrication
Precision metalwork is only possible with the right tools in your arsenal. You don’t need a professional shop to achieve elite results, but you do need a reliable MIG welder and a solid set of hammers and dollies. For more complex curves, an English wheel or a shrinker-stretcher becomes indispensable. Always prioritize safety by maintaining a clean workspace and using a high-quality welding helmet. You can find our top picks for these tools in our recommended gear section. This classic car bodywork guide is meant to empower you to do the work yourself, but never compromise on the quality of your equipment or your personal protection.
Rust Remediation and Surface Preparation Strategies
Once you’ve reinforced the chassis, it’s time to confront the most persistent enemy of vintage metal: oxidation. This classic car bodywork guide treats rust not as a cosmetic blemish, but as a biological threat that must be completely excised. You have three main paths for removal. Media blasting is the most thorough, stripping a whole shell to white metal, but it’s messy and requires professional equipment to avoid warping large panels. Chemical stripping reaches deep into seams where mechanical tools can’t touch, yet it requires meticulous neutralization to prevent future paint failure. Mechanical grinding with abrasive discs is your best friend for localized repairs, though you must be careful not to generate enough heat to warp the panel. Pick the method that matches the scale of your project, but never compromise on the result. Every speck of brown must be gone before you move forward.
Listen closely to this rule: never use body filler over active corrosion or pinholes. It might look smooth for a few months, but moisture will continue to feast on the steel underneath until the filler bubbles and falls off. If you find a hole, you must cut it out. The art of the patch panel lies in the butt-weld. By fitting the new steel perfectly flush with the old, you create a repair that is virtually invisible once ground smooth. This technique avoids the moisture-trapping overlaps that lead to “restoration’s revenge” a few years down the road. When welding these patches, use short tacks and jump around the panel to manage heat. Excessive heat on a large, flat quarter panel will cause it to oil-can, creating a structural nightmare that even the best block-sander can’t fix. Patience with the welder saves hours with the grinder.
Cutting Out the Cancer
Don’t trust your eyes alone when searching for rot. Use the hammer-and-pick method; tap the steel and listen for the dull thud of thin metal or poke suspected areas with a sharp pick. If it goes through, the metal is gone. Create precise templates using heavy cardstock to mirror the curves of the original body before you cut anything away. This ensures your new steel fits like a glove. Before you seal up any boxed sections or inner rockers, coat the interior surfaces with weld-through primers and internal cavity waxes to stop future rust from starting where you can’t see it.
The First Line of Defense: Modern Primers
Bare vintage steel is incredibly vulnerable, so you need to seal it immediately after cleaning. Epoxy primer is the only professional choice for this first layer because it’s completely waterproof and sticks to steel with incredible tenacity. Unlike high-build primers, epoxy doesn’t shrink or absorb moisture. You must respect the induction time and the recoat window specified by the manufacturer to ensure a proper bond between layers. Epoxy primer creates a non-porous chemical bond through a cross-linking molecular structure that seals bare vintage steel from oxygen and moisture. This foundation is what allows your final paint job to survive the elements for decades.
Custom Metalwork: Shaving and Clean Lines
Once your foundation is structurally sound, you can begin the aesthetic transformation that truly separates a restomod from a standard restoration. This classic car bodywork guide transitions from preservation to custom fabrication, where you have the freedom to refine the original design. Start by shaving the drip rails and door handles to achieve a streamlined, modern profile. These factory features often disrupt the car’s natural flow; removing them creates a continuous surface that catches the light without interruption. Similarly, narrowing and sectioning your chrome bumpers allows them to sit tighter against the body, eliminating the unsightly gaps common in 1960s production lines. It’s a surgical process of cutting, tucking, and welding that results in a much more cohesive appearance.
Don’t stop at the exterior sheet metal. Integrating modern LED lighting into vintage housings requires custom fabrication to ensure the new tech doesn’t look like a tacked-on afterthought. Inside the engine bay, you should build custom close-out panels to hide the modern wiring harnesses and plumbing that accompany high-performance swaps. This creates a clean, clinical environment that highlights the engine itself rather than the clutter of modern electronics. If you’re ready to take your project from a hobby to a masterpiece, start by studying The Ultimate Restomod Guide for a complete roadmap of the custom build process.
The Art of Shaving and Smoothing
Shaving trim and emblems requires more than just filling holes with a welder. You must manage thermal expansion carefully to avoid sink marks that reveal themselves only after the paint is dry. For a truly modern look, consider creating custom filler panels for a flush-mount glass installation. This eliminates the need for bulky factory gaskets and creates a seamless transition between the steel and the glass. Always remember that different metals expand at different rates, so your welding and cooling techniques must be methodical to keep the panels from distorting under the heat of the torch.
Refining Panel Gaps and Transitions
Consistency is the hallmark of a professional-grade build. Use the welding rod method to achieve uniform 3/16 inch gaps across every door, hood, and trunk lid. By welding a specific diameter rod to the edge of a panel and then carefully grinding it back, you can create laser-straight transitions that the factory could never achieve. Align your body lines across multiple panels to ensure a factory-plus finish that looks perfect from every angle. It’s vital to mock up all your modern trim and hardware before you apply the final primer. There is nothing more frustrating than having to grind on a finished panel because a new latch or handle doesn’t clear the custom metalwork you just completed.
The Finish Line: Precision Sanding and Paint Systems
The final stages of your build are where patience pays its greatest dividend. After the heavy fabrication is complete, you enter the meticulous world of surface refinement. This classic car bodywork guide emphasizes that a show-stopping finish isn’t created in the paint booth; it’s earned on the shop floor with a sanding block in hand. You must be methodical. Use long blocks and sand in an X-pattern to ensure you’re leveling the surface rather than following existing ripples. This process is the only way to achieve the laser-straight panels that define a high-end restomod. You can find the specific blocks and abrasives needed for this stage in our recommended gear section.
You cannot rely on your eyes alone during this phase. Guide coats are your most honest critics. By applying a light mist of contrasting powder or paint over your primer, you’ll immediately see every low spot and high ridge as you sand. If the guide coat remains in a valley, you have more work to do. Once the surface feels perfect, perform a final inspection using high-intensity LED light bars positioned at low angles. These lights cast long shadows over even the smallest imperfections, allowing you to catch ripples that would otherwise be invisible until the final clear coat is applied. This level of scrutiny is what separates a backyard project from a professional-grade machine.
Choosing Your Paint System
Your choice of paint system should align with your project’s ultimate purpose. While single-stage paints offer a period-correct look for traditional restorations, most restomod builders opt for a base-coat/clear-coat system. This modern approach provides incredible depth and allows you to wet-sand and buff the finish to a mirror shine. With major paint manufacturers like PPG and Axalta increasing global prices by up to 20% in early 2026, choosing high-quality materials is a significant investment that demands respect. We’ve seen a rise in matte and satin finishes recently, which offer a stealthy, industrial aesthetic that pairs perfectly with modern wheels and trim. When selecting a color, consider a palette that honors the car’s heritage while adding a contemporary twist, such as a vintage hue mixed with a modern pearl or metallic flake.
Protection and Sound Deadening
A true performance machine must be as durable as it is beautiful. Apply modern epoxy-based undercoatings to the wheel wells and floor pans to prevent future corrosion and provide a clean, uniform look. Before you even think about the interior, install high-quality sound deadening sheets throughout the cabin. This step is critical for achieving the modern refinement and quiet ride quality of a luxury car. During final assembly, protect your fresh paint by taping off every edge and corner. One slipped screwdriver during the reinstallation of chrome or glass can ruin months of labor, so take the extra time to shield your work. Your journey through this classic car bodywork guide concludes here, but the satisfaction of a precision-crafted machine is just beginning.
Take the Wheel of Your Metal Transformation
You’ve moved through the critical stages of reimagining vintage steel, from the initial structural reinforcements to the final precision of block sanding. This classic car bodywork guide has shown that a world-class build isn’t about expensive commercial acquisition; it’s about the disciplined labor you put in at the workbench. You’ve learned how to identify structural fatigue, manage the heat of a welder to prevent warpage, and use guide coats to reveal hidden surface flaws. These meticulous steps ensure that your foundation is as reliable as the modern performance drivetrain you plan to install.
Transforming a rusted shell into a precision-crafted machine is a marathon of small wins, but you don’t have to walk it alone. We offer authoritative guides trusted by thousands of builders, providing premium project blueprints and expert consulting for your most complex metalwork challenges. Download The Ultimate Restomod Guide to master every stage of your build and join a community dedicated to preserving heritage through modern innovation. The journey of a thousand welds begins with a single spark. Pick up your grinder, trust the process, and start crafting the machine you’ve always envisioned.
Frequently Asked Questions
How much does a full classic car body restoration cost?
Industry pricing in 2026 suggests a mid-range paint job typically costs between $2,000 and $5,000, while a show-quality finish can exceed $10,000. These figures don’t include the labor for metal repair or structural work. If you’re tackling a single panel, expect costs between $550 and $1,650 depending on the complexity. Doing the labor yourself is the most effective way to manage these significant expenses while ensuring the quality of the foundation.
Can I learn to do classic car bodywork as a complete beginner?
You can absolutely learn bodywork as a beginner if you approach the process with patience and the right educational roadmap. Start by practicing on scrap metal before touching your project car. This classic car bodywork guide is designed to break down intimidating tasks into logical steps. By focusing on one panel at a time and maintaining high standards for quality, you’ll develop the muscle memory and technical intuition needed for a professional result.
What is the best type of welder for classic car sheet metal?
A MIG welder with a shielding gas setup is the best choice for working on thin classic car sheet metal. It offers a shorter learning curve than TIG welding while providing excellent control over heat and penetration. Use a high-quality machine that allows for fine adjustments to wire speed and voltage. This control is vital for making the small, intermittent tack welds required to prevent panel warpage during the fabrication phase.
Is it better to repair original body panels or buy reproduction parts?
Original panels are usually preferred because they offer the best factory fit and gauge thickness, but reproduction steel is often the smarter choice for heavily rotted sections. If you spend forty hours patching a single fender, you might have been better off buying a high-quality reproduction part. Always inspect reproduction panels for fitment before welding. Sometimes the labor required to massage a new part exceeds the time needed to save the original heritage steel.
How do I prevent rust from returning after a bodywork repair?
Preventing rust return requires sealing bare metal immediately with a non-porous epoxy primer. Never leave your project in a damp garage without a protective coating. Once the exterior is sealed, treat the interior of boxed sections and rockers with internal cavity waxes. These coatings provide a hydrophobic barrier that stops moisture from attacking the steel from the inside out. Clean, dry metal and high-quality primers are your primary defense against future oxidation.
What is the difference between body filler and lead loading?
Body filler is a modern polyester resin used for fine surface leveling, while lead loading is a traditional method of filling seams with a molten metal alloy. Lead loading offers superior durability and doesn’t shrink, but it requires significant skill and carries health risks. Most modern builders prefer high-quality body fillers because they’re easier to sand and perfectly compatible with modern paint systems. Use filler only for minor imperfections, never to bridge holes or rot.
How long does the bodywork phase of a restomod project typically take?
The bodywork phase of a restomod build can take anywhere from 200 to over 1,000 hours depending on the condition of the car and your desired finish level. It’s often the longest part of the restoration journey. This classic car bodywork guide encourages you to embrace this slow pace. Don’t rush the block sanding or the metal finishing stages. The satisfaction of achieving a laser-straight body is well worth the months of methodical labor in the workshop.
What safety equipment is essential for classic car bodywork?
Essential safety gear includes a high-quality respirator with P100 filters, a professional welding helmet, and impact-resistant eye protection. You’re dealing with fine dust, metal shards, and harmful UV rays, so don’t cut corners here. Use heavy leather gloves when welding and nitrile gloves when handling chemicals or primers. Maintaining a clean, well-ventilated workspace is just as important as the gear you wear. Your long-term health is the most important tool in your shop.
What if the most critical component of your high-performance build isn’t the engine, but the vintage steel it sits in? You’ve likely felt that surge of excitement when looking at a classic project, quickly followed by the sinking feeling of discovering hidden rust in the rocker panels. It’s daunting to think about cutting into original metal, especially when you need to make room for modern suspension and wider tires. This classic car bodywork guide serves as your roadmap to overcoming those hurdles with the precision of a master craftsman.
We understand that your goal is a solid, rust-free chassis with perfect panel gaps that can handle the stress of contemporary power. You’re about to learn how to master the art of transforming vintage steel into a precision-crafted foundation for your modern performance machine. We’ll walk through the essential steps of identifying structural weaknesses, perfecting body lines, and modifying wheel wells for modern upgrades. By the end of this guide, you’ll have the confidence to transition from a passive admirer to an active creator, ensuring your project is built with both heritage and durability in mind.
Key Takeaways
- Understand why structural rigidity is non-negotiable when dropping modern horsepower into vintage frames and how to identify high-stress zones.
- Use this classic car bodywork guide to navigate the hierarchy of rust removal and ensure your foundation is free of hidden corrosion.
- Discover how to modernize your car’s silhouette by shaving drip rails and narrowing bumpers for a tighter, more cohesive look.
- Perfect your finish by implementing methodical block sanding and guide coat techniques that reveal and eliminate even the smallest surface imperfections.
The Restomod Bodywork Philosophy: Reimagining Vintage Steel
Restomodding is a deliberate act of evolution. While traditional automotive restoration focuses on returning a vehicle to its factory-born state, restomod bodywork demands a more aggressive vision. You aren’t just erasing time; you’re engineering a foundation that can handle modern torque and lateral G-forces. This classic car bodywork guide begins with a fundamental truth: the metal must serve the machine’s new purpose. You must look at a panel not just for what it was in 1969, but for what it needs to be to support a modern performance engine.
For your first build, aim for a driver-level restoration. This approach prioritizes a clean, reliable finish over the obsessive perfection of a concours show car. It allows you to actually drive the vehicle without fearing every pebble on the asphalt. Before you strike the first spark, decide on your aesthetic direction. Do you want a sleeper that hides its modern soul under a factory-original skin, or an aggressive custom profile that screams performance? This choice dictates every cut you make. Embracing this mental shift is vital. Cutting into original panels can feel like sacrilege, but it’s often the only way to accommodate the wider tires and modern suspension needed for a truly capable performance machine. Using a classic car bodywork guide helps you make these decisions with confidence rather than hesitation.
Assessing Your Foundation: Survivor vs. Project Car
Strip the car to its bones before making any assumptions. A survivor might look clean on the surface but hide decades of structural fatigue in the torque boxes or frame rails. Use a pick tool and a high-intensity light to probe for thin spots or pinholes that indicate internal rot. When you find damage, ask yourself if the original steel is worth the labor of patching. Often, modern reproduction steel is the smarter, safer choice for structural integrity, especially when you plan to double the factory horsepower. Always map out your bodywork roadmap in detail. Knowing exactly where you’ll reinforce the chassis before you pick up a grinder prevents costly backtracking later.
The Blueprint for a Clean Aesthetic
Every classic has a character line that defines its soul. Your job is to accentuate that line while integrating modern requirements. Check out our deep dive on what is a restomod to understand how these design choices impact the final build. Balancing classic proportions with modern ground clearance requires foresight. You might need to stretch wheel arches or modify floor pans to keep the car’s iconic silhouette while making room for a modern drivetrain. It’s a delicate dance between honoring the past and demanding more from the future. Focus on the gaps; tight, uniform panel gaps are the hallmark of a professional-grade restomod build.
Structural Reinforcement: Preparing the Chassis for Modern Power
Dropping a modern crate engine into a fifty year old unibody is a recipe for disaster if you haven’t reinforced the structure. Factory engineers never intended for these chassis to handle the torque of a contemporary performance powerplant. This classic car bodywork guide prioritizes structural rigidity because a twisting frame will eventually crack your fresh paint and ruin your panel gaps. Focus your attention on the torque boxes and frame rails. These are the high-stress points where the suspension transfers energy into the body. By installing subframe connectors, you effectively tie the front and rear of the car together, creating a unified platform that stays true under heavy acceleration.
Before you weld in reinforcements, ensure you have followed proper Rust Remediation and Surface Preparation Strategies to avoid trapping rot under new steel. Clean metal is the only acceptable surface for structural welding. If you’re feeling overwhelmed by the structural demands of your build, our Restomod Consulting Services can help you blueprint your chassis modifications with precision. Taking the time to stiffen the skeleton now ensures that your bodywork remains laser-straight for decades to come.
Modifying for Performance Fitment
Modern performance requires modern footprints. To fit the 305mm or wider tires common on today’s performance machines, you will likely need to perform a mini-tub. This involves widening the inner wheel wells toward the frame rails. It’s a surgical process that requires careful measurement to keep the exterior lines untouched. Similarly, modern six-speed transmissions are significantly bulkier than vintage four-speeds. You should expect to modify the transmission tunnel and potentially the firewall to achieve the correct drivetrain angle. For a detailed look at managing these clearances during a modern heart transplant, refer to our definitive guide to an LS engine swap.
Essential Gear for Metal Fabrication
Precision metalwork is only possible with the right tools in your arsenal. You don’t need a professional shop to achieve elite results, but you do need a reliable MIG welder and a solid set of hammers and dollies. For more complex curves, an English wheel or a shrinker-stretcher becomes indispensable. Always prioritize safety by maintaining a clean workspace and using a high-quality welding helmet. You can find our top picks for these tools in our recommended gear section. This classic car bodywork guide is meant to empower you to do the work yourself, but never compromise on the quality of your equipment or your personal protection.
Rust Remediation and Surface Preparation Strategies
Once you’ve reinforced the chassis, it’s time to confront the most persistent enemy of vintage metal: oxidation. This classic car bodywork guide treats rust not as a cosmetic blemish, but as a biological threat that must be completely excised. You have three main paths for removal. Media blasting is the most thorough, stripping a whole shell to white metal, but it’s messy and requires professional equipment to avoid warping large panels. Chemical stripping reaches deep into seams where mechanical tools can’t touch, yet it requires meticulous neutralization to prevent future paint failure. Mechanical grinding with abrasive discs is your best friend for localized repairs, though you must be careful not to generate enough heat to warp the panel. Pick the method that matches the scale of your project, but never compromise on the result. Every speck of brown must be gone before you move forward.
Listen closely to this rule: never use body filler over active corrosion or pinholes. It might look smooth for a few months, but moisture will continue to feast on the steel underneath until the filler bubbles and falls off. If you find a hole, you must cut it out. The art of the patch panel lies in the butt-weld. By fitting the new steel perfectly flush with the old, you create a repair that is virtually invisible once ground smooth. This technique avoids the moisture-trapping overlaps that lead to “restoration’s revenge” a few years down the road. When welding these patches, use short tacks and jump around the panel to manage heat. Excessive heat on a large, flat quarter panel will cause it to oil-can, creating a structural nightmare that even the best block-sander can’t fix. Patience with the welder saves hours with the grinder.
Cutting Out the Cancer
Don’t trust your eyes alone when searching for rot. Use the hammer-and-pick method; tap the steel and listen for the dull thud of thin metal or poke suspected areas with a sharp pick. If it goes through, the metal is gone. Create precise templates using heavy cardstock to mirror the curves of the original body before you cut anything away. This ensures your new steel fits like a glove. Before you seal up any boxed sections or inner rockers, coat the interior surfaces with weld-through primers and internal cavity waxes to stop future rust from starting where you can’t see it.
The First Line of Defense: Modern Primers
Bare vintage steel is incredibly vulnerable, so you need to seal it immediately after cleaning. Epoxy primer is the only professional choice for this first layer because it’s completely waterproof and sticks to steel with incredible tenacity. Unlike high-build primers, epoxy doesn’t shrink or absorb moisture. You must respect the induction time and the recoat window specified by the manufacturer to ensure a proper bond between layers. Epoxy primer creates a non-porous chemical bond through a cross-linking molecular structure that seals bare vintage steel from oxygen and moisture. This foundation is what allows your final paint job to survive the elements for decades.
Custom Metalwork: Shaving and Clean Lines
Once your foundation is structurally sound, you can begin the aesthetic transformation that truly separates a restomod from a standard restoration. This classic car bodywork guide transitions from preservation to custom fabrication, where you have the freedom to refine the original design. Start by shaving the drip rails and door handles to achieve a streamlined, modern profile. These factory features often disrupt the car’s natural flow; removing them creates a continuous surface that catches the light without interruption. Similarly, narrowing and sectioning your chrome bumpers allows them to sit tighter against the body, eliminating the unsightly gaps common in 1960s production lines. It’s a surgical process of cutting, tucking, and welding that results in a much more cohesive appearance.
Don’t stop at the exterior sheet metal. Integrating modern LED lighting into vintage housings requires custom fabrication to ensure the new tech doesn’t look like a tacked-on afterthought. Inside the engine bay, you should build custom close-out panels to hide the modern wiring harnesses and plumbing that accompany high-performance swaps. This creates a clean, clinical environment that highlights the engine itself rather than the clutter of modern electronics. If you’re ready to take your project from a hobby to a masterpiece, start by studying The Ultimate Restomod Guide for a complete roadmap of the custom build process.
The Art of Shaving and Smoothing
Shaving trim and emblems requires more than just filling holes with a welder. You must manage thermal expansion carefully to avoid sink marks that reveal themselves only after the paint is dry. For a truly modern look, consider creating custom filler panels for a flush-mount glass installation. This eliminates the need for bulky factory gaskets and creates a seamless transition between the steel and the glass. Always remember that different metals expand at different rates, so your welding and cooling techniques must be methodical to keep the panels from distorting under the heat of the torch.
Refining Panel Gaps and Transitions
Consistency is the hallmark of a professional-grade build. Use the welding rod method to achieve uniform 3/16 inch gaps across every door, hood, and trunk lid. By welding a specific diameter rod to the edge of a panel and then carefully grinding it back, you can create laser-straight transitions that the factory could never achieve. Align your body lines across multiple panels to ensure a factory-plus finish that looks perfect from every angle. It’s vital to mock up all your modern trim and hardware before you apply the final primer. There is nothing more frustrating than having to grind on a finished panel because a new latch or handle doesn’t clear the custom metalwork you just completed.
The Finish Line: Precision Sanding and Paint Systems
The final stages of your build are where patience pays its greatest dividend. After the heavy fabrication is complete, you enter the meticulous world of surface refinement. This classic car bodywork guide emphasizes that a show-stopping finish isn’t created in the paint booth; it’s earned on the shop floor with a sanding block in hand. You must be methodical. Use long blocks and sand in an X-pattern to ensure you’re leveling the surface rather than following existing ripples. This process is the only way to achieve the laser-straight panels that define a high-end restomod. You can find the specific blocks and abrasives needed for this stage in our recommended gear section.
You cannot rely on your eyes alone during this phase. Guide coats are your most honest critics. By applying a light mist of contrasting powder or paint over your primer, you’ll immediately see every low spot and high ridge as you sand. If the guide coat remains in a valley, you have more work to do. Once the surface feels perfect, perform a final inspection using high-intensity LED light bars positioned at low angles. These lights cast long shadows over even the smallest imperfections, allowing you to catch ripples that would otherwise be invisible until the final clear coat is applied. This level of scrutiny is what separates a backyard project from a professional-grade machine.
Choosing Your Paint System
Your choice of paint system should align with your project’s ultimate purpose. While single-stage paints offer a period-correct look for traditional restorations, most restomod builders opt for a base-coat/clear-coat system. This modern approach provides incredible depth and allows you to wet-sand and buff the finish to a mirror shine. With major paint manufacturers like PPG and Axalta increasing global prices by up to 20% in early 2026, choosing high-quality materials is a significant investment that demands respect. We’ve seen a rise in matte and satin finishes recently, which offer a stealthy, industrial aesthetic that pairs perfectly with modern wheels and trim. When selecting a color, consider a palette that honors the car’s heritage while adding a contemporary twist, such as a vintage hue mixed with a modern pearl or metallic flake.
Protection and Sound Deadening
A true performance machine must be as durable as it is beautiful. Apply modern epoxy-based undercoatings to the wheel wells and floor pans to prevent future corrosion and provide a clean, uniform look. Before you even think about the interior, install high-quality sound deadening sheets throughout the cabin. This step is critical for achieving the modern refinement and quiet ride quality of a luxury car. During final assembly, protect your fresh paint by taping off every edge and corner. One slipped screwdriver during the reinstallation of chrome or glass can ruin months of labor, so take the extra time to shield your work. Your journey through this classic car bodywork guide concludes here, but the satisfaction of a precision-crafted machine is just beginning.
Take the Wheel of Your Metal Transformation
You’ve moved through the critical stages of reimagining vintage steel, from the initial structural reinforcements to the final precision of block sanding. This classic car bodywork guide has shown that a world-class build isn’t about expensive commercial acquisition; it’s about the disciplined labor you put in at the workbench. You’ve learned how to identify structural fatigue, manage the heat of a welder to prevent warpage, and use guide coats to reveal hidden surface flaws. These meticulous steps ensure that your foundation is as reliable as the modern performance drivetrain you plan to install.
Transforming a rusted shell into a precision-crafted machine is a marathon of small wins, but you don’t have to walk it alone. We offer authoritative guides trusted by thousands of builders, providing premium project blueprints and expert consulting for your most complex metalwork challenges. Download The Ultimate Restomod Guide to master every stage of your build and join a community dedicated to preserving heritage through modern innovation. The journey of a thousand welds begins with a single spark. Pick up your grinder, trust the process, and start crafting the machine you’ve always envisioned.
Frequently Asked Questions
How much does a full classic car body restoration cost?
Industry pricing in 2026 suggests a mid-range paint job typically costs between $2,000 and $5,000, while a show-quality finish can exceed $10,000. These figures don’t include the labor for metal repair or structural work. If you’re tackling a single panel, expect costs between $550 and $1,650 depending on the complexity. Doing the labor yourself is the most effective way to manage these significant expenses while ensuring the quality of the foundation.
Can I learn to do classic car bodywork as a complete beginner?
You can absolutely learn bodywork as a beginner if you approach the process with patience and the right educational roadmap. Start by practicing on scrap metal before touching your project car. This classic car bodywork guide is designed to break down intimidating tasks into logical steps. By focusing on one panel at a time and maintaining high standards for quality, you’ll develop the muscle memory and technical intuition needed for a professional result.
What is the best type of welder for classic car sheet metal?
A MIG welder with a shielding gas setup is the best choice for working on thin classic car sheet metal. It offers a shorter learning curve than TIG welding while providing excellent control over heat and penetration. Use a high-quality machine that allows for fine adjustments to wire speed and voltage. This control is vital for making the small, intermittent tack welds required to prevent panel warpage during the fabrication phase.
Is it better to repair original body panels or buy reproduction parts?
Original panels are usually preferred because they offer the best factory fit and gauge thickness, but reproduction steel is often the smarter choice for heavily rotted sections. If you spend forty hours patching a single fender, you might have been better off buying a high-quality reproduction part. Always inspect reproduction panels for fitment before welding. Sometimes the labor required to massage a new part exceeds the time needed to save the original heritage steel.
How do I prevent rust from returning after a bodywork repair?
Preventing rust return requires sealing bare metal immediately with a non-porous epoxy primer. Never leave your project in a damp garage without a protective coating. Once the exterior is sealed, treat the interior of boxed sections and rockers with internal cavity waxes. These coatings provide a hydrophobic barrier that stops moisture from attacking the steel from the inside out. Clean, dry metal and high-quality primers are your primary defense against future oxidation.
What is the difference between body filler and lead loading?
Body filler is a modern polyester resin used for fine surface leveling, while lead loading is a traditional method of filling seams with a molten metal alloy. Lead loading offers superior durability and doesn’t shrink, but it requires significant skill and carries health risks. Most modern builders prefer high-quality body fillers because they’re easier to sand and perfectly compatible with modern paint systems. Use filler only for minor imperfections, never to bridge holes or rot.
How long does the bodywork phase of a restomod project typically take?
The bodywork phase of a restomod build can take anywhere from 200 to over 1,000 hours depending on the condition of the car and your desired finish level. It’s often the longest part of the restoration journey. This classic car bodywork guide encourages you to embrace this slow pace. Don’t rush the block sanding or the metal finishing stages. The satisfaction of achieving a laser-straight body is well worth the months of methodical labor in the workshop.
What safety equipment is essential for classic car bodywork?
Essential safety gear includes a high-quality respirator with P100 filters, a professional welding helmet, and impact-resistant eye protection. You’re dealing with fine dust, metal shards, and harmful UV rays, so don’t cut corners here. Use heavy leather gloves when welding and nitrile gloves when handling chemicals or primers. Maintaining a clean, well-ventilated workspace is just as important as the gear you wear. Your long-term health is the most important tool in your shop.