
The most powerful engine isn’t automatically the right heart for a Datsun 240Z restomod. A classic Datsun 240Z restomod guide should weigh the character of the original L-series against the modern performance of an SR20DET or RB25DET, while treating body condition as a make-or-break part of the decision.
The 240Z’s original L24 is a 2,393-cc inline-six, and keeping that engine preserves a direct link to the car’s heritage. Choosing a turbocharged swap can change the driving experience, but the right direction depends on the build you want and the condition of the car you start with.
Compare the three powertrains, check for rust and collision damage, and consider how emissions equipment and restoration choices shape your plan. The aim is a Z that feels purposeful on the road while keeping the distinctive shape and spirit that drew you to it.
Key Takeaways
- Match the L-series, SR20DET, or RB25DET to the driving character you want, then plan the supporting changes as part of the powertrain choice.
- Prioritize structural condition over attractive paint: inspect the floor pans, frame rails, rockers, suspension mounts, and other corrosion-prone areas.
- Understand the factory carburetor setup on a 1973 model before deciding how emissions equipment and induction fit your build.
- Balance restoration choices across the whole car, so transmission, wheels, brakes, and engine work toward one coherent result.
1. L-series, SR20DET, and RB25DET powertrain options
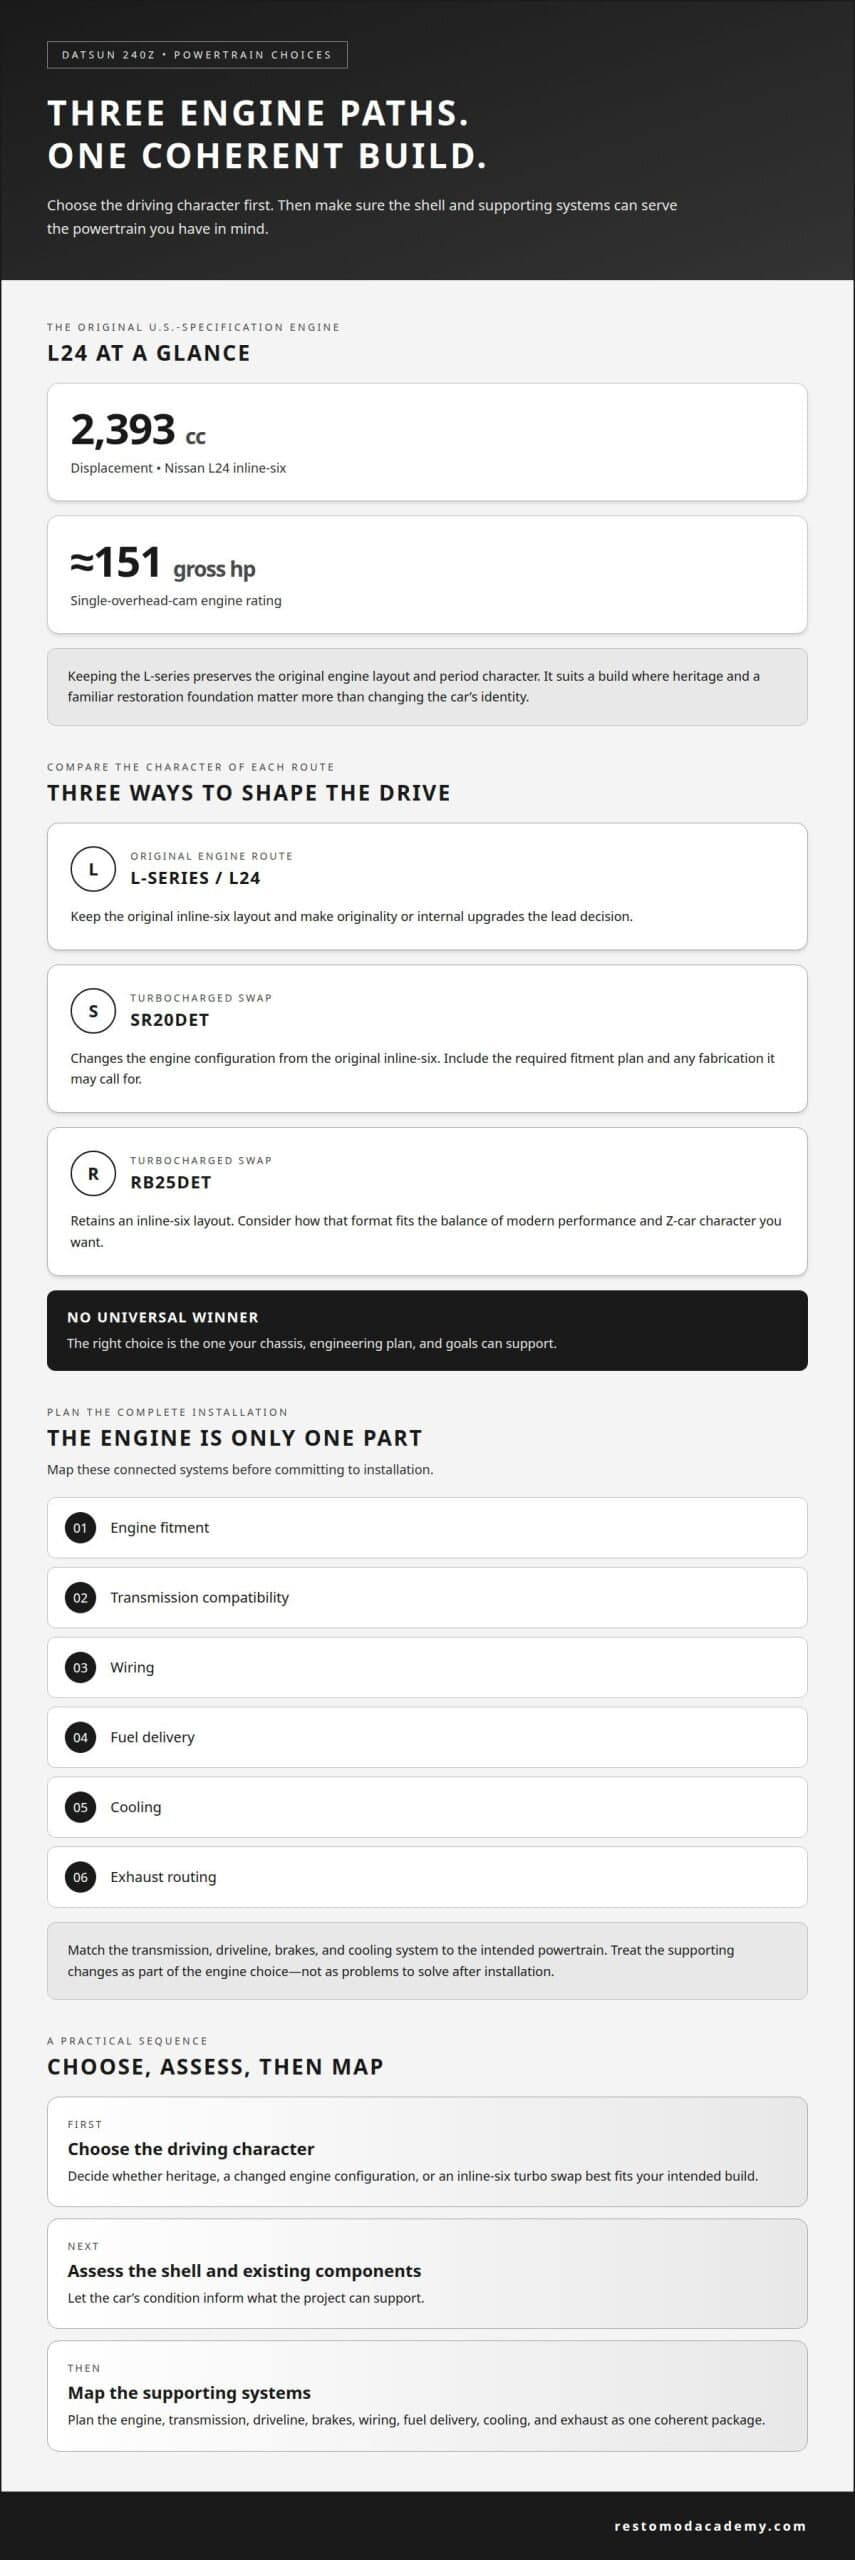
Start with the engine’s role in the character of your 240Z. The U.S.-specification car used a 2,393-cc Nissan L24, a single-overhead-cam inline-six rated at approximately 151 gross horsepower. Keeping the L-series preserves the original engine layout and the Z’s period character. It also gives the build a familiar foundation for restoration or measured performance upgrades. Choose this route when retaining a classic driving feel matters more than changing the car’s identity.
The SR20DET and RB25DET offer different paths to a turbocharged restomod. An SR20DET swap changes the engine configuration from the original inline-six, while the RB25DET retains an inline-six layout. Neither choice is simply an engine installation: plan for the supporting work, including engine fitment, transmission compatibility, wiring, fuel delivery, cooling, and exhaust routing. A complete plan helps keep the project coherent, rather than leaving major systems to resolve after the engine is in place.
Compare the three options against how you intend to use the car. For an L-series build, decide whether originality or internal upgrades lead the plan. For an SR20DET, account for the change in engine configuration and the fabrication it may require. For an RB25DET, consider how its inline-six format fits your desired balance of modern performance and Z-car character. In every case, match the transmission, driveline, brakes, and cooling system to the intended powertrain before committing to installation.
Use a practical sequence: choose the driving character first, assess the shell and existing components, then map the supporting systems. A restomod combines classic design with modern modifications, as explained in this overview of what a restomod is. That distinction helps frame the decision: an L-series can keep the engine’s heritage central, while an SR20DET or RB25DET makes the swap itself part of the transformation. There’s no universal winner; the right choice is the one your chassis, engineering plan, and goals can support.
2. Rust and accident-damage inspection
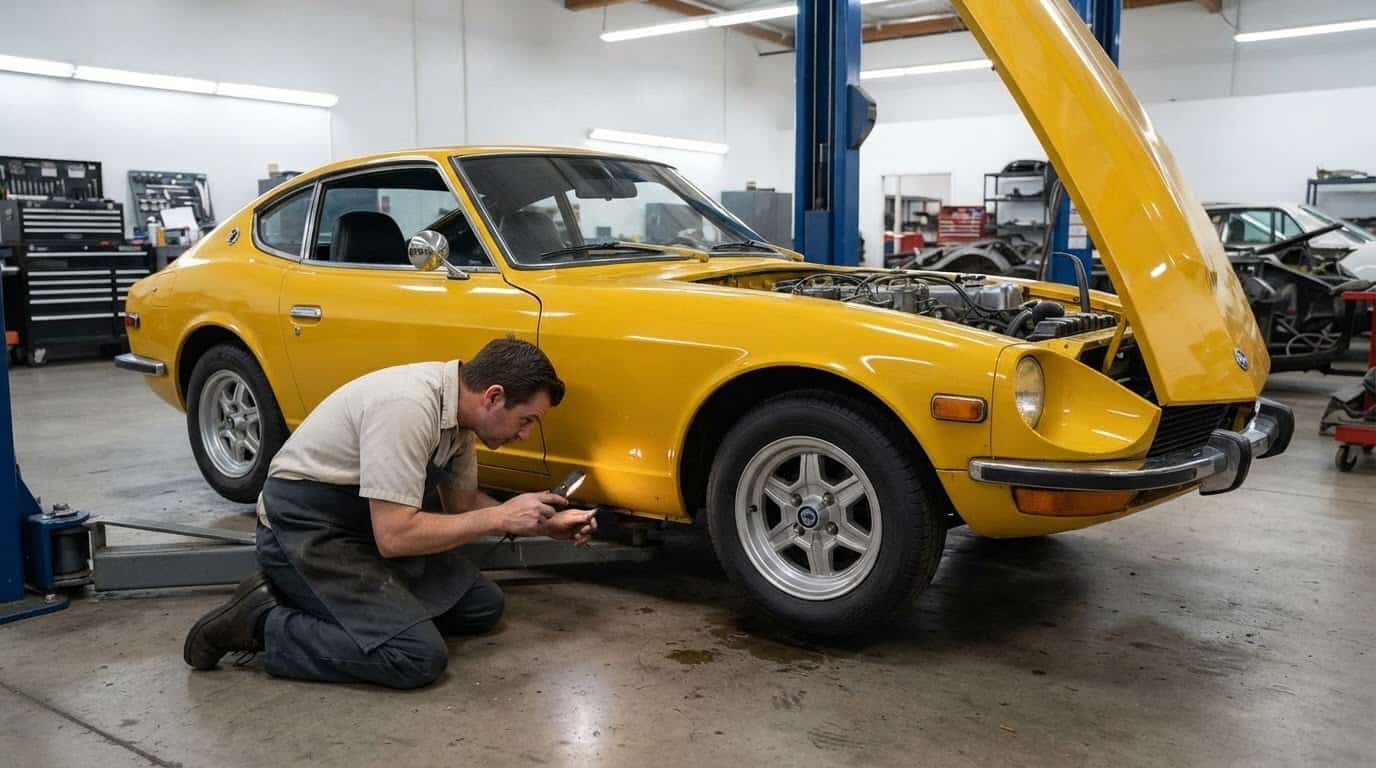
Treat the S30 body as the foundation of the build. Inspect the floor pans, frame rails, rocker panels, battery area, wheel arches, hatch area, and suspension mounting points. These areas can corrode, and damage hidden beneath paint or undercoating may be harder to assess. Bring a light and examine both sides of each panel where access allows. Look for bubbling, flaky metal, patch panels, and uneven seams. A classic Datsun 240Z restomod guide should put structural condition ahead of cosmetic appeal.
Start underneath. Follow the frame rails and inspect the points where they meet the floor and suspension mounts. Check the floor pans from inside the cabin and beneath the car, especially where carpeting or undercoating may hide the metal. Examine the rocker panels and wheel arches for corrosion or repairs that could conceal weakened areas. Around the battery, look for rust extending beyond the tray. At the hatch opening, inspect the seams and lower edges for bubbling or patchwork.
Next, look for signs of collision damage. Compare both sides for differences in panel gaps, creases, or visible repair seams. Check how the hood, doors, and hatch align with neighboring panels. Mismatched paint, irregular welds, or layers of filler may point to earlier bodywork, but visual clues alone cannot establish the full repair history. Inspect the front structure and rear body for bends or uneven joins. Note each concern by location to clarify the shell’s condition before planning metalwork.
Let structure guide the purchase decision. A cosmetically attractive Datsun 240Z with serious corrosion underneath is generally a weaker starting point than a less polished car with sound bodywork. Separate repairable surface issues from corrosion affecting frame rails, floors, or suspension mounting points. Then consider how rust repairs and collision corrections could shape the build sequence, because major bodywork can affect the timing of later restoration and modification. A classic Datsun 240Z restomod guide is most useful when it helps you assess the shell before choosing cosmetic upgrades. Judge the shell first; paint and trim can’t substitute for sound metal.
3. 1973 Emissions equipment and carburetors
A U.S.-specification 1973 Datsun 240Z left the factory with flat-top Hitachi carburetors. Use that configuration as a reference when evaluating a car that has passed through decades of repairs or modifications. Before tuning, identify the installed carburetors and note the linkage, air-cleaner arrangement, and visible emissions-related components. Photograph connections and hose routing before taking anything apart. This gives you a record of the setup and helps separate existing equipment from later changes.
Next, decide whether to retain a factory-style induction system or use a different carburetor arrangement. Keeping the flat-top Hitachi setup supports a period-focused restoration, but its condition and calibration still matter. Check for damaged parts, loose connections, and signs of previous adjustments before tuning. Make one change at a time and assess the engine’s response. Recording a baseline makes troubleshooting more methodical than changing several settings at once.
A performance-oriented example uses 45-millimeter DCOE carburetors. That is a distinct departure from the factory flat-top Hitachi configuration, so plan the intake, linkage, fuel delivery, and tuning as a connected system. Carburetor choice affects how air and fuel reach the engine, while setup determines how consistently it responds across operating conditions. Don’t treat the carburetors as an isolated upgrade. Coordinate their installation with the engine specification and the rest of the induction system.
For a 1973 project, make emissions equipment part of the build plan rather than an afterthought. First, record what remains on the car. Then identify which components the chosen restoration direction will retain or replace, and keep removed parts organized with their connections documented. If the car will be driven on public roads, account for applicable emissions requirements where it will be registered before changing its equipment. The factory Hitachi setup offers a reference for originality; 45-millimeter DCOEs illustrate a performance-focused alternative. Choose deliberately, and tune the complete combination rather than chasing a carburetor change alone.
4. Restoration and modification considerations
The Datsun 240Z was produced from 1970 through 1973, so each model year can anchor a restomod. Choose the strongest available shell and the features that suit your build, rather than assuming one year is automatically best. A Series 1 car built through the middle of 1971 may appeal to enthusiasts prioritizing early-model identity.
Original, modified, and restomod 240Zs don’t have a single fixed value hierarchy. Condition, originality, workmanship, and documentation all shape buyer interest; top Datsun Z-car prices have exceeded six figures. Treat that as evidence of the market’s potential, not a valuation for every car or build.
Emissions, inspection, and engine-swap requirements vary with where the car will be registered. Review the applicable state rules before selecting an engine or removing equipment, because those requirements can affect the build configuration and how you can use the car on the road.
A U.S. 240Z restomod has no single standard cost. The scope depends on the shell’s condition, body repairs, powertrain, supporting systems, interior work, and how much labor the project requires. Set priorities before work begins, then sequence structural repairs and mechanical upgrades before cosmetic finishing.
For modern safety, match braking upgrades to the car’s intended performance. Higher-powered builds commonly use four-piston calipers, while one documented setup pairs 300 mm vented front rotors with a 15/16-inch master cylinder. Wheel choice also affects fit: 16-inch wheels can balance modern tire and brake clearance with classic proportions. For the cabin, preserve the 240Z’s character while choosing practical materials and lighting; 3000 K LEDs can echo the warm appearance of original incandescent bulbs.
To locate Datsun 240Z specialists, parts, and shops, focus on demonstrated S30 experience and work that matches your project’s needs. Keep the plan coordinated across engine, brakes, wheels, and interior, rather than treating each upgrade in isolation. Build a coordinated restomod plan before committing to major changes.
Restomod Academy: The Ultimate Restomod Guide
Restomod Academy is a natural next step when your 240Z direction is clear but the decisions still need structure. The Ultimate Restomod Guide helps you build your understanding of the process, from classic-car foundations to modern upgrades. Turn to Restomod Consulting Services when you want guidance weighing project choices, such as engine direction, restoration priorities, and how modifications work together. Premium Project Blueprints can help translate a chosen vision into a more organized project plan.
Use the right resource for each stage: learn the fundamentals, get help thinking through decisions, or follow a blueprint as your build takes shape. Keep the Z’s original character in mind as you plan each change. For support with your project, contact Restomod Academy.
Shape the Build Around Your Vision
Give your 240Z project a clear north star before the next workshop decision. Decide what you want the car to feel like on the road, how much of its original character matters to you, and which compromises you’re comfortable making. A classic Datsun 240Z restomod guide can inform those choices, but your priorities should shape the finished machine. Write them down so each modification supports the same vision.
Treat the build as a series of connected decisions, not a race to install upgrades. A considered plan leaves room to learn, refine details, and keep the car’s design coherent as work progresses. Documenting your choices also creates a useful record of the project and the reasons behind each decision.
If you’d like guidance as your ideas become a practical plan, contact Restomod Academy about your build. Take the next step with care, and make the finished Z unmistakably yours.
Frequently Asked Questions
What are the best engine swap options for a Datsun 240Z?
The best option depends on whether you value period character, a different engine configuration, or a modernized build. Keep the L-series central for a more original feel; consider the SR20DET or RB25DET if you want a more substantial change. Before choosing, define how you’ll use the car and make the engine decision part of a complete plan for the finished build.
How do you upgrade the 240Z suspension, brakes, and steering?
Plan chassis upgrades as a coordinated system, starting with a clear use case, such as relaxed road driving or sharper handling. Assess suspension wear, steering play, and brake condition before choosing changes. Make sure the parts and setup work together instead of fitting upgrades in isolation. After installation, have the car’s alignment and handling assessed to ensure the steering response suits the suspension setup.
How much does a Datsun 240Z restomod cost in the United States?
There is no single standard cost. The total depends on the shell’s condition, body repairs, powertrain and supporting systems, interior work, and required labor; set priorities and sequence structural and mechanical work before cosmetic finishing.
The most powerful engine isn’t automatically the right heart for a Datsun 240Z restomod. A classic Datsun 240Z restomod guide should weigh the character of the original L-series against the modern performance of an SR20DET or RB25DET, while treating body condition as a make-or-break part of the decision.
The 240Z’s original L24 is a 2,393-cc inline-six, and keeping that engine preserves a direct link to the car’s heritage. Choosing a turbocharged swap can change the driving experience, but the right direction depends on the build you want and the condition of the car you start with.
Compare the three powertrains, check for rust and collision damage, and consider how emissions equipment and restoration choices shape your plan. The aim is a Z that feels purposeful on the road while keeping the distinctive shape and spirit that drew you to it.
Key Takeaways
- Match the L-series, SR20DET, or RB25DET to the driving character you want, then plan the supporting changes as part of the powertrain choice.
- Prioritize structural condition over attractive paint: inspect the floor pans, frame rails, rockers, suspension mounts, and other corrosion-prone areas.
- Understand the factory carburetor setup on a 1973 model before deciding how emissions equipment and induction fit your build.
- Balance restoration choices across the whole car, so transmission, wheels, brakes, and engine work toward one coherent result.
1. L-series, SR20DET, and RB25DET powertrain options
Start with the engine’s role in the character of your 240Z. The U.S.-specification car used a 2,393-cc Nissan L24, a single-overhead-cam inline-six rated at approximately 151 gross horsepower. Keeping the L-series preserves the original engine layout and the Z’s period character. It also gives the build a familiar foundation for restoration or measured performance upgrades. Choose this route when retaining a classic driving feel matters more than changing the car’s identity.
The SR20DET and RB25DET offer different paths to a turbocharged restomod. An SR20DET swap changes the engine configuration from the original inline-six, while the RB25DET retains an inline-six layout. Neither choice is simply an engine installation: plan for the supporting work, including engine fitment, transmission compatibility, wiring, fuel delivery, cooling, and exhaust routing. A complete plan helps keep the project coherent, rather than leaving major systems to resolve after the engine is in place.
Compare the three options against how you intend to use the car. For an L-series build, decide whether originality or internal upgrades lead the plan. For an SR20DET, account for the change in engine configuration and the fabrication it may require. For an RB25DET, consider how its inline-six format fits your desired balance of modern performance and Z-car character. In every case, match the transmission, driveline, brakes, and cooling system to the intended powertrain before committing to installation.
Use a practical sequence: choose the driving character first, assess the shell and existing components, then map the supporting systems. A restomod combines classic design with modern modifications, as explained in this overview of what a restomod is. That distinction helps frame the decision: an L-series can keep the engine’s heritage central, while an SR20DET or RB25DET makes the swap itself part of the transformation. There’s no universal winner; the right choice is the one your chassis, engineering plan, and goals can support.
2. Rust and accident-damage inspection
Treat the S30 body as the foundation of the build. Inspect the floor pans, frame rails, rocker panels, battery area, wheel arches, hatch area, and suspension mounting points. These areas can corrode, and damage hidden beneath paint or undercoating may be harder to assess. Bring a light and examine both sides of each panel where access allows. Look for bubbling, flaky metal, patch panels, and uneven seams. A classic Datsun 240Z restomod guide should put structural condition ahead of cosmetic appeal.
Start underneath. Follow the frame rails and inspect the points where they meet the floor and suspension mounts. Check the floor pans from inside the cabin and beneath the car, especially where carpeting or undercoating may hide the metal. Examine the rocker panels and wheel arches for corrosion or repairs that could conceal weakened areas. Around the battery, look for rust extending beyond the tray. At the hatch opening, inspect the seams and lower edges for bubbling or patchwork.
Next, look for signs of collision damage. Compare both sides for differences in panel gaps, creases, or visible repair seams. Check how the hood, doors, and hatch align with neighboring panels. Mismatched paint, irregular welds, or layers of filler may point to earlier bodywork, but visual clues alone cannot establish the full repair history. Inspect the front structure and rear body for bends or uneven joins. Note each concern by location to clarify the shell’s condition before planning metalwork.
Let structure guide the purchase decision. A cosmetically attractive Datsun 240Z with serious corrosion underneath is generally a weaker starting point than a less polished car with sound bodywork. Separate repairable surface issues from corrosion affecting frame rails, floors, or suspension mounting points. Then consider how rust repairs and collision corrections could shape the build sequence, because major bodywork can affect the timing of later restoration and modification. A classic Datsun 240Z restomod guide is most useful when it helps you assess the shell before choosing cosmetic upgrades. Judge the shell first; paint and trim can’t substitute for sound metal.
3. 1973 Emissions equipment and carburetors
A U.S.-specification 1973 Datsun 240Z left the factory with flat-top Hitachi carburetors. Use that configuration as a reference when evaluating a car that has passed through decades of repairs or modifications. Before tuning, identify the installed carburetors and note the linkage, air-cleaner arrangement, and visible emissions-related components. Photograph connections and hose routing before taking anything apart. This gives you a record of the setup and helps separate existing equipment from later changes.
Next, decide whether to retain a factory-style induction system or use a different carburetor arrangement. Keeping the flat-top Hitachi setup supports a period-focused restoration, but its condition and calibration still matter. Check for damaged parts, loose connections, and signs of previous adjustments before tuning. Make one change at a time and assess the engine’s response. Recording a baseline makes troubleshooting more methodical than changing several settings at once.
A performance-oriented example uses 45-millimeter DCOE carburetors. That is a distinct departure from the factory flat-top Hitachi configuration, so plan the intake, linkage, fuel delivery, and tuning as a connected system. Carburetor choice affects how air and fuel reach the engine, while setup determines how consistently it responds across operating conditions. Don’t treat the carburetors as an isolated upgrade. Coordinate their installation with the engine specification and the rest of the induction system.
For a 1973 project, make emissions equipment part of the build plan rather than an afterthought. First, record what remains on the car. Then identify which components the chosen restoration direction will retain or replace, and keep removed parts organized with their connections documented. If the car will be driven on public roads, account for applicable emissions requirements where it will be registered before changing its equipment. The factory Hitachi setup offers a reference for originality; 45-millimeter DCOEs illustrate a performance-focused alternative. Choose deliberately, and tune the complete combination rather than chasing a carburetor change alone.
4. Restoration and modification considerations
The Datsun 240Z was produced from 1970 through 1973, so each model year can anchor a restomod. Choose the strongest available shell and the features that suit your build, rather than assuming one year is automatically best. A Series 1 car built through the middle of 1971 may appeal to enthusiasts prioritizing early-model identity.
Original, modified, and restomod 240Zs don’t have a single fixed value hierarchy. Condition, originality, workmanship, and documentation all shape buyer interest; top Datsun Z-car prices have exceeded six figures. Treat that as evidence of the market’s potential, not a valuation for every car or build.
Emissions, inspection, and engine-swap requirements vary with where the car will be registered. Review the applicable state rules before selecting an engine or removing equipment, because those requirements can affect the build configuration and how you can use the car on the road.
A U.S. 240Z restomod has no single standard cost. The scope depends on the shell’s condition, body repairs, powertrain, supporting systems, interior work, and how much labor the project requires. Set priorities before work begins, then sequence structural repairs and mechanical upgrades before cosmetic finishing.
For modern safety, match braking upgrades to the car’s intended performance. Higher-powered builds commonly use four-piston calipers, while one documented setup pairs 300 mm vented front rotors with a 15/16-inch master cylinder. Wheel choice also affects fit: 16-inch wheels can balance modern tire and brake clearance with classic proportions. For the cabin, preserve the 240Z’s character while choosing practical materials and lighting; 3000 K LEDs can echo the warm appearance of original incandescent bulbs.
To locate Datsun 240Z specialists, parts, and shops, focus on demonstrated S30 experience and work that matches your project’s needs. Keep the plan coordinated across engine, brakes, wheels, and interior, rather than treating each upgrade in isolation. Build a coordinated restomod plan before committing to major changes.
Restomod Academy: The Ultimate Restomod Guide
Restomod Academy is a natural next step when your 240Z direction is clear but the decisions still need structure. The Ultimate Restomod Guide helps you build your understanding of the process, from classic-car foundations to modern upgrades. Turn to Restomod Consulting Services when you want guidance weighing project choices, such as engine direction, restoration priorities, and how modifications work together. Premium Project Blueprints can help translate a chosen vision into a more organized project plan.
Use the right resource for each stage: learn the fundamentals, get help thinking through decisions, or follow a blueprint as your build takes shape. Keep the Z’s original character in mind as you plan each change. For support with your project, contact Restomod Academy.
Shape the Build Around Your Vision
Give your 240Z project a clear north star before the next workshop decision. Decide what you want the car to feel like on the road, how much of its original character matters to you, and which compromises you’re comfortable making. A classic Datsun 240Z restomod guide can inform those choices, but your priorities should shape the finished machine. Write them down so each modification supports the same vision.
Treat the build as a series of connected decisions, not a race to install upgrades. A considered plan leaves room to learn, refine details, and keep the car’s design coherent as work progresses. Documenting your choices also creates a useful record of the project and the reasons behind each decision.
If you’d like guidance as your ideas become a practical plan, contact Restomod Academy about your build. Take the next step with care, and make the finished Z unmistakably yours.
Frequently Asked Questions
What are the best engine swap options for a Datsun 240Z?
The best option depends on whether you value period character, a different engine configuration, or a modernized build. Keep the L-series central for a more original feel; consider the SR20DET or RB25DET if you want a more substantial change. Before choosing, define how you’ll use the car and make the engine decision part of a complete plan for the finished build.
How do you upgrade the 240Z suspension, brakes, and steering?
Plan chassis upgrades as a coordinated system, starting with a clear use case, such as relaxed road driving or sharper handling. Assess suspension wear, steering play, and brake condition before choosing changes. Make sure the parts and setup work together instead of fitting upgrades in isolation. After installation, have the car’s alignment and handling assessed to ensure the steering response suits the suspension setup.
How much does a Datsun 240Z restomod cost in the United States?
There is no single standard cost. The total depends on the shell’s condition, body repairs, powertrain and supporting systems, interior work, and required labor; set priorities and sequence structural and mechanical work before cosmetic finishing.