
You’ve finally followed through on your vow to yourself in high school body shop class to one day acquire a classic car. But where do you even begin? This tutorial walks you through every step of classic car restoration, from choosing the right car to installing it. So, let’s focus on “How to Restore a Restomod’s Interior.”
How to Purchase a Restomod
Some ancient cars may need minor or extensive repairs before being “roadworthy.” So, before you commit to a horrible deal, read this advice to understand how to acquire a classic car that will be fun to restore and drive on the coming warm days.
Choose your dream vehicle’s make and model.
Classic automobiles come in many different shapes and sizes. You probably already have a few favorites in mind. However, before you start looking for your own car, you need to reduce your options by deciding on a make and model. For their instantly identifiable silhouettes and exquisite appearance, we recommend American classics from GM, Chrysler, and AMC.
Car Shopping and Price Comparison
When it comes to selecting a vehicle vendor, you have a lot of alternatives. For anyone interested in purchasing a historic car, the internet has opened up a whole new world. Make sure you do your homework and determine a reasonable pricing range for your desired automobile. After that, compare prices from other sellers.
Before you sign an agreement, make sure to consider the vehicle’s condition. Many antique automobiles require some TLC to return them to their former glory, but you shouldn’t expect to spend the same price for a vehicle that requires maintenance as you would for one that has been completely restored.
Before you buy, consider whether the car is worth restoring.
But, before you go out and buy your vehicle, you should think about a few things to see if restoration is something you want to accomplish in the first place.
The total cost of the car and the restoration
You should have an expert assess the car and provide you with an appraisal before purchasing it. They’ll be able to tell you how much a vehicle of this particular make and model normally sells for, so you don’t overspend. The expert should also be able to tell you how much work will be required to make the vehicle appear good or functional, so you can spend appropriately.
With a professional appraisal, you’ll know how much you should spend on the automobile and how much time it’ll take to fix it up over the course of several months.
The Operational Components’ Condition
You should evaluate the car’s operating components in addition to its visual condition. The overall expense and difficulty of the restoration process will skyrocket if the exhaust system, suspension, or transmission needs to be repaired or replaced.
You’ll have to pick if you want an original part or something more current if something needs to be replaced. We advocate utilizing original parts to keep your historic car’s value, but be aware that they can be more expensive.
Your Personal Choices
During the purchasing and restoration stages, make sure to keep your emotions in check. We recognize that you may have a favorite make and model of vehicle; we all have favorites.
While you may be eager to purchase a historic vehicle because it “feels right,” you must first decide whether it will be a wise investment.
Don’t get yourself into a restoration project that you don’t understand, and don’t buy a car just because it’ll be convenient or simple to restore. Wait for the automobile of your dreams to come along: the one you can afford and enjoy fixing the most.
Purchase the item
Purchasing a classic car entails more than simply passing over cash and driving away. Make certain that the vehicle’s title is transferred to your name on the day you purchase it. Different states have different laws when it comes to purchasing and selling cars, so make sure you’re following the standards in the state where the car is registered.
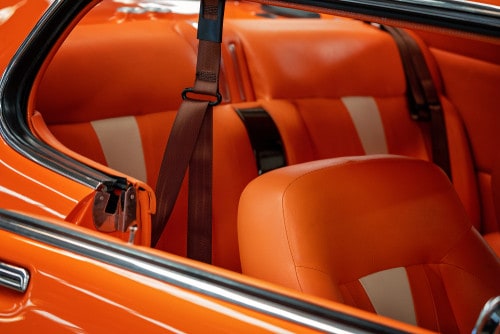
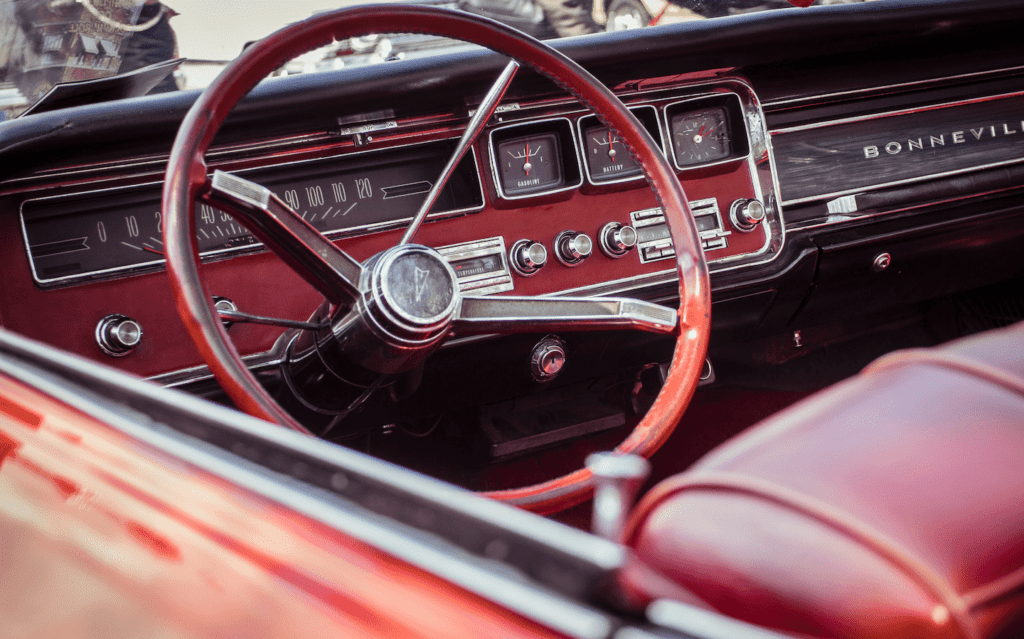
The Interior Restoration of Your Classic Car
You’re probably not thinking about how to fix the interior of your dream old car right after you buy it.
However, if your ride’s interior shows its age, you won’t be the envy of every classic vehicle aficionado in your neighborhood.
As a result, in addition to considering how to restore your vehicle’s engine and what color racing stripe to apply to the body, you need also to consider the interior.
It’s natural to reach for a screwdriver and a razor knife and start to work. However, that’s the quickest way to wind up with parts thrown all over the place, an interior cabin that doesn’t resemble anything from any era, and no idea what to do next.
Instead, we urge that you take the steps outlined below:
Make a strategy.
Put pen to paper and plan out every detail of your interior restoration before you even touch your new historic car. Assign a priority to each task to define a timeline for completion.
Here are some things to think about replacing:
Seat Kits – Replace your old upholstery with cloth, vinyl, or leather.
Panels — For a consistent look and feel, match the seats with new door and body panels.
Replace drooping old roof trim pieces with new ones.
Fabric Tops – A vinyl top will go well with the decor.
Complete replacement assemblies save time and money by eliminating the need for special tools. You can generally complete the task yourself, which is exactly what your project is about!
Start By Making Yourself Successful
Make sure you’re ready to accomplish the project before you spend any money:
- Make sure you have enough floor space and electrical power in your work area so you can comfortably tinker.
- Time — A good automotive restoration takes time, ranging from 800 to 1,000 hours of effort on average, so prepare ahead.
- Motivation – The restoration procedure is a labor of love, and nothing beats turning on your beauty after all of your hard work. Make sure you’re ready for this once-in-a-lifetime opportunity.
- Establish Your Budget Determine not only how much money you’ll need to spend, but also how much time you’ll be able to commit to the job. Overestimate to allow for unanticipated costs and issues that will inevitably develop during the course of your project.
Most people’s restoration finances start to appear shockingly small at this point.
Because of your limited funds, you may be tempted to forego a complete auto interior restoration. Are you really going to be satisfied driving around in a car that looks great on the exterior but is kept together with duct tape and zip ties on the inside? What if you want to sell the vehicle? In this condition, will any buyer give you top dollar? Certainly not! That’s why you should never consider abandoning your restoration project halfway through.
Tips to Help You Cut Your Costs
Don’t be concerned! There are steps you can take to ensure that restoring the interior of your historic vehicle does not cost a fortune. Among them are:
Decide what can be repaired and what needs to be replaced.
A few fixes and some sealant can go a long way toward completing the interior of your car. However, some things, such as a vintage auto door panel, can only be resold if they are totally replaced. Determine which pieces should be replaced and which should be tackled as DIY projects before commencing your interior renovation.
Establish a maximum budget.
Don’t just toss caution to the breeze and go crazy with your spending. Calculate the cost of your interior replacement parts, then add a little extra to pay for your own repairs. Once you’ve come up with a reasonable sum, vow not to go above it.
Professional detailing should be done.
You may think you can clean and finish your car, but a pro can do much more. Deep cleaning often reveals that many items you thought needed to be replaced just required a scrub.
Get Organized and Do Your Research
Automobile periodicals, assembly manuals, and original fabric swatch books, as well as the internet, can be useful resources for understanding muscle car interior restoration.
You’ll be surprised at how quickly a disassembled car can fill up your garage. Create enough storage space and a system to organize and store related components before you start cutting into your car.
Choose the appropriate tools.
You won’t find the equipment you’ll need to rebuild a muscle car’s interior in a typical toolbox. Rather, you’ll need specialized items like:
Heat Sources
Wheels for polishing
Tools for prying
Ring pliers for hogs
A compressor for air
Consult local mechanics and body shop professionals to determine exactly what you’ll require.
Implement your strategy.
Don’t be hesitant to seek assistance from professionals along the process. Remember to photograph each phase of the procedure so you’ll have visual references to refer to in the future.
Media Blasting Removes Rust and Old Paint off Your Classic Car Quickly
Rust, road salt stains, or filth that no amount of detergent can seem to remove? Media blasting is your key to a fully restored historic car when it comes to the toughest cleaning. Media blasting can be used to smooth metal and remove paint without causing any damage to the base material.
The Process of Media Blasting
Instead of spraying highly pressurized water droplets, media blasting cleans surfaces by shooting tiny bits of material through pressurized air. Because the compounds are significantly more abrasive than water droplets, they must be confined.
Media blasting is done in a cabinet. Inside the cabinet lies the ancient car part that needs cleaning, along with a blasting gun and heavy-duty gloves. A larger enclosure hides the cabinet. This aids in maintaining temperature and preventing the spread of hazardous tiny particles. Our staff protects themselves by using breathing masks when blasting.
Blasting Media Types
Media blasting substance depends on the classic car part and what needs cleaning. We use the following items to media blast:
- Walnut shells – Removes paint and mild rust; environmentally safe; low-cost; one-time usage
- Plastic beads – remove paint, and mild rust, and is reusable.
- Glass beads — Removes rust and smooths the surface of the metal.
- Aluminum oxide – the most powerful, smooths scratches, leaves a gritty finish, and lasts the longest.
- Removes oil from corn cob
- Dry ice is used to remove tar and ink.
- Procedure for Media Blasting
- When media blasting a classic automobile part, we aim to use the lightest material and lowest air pressure possible. We test the material and pressure setting on an invisible piece of the item that needs to be cleaned to determine this. Due to the rough finish left by media blasting, polishing may be required before the item may be totally recovered.
The Interior Guy Shares Carpet Tech Tips
The front half and the rear half of most carpets are sold separately. Just under the front seats, the seam or binding that connects the two parts runs side to side.
The first step is to totally remove the old one and prepare the floor pan so that no rust can enter and cause it to pop up.
The installation process begins with the rear part. The carpet should fit properly. Begin by completing the hump or driveshaft tunnel region. Attach any seat belt hardware and belts, then use chalk to mark the holes for the seat bolts (DO NOT TRIM THE PERIMETER EDGE OF THE CARPET YET). Only cut seatbelt holes.
Start in the front
Install the front section, starting with the inner tunnel area near the gas pedal on the driver’s side and the same place on the passenger side. To make installation easier, fold the front edge back towards the center of the automobile. Remove any shifter hardware that may be present.
Install the tunnel part first, just as you did with the back section. If necessary, install the console and shifter hardware.
Firewall
The firewall will be the next section to tackle. Trim the steering wheel, gas pedal, and vent boxes, among other things. All that unattractive crap under the dash, right? This is when a new, sharp razor blade will come in handy.
The kick panel areas will come next. Trim these portions, leaving enough to tuck below the kick panels. When we’re done, no floor pan steel!
Trim the rocker regions and sill plates after installing the front and back seats.
The seats will pull the carpet in, so tackle the rocker sections last. Cut once and measure twice.
Restomods value increases significantly with an improved interior.