
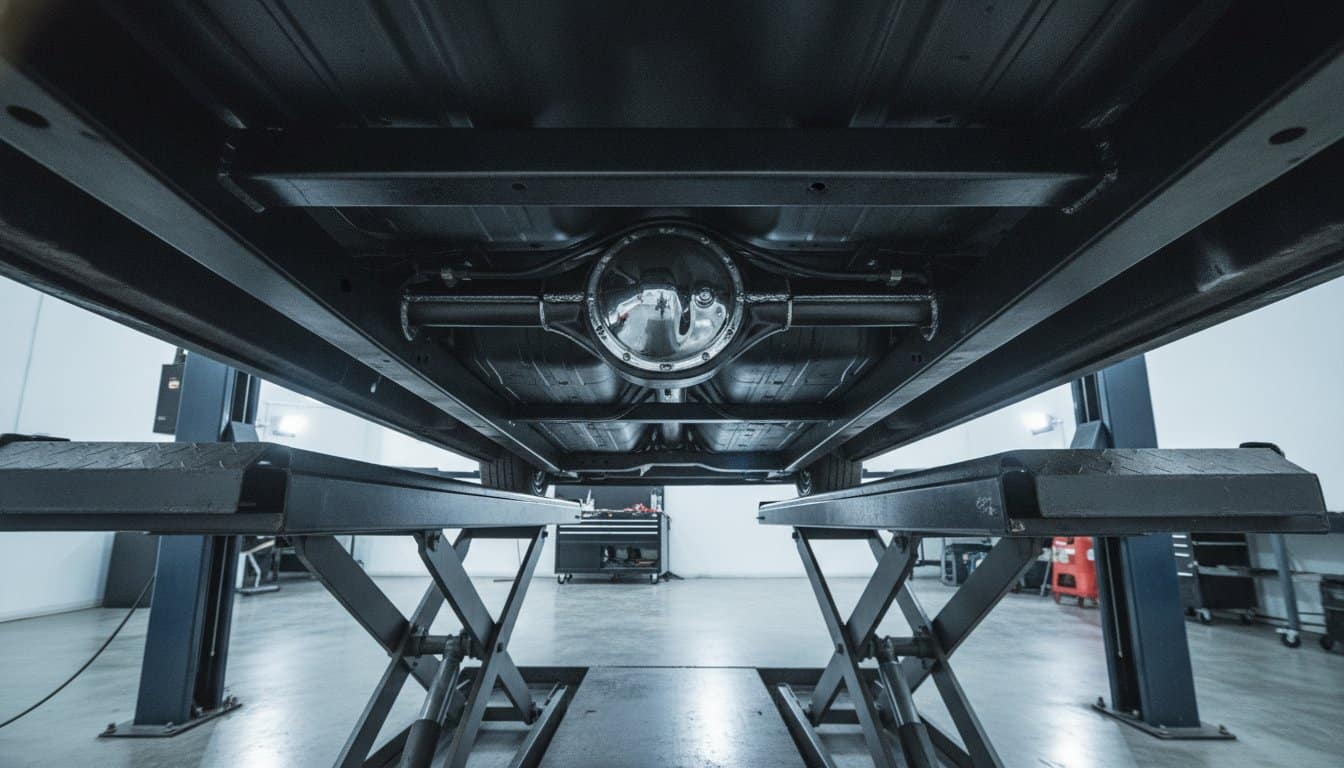
Your high-performance crate engine is only as effective as the steel it’s bolted to, and right now, your vintage frame is likely acting more like a wet noodle than a precision instrument. You’ve probably felt that unsettling twist during hard acceleration or heard the constant symphony of rattles when the road gets rough. It’s a frustrating reality for many enthusiasts that original factory engineering simply can’t keep up with the grip and torque of modern components. This is why chassis stiffening classic car projects are the absolute prerequisite for any serious build.
I understand the desire to maintain that heritage look while demanding modern handling precision. You want a vehicle that tracks straight, corners flat, and feels safe at high speeds. In this guide, I’ll show you how to master the technical art of structural reinforcement. We’ll explore the logical steps to eliminate frame flex and create a solid foundation for your suspension tuning. From selecting the right subframe connectors to understanding the role of modern fabrication, you’re about to turn your flexible vintage platform into a rigid masterpiece of engineering.
Key Takeaways
- Identify the engineering limitations of vintage steel and learn how chassis flex compromises your car’s handling predictability and safety.
- Explore essential bolt-on solutions like subframe connectors that serve as the first line of defense in your chassis stiffening classic car strategy.
- Learn the precise art of boxing frame rails and seam welding to provide the torsional rigidity required for high-torque modern engines.
- Understand how to integrate a roll cage as a three-dimensional structural truss that locks your vehicle’s geometry into place for high-speed driving.
- Develop a methodical planning sequence to ensure your structural modifications provide a solid, reliable foundation for future suspension and powertrain upgrades.
Understanding Chassis Flex and the Need for Structural Rigidity
Think of your classic car’s frame not as a solid block of iron, but as a giant torsion spring. Every time you dive into a corner or hammer the throttle, that spring winds up. This physical twisting of the frame under torque or cornering loads is known as chassis flex. While a small amount of movement was acceptable by 1960s standards, it becomes a major liability when you introduce modern horsepower and high-grip radial tires. A chassis stiffening classic car project is about more than just adding metal; it is about ensuring your vehicle remains a stable platform for the mechanical systems you’ve worked hard to install.
Vintage steel and assembly methods simply lack the torsional rigidity found in modern unibody designs. Back then, manufacturers relied on open C-channel frames and widely spaced spot welds that allowed the body to move. This flexibility leads to common symptoms that plague many builds, such as cowl shake, where the dashboard and steering column seem to vibrate independently of the rest of the car. You might also notice inconsistent tire wear or a cabin filled with persistent creaks and rattles. These aren’t just annoyances; they are evidence that your frame is yielding to the forces of the road.
Torsional Rigidity vs Beam Strength
It is vital to distinguish between beam strength and torsional rigidity. Beam strength refers to the frame’s ability to support vertical weight without sagging. Most classic frames excel at this. However, torsional rigidity is the resistance of a body to twisting. When a high-torque engine launches a car, it attempts to lift one front corner while pinning the opposite rear corner. Without adequate reinforcement, the frame literally twists along its longitudinal axis, soaking up energy that should be going to the pavement.
The Impact of Flex on Modern Suspension Systems
If you have invested in high-end coilovers or tubular control arms, their performance is entirely dependent on the integrity of their mounting points. When the chassis flexes, it changes your suspension geometry mid-turn. This movement makes it impossible to maintain a consistent tire contact patch, leading to unpredictable handling at the limit. By prioritizing structural integrity, you allow the suspension to do its job. A rigid chassis often permits you to run slightly softer spring rates, which improves ride quality without sacrificing the precision of your handling. It creates a predictable, safe environment where your tuning adjustments actually produce the results you expect.
While advanced fabrication represents the peak of structural engineering, many effective chassis stiffening classic car strategies begin with high-quality bolt-on components. These parts allow you to address specific weak points without immediately stripping the vehicle to a bare shell. For the enthusiast working in a home garage, these solutions provide a logical starting point to transform a flexible vintage platform into a predictable performance machine.
Subframe Connectors: The Unibody Essential
Unibody cars like the early Mustang or Camaro are essentially two separate frames joined by a thin sheet of floor pan. Subframe connectors bridge this gap by tying the front and rear sections together. Under-the-floor versions are popular for their ease of installation, with quality pairs typically costing between $260 and $410. Through-the-floor designs offer superior ground clearance and rigidity but require cutting the floor. Crucially, you must ensure the car is supported by its suspension on a level surface before securing these connectors. If you bolt them in while the car is on jack stands, you risk locking a twist into the frame forever.
Strut Tower and Firewall Bracing
The engine bay is a large, open box prone to diagonal flex during high-speed maneuvers. Strut tower braces triangulate the front end to prevent the towers from leaning inward under load. Adding a firewall brace further ties the front clip to the main cabin structure, which often results in an immediate improvement in steering feel and brake pedal response. For those seeking the best balance of weight and strength, chromoly components offer a significant advantage over standard mild steel. You can find more details on the tools needed for these installations in our recommended gear guide.
For cars with body-on-frame construction or those needing center-section support, X-braces provide the diagonal stability that factory crossmembers lack. While bolt-on kits offer an accessible entry point, I often recommend stitch-welding these components once you are satisfied with the fitment. This creates a permanent, cohesive structure that handles modern power with ease. Remember that these upgrades are the first step in a larger journey; they prepare your vehicle to handle the stresses of modern engines and high-performance tires without compromising safety.
Advanced Fabrication: Boxing Rails and Seam Welding
When you move beyond bolt-on components, you enter the heart of professional structural engineering. While braces and connectors offer significant improvements, advanced fabrication techniques allow you to fundamentally change the way your frame responds to stress. This stage of a chassis stiffening classic car project requires patience and a steady hand with a welder, but the results are a vehicle that feels modern, tight, and incredibly responsive. Before you strike an arc, ensure you have the right equipment by checking our recommended gear to maintain safety and precision in your workshop.
Boxing the Frame for Body-on-Frame Classics
Many vintage trucks and muscle cars utilize a body-on-frame design with open C-channel rails. These were designed for ease of assembly and cost-efficiency, not for handling 500 horsepower. Boxing involves welding a steel plate over the open side of the C-channel to create a fully enclosed box section. This modification exponentially increases the frame’s resistance to twisting. Start by creating cardboard templates for each section of the rail to ensure a perfect fit with your steel plate, typically 1/8-inch or 3/16-inch mild steel.
Managing heat soak is your biggest challenge during this process. If you lay down a continuous six-foot bead of weld, the frame will almost certainly warp as it cools. Work in short segments, jumping from one side of the car to the other to allow the metal to reach a stable temperature. Use gussets to reinforce high-stress corners and suspension mounting points, as these areas face the most leverage during hard cornering. This methodical approach ensures your frame stays straight while becoming significantly stronger.
The Art of Stitch Welding
Factory unibody cars were held together by thousands of small spot welds. These were sufficient for a grocery getter in 1968, but they act as pivot points under extreme load, allowing the body panels to move independently. Stitch welding, or seam welding, involves adding permanent welds along the factory seams to create a continuous bond between panels. This technique is particularly effective in the engine bay, around the door pillars, and along the floor pans.
Preparation is everything here. You must strip every ounce of paint, sealer, and undercoating from the seams before welding, or you’ll face porous, weak welds and potential fires. Once the metal is bright and clean, apply one-inch welds every three inches along the seam. Stitch welding distributes loads across the entire seam. This pattern provides maximum strength without adding unnecessary weight or excessive heat to the thin sheet metal. By the time you finish, the car will no longer groan when you pull into a steep driveway; it will move as a single, unified structure.
Integrating Roll Cages and Bracing for Safety and Performance
While boxing rails and adding connectors strengthens the foundation, a roll cage introduces a three-dimensional structural truss that ties the entire vehicle together. This is the pinnacle of a chassis stiffening classic car strategy. By connecting the floor, pillars, and roofline, you create a rigid box that resists twisting forces far better than any flat frame ever could. It changes the way the car responds to steering inputs, as the body no longer absorbs the energy meant for the tires. You aren’t just building a safety cell; you are creating a unified performance platform.
Roll Bars vs Full Cages
Choosing between a 4-point roll bar and a full 6-point or 8-point cage depends heavily on your intended use. A 4-point roll bar is an excellent compromise for street-driven cars. it improves rear chassis stiffness and provides a secure mounting point for harnesses without making the cabin inaccessible. If you are building for the track, material selection is critical. SCCA regulations for vehicles weighing between 1,701 and 2,699 pounds require a minimum tubing size of 1.500 inch outer diameter with a 0.095 inch wall thickness for mild steel. They explicitly disallow ERW tubing for new builds, so stick with Seamless or DOM mild steel. Remember that NHRA mandates a full roll cage for any car running 10.99 seconds or quicker or exceeding 135 mph. For those planning a high-performance build, our Restomod Consulting Services can help you determine the best cage configuration for your specific goals.
Chassis Bracing Beyond the Cage
Do not overlook the smaller, specific areas where leverage can still cause flex. Torque boxes are a notorious weak point in classic muscle cars; they are the transition points where the frame meets the floor pan and suspension mounts. Under high-torque loads, these boxes can actually tear or distort. Reinforcing them with plate steel is a mandatory step for any car with a modern V8. Similarly, if you are performing an independent rear suspension swap, a rear shock tower brace is essential. It prevents the towers from bowing inward under the increased lateral loads of a modern suspension. By integrating these braces and the roll cage into the frame rails, you create a cohesive structure that handles modern power with absolute confidence. This meticulous attention to detail ensures that your car remains safe, predictable, and incredibly fun to drive at the limit.
Executing Your Chassis Strategy: Planning the Foundation
Before you fire up the welder or order a single reinforcement plate, you must define your ultimate performance goals. A car destined for casual Sunday cruises requires a different structural approach than a pro-touring machine built to chase lap times. Jumping into a chassis stiffening classic car project without a clear roadmap often leads to conflicting modifications or wasted labor. You must think three steps ahead. Consider how your bracing will interact with your exhaust routing, fuel lines, and seating position. This is the moment to transition from a hobbyist to a strategic builder who values precision over speed.
The Order of Operations
Successful builds follow a strict logical sequence. Complete all rust repairs and panel alignments before you begin structural stiffening. If you weld in subframe connectors while the body is out of square, you’ll lock that misalignment into the car permanently. Similarly, always test fit your drivetrain before final welding of cages or crossmembers. If you are planning a high-performance heart transplant, refer to the definitive guide to an LS engine swap to ensure your new mounts and clearance requirements align with your structural reinforcements. Only after the fabrication is finished and the welds are inspected should you move toward final paint and interior assembly. This order protects your aesthetic investment and ensures the chassis remains the steady foundation it was meant to be.
Measuring Success
You don’t need a multi-million dollar engineering lab to verify your progress. You can perform a simple torsional flex test in your own garage using basic tools. Support the car at three corners on jack stands and place a floor jack under the fourth corner. Use a dial indicator to measure how much the frame moves before the other corners begin to lift. Document these measurements before and after your modifications to see the tangible results of your labor. Beyond the numbers, the true reward is the psychological impact on your driving. A stiff chassis provides immediate feedback through the steering wheel and seat, replacing the vague, wallowing sensation of vintage steel with modern confidence.
As you wrap up your structural phase, perform a final checklist. Inspect every weld for penetration and clean every seam to prevent future corrosion. If you feel overwhelmed by the complexity of these tasks, our Restomod Consulting Services offer the expert mentorship needed to refine your plan. For those ready to see the entire project through to completion, The Ultimate Restomod Guide serves as the comprehensive roadmap for your journey. Precision takes time, but the satisfaction of a perfectly executed foundation is a reward that lasts for the life of the vehicle.
Building the Backbone of Your Performance Legacy
Transforming a flexible vintage frame into a rigid performance platform is the most rewarding labor you can perform in your workshop. By moving beyond factory limitations and embracing modern engineering, you ensure that every horsepower gain translates directly to the pavement. You’ve learned how to identify structural weaknesses and execute advanced fabrication with precision. It’s a meticulous process. These steps aren’t just about speed; they are about creating a safe machine that respects its heritage while demanding contemporary reliability.
Mastering the technical art of a chassis stiffening classic car project requires a clear strategy and a commitment to quality. Under the expert mentorship of Brook Walsh, you can transition from planning to execution with absolute confidence. Our safety-first engineering approach and comprehensive project blueprints are designed to empower you to build a foundation that lasts. To take the next step in your journey, Download The Ultimate Restomod Guide to plan your structural foundation and start your transformation today. The road ahead is waiting. With the right backbone, your classic will be ready to conquer it.
Frequently Asked Questions
Will stiffening my chassis make the ride too harsh for the street?
Stiffening your chassis actually allows for a more compliant ride because it forces the suspension springs and shocks to handle road imperfections rather than the frame itself. When a chassis flexes, it acts as an uncontrolled spring that ruins ride quality. By creating a rigid foundation, you can often run slightly softer spring rates to achieve a comfortable street ride without sacrificing performance or handling precision.
What is the most cost-effective way to stiffen a unibody classic car?
Installing a set of bolt-on subframe connectors is the most cost-effective way to improve the structural integrity of a unibody vehicle. These components typically cost between $260 and $410 and provide an immediate reduction in longitudinal flex. For the DIY builder, this modification offers a high return on investment by bridging the gap between the front and rear subframes with minimal specialized tools.
Do I need a roll cage if I am only building a street-driven restomod?
You generally don’t need a full roll cage for a street-driven restomod, and a cage can actually pose safety risks if you aren’t wearing a helmet. A 4-point roll bar is a much better compromise for a car that sees regular road use. It provides significant chassis stiffening classic car benefits and rear impact protection without the dangerous overhead bars that could cause head injuries during a collision.
Can I stiffen my chassis without doing any welding?
Yes, you can achieve significant improvements through high-quality bolt-on components like strut tower braces, X-braces, and bolt-on subframe connectors. While welding offers the most permanent and rigid bond, modern bolt-on kits are engineered with precise tolerances to provide a major upgrade in rigidity. These are perfect for enthusiasts who want to avoid permanent modifications to the original factory sheet metal.
How much weight does a typical chassis stiffening kit add to a car?
A typical chassis stiffening project, including subframe connectors and a strut tower brace, usually adds between 30 and 50 pounds to the vehicle. While every pound matters in racing, the performance trade-off is overwhelmingly positive. The increased weight is positioned low in the vehicle’s center of gravity and the gains in handling predictability far outweigh the slight increase in total mass.
Is seam welding better than just adding subframe connectors?
Seam welding and subframe connectors serve different structural purposes and are most effective when used together. Subframe connectors prevent the entire car from twisting end to end, while seam welding prevents individual body panels from shifting relative to each other. If you must choose one, start with connectors to address the primary longitudinal flex, then move to seam welding for ultimate structural cohesion.
Does chassis stiffening help with cabin rattles and noise?
Chassis reinforcement is one of the most effective ways to eliminate persistent cabin rattles and squeaks. Most interior noise in vintage cars is caused by body panels rubbing together as the frame twists over uneven pavement. By completing a chassis stiffening classic car strategy, you stop that movement at the source, resulting in a much quieter and more refined driving experience that feels like a modern machine.
What is the difference between a strut bar and a sway bar?
A strut bar ties the tops of the suspension towers together to prevent chassis flex, while a sway bar connects the left and right suspension arms to control body roll during cornering. Think of the strut bar as a structural reinforcement for the frame and the sway bar as a tuning tool for the suspension. Both are necessary for a high-performance build, but they address entirely different mechanical forces.
Your high-performance crate engine is only as effective as the steel it’s bolted to, and right now, your vintage frame is likely acting more like a wet noodle than a precision instrument. You’ve probably felt that unsettling twist during hard acceleration or heard the constant symphony of rattles when the road gets rough. It’s a frustrating reality for many enthusiasts that original factory engineering simply can’t keep up with the grip and torque of modern components. This is why chassis stiffening classic car projects are the absolute prerequisite for any serious build.
I understand the desire to maintain that heritage look while demanding modern handling precision. You want a vehicle that tracks straight, corners flat, and feels safe at high speeds. In this guide, I’ll show you how to master the technical art of structural reinforcement. We’ll explore the logical steps to eliminate frame flex and create a solid foundation for your suspension tuning. From selecting the right subframe connectors to understanding the role of modern fabrication, you’re about to turn your flexible vintage platform into a rigid masterpiece of engineering.
Key Takeaways
- Identify the engineering limitations of vintage steel and learn how chassis flex compromises your car’s handling predictability and safety.
- Explore essential bolt-on solutions like subframe connectors that serve as the first line of defense in your chassis stiffening classic car strategy.
- Learn the precise art of boxing frame rails and seam welding to provide the torsional rigidity required for high-torque modern engines.
- Understand how to integrate a roll cage as a three-dimensional structural truss that locks your vehicle’s geometry into place for high-speed driving.
- Develop a methodical planning sequence to ensure your structural modifications provide a solid, reliable foundation for future suspension and powertrain upgrades.
Understanding Chassis Flex and the Need for Structural Rigidity
Think of your classic car’s frame not as a solid block of iron, but as a giant torsion spring. Every time you dive into a corner or hammer the throttle, that spring winds up. This physical twisting of the frame under torque or cornering loads is known as chassis flex. While a small amount of movement was acceptable by 1960s standards, it becomes a major liability when you introduce modern horsepower and high-grip radial tires. A chassis stiffening classic car project is about more than just adding metal; it is about ensuring your vehicle remains a stable platform for the mechanical systems you’ve worked hard to install.
Vintage steel and assembly methods simply lack the torsional rigidity found in modern unibody designs. Back then, manufacturers relied on open C-channel frames and widely spaced spot welds that allowed the body to move. This flexibility leads to common symptoms that plague many builds, such as cowl shake, where the dashboard and steering column seem to vibrate independently of the rest of the car. You might also notice inconsistent tire wear or a cabin filled with persistent creaks and rattles. These aren’t just annoyances; they are evidence that your frame is yielding to the forces of the road.
Torsional Rigidity vs Beam Strength
It is vital to distinguish between beam strength and torsional rigidity. Beam strength refers to the frame’s ability to support vertical weight without sagging. Most classic frames excel at this. However, torsional rigidity is the resistance of a body to twisting. When a high-torque engine launches a car, it attempts to lift one front corner while pinning the opposite rear corner. Without adequate reinforcement, the frame literally twists along its longitudinal axis, soaking up energy that should be going to the pavement.
The Impact of Flex on Modern Suspension Systems
If you have invested in high-end coilovers or tubular control arms, their performance is entirely dependent on the integrity of their mounting points. When the chassis flexes, it changes your suspension geometry mid-turn. This movement makes it impossible to maintain a consistent tire contact patch, leading to unpredictable handling at the limit. By prioritizing structural integrity, you allow the suspension to do its job. A rigid chassis often permits you to run slightly softer spring rates, which improves ride quality without sacrificing the precision of your handling. It creates a predictable, safe environment where your tuning adjustments actually produce the results you expect.
While advanced fabrication represents the peak of structural engineering, many effective chassis stiffening classic car strategies begin with high-quality bolt-on components. These parts allow you to address specific weak points without immediately stripping the vehicle to a bare shell. For the enthusiast working in a home garage, these solutions provide a logical starting point to transform a flexible vintage platform into a predictable performance machine.
Subframe Connectors: The Unibody Essential
Unibody cars like the early Mustang or Camaro are essentially two separate frames joined by a thin sheet of floor pan. Subframe connectors bridge this gap by tying the front and rear sections together. Under-the-floor versions are popular for their ease of installation, with quality pairs typically costing between $260 and $410. Through-the-floor designs offer superior ground clearance and rigidity but require cutting the floor. Crucially, you must ensure the car is supported by its suspension on a level surface before securing these connectors. If you bolt them in while the car is on jack stands, you risk locking a twist into the frame forever.
Strut Tower and Firewall Bracing
The engine bay is a large, open box prone to diagonal flex during high-speed maneuvers. Strut tower braces triangulate the front end to prevent the towers from leaning inward under load. Adding a firewall brace further ties the front clip to the main cabin structure, which often results in an immediate improvement in steering feel and brake pedal response. For those seeking the best balance of weight and strength, chromoly components offer a significant advantage over standard mild steel. You can find more details on the tools needed for these installations in our recommended gear guide.
For cars with body-on-frame construction or those needing center-section support, X-braces provide the diagonal stability that factory crossmembers lack. While bolt-on kits offer an accessible entry point, I often recommend stitch-welding these components once you are satisfied with the fitment. This creates a permanent, cohesive structure that handles modern power with ease. Remember that these upgrades are the first step in a larger journey; they prepare your vehicle to handle the stresses of modern engines and high-performance tires without compromising safety.
Advanced Fabrication: Boxing Rails and Seam Welding
When you move beyond bolt-on components, you enter the heart of professional structural engineering. While braces and connectors offer significant improvements, advanced fabrication techniques allow you to fundamentally change the way your frame responds to stress. This stage of a chassis stiffening classic car project requires patience and a steady hand with a welder, but the results are a vehicle that feels modern, tight, and incredibly responsive. Before you strike an arc, ensure you have the right equipment by checking our recommended gear to maintain safety and precision in your workshop.
Boxing the Frame for Body-on-Frame Classics
Many vintage trucks and muscle cars utilize a body-on-frame design with open C-channel rails. These were designed for ease of assembly and cost-efficiency, not for handling 500 horsepower. Boxing involves welding a steel plate over the open side of the C-channel to create a fully enclosed box section. This modification exponentially increases the frame’s resistance to twisting. Start by creating cardboard templates for each section of the rail to ensure a perfect fit with your steel plate, typically 1/8-inch or 3/16-inch mild steel.
Managing heat soak is your biggest challenge during this process. If you lay down a continuous six-foot bead of weld, the frame will almost certainly warp as it cools. Work in short segments, jumping from one side of the car to the other to allow the metal to reach a stable temperature. Use gussets to reinforce high-stress corners and suspension mounting points, as these areas face the most leverage during hard cornering. This methodical approach ensures your frame stays straight while becoming significantly stronger.
The Art of Stitch Welding
Factory unibody cars were held together by thousands of small spot welds. These were sufficient for a grocery getter in 1968, but they act as pivot points under extreme load, allowing the body panels to move independently. Stitch welding, or seam welding, involves adding permanent welds along the factory seams to create a continuous bond between panels. This technique is particularly effective in the engine bay, around the door pillars, and along the floor pans.
Preparation is everything here. You must strip every ounce of paint, sealer, and undercoating from the seams before welding, or you’ll face porous, weak welds and potential fires. Once the metal is bright and clean, apply one-inch welds every three inches along the seam. Stitch welding distributes loads across the entire seam. This pattern provides maximum strength without adding unnecessary weight or excessive heat to the thin sheet metal. By the time you finish, the car will no longer groan when you pull into a steep driveway; it will move as a single, unified structure.
Integrating Roll Cages and Bracing for Safety and Performance
While boxing rails and adding connectors strengthens the foundation, a roll cage introduces a three-dimensional structural truss that ties the entire vehicle together. This is the pinnacle of a chassis stiffening classic car strategy. By connecting the floor, pillars, and roofline, you create a rigid box that resists twisting forces far better than any flat frame ever could. It changes the way the car responds to steering inputs, as the body no longer absorbs the energy meant for the tires. You aren’t just building a safety cell; you are creating a unified performance platform.
Roll Bars vs Full Cages
Choosing between a 4-point roll bar and a full 6-point or 8-point cage depends heavily on your intended use. A 4-point roll bar is an excellent compromise for street-driven cars. it improves rear chassis stiffness and provides a secure mounting point for harnesses without making the cabin inaccessible. If you are building for the track, material selection is critical. SCCA regulations for vehicles weighing between 1,701 and 2,699 pounds require a minimum tubing size of 1.500 inch outer diameter with a 0.095 inch wall thickness for mild steel. They explicitly disallow ERW tubing for new builds, so stick with Seamless or DOM mild steel. Remember that NHRA mandates a full roll cage for any car running 10.99 seconds or quicker or exceeding 135 mph. For those planning a high-performance build, our Restomod Consulting Services can help you determine the best cage configuration for your specific goals.
Chassis Bracing Beyond the Cage
Do not overlook the smaller, specific areas where leverage can still cause flex. Torque boxes are a notorious weak point in classic muscle cars; they are the transition points where the frame meets the floor pan and suspension mounts. Under high-torque loads, these boxes can actually tear or distort. Reinforcing them with plate steel is a mandatory step for any car with a modern V8. Similarly, if you are performing an independent rear suspension swap, a rear shock tower brace is essential. It prevents the towers from bowing inward under the increased lateral loads of a modern suspension. By integrating these braces and the roll cage into the frame rails, you create a cohesive structure that handles modern power with absolute confidence. This meticulous attention to detail ensures that your car remains safe, predictable, and incredibly fun to drive at the limit.
Executing Your Chassis Strategy: Planning the Foundation
Before you fire up the welder or order a single reinforcement plate, you must define your ultimate performance goals. A car destined for casual Sunday cruises requires a different structural approach than a pro-touring machine built to chase lap times. Jumping into a chassis stiffening classic car project without a clear roadmap often leads to conflicting modifications or wasted labor. You must think three steps ahead. Consider how your bracing will interact with your exhaust routing, fuel lines, and seating position. This is the moment to transition from a hobbyist to a strategic builder who values precision over speed.
The Order of Operations
Successful builds follow a strict logical sequence. Complete all rust repairs and panel alignments before you begin structural stiffening. If you weld in subframe connectors while the body is out of square, you’ll lock that misalignment into the car permanently. Similarly, always test fit your drivetrain before final welding of cages or crossmembers. If you are planning a high-performance heart transplant, refer to the definitive guide to an LS engine swap to ensure your new mounts and clearance requirements align with your structural reinforcements. Only after the fabrication is finished and the welds are inspected should you move toward final paint and interior assembly. This order protects your aesthetic investment and ensures the chassis remains the steady foundation it was meant to be.
Measuring Success
You don’t need a multi-million dollar engineering lab to verify your progress. You can perform a simple torsional flex test in your own garage using basic tools. Support the car at three corners on jack stands and place a floor jack under the fourth corner. Use a dial indicator to measure how much the frame moves before the other corners begin to lift. Document these measurements before and after your modifications to see the tangible results of your labor. Beyond the numbers, the true reward is the psychological impact on your driving. A stiff chassis provides immediate feedback through the steering wheel and seat, replacing the vague, wallowing sensation of vintage steel with modern confidence.
As you wrap up your structural phase, perform a final checklist. Inspect every weld for penetration and clean every seam to prevent future corrosion. If you feel overwhelmed by the complexity of these tasks, our Restomod Consulting Services offer the expert mentorship needed to refine your plan. For those ready to see the entire project through to completion, The Ultimate Restomod Guide serves as the comprehensive roadmap for your journey. Precision takes time, but the satisfaction of a perfectly executed foundation is a reward that lasts for the life of the vehicle.
Building the Backbone of Your Performance Legacy
Transforming a flexible vintage frame into a rigid performance platform is the most rewarding labor you can perform in your workshop. By moving beyond factory limitations and embracing modern engineering, you ensure that every horsepower gain translates directly to the pavement. You’ve learned how to identify structural weaknesses and execute advanced fabrication with precision. It’s a meticulous process. These steps aren’t just about speed; they are about creating a safe machine that respects its heritage while demanding contemporary reliability.
Mastering the technical art of a chassis stiffening classic car project requires a clear strategy and a commitment to quality. Under the expert mentorship of Brook Walsh, you can transition from planning to execution with absolute confidence. Our safety-first engineering approach and comprehensive project blueprints are designed to empower you to build a foundation that lasts. To take the next step in your journey, Download The Ultimate Restomod Guide to plan your structural foundation and start your transformation today. The road ahead is waiting. With the right backbone, your classic will be ready to conquer it.
Frequently Asked Questions
Will stiffening my chassis make the ride too harsh for the street?
Stiffening your chassis actually allows for a more compliant ride because it forces the suspension springs and shocks to handle road imperfections rather than the frame itself. When a chassis flexes, it acts as an uncontrolled spring that ruins ride quality. By creating a rigid foundation, you can often run slightly softer spring rates to achieve a comfortable street ride without sacrificing performance or handling precision.
What is the most cost-effective way to stiffen a unibody classic car?
Installing a set of bolt-on subframe connectors is the most cost-effective way to improve the structural integrity of a unibody vehicle. These components typically cost between $260 and $410 and provide an immediate reduction in longitudinal flex. For the DIY builder, this modification offers a high return on investment by bridging the gap between the front and rear subframes with minimal specialized tools.
Do I need a roll cage if I am only building a street-driven restomod?
You generally don’t need a full roll cage for a street-driven restomod, and a cage can actually pose safety risks if you aren’t wearing a helmet. A 4-point roll bar is a much better compromise for a car that sees regular road use. It provides significant chassis stiffening classic car benefits and rear impact protection without the dangerous overhead bars that could cause head injuries during a collision.
Can I stiffen my chassis without doing any welding?
Yes, you can achieve significant improvements through high-quality bolt-on components like strut tower braces, X-braces, and bolt-on subframe connectors. While welding offers the most permanent and rigid bond, modern bolt-on kits are engineered with precise tolerances to provide a major upgrade in rigidity. These are perfect for enthusiasts who want to avoid permanent modifications to the original factory sheet metal.
How much weight does a typical chassis stiffening kit add to a car?
A typical chassis stiffening project, including subframe connectors and a strut tower brace, usually adds between 30 and 50 pounds to the vehicle. While every pound matters in racing, the performance trade-off is overwhelmingly positive. The increased weight is positioned low in the vehicle’s center of gravity and the gains in handling predictability far outweigh the slight increase in total mass.
Is seam welding better than just adding subframe connectors?
Seam welding and subframe connectors serve different structural purposes and are most effective when used together. Subframe connectors prevent the entire car from twisting end to end, while seam welding prevents individual body panels from shifting relative to each other. If you must choose one, start with connectors to address the primary longitudinal flex, then move to seam welding for ultimate structural cohesion.
Does chassis stiffening help with cabin rattles and noise?
Chassis reinforcement is one of the most effective ways to eliminate persistent cabin rattles and squeaks. Most interior noise in vintage cars is caused by body panels rubbing together as the frame twists over uneven pavement. By completing a chassis stiffening classic car strategy, you stop that movement at the source, resulting in a much quieter and more refined driving experience that feels like a modern machine.
What is the difference between a strut bar and a sway bar?
A strut bar ties the tops of the suspension towers together to prevent chassis flex, while a sway bar connects the left and right suspension arms to control body roll during cornering. Think of the strut bar as a structural reinforcement for the frame and the sway bar as a tuning tool for the suspension. Both are necessary for a high-performance build, but they address entirely different mechanical forces.