
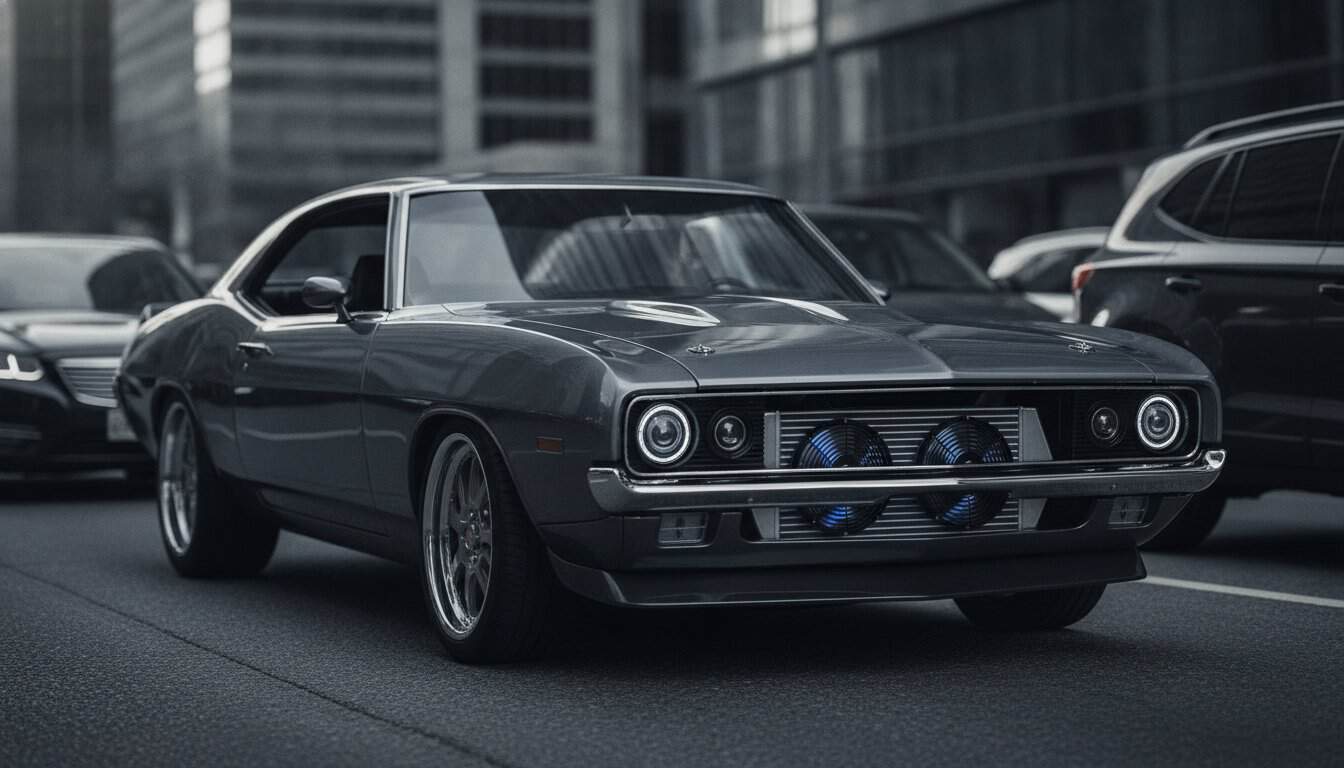
You’re stuck three cars back at a long red light on a sweltering afternoon, watching the temperature needle creep toward the red zone while your A/C starts blowing humid air. It’s a moment of pure anxiety that every enthusiast knows too well; the fear that your high-performance masterpiece might warp an expensive set of heads before the light turns green. Keeping a restomod cool in traffic isn’t just about finding the biggest radiator that fits your core support. It’s about mastering the science of airflow and electrical efficiency when the car is sitting at a dead stop.
I understand the frustration of building a high-output machine only to feel limited by the local weather or city gridlock. You’ve put in the labor to create something beautiful, and you deserve the confidence to drive it anywhere. This guide will show you how to engineer a fail-safe cooling system that handles modern horsepower without breaking a sweat. We’ll explore how to optimize shroud geometry, upgrade your electrical system for high-draw fans, and select the right thermal components to ensure your engine stays stable whether you’re on the open road or stuck in downtown congestion.
Key Takeaways
- Understand the fundamental physics of heat soak and why modern high-compression engines require a completely different cooling strategy than original vintage powerplants.
- Learn the engineering secrets to keeping a restomod cool in traffic by prioritizing radiator tube size over row count and ensuring your fan shroud captures every inch of the core surface.
- Stop the amperage trap by accurately calculating your total electrical load and upgrading from a vintage 60-amp alternator to support high-draw cooling fans and EFI systems.
- Optimize thermal transfer by balancing your coolant chemistry and maintaining high coolant velocity at low RPM through a performance water pump.
- Master a methodical system-first approach and learn how to perform a safe driveway traffic test to verify your build’s reliability before hitting the city streets.
The Physics of Traffic: Why Classic Cooling Fails at Idle
When you’re cruising at 60 MPH, your cooling system has it easy. High-speed air is forced through the radiator fins, carrying away heat with minimal effort from the fan. Once you pull into a city center, that natural airflow disappears entirely. This transition from ram-air cooling to static cooling is where most vintage systems fail because they weren’t designed for the stop-and-go reality of modern infrastructure. Mastering engine cooling fundamentals is the first step toward building a machine that stays calm at a red light.
Modern builds face a specific challenge known as heat soak. This happens when the engine bay becomes so saturated with thermal energy that the cooling system can’t effectively reject heat to the stagnant surrounding air. In a high-compression crate engine, this occurs much faster than in a low-compression vintage motor because of the increased internal friction and higher combustion pressures. When you add the thermal load of a high-output alternator and a modern A/C compressor, you’re asking the system to do significantly more work with less atmospheric help. Keeping a restomod cool in traffic requires moving away from heavy brass and copper radiators toward aluminum crossflow designs. Aluminum conducts heat more efficiently and allows for larger tube diameters, which increases the surface area available for cooling without increasing the overall footprint of the radiator.
To better understand the stress of managing a high-performance build in a stationary environment, watch this helpful video:
The Airflow Velocity Gap
Mechanical fans tied to engine RPM are fundamentally flawed for traffic. Your engine is at its lowest speed when you need the most cooling, leaving the fan spinning too slowly to pull sufficient air through the core. This is often made worse by custom bumper and grille designs that prioritize sleek aesthetics over open surface area, creating extra resistance for the air trying to reach your radiator. Airflow velocity is the primary driver of heat exchange at idle. Without a dedicated way to maintain high-speed air movement while the vehicle is stationary, you are simply waiting for the temperature gauge to hit the danger zone.
Modern Horsepower vs. Vintage Thermal Capacity
A vintage 289 V8 generates a manageable amount of heat, but a modern Coyote or LS swap can produce significantly more BTUs under the same conditions. Modern fuel injection systems utilize lean-burn technology to increase efficiency, which results in much higher combustion temperatures than old carburetors. If you’ve looked through our LS engine swap guide, you’ve seen how these modern powerplants require a massive jump in thermal capacity. You simply can’t expect a radiator sized for 1960s technology to handle the demands of a high-horsepower modern swap in the summer heat. Keeping a restomod cool in traffic means matching your cooling capacity to your actual horsepower output, not the size of the original engine bay.
The Holy Trinity of Restomod Cooling: Radiators, Fans, and Shrouds
Success in keeping a restomod cool in traffic depends on three components working in perfect harmony. If one link in this chain is weak, the entire system fails the moment the vehicle stops moving. Most enthusiasts focus solely on the radiator, but even the most advanced core is useless without the mechanical ability to pull air through it at a dead stop. You must view these parts as a single integrated unit rather than a collection of separate upgrades.
Don’t get distracted by the number of rows in a radiator. Instead, prioritize the size of the tubes. A 2-row radiator with 1-inch or 1.25-inch tubes offers significantly more surface contact area for heat dissipation than an old-school 4-row unit with tiny, restrictive tubes. Modern high-performance cooling strategies rely on this increased surface area to transfer thermal energy rapidly. Additionally, if you’re running air conditioning, leave a small gap of roughly 1/2 to 3/4 of an inch between the condenser and the radiator. This prevents the condenser from pre-heating the radiator core and allows for better airflow distribution across the entire surface.
Aluminum Crossflow Radiator Selection
Crossflow designs, where the tanks are located on the sides, are generally superior for the cramped engine bays found in most restomods. This configuration allows for a wider core and longer tube runs, which keeps the coolant in the airflow path for a greater duration. When selecting your unit, look for radiators that feature integrated transmission or oil coolers if you need to save space. However, ensure the primary core is large enough to handle the combined thermal load of both the engine and the drivetrain. If you are still in the planning phase, our Ultimate Restomod Guide can help you map out these space requirements before you buy parts.
The Science of Effective Shrouding
The fan shroud is the most critical component for keeping a restomod cool in traffic, yet it is often the most neglected. A proper shroud must capture 100% of the radiator surface area, forcing the fan to pull air through every single fin rather than just the circle directly in front of the blades. This creates a vacuum effect that ensures the entire core is working to shed heat even when there is no forward motion. Follow these rules for maximum efficiency:
- Maintain a clearance of 1/2 to 1 inch between the fan blade tips and the radiator face to optimize the pull.
- Avoid “open-box” shroud designs that allow air to recycle around the fan blades; the shroud should be tapered to funnel air toward the fan.
- Match your fan’s CFM (Cubic Feet per Minute) to your engine’s needs; a high-output V8 with A/C usually requires a minimum of 2,800 CFM to remain stable at idle.
- Seal any gaps between the shroud and the radiator with high-temperature bulb seal to prevent air leaks.
By focusing on these three pillars, you transform your cooling system from a passive heat exchanger into an active thermal management tool. This precision engineering is what separates a car that barely survives a cruise from one that thrives in any environment.
Electrical Infrastructure: Avoiding the Amperage Trap
You can install the largest radiator in the world, but if your fans aren’t receiving the voltage they need to spin at full capacity, you’ll never win the battle against heat. The invisible bottleneck in most builds is the electrical system. Keeping a restomod cool in traffic requires a robust power grid that can handle the massive draw of modern performance components. Many enthusiasts fall into the amperage trap, where they upgrade the cooling hardware but leave the vintage charging system in place, leading to a slow, inevitable overheat during a long idle.
Consider the math behind a modern build. A high-performance dual-fan setup can pull 40 to 50 amps just to start up and roughly 25 amps to run continuously. When you add an EFI system (15-20 amps), a high-pressure electric fuel pump (10-15 amps), and a modern ignition system, your total draw can easily exceed 80 amps. If you’re still running a 60-amp vintage alternator, your battery is essentially being drained while you sit at a red light. This drop in voltage causes the fans to slow down exactly when you need them most, proving that electrical health is inseparable from thermal management.
Sizing Your Alternator for Modern Loads
Perform an honest electrical load audit before you finalize your build. For any car running dual electric fans and air conditioning, I recommend a minimum 140-amp output alternator. While “one-wire” alternators are popular for their simplicity, they often struggle with voltage sensing because they don’t have a remote lead to tell them what the voltage is at the main power distribution block. A multi-wire alternator is often a better choice for precise regulation. If you are following our LS engine swap guide, you’ll find that these modern engines are designed for high-output charging systems from the factory, and your chassis wiring must be upgraded to match. Use heavy 8-gauge or 10-gauge wire for your fan circuits and always utilize dedicated relays to protect your switches from melting under high current.
Fan Control Strategies: Switches vs. PWM
The standard way to trigger a fan is a binary “on/off” temperature switch, but this creates a massive sudden load on your electrical system. This “hammer effect” causes the dimming lights and stumbling idle that plague many classic cars. A better solution for keeping a restomod cool in traffic is a Pulse Width Modulation (PWM) controller. These devices vary the fan speed based on actual temperature, starting the fans at a quiet 20% and ramping up only as needed. This reduces wear on the fan motors, eliminates voltage spikes, and maintains a much more stable operating temperature. Mount your temperature sensor in the cylinder head or the intake manifold to ensure the controller is reading the hottest coolant in the system, providing the most accurate response to rising heat.

Plumbing and Chemistry: Optimizing Heat Transfer
Even with a massive radiator and high-CFM fans, your cooling system will fail if the fluid inside isn’t moving efficiently. Success in keeping a restomod cool in traffic requires a deep understanding of coolant velocity and thermal conductivity. If the coolant lingers too long in the engine block, it absorbs too much heat; if it moves too fast through the radiator without enough airflow, it can’t shed that energy. You need to find the mechanical and chemical sweet spot where heat exchange happens at its peak efficiency.
High-Flow Water Pumps and Pulley Ratios
Standard water pumps are often designed for highway cruising rather than the low-RPM stress of city driving. A high-flow water pump is a vital upgrade because it features an improved impeller design that maintains higher coolant velocity when the engine is just idling. This prevents hot spots from forming in the cylinder heads. You must also consider your pulley ratios. While underdrive pulleys are great for freeing up a few horsepower on the track, they slow down your water pump at a red light. For a street-driven restomod, an overdrive pulley or a standard ratio is usually the better choice to keep the pump spinning fast enough to move fluid. Check our recommended gear list for high-performance pump brands that offer the precision needed for modern crate engines.
Coolant Mixtures and Additives
A common mistake is running 100% antifreeze, but glycol is actually a poor conductor of heat. Water is the hero here. A 50/50 mix of distilled water and high-quality coolant is standard, but in warmer climates where freezing isn’t a concern, you might even drop to a 70/30 water-to-glycol ratio to improve thermal transfer. You can also use surfactants, often called wetting agents, to break the surface tension of the water. This allows the coolant to make better contact with the internal metal surfaces of the engine and radiator. These additives typically cost between $10 and $30 and are a cheap way to gain a few extra degrees of cooling margin. To protect your expensive aluminum components, follow this checklist to prevent electrolysis:
- Always use distilled water to avoid mineral buildup and chemical reactions.
- Ensure your engine block and radiator are properly grounded to the chassis.
- Test your coolant every season with a multimeter to check for stray voltage.
- Consider a sacrificial anode in the radiator if you’re running a mix of different metals.
Don’t let trapped air ruin your hard work. Always use a coolant expansion tank at the highest point of the system to allow air bubbles to escape. If you’re struggling to calculate the right pulley ratios or flow rates for your specific engine swap, reach out to our Restomod Consulting Services for a personalized cooling audit. Properly burping the system and ensuring every air pocket is gone is the final step in creating a reliable cooling loop that won’t let you down.
The Restomod Academy Strategy for Traffic-Proof Performance
Building a machine that remains stable at a red light isn’t a matter of luck; it’s the result of a system-first approach where every component supports the next. Keeping a restomod cool in traffic requires you to stop viewing parts as isolated upgrades and start seeing them as an integrated thermal loop. You’ve already learned how to select the right radiator, optimize your shrouding, and beef up your electrical infrastructure. Now, you must verify that these components work together under real-world stress before you find yourself stranded in a city center.
Success in thermal management is about precision, not just capacity. Every detail matters, from the way air enters the front valance to the millisecond response of your fan controller. By following a methodical testing process, you can transition from hoping your car stays cool to knowing it will. This final stage of the build is what separates an amateur project from a professional-grade restoration that can be driven anywhere, anytime, regardless of the ambient temperature.
The Driveway Traffic Simulation
Don’t wait for a real traffic jam to discover a flaw in your cooling loop. Perform a controlled simulation in your driveway to stress-test the system safely. Start by bringing the engine up to operating temperature, then let it idle while stationary for at least twenty minutes. Use an infrared thermometer to scan the radiator core, looking for cold spots that indicate trapped air or internal clogs. Document the temperature rise over a 20-minute idle to ensure the reading stabilizes rather than climbing indefinitely. If the needle continues to creep up after the fans engage, you likely have an airflow or coolant velocity issue that needs addressing. This controlled environment allows you to monitor fan engagement and relay temperatures without the risk of being stuck on a busy road.
Final Checklist for a Cool Build
Before you consider the cooling system finished, run through this final checklist to catch the common mistakes that plague high-performance builds. Small errors in assembly can negate even the most expensive hardware upgrades. Focus on these critical points:
- Verify fan direction and polarity; ensure your puller fans are actually pulling air toward the engine, not pushing it against the incoming wind.
- Check the front air dam or valance to confirm it is directing air into the radiator core rather than allowing it to tumble under the car.
- Seal any gaps between the radiator and the core support to prevent air from bypassing the cooling fins at low speeds.
- Examine your fan controller settings; check our product reviews for the latest digital controllers that offer the most precise temperature triggers.
Take Command of Your Thermal Environment
You’ve moved beyond the anxiety of the red light and toward a future where your car handles every environment with poise. By mastering the intersection of high-flow plumbing, robust electrical infrastructure, and precise shrouding, you’ve turned a common mechanical weakness into a point of pride. Keeping a restomod cool in traffic is no longer a mystery; it’s a deliberate engineering success that ensures your engine stays within its ideal operating window regardless of the outside temperature.
If you’re ready to apply these principles to every square inch of your project, it’s time to go deeper into the mechanical arts. Master your build with The Ultimate Restomod Guide. This resource provides expert-led tutorials by Brook Walsh, comprehensive blueprints for modern engine swaps, and community-vetted product recommendations to help you achieve professional-grade results in your own garage. Your journey from a passive admirer to a confident creator starts with the right knowledge. Pick up your tools, trust your new engineering framework, and build something that truly lasts.
Frequently Asked Questions
Why does my car only overheat when I stop at a red light?
Your car overheats at a stop because you’ve lost the ram-air effect that naturally forces air through the radiator at speed. Once you stop, you’re entirely dependent on your fan’s ability to pull air through the core. If your fan or shroud setup isn’t up to the task, the coolant won’t shed heat fast enough to keep up with the engine’s thermal output. This is a common hurdle when keeping a restomod cool in traffic.
Is an aluminum radiator really better than the original copper one?
Aluminum radiators are superior to vintage copper units because they offer better structural rigidity and higher thermal efficiency. This rigidity allows manufacturers to use wider tubes, which increases the surface contact area between the coolant and the aluminum. While copper has a higher thermal conductivity in its pure form, the solder used to hold vintage radiators together acts as an insulator, making a modern aluminum crossflow design much more effective.
How many CFM does my electric fan need for a V8 engine?
A high-performance V8 engine typically requires an electric fan capable of moving between 2,500 and 2,800 CFM. If you’re running a modern crate engine with a high-compression ratio or a large-displacement big block, aim for the higher end of that spectrum. Don’t rely on the manufacturer’s advertised CFM alone; ensure your electrical system can provide the steady voltage needed to actually reach those numbers during a long idle.
Do I need a shroud if I have a high-powered electric fan?
A shroud is absolutely non-negotiable, regardless of how much power your electric fan has. Without a shroud, a fan only pulls air through the small circular area directly in front of the blades, leaving the rest of the radiator core stagnant. A proper shroud creates a vacuum that forces air through every square inch of the radiator fins. This maximizes the efficiency of your setup and is a critical step in keeping a restomod cool in traffic.
What is the best coolant temperature for a restomod?
Most restomods operate best between 180 and 200 degrees Fahrenheit. While old-school builders often tried to keep engines as cold as possible, modern fuel-injected engines actually run more efficiently and produce less wear when they stay near 195 degrees. Always check your specific engine’s requirements. If your temperatures consistently climb above 220 degrees while sitting in a city center, your cooling system is likely under-sized for the thermal load.
Can a bad ground cause my engine to overheat?
A poor electrical ground can definitely lead to overheating by preventing your electric fans from reaching their full RPM. If the fan motor can’t find a clean path to ground, it will draw more amperage and spin slower, significantly reducing airflow. Additionally, a bad ground can cause your temperature gauge to provide false high readings. Always ensure your engine block, chassis, and cooling fans share a common, clean grounding point to maintain system integrity.
Should I use a pusher or a puller fan for my radiator?
You should always use a puller fan mounted on the engine side of the radiator whenever space allows. Puller fans are more efficient because they don’t block the incoming ram-air at highway speeds and they provide more uniform airflow across the core at idle. Pusher fans, which sit in front of the radiator, should only be used as a secondary auxiliary source or as a last resort when engine bay clearance is extremely tight.
Does air conditioning make the engine run hotter in traffic?
Air conditioning significantly increases the thermal load on your engine during stop-and-go driving. The A/C compressor adds physical strain to the engine, while the condenser mounted in front of the radiator sheds its own heat directly into the air your radiator needs to stay cool. To counter this, ensure your fan system is wired to engage automatically whenever the A/C is turned on, providing the extra airflow needed to offset the increased heat.
You’re stuck three cars back at a long red light on a sweltering afternoon, watching the temperature needle creep toward the red zone while your A/C starts blowing humid air. It’s a moment of pure anxiety that every enthusiast knows too well; the fear that your high-performance masterpiece might warp an expensive set of heads before the light turns green. Keeping a restomod cool in traffic isn’t just about finding the biggest radiator that fits your core support. It’s about mastering the science of airflow and electrical efficiency when the car is sitting at a dead stop.
I understand the frustration of building a high-output machine only to feel limited by the local weather or city gridlock. You’ve put in the labor to create something beautiful, and you deserve the confidence to drive it anywhere. This guide will show you how to engineer a fail-safe cooling system that handles modern horsepower without breaking a sweat. We’ll explore how to optimize shroud geometry, upgrade your electrical system for high-draw fans, and select the right thermal components to ensure your engine stays stable whether you’re on the open road or stuck in downtown congestion.
Key Takeaways
- Understand the fundamental physics of heat soak and why modern high-compression engines require a completely different cooling strategy than original vintage powerplants.
- Learn the engineering secrets to keeping a restomod cool in traffic by prioritizing radiator tube size over row count and ensuring your fan shroud captures every inch of the core surface.
- Stop the amperage trap by accurately calculating your total electrical load and upgrading from a vintage 60-amp alternator to support high-draw cooling fans and EFI systems.
- Optimize thermal transfer by balancing your coolant chemistry and maintaining high coolant velocity at low RPM through a performance water pump.
- Master a methodical system-first approach and learn how to perform a safe driveway traffic test to verify your build’s reliability before hitting the city streets.
The Physics of Traffic: Why Classic Cooling Fails at Idle
When you’re cruising at 60 MPH, your cooling system has it easy. High-speed air is forced through the radiator fins, carrying away heat with minimal effort from the fan. Once you pull into a city center, that natural airflow disappears entirely. This transition from ram-air cooling to static cooling is where most vintage systems fail because they weren’t designed for the stop-and-go reality of modern infrastructure. Mastering engine cooling fundamentals is the first step toward building a machine that stays calm at a red light.
Modern builds face a specific challenge known as heat soak. This happens when the engine bay becomes so saturated with thermal energy that the cooling system can’t effectively reject heat to the stagnant surrounding air. In a high-compression crate engine, this occurs much faster than in a low-compression vintage motor because of the increased internal friction and higher combustion pressures. When you add the thermal load of a high-output alternator and a modern A/C compressor, you’re asking the system to do significantly more work with less atmospheric help. Keeping a restomod cool in traffic requires moving away from heavy brass and copper radiators toward aluminum crossflow designs. Aluminum conducts heat more efficiently and allows for larger tube diameters, which increases the surface area available for cooling without increasing the overall footprint of the radiator.
To better understand the stress of managing a high-performance build in a stationary environment, watch this helpful video:
The Airflow Velocity Gap
Mechanical fans tied to engine RPM are fundamentally flawed for traffic. Your engine is at its lowest speed when you need the most cooling, leaving the fan spinning too slowly to pull sufficient air through the core. This is often made worse by custom bumper and grille designs that prioritize sleek aesthetics over open surface area, creating extra resistance for the air trying to reach your radiator. Airflow velocity is the primary driver of heat exchange at idle. Without a dedicated way to maintain high-speed air movement while the vehicle is stationary, you are simply waiting for the temperature gauge to hit the danger zone.
Modern Horsepower vs. Vintage Thermal Capacity
A vintage 289 V8 generates a manageable amount of heat, but a modern Coyote or LS swap can produce significantly more BTUs under the same conditions. Modern fuel injection systems utilize lean-burn technology to increase efficiency, which results in much higher combustion temperatures than old carburetors. If you’ve looked through our LS engine swap guide, you’ve seen how these modern powerplants require a massive jump in thermal capacity. You simply can’t expect a radiator sized for 1960s technology to handle the demands of a high-horsepower modern swap in the summer heat. Keeping a restomod cool in traffic means matching your cooling capacity to your actual horsepower output, not the size of the original engine bay.
The Holy Trinity of Restomod Cooling: Radiators, Fans, and Shrouds
Success in keeping a restomod cool in traffic depends on three components working in perfect harmony. If one link in this chain is weak, the entire system fails the moment the vehicle stops moving. Most enthusiasts focus solely on the radiator, but even the most advanced core is useless without the mechanical ability to pull air through it at a dead stop. You must view these parts as a single integrated unit rather than a collection of separate upgrades.
Don’t get distracted by the number of rows in a radiator. Instead, prioritize the size of the tubes. A 2-row radiator with 1-inch or 1.25-inch tubes offers significantly more surface contact area for heat dissipation than an old-school 4-row unit with tiny, restrictive tubes. Modern high-performance cooling strategies rely on this increased surface area to transfer thermal energy rapidly. Additionally, if you’re running air conditioning, leave a small gap of roughly 1/2 to 3/4 of an inch between the condenser and the radiator. This prevents the condenser from pre-heating the radiator core and allows for better airflow distribution across the entire surface.
Aluminum Crossflow Radiator Selection
Crossflow designs, where the tanks are located on the sides, are generally superior for the cramped engine bays found in most restomods. This configuration allows for a wider core and longer tube runs, which keeps the coolant in the airflow path for a greater duration. When selecting your unit, look for radiators that feature integrated transmission or oil coolers if you need to save space. However, ensure the primary core is large enough to handle the combined thermal load of both the engine and the drivetrain. If you are still in the planning phase, our Ultimate Restomod Guide can help you map out these space requirements before you buy parts.
The Science of Effective Shrouding
The fan shroud is the most critical component for keeping a restomod cool in traffic, yet it is often the most neglected. A proper shroud must capture 100% of the radiator surface area, forcing the fan to pull air through every single fin rather than just the circle directly in front of the blades. This creates a vacuum effect that ensures the entire core is working to shed heat even when there is no forward motion. Follow these rules for maximum efficiency:
- Maintain a clearance of 1/2 to 1 inch between the fan blade tips and the radiator face to optimize the pull.
- Avoid “open-box” shroud designs that allow air to recycle around the fan blades; the shroud should be tapered to funnel air toward the fan.
- Match your fan’s CFM (Cubic Feet per Minute) to your engine’s needs; a high-output V8 with A/C usually requires a minimum of 2,800 CFM to remain stable at idle.
- Seal any gaps between the shroud and the radiator with high-temperature bulb seal to prevent air leaks.
By focusing on these three pillars, you transform your cooling system from a passive heat exchanger into an active thermal management tool. This precision engineering is what separates a car that barely survives a cruise from one that thrives in any environment.
Electrical Infrastructure: Avoiding the Amperage Trap
You can install the largest radiator in the world, but if your fans aren’t receiving the voltage they need to spin at full capacity, you’ll never win the battle against heat. The invisible bottleneck in most builds is the electrical system. Keeping a restomod cool in traffic requires a robust power grid that can handle the massive draw of modern performance components. Many enthusiasts fall into the amperage trap, where they upgrade the cooling hardware but leave the vintage charging system in place, leading to a slow, inevitable overheat during a long idle.
Consider the math behind a modern build. A high-performance dual-fan setup can pull 40 to 50 amps just to start up and roughly 25 amps to run continuously. When you add an EFI system (15-20 amps), a high-pressure electric fuel pump (10-15 amps), and a modern ignition system, your total draw can easily exceed 80 amps. If you’re still running a 60-amp vintage alternator, your battery is essentially being drained while you sit at a red light. This drop in voltage causes the fans to slow down exactly when you need them most, proving that electrical health is inseparable from thermal management.
Sizing Your Alternator for Modern Loads
Perform an honest electrical load audit before you finalize your build. For any car running dual electric fans and air conditioning, I recommend a minimum 140-amp output alternator. While “one-wire” alternators are popular for their simplicity, they often struggle with voltage sensing because they don’t have a remote lead to tell them what the voltage is at the main power distribution block. A multi-wire alternator is often a better choice for precise regulation. If you are following our LS engine swap guide, you’ll find that these modern engines are designed for high-output charging systems from the factory, and your chassis wiring must be upgraded to match. Use heavy 8-gauge or 10-gauge wire for your fan circuits and always utilize dedicated relays to protect your switches from melting under high current.
Fan Control Strategies: Switches vs. PWM
The standard way to trigger a fan is a binary “on/off” temperature switch, but this creates a massive sudden load on your electrical system. This “hammer effect” causes the dimming lights and stumbling idle that plague many classic cars. A better solution for keeping a restomod cool in traffic is a Pulse Width Modulation (PWM) controller. These devices vary the fan speed based on actual temperature, starting the fans at a quiet 20% and ramping up only as needed. This reduces wear on the fan motors, eliminates voltage spikes, and maintains a much more stable operating temperature. Mount your temperature sensor in the cylinder head or the intake manifold to ensure the controller is reading the hottest coolant in the system, providing the most accurate response to rising heat.
Plumbing and Chemistry: Optimizing Heat Transfer
Even with a massive radiator and high-CFM fans, your cooling system will fail if the fluid inside isn’t moving efficiently. Success in keeping a restomod cool in traffic requires a deep understanding of coolant velocity and thermal conductivity. If the coolant lingers too long in the engine block, it absorbs too much heat; if it moves too fast through the radiator without enough airflow, it can’t shed that energy. You need to find the mechanical and chemical sweet spot where heat exchange happens at its peak efficiency.
High-Flow Water Pumps and Pulley Ratios
Standard water pumps are often designed for highway cruising rather than the low-RPM stress of city driving. A high-flow water pump is a vital upgrade because it features an improved impeller design that maintains higher coolant velocity when the engine is just idling. This prevents hot spots from forming in the cylinder heads. You must also consider your pulley ratios. While underdrive pulleys are great for freeing up a few horsepower on the track, they slow down your water pump at a red light. For a street-driven restomod, an overdrive pulley or a standard ratio is usually the better choice to keep the pump spinning fast enough to move fluid. Check our recommended gear list for high-performance pump brands that offer the precision needed for modern crate engines.
Coolant Mixtures and Additives
A common mistake is running 100% antifreeze, but glycol is actually a poor conductor of heat. Water is the hero here. A 50/50 mix of distilled water and high-quality coolant is standard, but in warmer climates where freezing isn’t a concern, you might even drop to a 70/30 water-to-glycol ratio to improve thermal transfer. You can also use surfactants, often called wetting agents, to break the surface tension of the water. This allows the coolant to make better contact with the internal metal surfaces of the engine and radiator. These additives typically cost between $10 and $30 and are a cheap way to gain a few extra degrees of cooling margin. To protect your expensive aluminum components, follow this checklist to prevent electrolysis:
- Always use distilled water to avoid mineral buildup and chemical reactions.
- Ensure your engine block and radiator are properly grounded to the chassis.
- Test your coolant every season with a multimeter to check for stray voltage.
- Consider a sacrificial anode in the radiator if you’re running a mix of different metals.
Don’t let trapped air ruin your hard work. Always use a coolant expansion tank at the highest point of the system to allow air bubbles to escape. If you’re struggling to calculate the right pulley ratios or flow rates for your specific engine swap, reach out to our Restomod Consulting Services for a personalized cooling audit. Properly burping the system and ensuring every air pocket is gone is the final step in creating a reliable cooling loop that won’t let you down.
The Restomod Academy Strategy for Traffic-Proof Performance
Building a machine that remains stable at a red light isn’t a matter of luck; it’s the result of a system-first approach where every component supports the next. Keeping a restomod cool in traffic requires you to stop viewing parts as isolated upgrades and start seeing them as an integrated thermal loop. You’ve already learned how to select the right radiator, optimize your shrouding, and beef up your electrical infrastructure. Now, you must verify that these components work together under real-world stress before you find yourself stranded in a city center.
Success in thermal management is about precision, not just capacity. Every detail matters, from the way air enters the front valance to the millisecond response of your fan controller. By following a methodical testing process, you can transition from hoping your car stays cool to knowing it will. This final stage of the build is what separates an amateur project from a professional-grade restoration that can be driven anywhere, anytime, regardless of the ambient temperature.
The Driveway Traffic Simulation
Don’t wait for a real traffic jam to discover a flaw in your cooling loop. Perform a controlled simulation in your driveway to stress-test the system safely. Start by bringing the engine up to operating temperature, then let it idle while stationary for at least twenty minutes. Use an infrared thermometer to scan the radiator core, looking for cold spots that indicate trapped air or internal clogs. Document the temperature rise over a 20-minute idle to ensure the reading stabilizes rather than climbing indefinitely. If the needle continues to creep up after the fans engage, you likely have an airflow or coolant velocity issue that needs addressing. This controlled environment allows you to monitor fan engagement and relay temperatures without the risk of being stuck on a busy road.
Final Checklist for a Cool Build
Before you consider the cooling system finished, run through this final checklist to catch the common mistakes that plague high-performance builds. Small errors in assembly can negate even the most expensive hardware upgrades. Focus on these critical points:
- Verify fan direction and polarity; ensure your puller fans are actually pulling air toward the engine, not pushing it against the incoming wind.
- Check the front air dam or valance to confirm it is directing air into the radiator core rather than allowing it to tumble under the car.
- Seal any gaps between the radiator and the core support to prevent air from bypassing the cooling fins at low speeds.
- Examine your fan controller settings; check our product reviews for the latest digital controllers that offer the most precise temperature triggers.
Take Command of Your Thermal Environment
You’ve moved beyond the anxiety of the red light and toward a future where your car handles every environment with poise. By mastering the intersection of high-flow plumbing, robust electrical infrastructure, and precise shrouding, you’ve turned a common mechanical weakness into a point of pride. Keeping a restomod cool in traffic is no longer a mystery; it’s a deliberate engineering success that ensures your engine stays within its ideal operating window regardless of the outside temperature.
If you’re ready to apply these principles to every square inch of your project, it’s time to go deeper into the mechanical arts. Master your build with The Ultimate Restomod Guide. This resource provides expert-led tutorials by Brook Walsh, comprehensive blueprints for modern engine swaps, and community-vetted product recommendations to help you achieve professional-grade results in your own garage. Your journey from a passive admirer to a confident creator starts with the right knowledge. Pick up your tools, trust your new engineering framework, and build something that truly lasts.
Frequently Asked Questions
Why does my car only overheat when I stop at a red light?
Your car overheats at a stop because you’ve lost the ram-air effect that naturally forces air through the radiator at speed. Once you stop, you’re entirely dependent on your fan’s ability to pull air through the core. If your fan or shroud setup isn’t up to the task, the coolant won’t shed heat fast enough to keep up with the engine’s thermal output. This is a common hurdle when keeping a restomod cool in traffic.
Is an aluminum radiator really better than the original copper one?
Aluminum radiators are superior to vintage copper units because they offer better structural rigidity and higher thermal efficiency. This rigidity allows manufacturers to use wider tubes, which increases the surface contact area between the coolant and the aluminum. While copper has a higher thermal conductivity in its pure form, the solder used to hold vintage radiators together acts as an insulator, making a modern aluminum crossflow design much more effective.
How many CFM does my electric fan need for a V8 engine?
A high-performance V8 engine typically requires an electric fan capable of moving between 2,500 and 2,800 CFM. If you’re running a modern crate engine with a high-compression ratio or a large-displacement big block, aim for the higher end of that spectrum. Don’t rely on the manufacturer’s advertised CFM alone; ensure your electrical system can provide the steady voltage needed to actually reach those numbers during a long idle.
Do I need a shroud if I have a high-powered electric fan?
A shroud is absolutely non-negotiable, regardless of how much power your electric fan has. Without a shroud, a fan only pulls air through the small circular area directly in front of the blades, leaving the rest of the radiator core stagnant. A proper shroud creates a vacuum that forces air through every square inch of the radiator fins. This maximizes the efficiency of your setup and is a critical step in keeping a restomod cool in traffic.
What is the best coolant temperature for a restomod?
Most restomods operate best between 180 and 200 degrees Fahrenheit. While old-school builders often tried to keep engines as cold as possible, modern fuel-injected engines actually run more efficiently and produce less wear when they stay near 195 degrees. Always check your specific engine’s requirements. If your temperatures consistently climb above 220 degrees while sitting in a city center, your cooling system is likely under-sized for the thermal load.
Can a bad ground cause my engine to overheat?
A poor electrical ground can definitely lead to overheating by preventing your electric fans from reaching their full RPM. If the fan motor can’t find a clean path to ground, it will draw more amperage and spin slower, significantly reducing airflow. Additionally, a bad ground can cause your temperature gauge to provide false high readings. Always ensure your engine block, chassis, and cooling fans share a common, clean grounding point to maintain system integrity.
Should I use a pusher or a puller fan for my radiator?
You should always use a puller fan mounted on the engine side of the radiator whenever space allows. Puller fans are more efficient because they don’t block the incoming ram-air at highway speeds and they provide more uniform airflow across the core at idle. Pusher fans, which sit in front of the radiator, should only be used as a secondary auxiliary source or as a last resort when engine bay clearance is extremely tight.
Does air conditioning make the engine run hotter in traffic?
Air conditioning significantly increases the thermal load on your engine during stop-and-go driving. The A/C compressor adds physical strain to the engine, while the condenser mounted in front of the radiator sheds its own heat directly into the air your radiator needs to stay cool. To counter this, ensure your fan system is wired to engage automatically whenever the A/C is turned on, providing the extra airflow needed to offset the increased heat.