
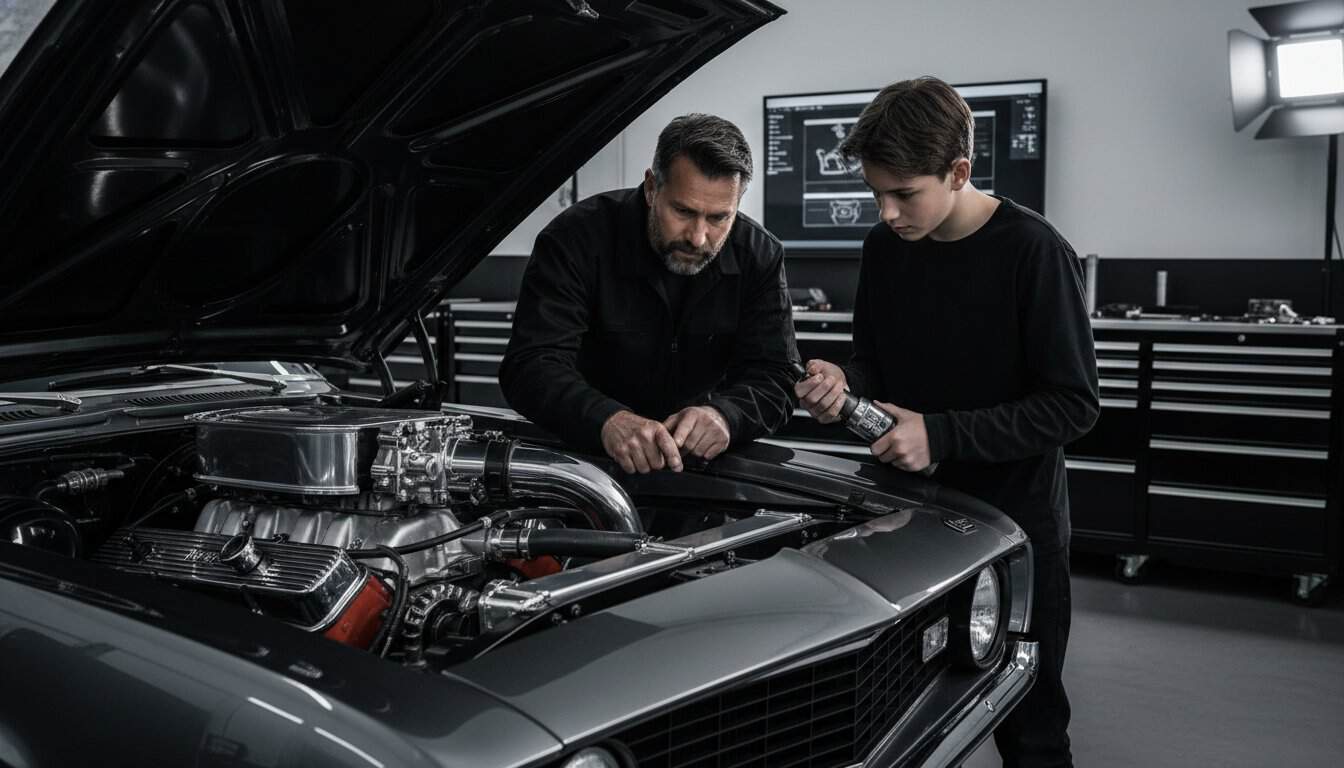
Did you know that 67% of fathers view working on a car with their children as the ultimate bonding experience? It’s a powerful sentiment, yet many enthusiasts hesitate because they fear a pile of rusted parts will eventually sit forgotten in the driveway. If you’re currently planning a father son car project, you aren’t just looking for a weekend hobby; you’re looking to build a legacy. The challenge is balancing the raw character of a vintage machine with the modern safety and reliability needed for a driver who’s just learning the ropes.
You probably feel that same mix of excitement and anxiety, wondering if the costs will spiral or if the technical hurdles will kill the momentum. We agree that a project should be a source of pride rather than a source of stress. This guide will show you how to execute a structured restomod build that transforms a classic chassis into a dependable masterpiece while teaching your child the fundamentals of mechanical engineering. We’ll walk through everything from selecting a donor vehicle to establishing a realistic budget, ensuring your journey ends with a turn of the key and a lifetime of shared memories.
Key Takeaways
- Embrace the restomod philosophy to create a vehicle that pairs timeless aesthetics with the modern safety features necessary for a young driver.
- Secure a donor car with extensive aftermarket support to ensure your garage time is spent building rather than hunting for elusive vintage parts.
- Master the logistics of planning a father son car project by accounting for hidden hardware costs and setting up a collaborative, two-person workspace.
- Follow a phased mentorship roadmap that uses the teardown process to teach mechanical systems before prioritizing critical disc brake and steering upgrades.
- Implement a rigorous nut and bolt safety checklist to guarantee reliability and confidence before you ever turn the key for that first shakedown run.
Defining the Vision: Why a Restomod is the Ideal Father-Son Project
Imagine the silhouette of a classic 1972 C10 pulling into the high school parking lot. It carries the soul and heritage of a vintage machine, but when your son turns the key, it fires instantly with the precision of a modern fuel-injected daily driver. This is the heart of the restomod philosophy. By blending iconic vintage aesthetics with modern performance upgrades, you create a vehicle that is both a tribute to the past and a functional tool for the future. When you are planning a father son car project, you’re choosing a path that prioritizes drivability and safety over strict factory originality.
To see how this dynamic plays out in a real workshop, watch this video covering a joint build:
Restoration vs. Restomod: Choosing the Right Path
Deciding between a pure restoration and a restomod is your first major hurdle. A 100 percent original restoration is a noble pursuit, but it often leads to a car that’s temperamental and difficult for a novice to handle. Sourcing rare, period-correct hardware can stall a project for months while you hunt through swap meets. In contrast, a restomod utilizes modern aftermarket components that are readily available. Swapping a finicky carburetor for electronic fuel injection ensures the car starts every morning, regardless of the weather. This approach is fundamentally safer for a young driver; you can integrate disc brakes, modern steering racks, and improved lighting that vintage factory specs simply didn’t offer. If you need a deeper dive into these technical definitions, you can explore what is a restomod on our site or check the broader industry context of what is a restomod through historical conservation standards.
Setting the Emotional and Educational Goals
The workshop is your classroom. Before you pick up a wrench, define the specific skills you want to pass down. You might start with basic tool handling and progress to complex wiring or suspension geometry. Be prepared for the learning curve; it’s steep and often frustrating. That struggle is where the real bonding happens. It’s the late nights spent troubleshooting a ground wire or fighting a seized bolt that build character and resilience. To keep the momentum, ensure your child has skin in the game. Whether they make the final call on the interior color or contribute a small portion of their summer job earnings toward a specific part, that investment prevents the project from feeling like a chore. Project fatigue is real, so celebrate small milestones like the first time the engine turns over to keep the fire alive while planning a father son car project.
Selecting the Ideal Donor Car for Your Joint Build
The success of your build starts long before the first wrench touches a bolt. When you are planning a father son car project, the donor vehicle acts as the foundation for both the mechanical build and the educational journey. The golden rule is simple: choose a platform with massive aftermarket support. Avoid rare or obscure models that require you to scour obscure forums for a single door handle. You want a car where you can order every nut, bolt, and body panel from a catalog, ensuring that your garage time is spent making progress rather than waiting on shipping from a salvage yard across the country.
Trucks and muscle cars from the 1960s through the 1980s are the undisputed champions of the first-time restomod. These vehicles offer simple, logical engineering that is easy for a young mind to grasp. They provide ample engine bay room, making it easier to teach the difference between a master cylinder and a proportioning valve without bruising your knuckles. While a low purchase price is tempting, be ruthless about evaluating rust. Surface oxidation is a teaching moment, but structural rot in the frame or unibody is a project-killer for a novice team. If you find yourself overwhelmed by the options, our Restomod Consulting Services can help you vet a potential purchase before you commit your budget.
Top 5 Donor Cars for Father-Son Projects
- 1965-1970 Ford Mustang: This is the quintessential starter classic. The parts availability is unmatched, and the simple leaf spring rear suspension makes handling upgrades straightforward.
- 1967-1987 Chevy C10: These trucks are incredibly popular for a reason. They offer a massive engine bay and a huge community of builders. For those looking to modernize a Chevy platform, the definitive guide to an LS engine swap offers a roadmap for reliable power in these pickups.
- 1970-1981 Chevy Camaro: The second-generation F-body is a fantastic platform for learning about suspension geometry. It responds exceptionally well to modern subframe connectors and coilover conversions.
Evaluating the Mechanical Starting Point
Decide early if you want a runner or a basket case. A car that starts and stops allows for immediate “wins,” which is vital for keeping a child’s interest. A basket case in boxes might be cheaper, but the lack of context can be demoralizing. When you go to look at a car, involve your child in the process. Bring a car safety checklist to evaluate the vehicle’s current state together. Look specifically for previous hack job repairs, such as bird-poop welds or twisted wiring harnesses. These shortcuts by previous owners are often more difficult to fix than honest mechanical wear. Choose a car with a high cool factor that resonates with both of you; that emotional connection will be the fuel that gets you through the difficult stages of the teardown.
Budgeting and Tooling: Preparing Your Workspace
Planning a father son car project requires a shift in how you view your garage. It’s no longer just a storage space; it’s a laboratory where precision meets passion. Before you order a single part, prepare the environment. Effective lighting and clear floor space aren’t just about comfort; they’re about safety and maintaining the momentum of the build. When you work as a two-person team, organization becomes your greatest asset. Assign specific storage bins for each system, such as brakes, electrical, and fuel, to ensure you aren’t tripping over each other while searching for a 10mm socket.
Creating a realistic budget is the difference between a completed car and a permanent lawn ornament. Most builders account for the major components but forget the hidden 20 percent. This margin covers the consumables that keep a project moving: specialized fluids, high-grade hardware, and shop supplies. For a first build, adopt a strategy of buying as you go. While a complete car in a box kit is tempting, purchasing parts in stages prevents your workspace from becoming an unmanageable warehouse and keeps your cash flow under control.
The Essential Tool Kit for Restomod Beginners
Invest in high-quality hand tools that will last a lifetime. You should splurge on items like ratchets and torque wrenches where precision is non-negotiable, but you can save on simple items like jack stands or pry bars. Introducing tools like a multimeter or a torque wrench early in the build teaches the importance of accuracy, a core principle found in professional automotive technology programs. For a complete list of what you need to get started, consult our recommended gear guide. Learning to trust your tools is the first step in becoming a confident builder.
Developing a Phased Financial Plan
Break your budget into four distinct phases: Chassis and Brakes, Powertrain, Interior, and finally, Paint. This structure allows you to focus your financial resources on making the car safe and drivable before worrying about aesthetics. Use a shared spreadsheet to track every penny; this is a vital part of planning a father son car project as it teaches financial responsibility and project management. Watch out for project creep, which is the urge to upgrade to a more expensive part just because you are already in there. Stick to your initial vision to ensure you actually reach the finish line without draining your savings.
The Mentorship Roadmap: Breaking Down the Build
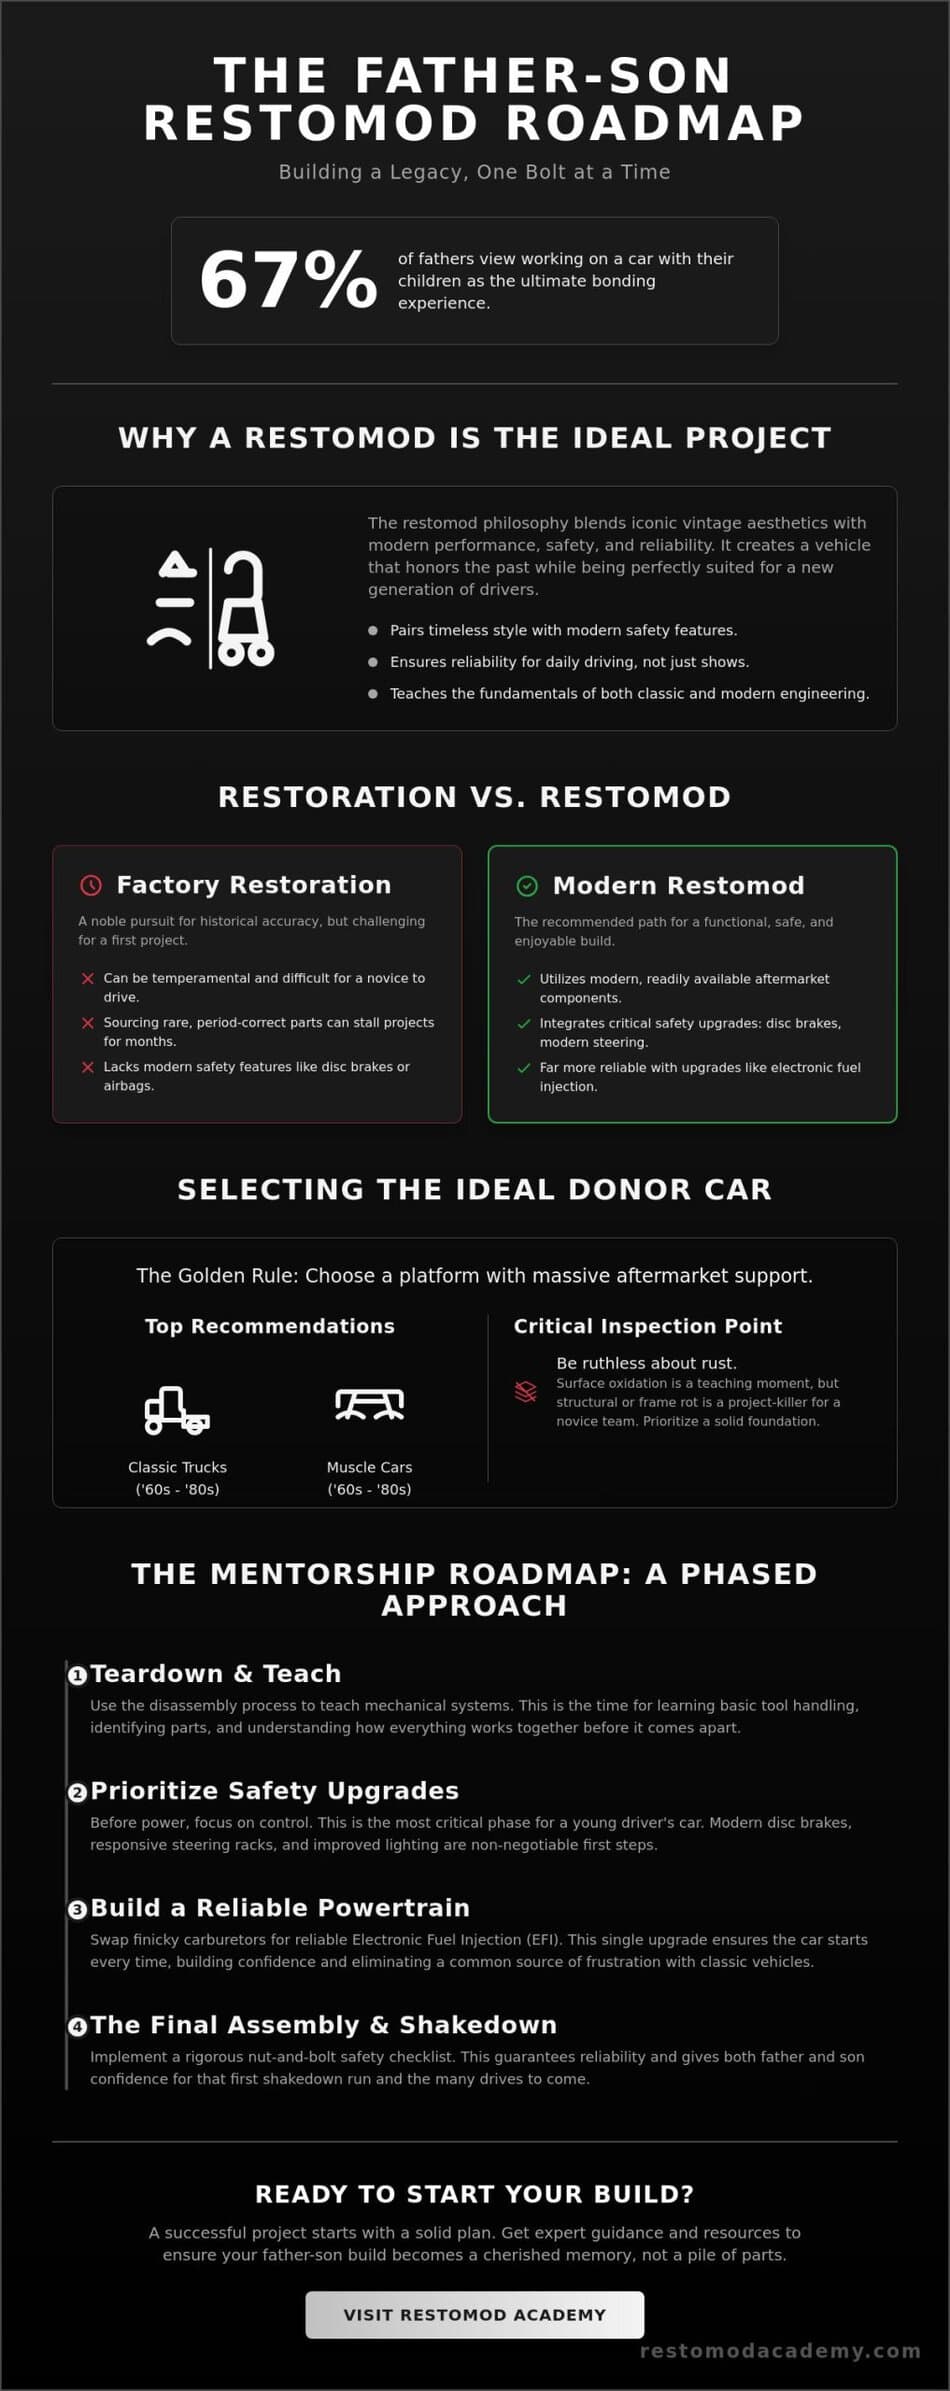
Executing a successful build requires more than just mechanical skill; it requires a logical sequence of milestones. When you are planning a father son car project, the order of operations determines whether the child stays engaged or gets overwhelmed. We break this down into four primary phases. Phase one is the teardown. This process isn’t just about taking things apart; it’s about cataloging every screw and understanding how the fuel system interacts with the chassis. Phase two shifts to safety. Safety comes first. Before you add horsepower, you must ensure the car can stop. This means prioritizing modern disc brakes and steering upgrades over paint and chrome.
Phase three is the heart of the machine. Whether you’re doing a top-end rebuild or a full heart transplant, this is where the vehicle gains its personality. Finally, phase four covers comfort and tech. Modernizing the wiring harness is the single best way to ensure 21st-century reliability and integrate modern conveniences like Bluetooth audio or digital gauges. This structured approach prevents the project from stalling and ensures every hour in the garage moves you closer to the first shakedown run.
Teaching the ‘Why’ Behind the ‘How’
Every task in the garage is a physics lesson. When your child struggles with a stubborn lug nut, explain the concept of torque and leverage. If they snap a bolt, don’t take over. Instead, treat it as a masterclass in extraction and patience. Encourage them to lead on specific sub-projects. Let them research the audio system or design the interior layout. This hands-on approach is the most rewarding part of planning a father son car project, as it builds confidence that no textbook can provide. This ownership is what transforms a simple restoration into a shared achievement.
Major Milestone: The Engine Swap
For many, the engine swap is the most intimidating hurdle. In the restomod community, the LS engine swap remains the gold standard for its balance of power, weight, and sheer reliability. It turns a temperamental classic into a car that can handle a cross-country road trip. Managing the wiring harnesses and computer management systems is a complex task that requires meticulous attention to detail. To master this specific challenge, we recommend following the definitive guide to an LS engine swap.
If you want a structured plan that covers every one of these phases in detail, pick up The Ultimate Restomod Guide to keep your build on track.
Safety, Reliability, and the First Drive
The moment of truth arrives when the jack stands finally hit the floor. Before you ever engage the starter, you must perform a comprehensive nut and bolt check. This isn’t a casual glance; it’s a systematic verification where you touch every single fastener on the suspension, steering, and braking systems to ensure they are torqued to specification. When you are planning a father son car project, this final stage is where you instill the discipline of professional craftsmanship. You aren’t just building a car. You’re building a machine that your child will pilot on public roads, and that responsibility requires absolute precision.
Safety is the foundation of any successful restomod. While vintage aesthetics are the draw, factory safety standards from decades ago are insufficient for May 2026 traffic. Replace that single-reservoir master cylinder with a modern dual-circuit unit to prevent total brake failure. Install three-point retractable seatbelts that offer real protection. If you’re building in California, stay aware of the current Leno’s Law (SB 1392), which provides smog-check exemptions for vehicles manufactured before the 1981 model year. This allows you to focus your energy on mechanical reliability rather than emissions bureaucracy. If you want to ensure your final assembly is flawless, our Premium Project Blueprints provide the technical precision you need for a safe first run.
Modernizing for Safety
Visibility and grip are your primary defenses on the road. Upgrading to modern LED lighting is a non-negotiable safety feature for night driving. It ensures you can see and be seen, a task where vintage sealed beams fail miserably. Pair this with modern radial tires. Unlike the bias-ply tires of the past, radials provide predictable handling and significantly shorter stopping distances. To ensure your build meets these high standards, review our framework for modernizing classics at restomodacademy.com. Proper suspension geometry and high-quality rubber turn a nervous vintage ride into a confident, modern experience.
The Journey Doesn’t End at the Driveway
The first drive is a psychological milestone that 67% of fathers describe as the peak of the bonding experience. As you transition from the garage to the street, take the time to teach your child the nuances of a vintage machine. Show them how to listen for mechanical feedback and how to perform the ongoing maintenance that a high-performance restomod requires. This project is a gateway into the broader automotive community. Encourage them to document the build on social media or a personal blog to share their progress. Planning a father son car project is about more than the finished product; it’s about the lifelong bond forged through grease, grit, and the shared thrill of the open road.
Ignite the Engine of Your Shared Legacy
The journey from a rusted frame to a reliable street machine is a marathon of precision and patience. By prioritizing modern safety systems and selecting a donor car with robust aftermarket support, you ensure your project moves forward instead of stalling. Successful planning a father son car project is about more than just mechanical milestones; it’s about the transmission of knowledge and the shared satisfaction of solving complex engineering hurdles together. You have learned how to structure your budget, organize your workspace, and follow a phased roadmap that keeps the momentum high and the child engaged.
Now is the time to transition from the planning phase to the workshop floor. With expert mentorship from Brook Walsh and our comprehensive blueprints for popular donor cars, you can navigate the technical complexities of your build with confidence. Join a community of thousands of DIY builders who are preserving automotive heritage while embracing modern performance. Download The Ultimate Restomod Guide to start your project roadmap today and take the first step toward a finished machine. Your garage is waiting; grab the wrenches and start building a bond that will outlast the paint job.
Frequently Asked Questions
What is the best age to start a car project with my son?
Start involving your child as early as age 12 to 14. At this stage, they possess the fine motor skills to handle tools safely and the cognitive ability to grasp complex engineering concepts. This window allows them to contribute meaningfully to the build before they reach driving age, creating a deep sense of ownership in the machine they will eventually pilot.
How much does a typical father-son car project cost?
A basic restoration focusing on safety and functionality typically ranges from $20,000 to $50,000. When you are planning a father son car project, you should account for specific milestones: a professional engine rebuild typically costs between $2,500 and $10,500, while quality interior work generally ranges from $5,000 to $15,000. These figures help you establish a realistic financial roadmap from the start.
Is it better to buy a car that runs or a non-runner for a project?
Always prioritize a vehicle that runs and drives, even if it requires significant work. Starting with a runner provides immediate psychological wins and allows your child to see the car as a functional machine rather than a pile of scrap. A non-runner often leads to project fatigue because the initial teardown can feel endless without the context of a working vehicle.
What are the easiest cars to find parts for when restomodding?
The Ford Mustang (1965-1970) and Chevrolet C10 (1967-1987) offer the most extensive aftermarket support in the industry. Because these models represent a significant portion of the restomod market, you can source everything from body panels to modern wiring harnesses from catalogs. This accessibility ensures your garage time is spent making progress rather than hunting for elusive vintage hardware.
How do I keep my teenager interested in the project when it gets difficult?
Give your teenager genuine decision-making power over specific aspects of the build, such as the wheel style or the modern tech integration. According to industry surveys, 67% of fathers view this as a primary bonding experience, but it only works if the child feels like a partner. Celebrate small victories, like the first time the headlights flicker to life, to maintain momentum through difficult phases.
Do I need a professional shop to build a restomod car?
You don’t need a professional facility, but a well-organized two-car garage is essential for a safe workspace. Having enough room to move around the vehicle and a dedicated area for parts storage allows a two-person team to work efficiently. Focus on acquiring a solid set of hand tools, a floor jack, and jack stands before you begin the teardown phase.
What are the most important safety upgrades for a classic car?
The most critical upgrades include a dual-circuit master cylinder, modern three-point seatbelts, and LED lighting. Classic cars were built to different standards, so transitioning to modern radial tires and disc brakes is non-negotiable for planning a father son car project intended for modern roads. These enhancements ensure the vehicle is as predictable and safe as a modern daily driver.
How long does a father-son car restoration usually take?
A comprehensive home restoration usually takes between one and three years of consistent weekend work. While a professional concours-level restoration can require up to 5,000 hours of labor, a high-quality restomod build often lands between 1,000 and 2,000 hours. Emphasize the quality of the journey and the skills learned rather than rushing toward a specific deadline.
Did you know that 67% of fathers view working on a car with their children as the ultimate bonding experience? It’s a powerful sentiment, yet many enthusiasts hesitate because they fear a pile of rusted parts will eventually sit forgotten in the driveway. If you’re currently planning a father son car project, you aren’t just looking for a weekend hobby; you’re looking to build a legacy. The challenge is balancing the raw character of a vintage machine with the modern safety and reliability needed for a driver who’s just learning the ropes.
You probably feel that same mix of excitement and anxiety, wondering if the costs will spiral or if the technical hurdles will kill the momentum. We agree that a project should be a source of pride rather than a source of stress. This guide will show you how to execute a structured restomod build that transforms a classic chassis into a dependable masterpiece while teaching your child the fundamentals of mechanical engineering. We’ll walk through everything from selecting a donor vehicle to establishing a realistic budget, ensuring your journey ends with a turn of the key and a lifetime of shared memories.
Key Takeaways
- Embrace the restomod philosophy to create a vehicle that pairs timeless aesthetics with the modern safety features necessary for a young driver.
- Secure a donor car with extensive aftermarket support to ensure your garage time is spent building rather than hunting for elusive vintage parts.
- Master the logistics of planning a father son car project by accounting for hidden hardware costs and setting up a collaborative, two-person workspace.
- Follow a phased mentorship roadmap that uses the teardown process to teach mechanical systems before prioritizing critical disc brake and steering upgrades.
- Implement a rigorous nut and bolt safety checklist to guarantee reliability and confidence before you ever turn the key for that first shakedown run.
Defining the Vision: Why a Restomod is the Ideal Father-Son Project
Imagine the silhouette of a classic 1972 C10 pulling into the high school parking lot. It carries the soul and heritage of a vintage machine, but when your son turns the key, it fires instantly with the precision of a modern fuel-injected daily driver. This is the heart of the restomod philosophy. By blending iconic vintage aesthetics with modern performance upgrades, you create a vehicle that is both a tribute to the past and a functional tool for the future. When you are planning a father son car project, you’re choosing a path that prioritizes drivability and safety over strict factory originality.
To see how this dynamic plays out in a real workshop, watch this video covering a joint build:
Restoration vs. Restomod: Choosing the Right Path
Deciding between a pure restoration and a restomod is your first major hurdle. A 100 percent original restoration is a noble pursuit, but it often leads to a car that’s temperamental and difficult for a novice to handle. Sourcing rare, period-correct hardware can stall a project for months while you hunt through swap meets. In contrast, a restomod utilizes modern aftermarket components that are readily available. Swapping a finicky carburetor for electronic fuel injection ensures the car starts every morning, regardless of the weather. This approach is fundamentally safer for a young driver; you can integrate disc brakes, modern steering racks, and improved lighting that vintage factory specs simply didn’t offer. If you need a deeper dive into these technical definitions, you can explore what is a restomod on our site or check the broader industry context of what is a restomod through historical conservation standards.
Setting the Emotional and Educational Goals
The workshop is your classroom. Before you pick up a wrench, define the specific skills you want to pass down. You might start with basic tool handling and progress to complex wiring or suspension geometry. Be prepared for the learning curve; it’s steep and often frustrating. That struggle is where the real bonding happens. It’s the late nights spent troubleshooting a ground wire or fighting a seized bolt that build character and resilience. To keep the momentum, ensure your child has skin in the game. Whether they make the final call on the interior color or contribute a small portion of their summer job earnings toward a specific part, that investment prevents the project from feeling like a chore. Project fatigue is real, so celebrate small milestones like the first time the engine turns over to keep the fire alive while planning a father son car project.
Selecting the Ideal Donor Car for Your Joint Build
The success of your build starts long before the first wrench touches a bolt. When you are planning a father son car project, the donor vehicle acts as the foundation for both the mechanical build and the educational journey. The golden rule is simple: choose a platform with massive aftermarket support. Avoid rare or obscure models that require you to scour obscure forums for a single door handle. You want a car where you can order every nut, bolt, and body panel from a catalog, ensuring that your garage time is spent making progress rather than waiting on shipping from a salvage yard across the country.
Trucks and muscle cars from the 1960s through the 1980s are the undisputed champions of the first-time restomod. These vehicles offer simple, logical engineering that is easy for a young mind to grasp. They provide ample engine bay room, making it easier to teach the difference between a master cylinder and a proportioning valve without bruising your knuckles. While a low purchase price is tempting, be ruthless about evaluating rust. Surface oxidation is a teaching moment, but structural rot in the frame or unibody is a project-killer for a novice team. If you find yourself overwhelmed by the options, our Restomod Consulting Services can help you vet a potential purchase before you commit your budget.
Top 5 Donor Cars for Father-Son Projects
- 1965-1970 Ford Mustang: This is the quintessential starter classic. The parts availability is unmatched, and the simple leaf spring rear suspension makes handling upgrades straightforward.
- 1967-1987 Chevy C10: These trucks are incredibly popular for a reason. They offer a massive engine bay and a huge community of builders. For those looking to modernize a Chevy platform, the definitive guide to an LS engine swap offers a roadmap for reliable power in these pickups.
- 1970-1981 Chevy Camaro: The second-generation F-body is a fantastic platform for learning about suspension geometry. It responds exceptionally well to modern subframe connectors and coilover conversions.
Evaluating the Mechanical Starting Point
Decide early if you want a runner or a basket case. A car that starts and stops allows for immediate “wins,” which is vital for keeping a child’s interest. A basket case in boxes might be cheaper, but the lack of context can be demoralizing. When you go to look at a car, involve your child in the process. Bring a car safety checklist to evaluate the vehicle’s current state together. Look specifically for previous hack job repairs, such as bird-poop welds or twisted wiring harnesses. These shortcuts by previous owners are often more difficult to fix than honest mechanical wear. Choose a car with a high cool factor that resonates with both of you; that emotional connection will be the fuel that gets you through the difficult stages of the teardown.
Budgeting and Tooling: Preparing Your Workspace
Planning a father son car project requires a shift in how you view your garage. It’s no longer just a storage space; it’s a laboratory where precision meets passion. Before you order a single part, prepare the environment. Effective lighting and clear floor space aren’t just about comfort; they’re about safety and maintaining the momentum of the build. When you work as a two-person team, organization becomes your greatest asset. Assign specific storage bins for each system, such as brakes, electrical, and fuel, to ensure you aren’t tripping over each other while searching for a 10mm socket.
Creating a realistic budget is the difference between a completed car and a permanent lawn ornament. Most builders account for the major components but forget the hidden 20 percent. This margin covers the consumables that keep a project moving: specialized fluids, high-grade hardware, and shop supplies. For a first build, adopt a strategy of buying as you go. While a complete car in a box kit is tempting, purchasing parts in stages prevents your workspace from becoming an unmanageable warehouse and keeps your cash flow under control.
The Essential Tool Kit for Restomod Beginners
Invest in high-quality hand tools that will last a lifetime. You should splurge on items like ratchets and torque wrenches where precision is non-negotiable, but you can save on simple items like jack stands or pry bars. Introducing tools like a multimeter or a torque wrench early in the build teaches the importance of accuracy, a core principle found in professional automotive technology programs. For a complete list of what you need to get started, consult our recommended gear guide. Learning to trust your tools is the first step in becoming a confident builder.
Developing a Phased Financial Plan
Break your budget into four distinct phases: Chassis and Brakes, Powertrain, Interior, and finally, Paint. This structure allows you to focus your financial resources on making the car safe and drivable before worrying about aesthetics. Use a shared spreadsheet to track every penny; this is a vital part of planning a father son car project as it teaches financial responsibility and project management. Watch out for project creep, which is the urge to upgrade to a more expensive part just because you are already in there. Stick to your initial vision to ensure you actually reach the finish line without draining your savings.
The Mentorship Roadmap: Breaking Down the Build
Executing a successful build requires more than just mechanical skill; it requires a logical sequence of milestones. When you are planning a father son car project, the order of operations determines whether the child stays engaged or gets overwhelmed. We break this down into four primary phases. Phase one is the teardown. This process isn’t just about taking things apart; it’s about cataloging every screw and understanding how the fuel system interacts with the chassis. Phase two shifts to safety. Safety comes first. Before you add horsepower, you must ensure the car can stop. This means prioritizing modern disc brakes and steering upgrades over paint and chrome.
Phase three is the heart of the machine. Whether you’re doing a top-end rebuild or a full heart transplant, this is where the vehicle gains its personality. Finally, phase four covers comfort and tech. Modernizing the wiring harness is the single best way to ensure 21st-century reliability and integrate modern conveniences like Bluetooth audio or digital gauges. This structured approach prevents the project from stalling and ensures every hour in the garage moves you closer to the first shakedown run.
Teaching the ‘Why’ Behind the ‘How’
Every task in the garage is a physics lesson. When your child struggles with a stubborn lug nut, explain the concept of torque and leverage. If they snap a bolt, don’t take over. Instead, treat it as a masterclass in extraction and patience. Encourage them to lead on specific sub-projects. Let them research the audio system or design the interior layout. This hands-on approach is the most rewarding part of planning a father son car project, as it builds confidence that no textbook can provide. This ownership is what transforms a simple restoration into a shared achievement.
Major Milestone: The Engine Swap
For many, the engine swap is the most intimidating hurdle. In the restomod community, the LS engine swap remains the gold standard for its balance of power, weight, and sheer reliability. It turns a temperamental classic into a car that can handle a cross-country road trip. Managing the wiring harnesses and computer management systems is a complex task that requires meticulous attention to detail. To master this specific challenge, we recommend following the definitive guide to an LS engine swap.
If you want a structured plan that covers every one of these phases in detail, pick up The Ultimate Restomod Guide to keep your build on track.
Safety, Reliability, and the First Drive
The moment of truth arrives when the jack stands finally hit the floor. Before you ever engage the starter, you must perform a comprehensive nut and bolt check. This isn’t a casual glance; it’s a systematic verification where you touch every single fastener on the suspension, steering, and braking systems to ensure they are torqued to specification. When you are planning a father son car project, this final stage is where you instill the discipline of professional craftsmanship. You aren’t just building a car. You’re building a machine that your child will pilot on public roads, and that responsibility requires absolute precision.
Safety is the foundation of any successful restomod. While vintage aesthetics are the draw, factory safety standards from decades ago are insufficient for May 2026 traffic. Replace that single-reservoir master cylinder with a modern dual-circuit unit to prevent total brake failure. Install three-point retractable seatbelts that offer real protection. If you’re building in California, stay aware of the current Leno’s Law (SB 1392), which provides smog-check exemptions for vehicles manufactured before the 1981 model year. This allows you to focus your energy on mechanical reliability rather than emissions bureaucracy. If you want to ensure your final assembly is flawless, our Premium Project Blueprints provide the technical precision you need for a safe first run.
Modernizing for Safety
Visibility and grip are your primary defenses on the road. Upgrading to modern LED lighting is a non-negotiable safety feature for night driving. It ensures you can see and be seen, a task where vintage sealed beams fail miserably. Pair this with modern radial tires. Unlike the bias-ply tires of the past, radials provide predictable handling and significantly shorter stopping distances. To ensure your build meets these high standards, review our framework for modernizing classics at restomodacademy.com. Proper suspension geometry and high-quality rubber turn a nervous vintage ride into a confident, modern experience.
The Journey Doesn’t End at the Driveway
The first drive is a psychological milestone that 67% of fathers describe as the peak of the bonding experience. As you transition from the garage to the street, take the time to teach your child the nuances of a vintage machine. Show them how to listen for mechanical feedback and how to perform the ongoing maintenance that a high-performance restomod requires. This project is a gateway into the broader automotive community. Encourage them to document the build on social media or a personal blog to share their progress. Planning a father son car project is about more than the finished product; it’s about the lifelong bond forged through grease, grit, and the shared thrill of the open road.
Ignite the Engine of Your Shared Legacy
The journey from a rusted frame to a reliable street machine is a marathon of precision and patience. By prioritizing modern safety systems and selecting a donor car with robust aftermarket support, you ensure your project moves forward instead of stalling. Successful planning a father son car project is about more than just mechanical milestones; it’s about the transmission of knowledge and the shared satisfaction of solving complex engineering hurdles together. You have learned how to structure your budget, organize your workspace, and follow a phased roadmap that keeps the momentum high and the child engaged.
Now is the time to transition from the planning phase to the workshop floor. With expert mentorship from Brook Walsh and our comprehensive blueprints for popular donor cars, you can navigate the technical complexities of your build with confidence. Join a community of thousands of DIY builders who are preserving automotive heritage while embracing modern performance. Download The Ultimate Restomod Guide to start your project roadmap today and take the first step toward a finished machine. Your garage is waiting; grab the wrenches and start building a bond that will outlast the paint job.
Frequently Asked Questions
What is the best age to start a car project with my son?
Start involving your child as early as age 12 to 14. At this stage, they possess the fine motor skills to handle tools safely and the cognitive ability to grasp complex engineering concepts. This window allows them to contribute meaningfully to the build before they reach driving age, creating a deep sense of ownership in the machine they will eventually pilot.
How much does a typical father-son car project cost?
A basic restoration focusing on safety and functionality typically ranges from $20,000 to $50,000. When you are planning a father son car project, you should account for specific milestones: a professional engine rebuild typically costs between $2,500 and $10,500, while quality interior work generally ranges from $5,000 to $15,000. These figures help you establish a realistic financial roadmap from the start.
Is it better to buy a car that runs or a non-runner for a project?
Always prioritize a vehicle that runs and drives, even if it requires significant work. Starting with a runner provides immediate psychological wins and allows your child to see the car as a functional machine rather than a pile of scrap. A non-runner often leads to project fatigue because the initial teardown can feel endless without the context of a working vehicle.
What are the easiest cars to find parts for when restomodding?
The Ford Mustang (1965-1970) and Chevrolet C10 (1967-1987) offer the most extensive aftermarket support in the industry. Because these models represent a significant portion of the restomod market, you can source everything from body panels to modern wiring harnesses from catalogs. This accessibility ensures your garage time is spent making progress rather than hunting for elusive vintage hardware.
How do I keep my teenager interested in the project when it gets difficult?
Give your teenager genuine decision-making power over specific aspects of the build, such as the wheel style or the modern tech integration. According to industry surveys, 67% of fathers view this as a primary bonding experience, but it only works if the child feels like a partner. Celebrate small victories, like the first time the headlights flicker to life, to maintain momentum through difficult phases.
Do I need a professional shop to build a restomod car?
You don’t need a professional facility, but a well-organized two-car garage is essential for a safe workspace. Having enough room to move around the vehicle and a dedicated area for parts storage allows a two-person team to work efficiently. Focus on acquiring a solid set of hand tools, a floor jack, and jack stands before you begin the teardown phase.
What are the most important safety upgrades for a classic car?
The most critical upgrades include a dual-circuit master cylinder, modern three-point seatbelts, and LED lighting. Classic cars were built to different standards, so transitioning to modern radial tires and disc brakes is non-negotiable for planning a father son car project intended for modern roads. These enhancements ensure the vehicle is as predictable and safe as a modern daily driver.
How long does a father-son car restoration usually take?
A comprehensive home restoration usually takes between one and three years of consistent weekend work. While a professional concours-level restoration can require up to 5,000 hours of labor, a high-quality restomod build often lands between 1,000 and 2,000 hours. Emphasize the quality of the journey and the skills learned rather than rushing toward a specific deadline.