
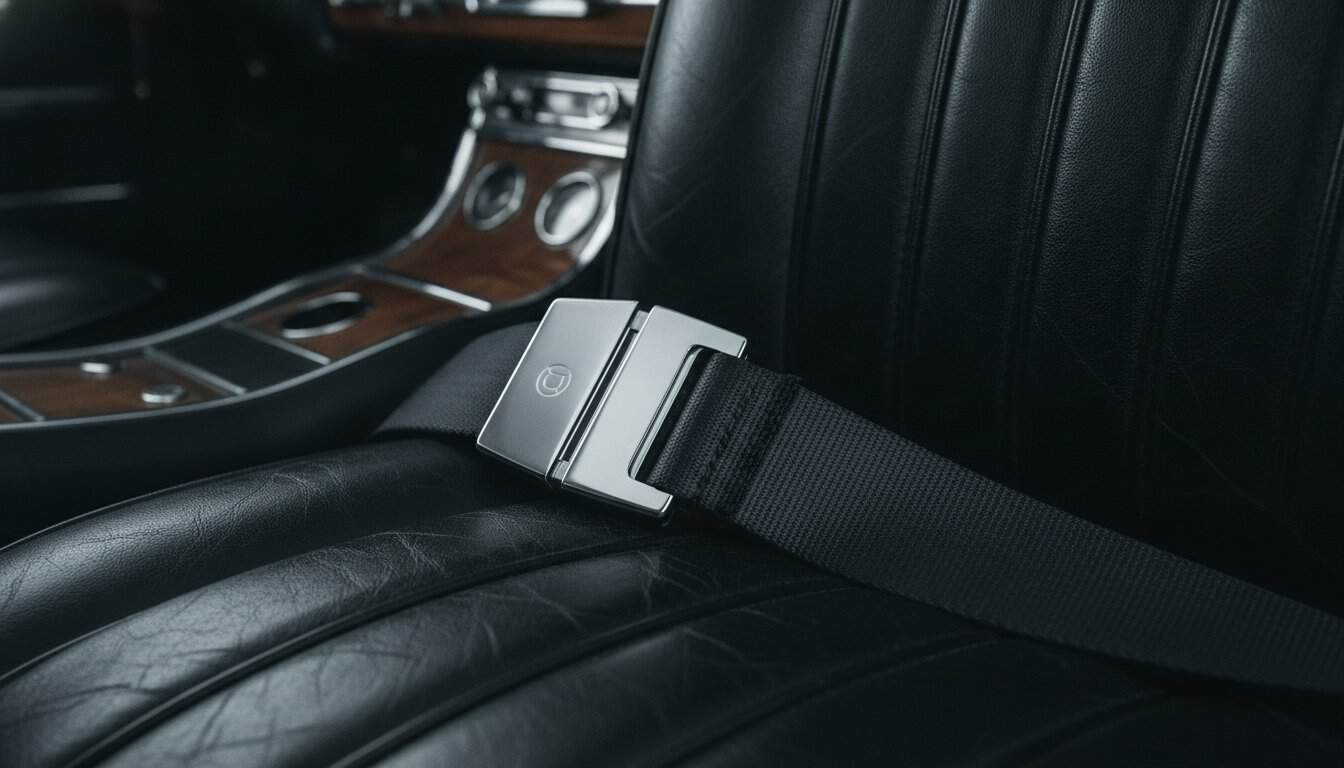
A vintage lap belt is little more than a period-correct suggestion when you’re facing the reality of a modern traffic collision. You’ve likely felt that nagging hesitation before a long drive, wondering if your classic’s original restraints are actually up to the task or if they’ll succumb to the dangerous submarine effect during an impact. It’s a valid concern for any enthusiast who values their life as much as their paint job. This three-point seatbelt conversion guide provides the technical roadmap you need to bridge the gap between 1960s style and 21st-century security. We’ll show you how to upgrade your cabin with restraints that meet FMVSS #209 standards while maintaining a seamless, factory-installed appearance.
We believe a safety system is only as reliable as the metal it’s bolted to. Instead of settling for flimsy bolt-on solutions, you’ll learn to identify and reinforce structural mounting points for maximum integrity. We’ll walk through the nuances of retractor placement and how to select hardware that complements your interior’s unique character. By the end of this project, you’ll have the confidence to push your machine to its limits, knowing your passengers are protected by a system that’s both elegant and over-engineered. Let’s get to work on making your classic as safe as it is iconic.
Key Takeaways
- Understand the critical physics of the submarine effect and why upgrading from lap belts is a non-negotiable step for any high-performance project.
- Identify the core components of modern restraint systems, including why inertia reel retractors are superior to the static belts found in many older kits.
- Use this three-point seatbelt conversion guide to pinpoint structural mounting locations and establish the correct geometry for your B-pillar shoulder mounts.
- Master the technical steps of drilling and preparing your chassis to ensure every bolt meets the professional standards required for modern road safety.
- Learn how to blend these essential safety upgrades into your interior design so they don’t distract from your car’s heritage aesthetics.
The Physics of Safety: Why Lap Belts Are Not Enough in 2026
You love the smell of vintage vinyl and the roar of a carbureted V8, but driving a classic shouldn’t feel like a roll of the dice every time you merge onto the highway. In the 1960s, lap belts were the gold standard for automotive safety. By 2026, we’ve learned they’re essentially a pivot point for your spine. When you follow this three-point seatbelt conversion guide, you aren’t just changing parts; you’re re-engineering the survival cell of your vehicle. A lap belt secures your hips, but it leaves your upper body completely unrestrained, allowing your head and chest to accelerate toward the steering wheel or dashboard with lethal force during a sudden stop. If you’re still defining the scope of your project, understanding what is a restomod can help you prioritize these safety upgrades as part of a cohesive build philosophy.
To better understand the mechanical differences between these systems and how they fit into a vintage chassis, watch this helpful video:
Understanding the Submarine Effect
The submarine effect is a terrifying phenomenon where a passenger slides forward and downward under their restraint during a collision. Without a shoulder harness to pin your torso against the seat back, your body naturally folds at the waist. This motion forces the lap belt up into the soft tissue of your abdomen. Instead of the belt catching on your sturdy pelvic bones, it crushes internal organs against the spine. Installing a three-point system creates a triangle of stability. It anchors you firmly, preventing that downward slide and keeping the lap portion of the belt exactly where it belongs on your hips.
Modern Kinetic Energy Management
Safety technology has evolved significantly since the Invention of the three-point seatbelt in 1959. Modern systems don’t just stop you; they manage the energy of the stop. High-quality webbing is designed with a specific percentage of controlled stretch. This elongation absorbs a portion of the kinetic energy, slowing your body down over milliseconds rather than stopping it instantly. This is why replacing old, brittle webbing is mandatory, even if you’re keeping a stock look.
- Vintage webbing from the 1960s or 70s is likely UV-damaged and stiff, losing its ability to stretch without snapping under load.
- Three-point systems distribute impact forces across the ribcage and shoulders, which are far more capable of handling high loads than the lower abdomen.
- A modern inertia reel locks instantly during sudden deceleration, whereas old static belts require manual adjustment that is often left too loose for effective protection.
Upgrading your interior isn’t just about surviving a worst-case scenario. It’s about the psychological freedom to enjoy your car. When you know your mounting points are reinforced and your hardware is modern, you drive with a level of confidence that a lap-only setup can’t provide. It transforms the driving experience from a cautious crawl into a spirited adventure, allowing you to focus on the road instead of the risks.
Anatomy of a Three-Point Seatbelt Conversion Kit
Choosing the right hardware is the difference between a cosmetic upgrade and a life-saving modification. When you search for a three-point seatbelt conversion guide, you’ll find plenty of generic kits, but a true restomodder looks for precision engineering. A high-quality kit isn’t just about the belt; it’s a comprehensive system of matched components designed to work together under extreme stress. Following a professional three-point seatbelt conversion guide ensures you don’t miss these critical hardware distinctions that separate a show car from a safe, drivable machine.
Inertia Reels versus Static Belts
Static belts are the simplest form of restraint, but they’re often inconvenient for daily driving. They require you to manually adjust the tension every time you change your seating position or wear a heavier jacket. If they’re too loose, they won’t stop you in time; if they’re too tight, they’re uncomfortable. In contrast, Emergency Locking Retractors (ELR), or inertia reels, provide modern convenience and superior protection. They allow you to lean forward to reach the radio or glovebox while remaining ready to lock instantly during sudden deceleration. According to NHTSA safety statistics, properly functioning restraints are the single most effective way to save lives in a crash. One critical detail many enthusiasts overlook is mounting angle sensitivity. Most inertia reels are designed to operate at a specific orientation, usually vertical. If you mount them at a tilt, the internal pendulum may lock the belt permanently or fail to lock when needed.
Essential Hardware and Webbing
Don’t ever compromise on your fasteners. Automotive safety restraints almost universally use a 7/16-20 thread size. You must ensure your kit includes Grade 8 bolts, which are identified by six radial lines on the bolt head. These bolts possess the tensile strength necessary to withstand thousands of pounds of force without shearing. If you’re unsure about the quality of a specific brand, checking detailed product reviews can save you from purchasing inferior hardware. Precision matters here, so always verify your torque specifications during the final assembly to ensure the structural integrity of your cabin.
Webbing is your primary interface with the safety system. Modern aftermarket belts offer a rainbow of colors to match your restomod interior ideas, from classic parchment to vibrant performance red. However, look beyond the color. Ensure the webbing is treated for UV resistance to prevent the fibers from becoming brittle under the sun. High-quality polyester webbing typically has a breaking strength exceeding 6,000 pounds, providing a necessary safety margin for high-performance applications.
Finally, consider the buckle style. You can opt for period-correct chrome lift-latches that mirror 1960s aesthetics or modern plastic push-buttons for ease of use. Both can be safe if manufactured to FMVSS #209 standards, so choose the one that fits your design vision. If you want to dive deeper into the world of precision building, check out our premium project blueprints for professional-grade guidance on your next interior overhaul.
Assessing Your Classic Car Structural Mounting Points
Your classic car was built in an era when safety was an afterthought, but your restoration shouldn’t be. When you consult a three-point seatbelt conversion guide, the most critical phase isn’t the assembly of the belts themselves; it’s the assessment of the steel they’re tethered to. Most vehicles manufactured after 1968 feature factory mounting dimples or pre-drilled holes in the B-pillars and floor pans, but earlier models require you to create these anchors from scratch. You must understand that these points are the foundation of your entire safety system.
Engineering a secure mount requires adhering to the Federal Motor Vehicle Safety Standards for Seat Belt Anchorages, which dictate how these points must withstand immense kinetic loads. If your car lacks factory provisions, you can’t simply drill a hole and call it a day. You’re effectively building a bridge between the restraint system and the chassis. This three-point seatbelt conversion guide focuses on making that bridge unbreakable by prioritizing structural reinforcement. Before you pick up the drill, perform a thorough inspection of your vehicle’s skeleton:
- Locate factory dimples by feeling behind the headliner or interior trim panels.
- Check the backside of the floor pan for existing reinforced bungs or threaded plates.
- Identify any previous body repairs or patches that might have compromised the original sheet metal.
The B-Pillar Challenge
Calculating the correct height for your shoulder mount is a precise task. If the mount is too low, the belt will compress your spine during an impact. If it’s too high, it creates a neck hazard. Aim for a position roughly two inches above your shoulder when seated. Since B-pillars are hollow, you’ll need to fish a reinforcement plate into the cavity. Use a piece of mechanics wire or a strong magnet to guide the plate into position behind your drilled hole. This plate acts as a structural sandwich, distributing the load across the entire pillar rather than just a single point on the thin sheet metal.
Floor and Tunnel Reinforcement
Floor pans are often the weakest link in a vintage interior. A standard washer will pull straight through the floor in a collision. You must use reinforcement plates that are at least 2×2 inches square to create a stable anchor. These plates increase the surface area of the mount, ensuring the bolt stays anchored to the car even under extreme stress. Before you drill, inspect your floor for rust. If the metal is thin or pitted, you must replace the section with fresh steel. A seatbelt is only as strong as the metal it’s bolted to, and your safety depends on the integrity of that connection.

Step-by-Step: Installing Your Three-Point Conversion
Execution is where your research meets the reality of the workshop. Transitioning from assessment to action requires a clean workspace and a methodical approach. Start by stripping back the interior components, including seats, kick panels, and the headliner if your mounting points are located in the upper pillars. Removing the original lap belt hardware is usually straightforward, but don’t discard the factory bolts until you’ve verified your new hardware matches the thread pitch. This three-point seatbelt conversion guide emphasizes precision over speed; rushing the installation often leads to misaligned retractors or damaged trim.
Drilling and Hole Preparation
Precision drilling in automotive sheet metal requires the right tools. Use a high-quality step-bit to create clean, burr-free holes. Unlike standard twist bits, step-bits won’t grab or tear the thin metal of a B-pillar. Once your holes are drilled, treat the bare metal edges immediately. A quick application of zinc-rich primer or touch-up paint prevents future corrosion from taking hold in hidden cavities. Before moving to the next step, dry-fit your interior trim panels to ensure the new mounting hardware won’t cause unsightly bulges or interference with the headliner.
Geometry and Alignment Checks
Many builders fail to account for the belt’s path during the final assembly. You must test the belt movement to ensure it clears the seat back without friction. A common error addressed in this three-point seatbelt conversion guide is the shoulder twist. This occurs when the top anchor pivot is tightened at an angle that forces the webbing to bunch or flip. To avoid this, keep the pivot bolt slightly loose while you pull the belt through its full range of motion. Once the belt tracks straight and flat against your chest, lock the hardware down. Ensure the buckle length is adjusted so the release button sits comfortably at your hip, easily accessible but tucked away from seat adjustment levers.
Final Safety Verification
The final step is a rigorous verification of your work. Perform a series of sharp tugs on the webbing to verify the inertia reel engagement. The belt should lock instantly with every snap. If the reel feels sluggish or fails to lock, re-examine the mounting angle of the retractor box. Even a few degrees of tilt can interfere with the internal pendulum. Use a calibrated torque wrench to bring all 7/16-20 safety hardware to the 30-40 lb-ft range. For a complete list of the tools required for this level of precision, consult our recommended gear list.
Safety is the cornerstone of every high-performance build. If you want to ensure your entire vehicle meets these professional standards, download our Premium Project Blueprints to guide your restoration from the chassis up.
Mastering Your Interior: Safety Meets Style
Integrate your safety upgrades into the initial planning stages of your project to ensure the final result feels intentional rather than reactive. A truly successful build treats the cabin as a cohesive ecosystem where modern performance and vintage aesthetics coexist. By following this three-point seatbelt conversion guide, you’ve already secured the structural integrity of your machine. Now, you must focus on the artistry of the installation. This is the moment where you transition from a mechanic to a designer, ensuring every component reflects the high standards of your overall vision.
View these restraints as a vital enhancement to your car’s daily drivability. Modern inertia reels allow for a range of motion that original static belts simply cannot match, making everything from checking your blind spots to reaching for the ignition more comfortable. This improvement in ergonomics, combined with the peace of mind that comes from modern engineering, encourages you to take the long way home. Beyond personal enjoyment, these upgrades significantly boost vehicle resale value. In a market increasingly focused on safety, buyers in 2026 are looking for classics that don’t compromise on protection. For instance, new regulations like New Hampshire’s HB326, effective January 1, 2026, highlight a growing legal emphasis on fitting antique vehicles with DOT-approved restraints. Staying ahead of these trends makes your car more desirable to the next generation of enthusiasts.
This focus on safety and modern engineering shouldn’t be limited to your vehicle; for readers interested in bringing these same principles of accessibility and protection to their home, check out Blueprint Kitchen and Bath Design Studio.
A Visual Upgrade for the Cabin
Look beyond the utilitarian nature of the hardware and consider how it interacts with your existing trim. You can match your buckle finishes to your chrome window cranks or brushed aluminum door handles to create a factory-plus appearance. Many builders choose to blend modern retractors into custom interior panels or hide them behind period-correct upholstery for a stealthy look. Use color-matched webbing that complements your seat covers to tie the entire room together. If you’re looking for inspiration on how to execute these details, our definition of a restomod provides a framework for balancing these modern touches with heritage style.
The Restomod Academy Philosophy
Safety is the foundation of every high-performance build we champion. We believe that the thrill of a high-horsepower engine or a precision suspension setup is only fully realized when you trust the car to protect you. Moving from basic repair to professional-grade modification requires a shift in mindset. It’s about taking ownership of the build and refusing to settle for “good enough” when it comes to structural assembly. If this project has sparked a desire for more advanced fabrication, you can expand your skillset by exploring the technical challenges found in our other restoration resources. Every bolt you torque and every plate you weld is a learning opportunity that brings you one step closer to mastering the craft of the modern classic.
Secure Your Legacy for the Road Ahead
You’ve moved beyond the theory of safety and into the practical labor of protecting what you’ve built. By prioritizing structural reinforcement over simple aesthetics, you ensure that your classic remains a viable machine for decades to come. This three-point seatbelt conversion guide serves as your technical roadmap for bridging the gap between vintage charm and modern kinetic energy management. You’ve learned how to identify critical mounting points and execute a precise installation that respects the original lines of your interior while meeting 2026 safety expectations.
Every project is an opportunity to elevate your craft from simple maintenance to professional-grade engineering. With the expert mentorship of Brook Walsh and access to authoritative restomod education, you can transform any vintage chassis into a reliable, high-performance performer. Don’t stop at the interior; look at your entire build as a cohesive system. Download The Ultimate Restomod Guide to master your project and gain access to the comprehensive project blueprints you need to achieve precision. The journey of restoration is a long one, but with the right guidance, you’ll find satisfaction in every turn of the wrench. Keep building with pride and precision.
Frequently Asked Questions
Can I install three-point belts in a car that never had them from the factory?
Yes, you can retrofit nearly any classic vehicle by creating new structural anchor points. This process is a central part of any professional three-point seatbelt conversion guide, as it involves identifying the strongest areas of the chassis, like the B-pillar and floor pan. You must use reinforcement plates to distribute crash forces across a wider surface area of the vintage sheet metal to ensure the mounts don’t fail under stress.
What is the best mounting height for a shoulder belt in a classic car?
The ideal position for a shoulder mount is approximately two inches above your shoulder when you’re seated. This specific height prevents the belt from compressing your spine during a collision while also keeping the webbing away from your neck. If your car lacks a factory dimple at this height, you’ll need to measure and drill with precision to ensure the geometry works for your specific torso height.
Do I need to weld in reinforcement plates for the seatbelt mounts?
Welding is the most secure method for attaching anchor bungs, but many builders successfully use large-area backing plates. These plates, typically measuring at least 2×2 inches, act as a structural sandwich that prevents the bolt from pulling through the thin floor pan. If you’re building a high-performance machine, welding provides that extra margin of safety you’ll want when pushing the car to its limits.
Are aftermarket seatbelt conversion kits legal and safe?
Aftermarket kits are safe and legal provided they carry certification for FMVSS #209 and #302 standards. These regulations ensure the webbing, buckles, and retractors can withstand specific loads and resist flammability. Following a reliable three-point seatbelt conversion guide helps you select hardware that meets these professional requirements rather than settling for unrated components that might fail during an impact.
How do I fix a seatbelt that keeps twisting over my shoulder?
A twisting belt is usually caused by a misaligned top pivot or a retractor mounted at the wrong angle. Ensure the shoulder loop can swivel freely and that the webbing isn’t bunching inside the hardware. If the belt flips every time you pull it, you may need to loosen the mounting bolt and rotate the pivot until the belt tracks flat against your body during use.
What grade of bolts should be used for seatbelt installation?
You must use Grade 8 bolts with a 7/16-20 thread size for all safety restraint connections. Grade 8 hardware is identifiable by the six radial lines on the bolt head and offers the high tensile strength required for automotive safety. Never substitute these with standard hardware store bolts, as they lack the shear resistance necessary to hold up under the thousands of pounds of force generated in a crash.
Will installing three-point belts ruin the value of my classic car?
Modern safety upgrades typically increase the market value and desirability of a restomod. While purists might prefer original lap belts, most buyers in 2026 value the ability to drive their classic safely in modern traffic. A clean, professional installation that matches the interior aesthetic shows a high level of care and craft that collectors and daily drivers alike appreciate.
What is the difference between a 2-point and a 3-point seatbelt?
A 2-point belt, commonly known as a lap belt, only secures the hips, whereas a 3-point system adds a shoulder harness to restrain the upper torso. The addition of that third mounting point is what prevents your head and chest from striking the steering column or dashboard during a sudden stop. It’s the difference between a simple restraint and a comprehensive safety system that prevents the dangerous submarine effect.
A vintage lap belt is little more than a period-correct suggestion when you’re facing the reality of a modern traffic collision. You’ve likely felt that nagging hesitation before a long drive, wondering if your classic’s original restraints are actually up to the task or if they’ll succumb to the dangerous submarine effect during an impact. It’s a valid concern for any enthusiast who values their life as much as their paint job. This three-point seatbelt conversion guide provides the technical roadmap you need to bridge the gap between 1960s style and 21st-century security. We’ll show you how to upgrade your cabin with restraints that meet FMVSS #209 standards while maintaining a seamless, factory-installed appearance.
We believe a safety system is only as reliable as the metal it’s bolted to. Instead of settling for flimsy bolt-on solutions, you’ll learn to identify and reinforce structural mounting points for maximum integrity. We’ll walk through the nuances of retractor placement and how to select hardware that complements your interior’s unique character. By the end of this project, you’ll have the confidence to push your machine to its limits, knowing your passengers are protected by a system that’s both elegant and over-engineered. Let’s get to work on making your classic as safe as it is iconic.
Key Takeaways
- Understand the critical physics of the submarine effect and why upgrading from lap belts is a non-negotiable step for any high-performance project.
- Identify the core components of modern restraint systems, including why inertia reel retractors are superior to the static belts found in many older kits.
- Use this three-point seatbelt conversion guide to pinpoint structural mounting locations and establish the correct geometry for your B-pillar shoulder mounts.
- Master the technical steps of drilling and preparing your chassis to ensure every bolt meets the professional standards required for modern road safety.
- Learn how to blend these essential safety upgrades into your interior design so they don’t distract from your car’s heritage aesthetics.
The Physics of Safety: Why Lap Belts Are Not Enough in 2026
You love the smell of vintage vinyl and the roar of a carbureted V8, but driving a classic shouldn’t feel like a roll of the dice every time you merge onto the highway. In the 1960s, lap belts were the gold standard for automotive safety. By 2026, we’ve learned they’re essentially a pivot point for your spine. When you follow this three-point seatbelt conversion guide, you aren’t just changing parts; you’re re-engineering the survival cell of your vehicle. A lap belt secures your hips, but it leaves your upper body completely unrestrained, allowing your head and chest to accelerate toward the steering wheel or dashboard with lethal force during a sudden stop. If you’re still defining the scope of your project, understanding what is a restomod can help you prioritize these safety upgrades as part of a cohesive build philosophy.
To better understand the mechanical differences between these systems and how they fit into a vintage chassis, watch this helpful video:
Understanding the Submarine Effect
The submarine effect is a terrifying phenomenon where a passenger slides forward and downward under their restraint during a collision. Without a shoulder harness to pin your torso against the seat back, your body naturally folds at the waist. This motion forces the lap belt up into the soft tissue of your abdomen. Instead of the belt catching on your sturdy pelvic bones, it crushes internal organs against the spine. Installing a three-point system creates a triangle of stability. It anchors you firmly, preventing that downward slide and keeping the lap portion of the belt exactly where it belongs on your hips.
Modern Kinetic Energy Management
Safety technology has evolved significantly since the Invention of the three-point seatbelt in 1959. Modern systems don’t just stop you; they manage the energy of the stop. High-quality webbing is designed with a specific percentage of controlled stretch. This elongation absorbs a portion of the kinetic energy, slowing your body down over milliseconds rather than stopping it instantly. This is why replacing old, brittle webbing is mandatory, even if you’re keeping a stock look.
- Vintage webbing from the 1960s or 70s is likely UV-damaged and stiff, losing its ability to stretch without snapping under load.
- Three-point systems distribute impact forces across the ribcage and shoulders, which are far more capable of handling high loads than the lower abdomen.
- A modern inertia reel locks instantly during sudden deceleration, whereas old static belts require manual adjustment that is often left too loose for effective protection.
Upgrading your interior isn’t just about surviving a worst-case scenario. It’s about the psychological freedom to enjoy your car. When you know your mounting points are reinforced and your hardware is modern, you drive with a level of confidence that a lap-only setup can’t provide. It transforms the driving experience from a cautious crawl into a spirited adventure, allowing you to focus on the road instead of the risks.
Anatomy of a Three-Point Seatbelt Conversion Kit
Choosing the right hardware is the difference between a cosmetic upgrade and a life-saving modification. When you search for a three-point seatbelt conversion guide, you’ll find plenty of generic kits, but a true restomodder looks for precision engineering. A high-quality kit isn’t just about the belt; it’s a comprehensive system of matched components designed to work together under extreme stress. Following a professional three-point seatbelt conversion guide ensures you don’t miss these critical hardware distinctions that separate a show car from a safe, drivable machine.
Inertia Reels versus Static Belts
Static belts are the simplest form of restraint, but they’re often inconvenient for daily driving. They require you to manually adjust the tension every time you change your seating position or wear a heavier jacket. If they’re too loose, they won’t stop you in time; if they’re too tight, they’re uncomfortable. In contrast, Emergency Locking Retractors (ELR), or inertia reels, provide modern convenience and superior protection. They allow you to lean forward to reach the radio or glovebox while remaining ready to lock instantly during sudden deceleration. According to NHTSA safety statistics, properly functioning restraints are the single most effective way to save lives in a crash. One critical detail many enthusiasts overlook is mounting angle sensitivity. Most inertia reels are designed to operate at a specific orientation, usually vertical. If you mount them at a tilt, the internal pendulum may lock the belt permanently or fail to lock when needed.
Essential Hardware and Webbing
Don’t ever compromise on your fasteners. Automotive safety restraints almost universally use a 7/16-20 thread size. You must ensure your kit includes Grade 8 bolts, which are identified by six radial lines on the bolt head. These bolts possess the tensile strength necessary to withstand thousands of pounds of force without shearing. If you’re unsure about the quality of a specific brand, checking detailed product reviews can save you from purchasing inferior hardware. Precision matters here, so always verify your torque specifications during the final assembly to ensure the structural integrity of your cabin.
Webbing is your primary interface with the safety system. Modern aftermarket belts offer a rainbow of colors to match your restomod interior ideas, from classic parchment to vibrant performance red. However, look beyond the color. Ensure the webbing is treated for UV resistance to prevent the fibers from becoming brittle under the sun. High-quality polyester webbing typically has a breaking strength exceeding 6,000 pounds, providing a necessary safety margin for high-performance applications.
Finally, consider the buckle style. You can opt for period-correct chrome lift-latches that mirror 1960s aesthetics or modern plastic push-buttons for ease of use. Both can be safe if manufactured to FMVSS #209 standards, so choose the one that fits your design vision. If you want to dive deeper into the world of precision building, check out our premium project blueprints for professional-grade guidance on your next interior overhaul.
Assessing Your Classic Car Structural Mounting Points
Your classic car was built in an era when safety was an afterthought, but your restoration shouldn’t be. When you consult a three-point seatbelt conversion guide, the most critical phase isn’t the assembly of the belts themselves; it’s the assessment of the steel they’re tethered to. Most vehicles manufactured after 1968 feature factory mounting dimples or pre-drilled holes in the B-pillars and floor pans, but earlier models require you to create these anchors from scratch. You must understand that these points are the foundation of your entire safety system.
Engineering a secure mount requires adhering to the Federal Motor Vehicle Safety Standards for Seat Belt Anchorages, which dictate how these points must withstand immense kinetic loads. If your car lacks factory provisions, you can’t simply drill a hole and call it a day. You’re effectively building a bridge between the restraint system and the chassis. This three-point seatbelt conversion guide focuses on making that bridge unbreakable by prioritizing structural reinforcement. Before you pick up the drill, perform a thorough inspection of your vehicle’s skeleton:
- Locate factory dimples by feeling behind the headliner or interior trim panels.
- Check the backside of the floor pan for existing reinforced bungs or threaded plates.
- Identify any previous body repairs or patches that might have compromised the original sheet metal.
The B-Pillar Challenge
Calculating the correct height for your shoulder mount is a precise task. If the mount is too low, the belt will compress your spine during an impact. If it’s too high, it creates a neck hazard. Aim for a position roughly two inches above your shoulder when seated. Since B-pillars are hollow, you’ll need to fish a reinforcement plate into the cavity. Use a piece of mechanics wire or a strong magnet to guide the plate into position behind your drilled hole. This plate acts as a structural sandwich, distributing the load across the entire pillar rather than just a single point on the thin sheet metal.
Floor and Tunnel Reinforcement
Floor pans are often the weakest link in a vintage interior. A standard washer will pull straight through the floor in a collision. You must use reinforcement plates that are at least 2×2 inches square to create a stable anchor. These plates increase the surface area of the mount, ensuring the bolt stays anchored to the car even under extreme stress. Before you drill, inspect your floor for rust. If the metal is thin or pitted, you must replace the section with fresh steel. A seatbelt is only as strong as the metal it’s bolted to, and your safety depends on the integrity of that connection.
Step-by-Step: Installing Your Three-Point Conversion
Execution is where your research meets the reality of the workshop. Transitioning from assessment to action requires a clean workspace and a methodical approach. Start by stripping back the interior components, including seats, kick panels, and the headliner if your mounting points are located in the upper pillars. Removing the original lap belt hardware is usually straightforward, but don’t discard the factory bolts until you’ve verified your new hardware matches the thread pitch. This three-point seatbelt conversion guide emphasizes precision over speed; rushing the installation often leads to misaligned retractors or damaged trim.
Drilling and Hole Preparation
Precision drilling in automotive sheet metal requires the right tools. Use a high-quality step-bit to create clean, burr-free holes. Unlike standard twist bits, step-bits won’t grab or tear the thin metal of a B-pillar. Once your holes are drilled, treat the bare metal edges immediately. A quick application of zinc-rich primer or touch-up paint prevents future corrosion from taking hold in hidden cavities. Before moving to the next step, dry-fit your interior trim panels to ensure the new mounting hardware won’t cause unsightly bulges or interference with the headliner.
Geometry and Alignment Checks
Many builders fail to account for the belt’s path during the final assembly. You must test the belt movement to ensure it clears the seat back without friction. A common error addressed in this three-point seatbelt conversion guide is the shoulder twist. This occurs when the top anchor pivot is tightened at an angle that forces the webbing to bunch or flip. To avoid this, keep the pivot bolt slightly loose while you pull the belt through its full range of motion. Once the belt tracks straight and flat against your chest, lock the hardware down. Ensure the buckle length is adjusted so the release button sits comfortably at your hip, easily accessible but tucked away from seat adjustment levers.
Final Safety Verification
The final step is a rigorous verification of your work. Perform a series of sharp tugs on the webbing to verify the inertia reel engagement. The belt should lock instantly with every snap. If the reel feels sluggish or fails to lock, re-examine the mounting angle of the retractor box. Even a few degrees of tilt can interfere with the internal pendulum. Use a calibrated torque wrench to bring all 7/16-20 safety hardware to the 30-40 lb-ft range. For a complete list of the tools required for this level of precision, consult our recommended gear list.
Safety is the cornerstone of every high-performance build. If you want to ensure your entire vehicle meets these professional standards, download our Premium Project Blueprints to guide your restoration from the chassis up.
Mastering Your Interior: Safety Meets Style
Integrate your safety upgrades into the initial planning stages of your project to ensure the final result feels intentional rather than reactive. A truly successful build treats the cabin as a cohesive ecosystem where modern performance and vintage aesthetics coexist. By following this three-point seatbelt conversion guide, you’ve already secured the structural integrity of your machine. Now, you must focus on the artistry of the installation. This is the moment where you transition from a mechanic to a designer, ensuring every component reflects the high standards of your overall vision.
View these restraints as a vital enhancement to your car’s daily drivability. Modern inertia reels allow for a range of motion that original static belts simply cannot match, making everything from checking your blind spots to reaching for the ignition more comfortable. This improvement in ergonomics, combined with the peace of mind that comes from modern engineering, encourages you to take the long way home. Beyond personal enjoyment, these upgrades significantly boost vehicle resale value. In a market increasingly focused on safety, buyers in 2026 are looking for classics that don’t compromise on protection. For instance, new regulations like New Hampshire’s HB326, effective January 1, 2026, highlight a growing legal emphasis on fitting antique vehicles with DOT-approved restraints. Staying ahead of these trends makes your car more desirable to the next generation of enthusiasts.
This focus on safety and modern engineering shouldn’t be limited to your vehicle; for readers interested in bringing these same principles of accessibility and protection to their home, check out Blueprint Kitchen and Bath Design Studio.
A Visual Upgrade for the Cabin
Look beyond the utilitarian nature of the hardware and consider how it interacts with your existing trim. You can match your buckle finishes to your chrome window cranks or brushed aluminum door handles to create a factory-plus appearance. Many builders choose to blend modern retractors into custom interior panels or hide them behind period-correct upholstery for a stealthy look. Use color-matched webbing that complements your seat covers to tie the entire room together. If you’re looking for inspiration on how to execute these details, our definition of a restomod provides a framework for balancing these modern touches with heritage style.
The Restomod Academy Philosophy
Safety is the foundation of every high-performance build we champion. We believe that the thrill of a high-horsepower engine or a precision suspension setup is only fully realized when you trust the car to protect you. Moving from basic repair to professional-grade modification requires a shift in mindset. It’s about taking ownership of the build and refusing to settle for “good enough” when it comes to structural assembly. If this project has sparked a desire for more advanced fabrication, you can expand your skillset by exploring the technical challenges found in our other restoration resources. Every bolt you torque and every plate you weld is a learning opportunity that brings you one step closer to mastering the craft of the modern classic.
Secure Your Legacy for the Road Ahead
You’ve moved beyond the theory of safety and into the practical labor of protecting what you’ve built. By prioritizing structural reinforcement over simple aesthetics, you ensure that your classic remains a viable machine for decades to come. This three-point seatbelt conversion guide serves as your technical roadmap for bridging the gap between vintage charm and modern kinetic energy management. You’ve learned how to identify critical mounting points and execute a precise installation that respects the original lines of your interior while meeting 2026 safety expectations.
Every project is an opportunity to elevate your craft from simple maintenance to professional-grade engineering. With the expert mentorship of Brook Walsh and access to authoritative restomod education, you can transform any vintage chassis into a reliable, high-performance performer. Don’t stop at the interior; look at your entire build as a cohesive system. Download The Ultimate Restomod Guide to master your project and gain access to the comprehensive project blueprints you need to achieve precision. The journey of restoration is a long one, but with the right guidance, you’ll find satisfaction in every turn of the wrench. Keep building with pride and precision.
Frequently Asked Questions
Can I install three-point belts in a car that never had them from the factory?
Yes, you can retrofit nearly any classic vehicle by creating new structural anchor points. This process is a central part of any professional three-point seatbelt conversion guide, as it involves identifying the strongest areas of the chassis, like the B-pillar and floor pan. You must use reinforcement plates to distribute crash forces across a wider surface area of the vintage sheet metal to ensure the mounts don’t fail under stress.
What is the best mounting height for a shoulder belt in a classic car?
The ideal position for a shoulder mount is approximately two inches above your shoulder when you’re seated. This specific height prevents the belt from compressing your spine during a collision while also keeping the webbing away from your neck. If your car lacks a factory dimple at this height, you’ll need to measure and drill with precision to ensure the geometry works for your specific torso height.
Do I need to weld in reinforcement plates for the seatbelt mounts?
Welding is the most secure method for attaching anchor bungs, but many builders successfully use large-area backing plates. These plates, typically measuring at least 2×2 inches, act as a structural sandwich that prevents the bolt from pulling through the thin floor pan. If you’re building a high-performance machine, welding provides that extra margin of safety you’ll want when pushing the car to its limits.
Are aftermarket seatbelt conversion kits legal and safe?
Aftermarket kits are safe and legal provided they carry certification for FMVSS #209 and #302 standards. These regulations ensure the webbing, buckles, and retractors can withstand specific loads and resist flammability. Following a reliable three-point seatbelt conversion guide helps you select hardware that meets these professional requirements rather than settling for unrated components that might fail during an impact.
How do I fix a seatbelt that keeps twisting over my shoulder?
A twisting belt is usually caused by a misaligned top pivot or a retractor mounted at the wrong angle. Ensure the shoulder loop can swivel freely and that the webbing isn’t bunching inside the hardware. If the belt flips every time you pull it, you may need to loosen the mounting bolt and rotate the pivot until the belt tracks flat against your body during use.
What grade of bolts should be used for seatbelt installation?
You must use Grade 8 bolts with a 7/16-20 thread size for all safety restraint connections. Grade 8 hardware is identifiable by the six radial lines on the bolt head and offers the high tensile strength required for automotive safety. Never substitute these with standard hardware store bolts, as they lack the shear resistance necessary to hold up under the thousands of pounds of force generated in a crash.
Will installing three-point belts ruin the value of my classic car?
Modern safety upgrades typically increase the market value and desirability of a restomod. While purists might prefer original lap belts, most buyers in 2026 value the ability to drive their classic safely in modern traffic. A clean, professional installation that matches the interior aesthetic shows a high level of care and craft that collectors and daily drivers alike appreciate.
What is the difference between a 2-point and a 3-point seatbelt?
A 2-point belt, commonly known as a lap belt, only secures the hips, whereas a 3-point system adds a shoulder harness to restrain the upper torso. The addition of that third mounting point is what prevents your head and chest from striking the steering column or dashboard during a sudden stop. It’s the difference between a simple restraint and a comprehensive safety system that prevents the dangerous submarine effect.