
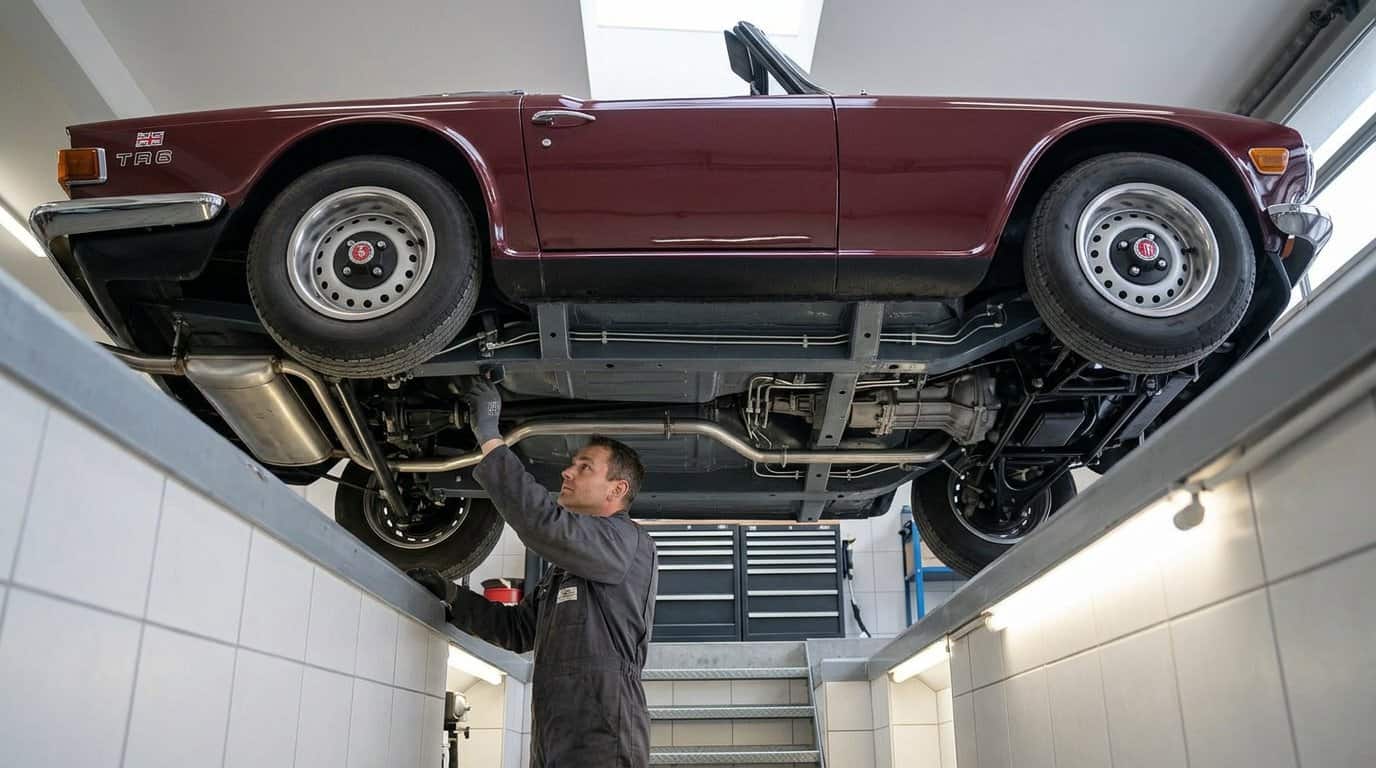
A beautiful TR6 can still be the wrong starting point for a restomod. Assess corrosion and chassis condition before committing to upgrades, because work on other parts may be wasted if the frame is unsound. A Triumph TR6 restomod guide should help you judge the whole car, not just the parts that catch your eye first.
The appeal is easy to understand: preserve the character of a classic while making it more dependable and enjoyable to drive. The challenge is choosing where to keep the original feel and where modern changes make sense. This guide explains how to assess body corrosion, chassis condition, engine variants, suspension, brakes, wire wheels, interior trim, and electrical systems. You’ll see how those choices connect, so you can set priorities around the car’s condition, your driving goals, and the work you’re prepared to take on. Start with sound structure, then shape the build with care.
Key Takeaways
- Assess the chassis and corrosion before planning cosmetic or performance upgrades; structural condition shapes the rest of the build.
- Identify the engine and fuel-system variant before choosing performance changes, since TR6 specifications differ by market and model year.
- Evaluate suspension, brakes, and wire wheels as a connected package to balance handling, braking, and classic character.
- Include interior and electrical systems in the build plan so modern reliability upgrades complement the TR6’s original feel.
Body corrosion and chassis inspection
Start with the frame, not the paint. A Triumph TR6’s chassis carries the suspension and supports the body, so corrosion or poor previous repairs can undermine later engine, brake, and cosmetic work. The TR6 was produced from 1969 to 1976, giving buyers cars with decades of different storage and repair histories. Inspect the frame’s rails, joints, mounting points, and repaired areas for corrosion, distortion, and questionable welds. A clean-looking body can still hide structural trouble underneath.
Next, examine body panels and the places where moisture can collect. Check the floor pans, sills, wheel arches, trunk floor, and body-to-frame mounts from above and below. Look for bubbling paint, soft metal, patch panels, and seams that don’t align. On a modified car, fresh paint or undercoating can make inspection harder; pay attention to uneven surfaces and repairs that conceal rather than resolve rust. Understand how a restomod combines classic design and modern upgrades before deciding whether a body repair supports your build plan.
For U.S. road use, modified classic-car safety and emissions requirements depend on the vehicle’s jurisdiction and configuration. Treat both as design constraints, particularly when changes affect the engine, exhaust, lighting, or braking system; don’t assume a modification is exempt simply because the TR6 is old.
When buying a modified TR6, check for structural corrosion, incomplete repairs, and signs that suspension components or body mounts were attached to weakened metal. Ask for records describing major chassis work and modifications, then compare those records with what’s physically installed. During a road test, note pulling, unusual vibration, or noises over uneven surfaces. Those symptoms don’t identify one specific fault, but they can point toward chassis, suspension, wheel, or alignment issues that deserve closer inspection before you commit.
- Inspect frame rails, joints, and suspension mounting points for corrosion or poor repairs.
- Examine floors, sills, wheel arches, and trunk areas for concealed rust.
- Assess chassis condition before setting the scope of body or performance work.
Engine specifications and fuel-injection variants
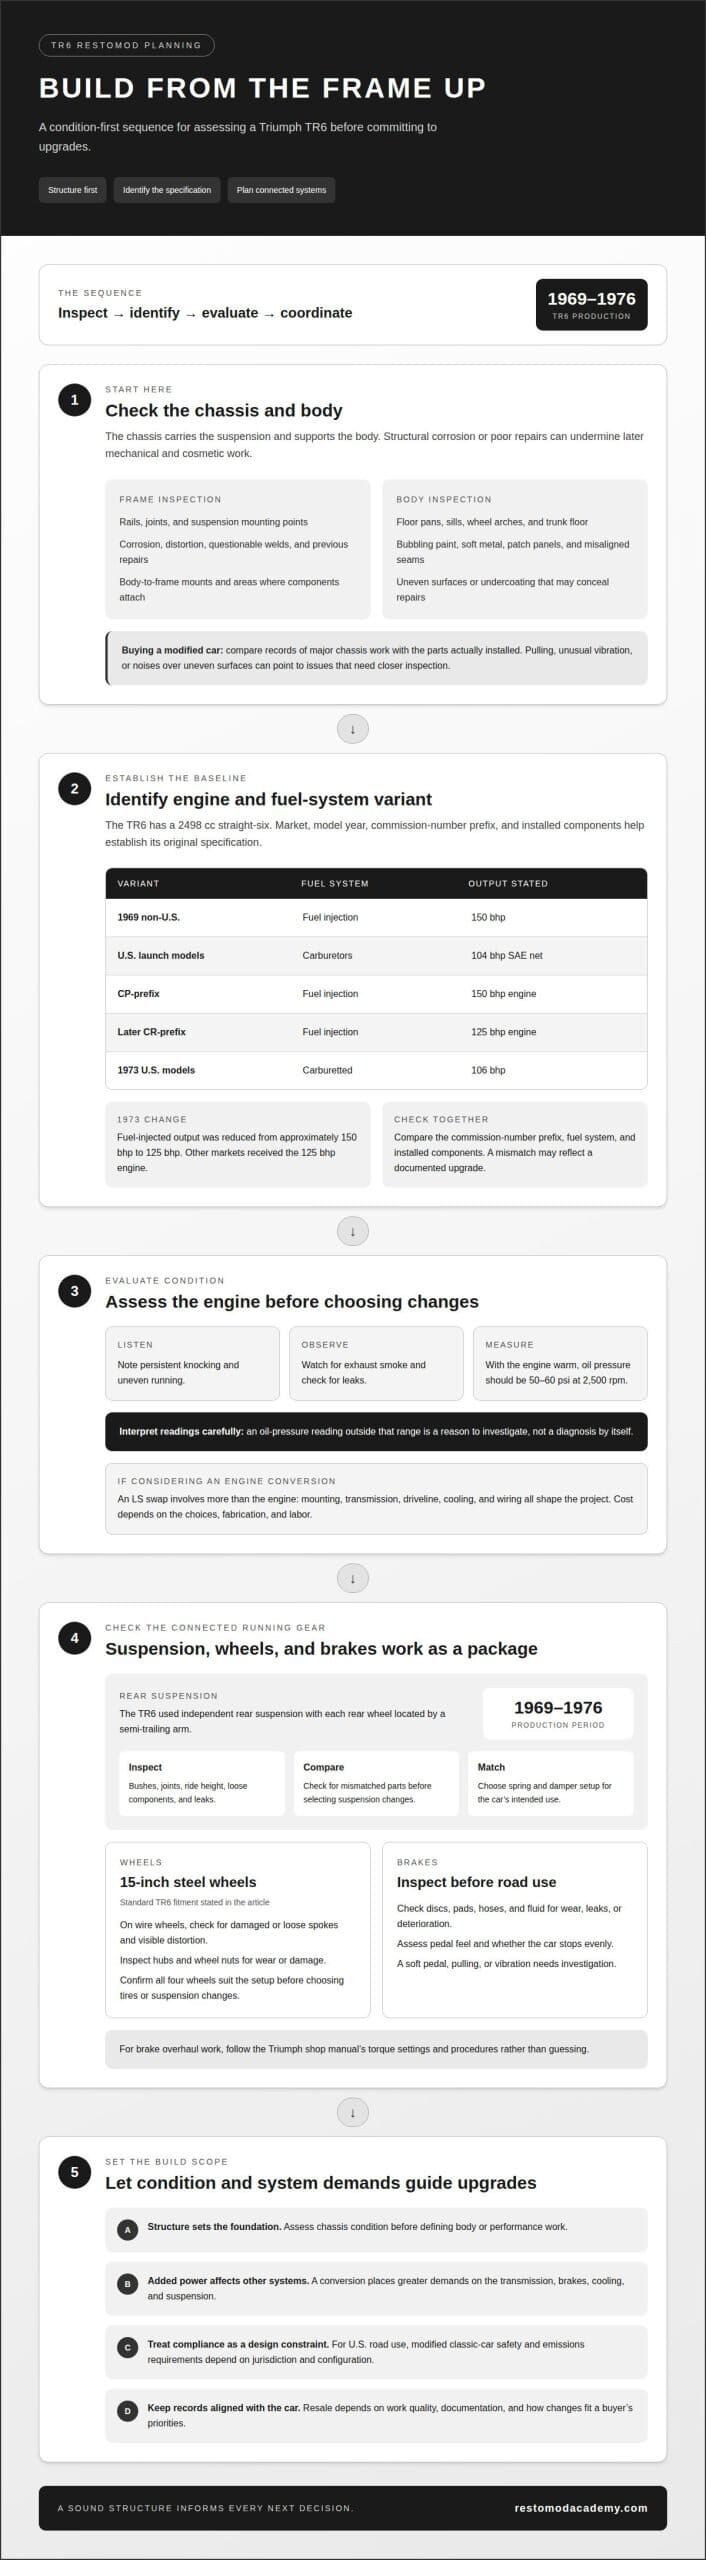
The TR6’s 2498 cc straight-six came in different fuel-system and output configurations. At launch in 1969, non-US models used fuel injection and produced 150 bhp, while U.S. cars used carburetors and produced 104 bhp SAE net. These figures vary by market and rating convention, so identify the car’s original specification before judging its current setup. A Triumph TR6 restomod guide should begin with that distinction because it shapes the baseline for any engine plan.
Model details matter. CP-prefix TR6s had the 150 bhp engine, while later CR-prefix models had the 125 bhp engine. During 1973, fuel-injected output was reduced from approximately 150 bhp to 125 bhp. U.S. models that year had a 106 bhp carburetted engine; other markets received the 125 bhp engine. Compare the commission-number prefix, fuel system, and installed components. A mismatch may reflect a documented upgrade, but it changes how you assess originality and plan tuning.
Which engine swaps fit a TR6, and what do they cost? An LS engine swap is one documented conversion path, but fitment involves more than the engine: mounting, transmission, driveline, cooling, and wiring all shape the project. Cost depends on those choices, fabrication, and labor, so budget from a project-specific quote rather than a generic figure. Use a Triumph TR6 restomod guide to map these interdependent decisions before settling on a conversion.
Evaluate the engine before choosing a rebuild or upgrade. Listen for persistent knocking, watch for exhaust smoke, and note leaks or uneven running. With the engine warm, oil pressure should be 50-60 psi at 2,500 rpm. Treat a reading outside that range as a reason to investigate, not as a diagnosis by itself. Regular oil and cooling-system maintenance, careful tuning, and sound installation all contribute to dependable operation.
How do upgrades affect reliability, handling, and resale? A well-integrated conversion can improve drivability, but added power also places greater demands on the transmission, brakes, cooling, and suspension. Resale depends on the quality of the work, its documentation, and how well the changes align with a buyer’s priorities.
For a closer look at conversion planning, explore this guide to an LS engine swap.
Suspension, brakes, and wire wheels
From 1969 to 1976, the TR6 used independent rear suspension, with each rear wheel located by a semi-trailing arm. That layout gives the rear suspension a distinct role in handling, so worn bushes, damaged joints, or uneven ride height can affect how the car behaves through corners. Check for loose components, leaks, and mismatched parts before choosing upgrades. A change in spring or damper setup should work with the car’s intended use, not simply make the suspension stiffer.
Standard TR6s used 15-inch steel wheels, while a modified example may wear wire wheels. Inspect each wire wheel for damaged or loose spokes, visible distortion, and secure fitment. Check the hubs and wheel nuts for wear or damage, too. Wheel condition matters beyond appearance: a poor fit or damaged wheel can compromise the feel of the steering and suspension. Confirm that all four wheels suit the car’s setup before settling on tires or suspension changes.
Give the brakes equal attention. Examine the discs, pads, hoses, and fluid for wear, leaks, or deterioration, then assess pedal feel and whether the car stops evenly. A soft pedal, pulling under braking, or vibration needs investigation before road use. A Triumph shop manual provides torque settings and step-by-step brake-overhaul procedures. Follow those specifications rather than guessing, especially when replacing or modifying components.
The TR6’s four-speed manual transmission may also have overdrive, so identify the unit before testing it. Models from 1969 to 1972 used the Laycock A-Type overdrive, which operated in second, third, and fourth gears. Models from 1973 to 1976 transitioned to the Laycock J-Type, operating in third and fourth gears. The J-Type was fitted from late 1972, so check the installed unit instead of assuming the model year tells the whole story. During a drive, note missed engagement, slipping, or unusual transmission noises; these symptoms help define the work needed before the car’s handling upgrades are finalized.
Interior and electrical-system restoration
Start the cabin assessment with the TR6’s seats, dashboard, carpets, and door panels. Check seat frames and upholstery for damage, then inspect the foam and mounting points before choosing replacement trim. Look for cracked dashboard surfaces, damp carpet, loose switches, and worn weather seals. Water intrusion can damage both interior materials and nearby wiring, so trace dampness to its source before fitting new carpet. Decide whether to retain the original appearance or introduce discreet upgrades, such as more supportive seating.
Approach the electrical system circuit by circuit. Inspect battery connections, grounds, wiring insulation, connectors, and fuse locations for corrosion, brittle coverings, loose terminals, or untidy splices. Test the lights, gauges, wipers, heater controls, and ignition functions individually. If a component fails, trace its circuit before replacing parts: a poor ground or damaged connector can mimic a failed switch. Record repairs and wiring changes so future troubleshooting is straightforward.
A restomod keeps the TR6’s character while allowing modern comfort and electrical improvements; a stock restoration prioritizes original specification and appearance. Compared with other classic sports cars, the TR6’s appeal rests on its own design and driving character, so the right balance depends on whether you value originality or updated usability.
In the United States, a TR6 restomod’s cost depends on its condition, interior materials, electrical repairs, and upgrade scope; the price is given after a quote request. A cabin needing trim renewal and minor wiring repairs calls for a different plan than one requiring extensive circuit replacement and custom equipment.
Modern fuel injection, cooling, and electrical upgrades work best as a coordinated system. Match fuel delivery and engine controls, cooling capacity, and charging needs to the chosen engine setup. Plan wiring for added equipment, protect connections from heat and abrasion, and leave service access for future repairs. For help shaping a cohesive build, plan your TR6 restomod with expert guidance.
Restomod Academy: The Ultimate Restomod Guide
Restomod Academy is a natural next step when your TR6 assessment turns into build decisions. The Ultimate Restomod Guide offers broader learning for planning a classic-car project, while Restomod Consulting Services can help you think through choices such as preserving the original character or introducing modern systems. Premium Project Blueprints offer another resource when you want a defined direction for your build.
Use inspection findings to set priorities. A sound chassis and tired interior call for a different sequence than a project that needs structural repairs and wiring work. Define your goals, then choose guidance that fits the decisions ahead. Restomod Academy’s Ultimate Restomod Guide can help you plan for ownership and make informed choices as you develop the build.
Contact Restomod Academy to discuss the next step in your TR6 project.
Set the Direction for Your Build
Let the car you want to drive shape every decision that follows. A Triumph TR6 restomod guide is most useful when it helps you define a clear balance between heritage and modern usability, rather than encouraging upgrades for their own sake. Before the next task begins, decide what matters most: a period-inspired cabin, confident touring, sharper response, or a carefully blended combination. That direction gives each choice a purpose and helps keep the finished car coherent.
Keep a written record of your priorities as the project evolves. New ideas will surface, but a steady plan helps distinguish meaningful improvements from distractions. Treat each stage as part of the craft, and leave room to learn as you build. The result should feel unmistakably like your TR6, shaped by thoughtful work and personal intent.
Contact Restomod Academy to discuss your next step. Your project can start with one considered decision and grow from there.
Frequently Asked Questions
What is a Triumph TR6 restomod and what are the most popular upgrades?
A TR6 restomod combines the car’s classic identity with selected modern improvements. Owners often focus on greater comfort, easier everyday use, and more dependable operation, while choosing how much of the original appearance to preserve. Audio upgrades can also refresh the cabin experience. The right combination depends on how you plan to drive the car and which original qualities matter most to you.
What are the best suspension, brake, and steering upgrades for a Triumph TR6?
The best choices create a balanced setup, rather than maximizing one component in isolation. Match suspension changes to the car’s intended use, and ensure brake performance suits the vehicle’s power and handling. For steering, address excessive play and worn components before considering modifications. A road-focused TR6 and one built for spirited driving can call for different priorities, so define the desired feel before selecting parts.
What are the steps to plan and build a Triumph TR6 restomod?
Begin by defining the car’s purpose, preferred balance of originality and modernization, and available project resources. Then document the TR6’s condition and list the work by priority, separating structural needs from optional upgrades. Choose compatible systems and plan their installation order before dismantling components. Record parts, wiring changes, and completed work as the build progresses. Review the plan between stages so new discoveries don’t derail the project’s direction.
What safety and emissions rules apply to modified classic cars in the United States?
Requirements depend on the vehicle’s jurisdiction and configuration. Treat safety and emissions rules as design constraints, particularly when changes affect the engine, exhaust, lighting, or braking system. Don’t assume the car is exempt because it is old.
Which engine swaps fit a Triumph TR6, and what do they cost?
An LS engine swap is one documented conversion path. Fitment depends on mounting, transmission, driveline, cooling, and wiring. Costs vary with those choices, fabrication, and labor, so base your budget on a project-specific quote.
A beautiful TR6 can still be the wrong starting point for a restomod. Assess corrosion and chassis condition before committing to upgrades, because work on other parts may be wasted if the frame is unsound. A Triumph TR6 restomod guide should help you judge the whole car, not just the parts that catch your eye first.
The appeal is easy to understand: preserve the character of a classic while making it more dependable and enjoyable to drive. The challenge is choosing where to keep the original feel and where modern changes make sense. This guide explains how to assess body corrosion, chassis condition, engine variants, suspension, brakes, wire wheels, interior trim, and electrical systems. You’ll see how those choices connect, so you can set priorities around the car’s condition, your driving goals, and the work you’re prepared to take on. Start with sound structure, then shape the build with care.
Key Takeaways
- Assess the chassis and corrosion before planning cosmetic or performance upgrades; structural condition shapes the rest of the build.
- Identify the engine and fuel-system variant before choosing performance changes, since TR6 specifications differ by market and model year.
- Evaluate suspension, brakes, and wire wheels as a connected package to balance handling, braking, and classic character.
- Include interior and electrical systems in the build plan so modern reliability upgrades complement the TR6’s original feel.
Body corrosion and chassis inspection
Start with the frame, not the paint. A Triumph TR6’s chassis carries the suspension and supports the body, so corrosion or poor previous repairs can undermine later engine, brake, and cosmetic work. The TR6 was produced from 1969 to 1976, giving buyers cars with decades of different storage and repair histories. Inspect the frame’s rails, joints, mounting points, and repaired areas for corrosion, distortion, and questionable welds. A clean-looking body can still hide structural trouble underneath.
Next, examine body panels and the places where moisture can collect. Check the floor pans, sills, wheel arches, trunk floor, and body-to-frame mounts from above and below. Look for bubbling paint, soft metal, patch panels, and seams that don’t align. On a modified car, fresh paint or undercoating can make inspection harder; pay attention to uneven surfaces and repairs that conceal rather than resolve rust. Understand how a restomod combines classic design and modern upgrades before deciding whether a body repair supports your build plan.
For U.S. road use, modified classic-car safety and emissions requirements depend on the vehicle’s jurisdiction and configuration. Treat both as design constraints, particularly when changes affect the engine, exhaust, lighting, or braking system; don’t assume a modification is exempt simply because the TR6 is old.
When buying a modified TR6, check for structural corrosion, incomplete repairs, and signs that suspension components or body mounts were attached to weakened metal. Ask for records describing major chassis work and modifications, then compare those records with what’s physically installed. During a road test, note pulling, unusual vibration, or noises over uneven surfaces. Those symptoms don’t identify one specific fault, but they can point toward chassis, suspension, wheel, or alignment issues that deserve closer inspection before you commit.
- Inspect frame rails, joints, and suspension mounting points for corrosion or poor repairs.
- Examine floors, sills, wheel arches, and trunk areas for concealed rust.
- Assess chassis condition before setting the scope of body or performance work.
Engine specifications and fuel-injection variants
The TR6’s 2498 cc straight-six came in different fuel-system and output configurations. At launch in 1969, non-US models used fuel injection and produced 150 bhp, while U.S. cars used carburetors and produced 104 bhp SAE net. These figures vary by market and rating convention, so identify the car’s original specification before judging its current setup. A Triumph TR6 restomod guide should begin with that distinction because it shapes the baseline for any engine plan.
Model details matter. CP-prefix TR6s had the 150 bhp engine, while later CR-prefix models had the 125 bhp engine. During 1973, fuel-injected output was reduced from approximately 150 bhp to 125 bhp. U.S. models that year had a 106 bhp carburetted engine; other markets received the 125 bhp engine. Compare the commission-number prefix, fuel system, and installed components. A mismatch may reflect a documented upgrade, but it changes how you assess originality and plan tuning.
Which engine swaps fit a TR6, and what do they cost? An LS engine swap is one documented conversion path, but fitment involves more than the engine: mounting, transmission, driveline, cooling, and wiring all shape the project. Cost depends on those choices, fabrication, and labor, so budget from a project-specific quote rather than a generic figure. Use a Triumph TR6 restomod guide to map these interdependent decisions before settling on a conversion.
Evaluate the engine before choosing a rebuild or upgrade. Listen for persistent knocking, watch for exhaust smoke, and note leaks or uneven running. With the engine warm, oil pressure should be 50-60 psi at 2,500 rpm. Treat a reading outside that range as a reason to investigate, not as a diagnosis by itself. Regular oil and cooling-system maintenance, careful tuning, and sound installation all contribute to dependable operation.
How do upgrades affect reliability, handling, and resale? A well-integrated conversion can improve drivability, but added power also places greater demands on the transmission, brakes, cooling, and suspension. Resale depends on the quality of the work, its documentation, and how well the changes align with a buyer’s priorities.
For a closer look at conversion planning, explore this guide to an LS engine swap.
Suspension, brakes, and wire wheels
From 1969 to 1976, the TR6 used independent rear suspension, with each rear wheel located by a semi-trailing arm. That layout gives the rear suspension a distinct role in handling, so worn bushes, damaged joints, or uneven ride height can affect how the car behaves through corners. Check for loose components, leaks, and mismatched parts before choosing upgrades. A change in spring or damper setup should work with the car’s intended use, not simply make the suspension stiffer.
Standard TR6s used 15-inch steel wheels, while a modified example may wear wire wheels. Inspect each wire wheel for damaged or loose spokes, visible distortion, and secure fitment. Check the hubs and wheel nuts for wear or damage, too. Wheel condition matters beyond appearance: a poor fit or damaged wheel can compromise the feel of the steering and suspension. Confirm that all four wheels suit the car’s setup before settling on tires or suspension changes.
Give the brakes equal attention. Examine the discs, pads, hoses, and fluid for wear, leaks, or deterioration, then assess pedal feel and whether the car stops evenly. A soft pedal, pulling under braking, or vibration needs investigation before road use. A Triumph shop manual provides torque settings and step-by-step brake-overhaul procedures. Follow those specifications rather than guessing, especially when replacing or modifying components.
The TR6’s four-speed manual transmission may also have overdrive, so identify the unit before testing it. Models from 1969 to 1972 used the Laycock A-Type overdrive, which operated in second, third, and fourth gears. Models from 1973 to 1976 transitioned to the Laycock J-Type, operating in third and fourth gears. The J-Type was fitted from late 1972, so check the installed unit instead of assuming the model year tells the whole story. During a drive, note missed engagement, slipping, or unusual transmission noises; these symptoms help define the work needed before the car’s handling upgrades are finalized.
Interior and electrical-system restoration
Start the cabin assessment with the TR6’s seats, dashboard, carpets, and door panels. Check seat frames and upholstery for damage, then inspect the foam and mounting points before choosing replacement trim. Look for cracked dashboard surfaces, damp carpet, loose switches, and worn weather seals. Water intrusion can damage both interior materials and nearby wiring, so trace dampness to its source before fitting new carpet. Decide whether to retain the original appearance or introduce discreet upgrades, such as more supportive seating.
Approach the electrical system circuit by circuit. Inspect battery connections, grounds, wiring insulation, connectors, and fuse locations for corrosion, brittle coverings, loose terminals, or untidy splices. Test the lights, gauges, wipers, heater controls, and ignition functions individually. If a component fails, trace its circuit before replacing parts: a poor ground or damaged connector can mimic a failed switch. Record repairs and wiring changes so future troubleshooting is straightforward.
A restomod keeps the TR6’s character while allowing modern comfort and electrical improvements; a stock restoration prioritizes original specification and appearance. Compared with other classic sports cars, the TR6’s appeal rests on its own design and driving character, so the right balance depends on whether you value originality or updated usability.
In the United States, a TR6 restomod’s cost depends on its condition, interior materials, electrical repairs, and upgrade scope; the price is given after a quote request. A cabin needing trim renewal and minor wiring repairs calls for a different plan than one requiring extensive circuit replacement and custom equipment.
Modern fuel injection, cooling, and electrical upgrades work best as a coordinated system. Match fuel delivery and engine controls, cooling capacity, and charging needs to the chosen engine setup. Plan wiring for added equipment, protect connections from heat and abrasion, and leave service access for future repairs. For help shaping a cohesive build, plan your TR6 restomod with expert guidance.
Restomod Academy: The Ultimate Restomod Guide
Restomod Academy is a natural next step when your TR6 assessment turns into build decisions. The Ultimate Restomod Guide offers broader learning for planning a classic-car project, while Restomod Consulting Services can help you think through choices such as preserving the original character or introducing modern systems. Premium Project Blueprints offer another resource when you want a defined direction for your build.
Use inspection findings to set priorities. A sound chassis and tired interior call for a different sequence than a project that needs structural repairs and wiring work. Define your goals, then choose guidance that fits the decisions ahead. Restomod Academy’s Ultimate Restomod Guide can help you plan for ownership and make informed choices as you develop the build.
Contact Restomod Academy to discuss the next step in your TR6 project.
Set the Direction for Your Build
Let the car you want to drive shape every decision that follows. A Triumph TR6 restomod guide is most useful when it helps you define a clear balance between heritage and modern usability, rather than encouraging upgrades for their own sake. Before the next task begins, decide what matters most: a period-inspired cabin, confident touring, sharper response, or a carefully blended combination. That direction gives each choice a purpose and helps keep the finished car coherent.
Keep a written record of your priorities as the project evolves. New ideas will surface, but a steady plan helps distinguish meaningful improvements from distractions. Treat each stage as part of the craft, and leave room to learn as you build. The result should feel unmistakably like your TR6, shaped by thoughtful work and personal intent.
Contact Restomod Academy to discuss your next step. Your project can start with one considered decision and grow from there.
Frequently Asked Questions
What is a Triumph TR6 restomod and what are the most popular upgrades?
A TR6 restomod combines the car’s classic identity with selected modern improvements. Owners often focus on greater comfort, easier everyday use, and more dependable operation, while choosing how much of the original appearance to preserve. Audio upgrades can also refresh the cabin experience. The right combination depends on how you plan to drive the car and which original qualities matter most to you.
What are the best suspension, brake, and steering upgrades for a Triumph TR6?
The best choices create a balanced setup, rather than maximizing one component in isolation. Match suspension changes to the car’s intended use, and ensure brake performance suits the vehicle’s power and handling. For steering, address excessive play and worn components before considering modifications. A road-focused TR6 and one built for spirited driving can call for different priorities, so define the desired feel before selecting parts.
What are the steps to plan and build a Triumph TR6 restomod?
Begin by defining the car’s purpose, preferred balance of originality and modernization, and available project resources. Then document the TR6’s condition and list the work by priority, separating structural needs from optional upgrades. Choose compatible systems and plan their installation order before dismantling components. Record parts, wiring changes, and completed work as the build progresses. Review the plan between stages so new discoveries don’t derail the project’s direction.
What safety and emissions rules apply to modified classic cars in the United States?
Requirements depend on the vehicle’s jurisdiction and configuration. Treat safety and emissions rules as design constraints, particularly when changes affect the engine, exhaust, lighting, or braking system. Don’t assume the car is exempt because it is old.
Which engine swaps fit a Triumph TR6, and what do they cost?
An LS engine swap is one documented conversion path. Fitment depends on mounting, transmission, driveline, cooling, and wiring. Costs vary with those choices, fabrication, and labor, so base your budget on a project-specific quote.