
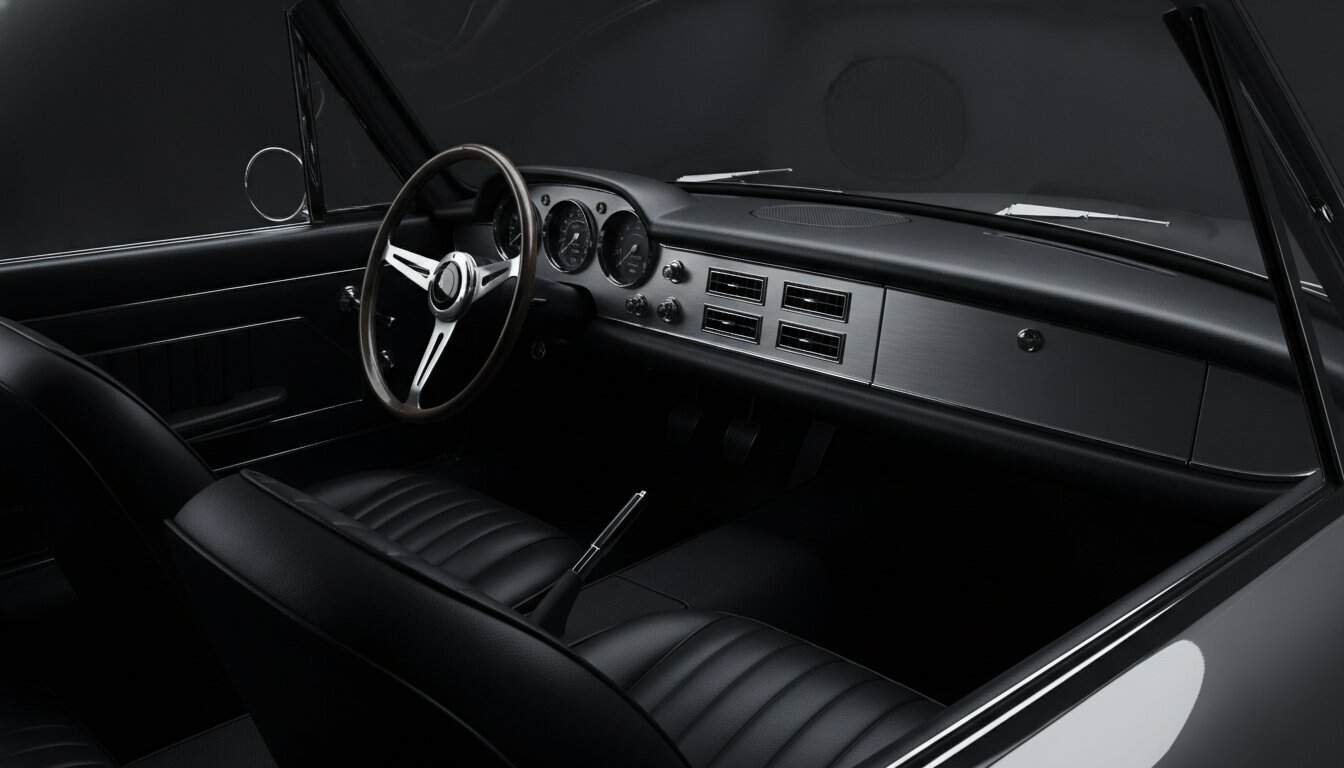
What if the most authentic part of your vintage driving experience is the one thing keeping you from actually hitting the road? We’ve all been there, white-knuckling the steering wheel in a cabin that feels more like a greenhouse than a cockpit, watching the mercury rise while you sweat through your upholstery. You love the heritage of your machine, but the struggle to find R12 refrigerant or fit a bulky, archaic compressor under the hood is a battle no enthusiast should have to fight in 2026. It’s time to stop viewing modern comfort as a compromise to your car’s character.
I understand the hesitation to cut into a classic, but you deserve a ride that performs as well as it looks. In this guide, I’ll teach you how to install vintage air conditioning that delivers ice-cold relief even in 100-degree weather without sacrificing an ounce of your car’s soul. We’re going to dive into the technical nuances of modern Gen V systems, focusing on clean packaging and the precision of electronic controls. You’ll learn to navigate the tightening supply of R-134a and master the electrical requirements of high-performance compressors. By the end of this project, your cabin will be a sanctuary of contemporary performance wrapped in timeless style.
Key Takeaways
- Learn how to transition from bulky, obsolete R12 units to compact, high-performance systems that utilize 2026 refrigerant standards for maximum efficiency.
- Identify the critical components of a modern HVAC kit, including the high-performance Sanden-style compressor and optimized condensers designed for superior heat dissipation.
- Master the technical nuances of how to install vintage air conditioning while preserving your vehicle’s original aesthetics through clean, hidden packaging.
- Prepare your project for success by upgrading your electrical and cooling systems to handle the increased demands of a contemporary climate control unit.
- Evaluate the differences between model-specific and universal builder kits to select the ideal climate solution for your specific restomod roadmap.
The Evolution of Cabin Comfort in Classic Restomods
The climate control system in your classic is often the deciding factor between a weekend cruiser and a vehicle you can actually live with. When we talk about a vintage car air conditioning kit, we aren’t just discussing a bolt-on compressor. We are looking at a complete HVAC replacement system that swaps out your entire under-dash assembly for a modern, high-performance unit. This evolution is central to the what is a restomod philosophy, where we prioritize modern reliability to ensure these machines remain on the road rather than gathering dust in a garage.
Looking at the history of automotive air conditioning shows us how far we’ve come from the massive, power-robbing units of the 1950s and 60s. Back then, systems relied on bulky factory R12 setups that were heavy and notoriously difficult to maintain. Today, the transition to compact R134a or R1234yf units allows for far more efficiency in a package half the size of the original. Understanding how to install vintage air conditioning starts with recognizing that you are upgrading the very lungs of your vehicle to handle the demands of 2026 driving conditions.
Why Your Original Factory AC is Failing You
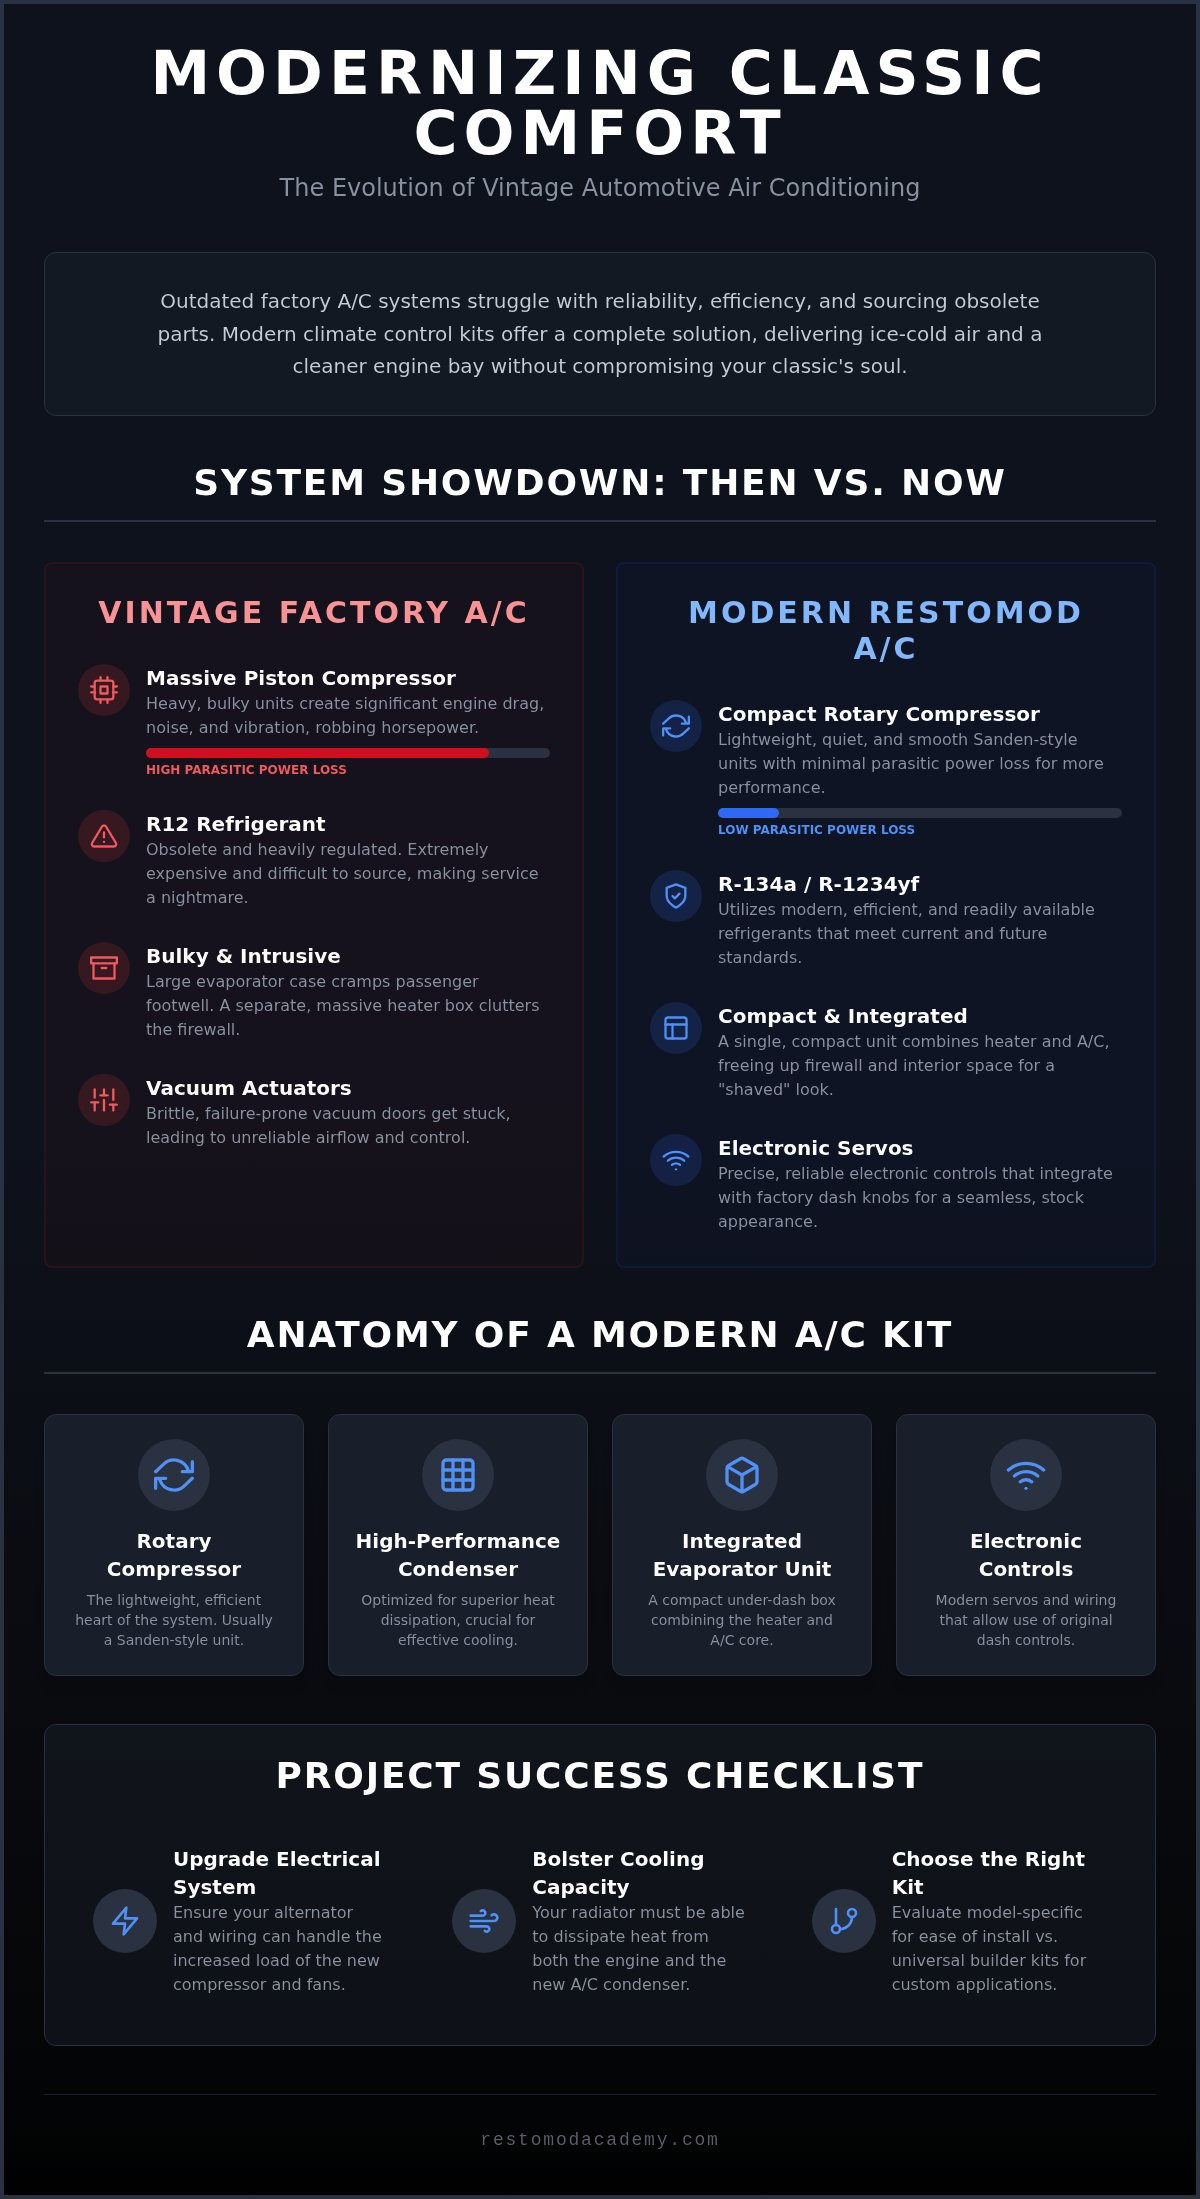
Your factory system likely relies on a massive piston-style compressor. These units are essentially small engines themselves, creating significant drag and vibration that saps power from your crank. Modern rotary units are lighter, quieter, and draw far less horsepower. Beyond the hardware, sourcing R12 refrigerant in 2026 is an expensive, regulated hurdle that makes servicing old systems a nightmare for the DIY builder.
Original setups also suffer from several mechanical bottlenecks:
- Brittle vacuum-actuated doors that fail, leaving you with air that only blows through the defroster regardless of your settings.
- Bulky evaporator cases that cramp the passenger footwell and limit your interior design options.
- Corroded copper-brass coils that lack the thermal efficiency of modern aluminum brazed-louver designs.
A modern integrated unit combines the heater and AC into one compact box. This eliminates the need for a separate heater core assembly and frees up significant interior real estate for a cleaner build.
The Aesthetic Advantage of Modern Kits
One of the greatest rewards of this upgrade is the visual transformation of your engine bay. By removing the massive factory heater box from the firewall, you achieve a smooth, “shaved” look that highlights your engine rather than a plastic crate. These kits also utilize electronic conversion technology. This means you can keep your original factory knobs and sliders on the dash while they command precise, modern servos behind the scenes. It’s the ultimate blend of heritage style and contemporary performance. Mastering how to install vintage air conditioning gives you the power to redesign your interior layout without the constraints of 50 year old engineering. You can tuck your lines inside the fenders and hide the evaporator behind the dash for a truly professional finish that looks as cool as it feels.
Anatomy of Modern Vintage Car Air Conditioning Kits
To master how to install vintage air conditioning, you must first understand the mechanical symphony occurring under your hood and dash. While the basic principles of how car AC systems work remain consistent, the hardware has undergone a radical transformation. Modern kits are designed to be modular, efficient, and discreet, allowing you to hide the modern part of your restomod while enjoying its benefits. Every component, from the compressor to the smallest O-ring, plays a specific role in moving heat out of your cabin and into the atmosphere.
The Heart of the System: The Rotary Compressor
The Sanden compressor is the industry standard for restomod builds. Unlike the massive, vibrating piston compressors of the 1960s, these rotary units use a series of small pistons that move in a smooth, circular motion. This design shaves significant weight from your engine’s front end and drastically reduces parasitic power loss. You’ll find various mounting options, such as top-mount or side-mount brackets, which are essential for clearing custom suspension components or low-profile hoods. It’s vital to choose a compressor that matches your specific pulley system. Whether you’re retaining a period-correct V-belt or upgrading to a high-performance serpentine drive, the alignment must be precise to prevent belt squeal or premature failure.
Beyond the compressor, the condenser is your primary tool for heat dissipation. It sits in front of your radiator, catching the incoming airflow to cool the high-pressure refrigerant. In 2026, we prioritize parallel-flow condensers because they offer significantly more surface area than older tube-and-fin designs. Connecting these parts requires reduced-barrier hoses. These are now the mandatory standard because they prevent modern refrigerant molecules from leaching through the hose walls. Finally, the receiver-drier acts as a vital safeguard. It contains a desiccant that pulls moisture out of the closed system, ensuring that ice crystals don’t form and clog your expansion valve during a long summer drive.
Evaporator Technology: Fly-By-Wire vs Mechanical
The evaporator unit is where the magic happens inside the cabin. Modern units are engineering marvels that combine heating, cooling, and defrosting into a single, compact case. Gone are the days of stiff, binding cables that required a heavy hand to adjust. Today’s kits use electronic servo motors, often referred to as fly-by-wire technology. These motors provide smooth, infinite adjustment of your air blend and fan speed, allowing for the kind of precision climate control found in a modern luxury car. Because these units are completely sealed, they also prevent the annoying cabin leaks and drafts that were common in factory assemblies. If you find the technical specs of these systems daunting, my Restomod Consulting Services can provide a steady hand to help you select the right hardware for your project’s goals.
Model-Specific vs Universal AC Kits: Evaluating Your Options
Choosing your climate control package is a fork in the road that defines your entire assembly process. When you’re researching how to install vintage air conditioning, you’ll quickly find that kits generally fall into two categories: model-specific and universal builder series. This decision isn’t just about what fits your car; it’s about how you intend to use the vehicle and how much custom fabrication you’re willing to undertake. For many enthusiasts, the goal is a balance between rapid progress and a professional, integrated finish that respects the car’s original design.
The Pros and Cons of Model-Specific Systems
Model-specific kits are the gold standard for popular muscle cars and vintage trucks. These systems are engineered to utilize factory mounting holes, which means you won’t be drilling unnecessary holes in your pristine firewall. They often include pre-formed hardlines designed to snake around original engine components, and they utilize your existing dash vent locations for a seamless look. This saves a massive amount of installation time, allowing you to focus on the precision of the assembly rather than engineering a mounting solution from scratch.
However, these kits have limitations. If you’ve already executed the definitive guide to an LS engine swap or a Coyote conversion, the “model-specific” engine brackets might not align with your new power plant. You’ll need to verify that the kit’s compressor location doesn’t interfere with your modern steering rack or custom headers. While these kits are excellent for keeping a car looking stock, they can be restrictive if you’ve moved away from the factory configuration in other areas of your build.
When to Choose a Universal Builder Series Kit
A universal builder series kit is the right choice when your project moves beyond the boundaries of a standard restoration. If you’ve smoothed your firewall for a show-car finish or completely redesigned your dashboard, a model-specific kit simply won’t fit. Universal units offer the flexibility to mount the evaporator anywhere in the cabin, even tucked away in the trunk if you’re building a radical custom with limited dash space. This path requires you to create your own mounting brackets and custom-route your refrigerant hoses, but the creative freedom is unmatched.
Working with a universal kit allows you to integrate bespoke louvers and registers that match your custom interior. You aren’t limited by where the factory thought the vents should go in 1968. You can prioritize airflow to the driver’s face or hide the vents entirely for a minimalist aesthetic. While this approach demands more patience and technical labor, the result is a climate control system that is as much a part of the car’s artistry as the paint or upholstery. Remember that every custom choice adds a layer of complexity to how to install vintage air conditioning, so always measure twice and plan your plumbing routes before making your first cut.
Planning Your AC Install: Power, Space, and Plumbing Requirements
Planning how to install vintage air conditioning requires a holistic view of your vehicle’s ecosystem. You aren’t just adding a luxury; you’re increasing the thermal and electrical load on every supporting system. Successful integration starts long before you pick up a wrench. You must evaluate if your classic is prepared to support modern performance without overheating or stalling out at a stoplight. This preparation phase is the difference between a system that blows lukewarm air and one that keeps you comfortable in the harshest conditions.
Most factory alternators from the 1960s or 70s produced between 35 and 60 amps. A modern climate control system, especially when paired with high-velocity electric fans, will easily exceed that capacity. To maintain a steady voltage at idle, you should upgrade to a 100+ amp alternator. This ensures your ignition system and fuel pump receive clean power while the AC blower is on high. Additionally, your cooling stack needs attention. The AC condenser sits directly in front of your radiator, pre-heating the air before it reaches the engine. I recommend upgrading to a high-capacity aluminum radiator and a shrouded electric fan setup to handle the extra heat during a sweltering 2026 summer drive.
Firewall preparation is where you define the professional quality of your build. Instead of running hoses through jagged holes with rubber grommets, use a dedicated bulkhead plate. This provides a leak-free, structural pass-through for your refrigerant and heater lines. When routing these lines, keep them away from your exhaust headers. Heat soak can raise vent temperatures by several degrees before the air even reaches the cabin. If you’re building a high-end restomod, take the time to install sound and heat deadening materials throughout the cabin. Insulating the floor and firewall will significantly reduce the load on your AC unit, allowing it to reach ice-cold temperatures faster.
Engine Swap Integration: LS, Coyote, and Hemi
If you’ve followed the definitive guide to an LS engine swap, you know that accessory drive space is a precious commodity. You must choose a compressor bracket that keeps the unit tight to the engine block to avoid interference with the frame rails or steering box. Modern serpentine systems are far superior to old V-belt configurations for high-RPM reliability and consistent belt tension. Always mock up your compressor with the engine in the car to ensure you have enough clearance for your fittings and hose ends, especially on narrow-chassis cars.
Electrical and Vacuum Considerations
Modern kits have moved beyond the unreliable vacuum-operated controls of the past. By using electronic servo motors, these systems provide precise door movement without the risk of a vacuum leak causing your vents to fail. Proper grounding is essential to prevent electronic noise from interfering with your EFI or digital dash. Connect your AC system to a dedicated ground block rather than relying on a rusty chassis bolt. Finally, install a trinary safety switch. This protects your compressor from high or low pressure spikes and automatically triggers your electric fans when head pressure rises. If you’re feeling overwhelmed by the plumbing and electrical layout, my Restomod Consulting Services can help you map out a blueprint that ensures your first install is your last.
Selecting Your Climate Control System and Starting Your Build
Finalizing your climate control strategy is the bridge between dreaming and doing. You have already assessed your electrical capacity and understood the mechanical anatomy of these systems. Now, you must weigh your specific car model against your engine type and dashboard layout to select the perfect kit. Whether you are aiming for a factory-correct look or a completely custom cabin, the choice of hardware sets the pace for the rest of your interior assembly. This is a pivotal moment in your project where precision in selection prevents frustration during the installation.
Building Your Restomod Interior Strategy
Integrating AC should happen early in your interior timeline. You want the evaporator mounted and the refrigerant lines routed before the carpet, insulation, and dash pads are permanently installed. For inspiration on vent placement and blending modern controls with heritage aesthetics, explore restomod interior ideas. This resource helps you visualize how to hide modern components while maintaining the soul of your classic. I always tell my students to document every step of their installation with photos and detailed wiring diagrams. This documentation is a gift to your future self when it comes to maintenance or troubleshooting in the years to come.
Your Roadmap to a Cooler Classic
Before you place your order, conduct a final audit of your space. Measure your under-dash clearances and verify that your chosen kit won’t interfere with your glove box or wiper motor. It is also wise to check the warranty and technical support reputation of the manufacturer. I suggest looking at our product reviews for feedback on specific kits from builders who have tackled these same challenges. Ensure you have the right specialized tools on hand by reviewing our recommended gear, which includes the manifold gauges and vacuum pumps necessary for a successful startup.
If you are tackling a unique one-off build with a custom chassis or a rare engine swap, standard kits might fall short. This is where my Restomod Consulting Services or Premium Project Blueprints become invaluable. We can help you navigate the technical nuances of how to install vintage air conditioning in complex scenarios, ensuring your project doesn’t stall due to a packaging conflict. Always consult the Ultimate Restomod Guide for a full roadmap of how this climate control install fits into your total vehicle transformation. With a clear plan and the right education, you can turn your sweltering cabin into a sanctuary of modern performance by the summer of 2026.
Take Command of Your Cabin Comfort
You have the roadmap. Upgrading your classic with a modern HVAC system is more than a luxury; it’s a commitment to the longevity and drivability of your machine. By understanding the mechanical anatomy of rotary compressors and the nuances of electrical integration, you’ve moved past the intimidation of complex assembly. Whether you’ve chosen a model-specific kit for its seamless fit or a universal builder series for ultimate creative freedom, the reward is a vehicle that performs as beautifully in August as it does in October.
Mastering how to install vintage air conditioning is a significant milestone in any restomod journey. This process bridges the gap between the raw mechanical spirit of the past and the precision of 2026 technology. If you’re ready to dive deeper into your interior transformation, download The Ultimate Restomod Guide to plan your perfect interior upgrade. Featuring authoritative guidance from enthusiast Brook Walsh, these resources are used by beginners and professional builders worldwide to achieve excellence. Pick up your tools, trust your meticulous preparation, and get ready to enjoy the coolest ride of your life.
Frequently Asked Questions
Do modern AC kits require a high-output alternator?
Yes, you should upgrade to an alternator capable of at least 100 amps. Original factory units often produced as little as 35 amps, which is insufficient for a modern climate control system. When you factor in the high-velocity blower motor and the electric cooling fans required to pull air through the condenser, the electrical load increases significantly. Maintaining a steady voltage at idle ensures your electronics and ignition system remain stable during operation.
Can I install a vintage car air conditioning kit myself?
You can certainly tackle this project yourself if you have basic mechanical skills and a patient approach. Learning how to install vintage air conditioning is one of the most rewarding DIY milestones in the restomod community. You will need to handle under-dash assembly, engine bracket mounting, and hose routing. While you can perform the physical installation, I recommend taking the car to a professional shop for the final vacuum and refrigerant charge to ensure precision.
Will a modern AC compressor work with my original factory vents?
Most modern kits are designed to integrate seamlessly with your original factory vents through specialized adapters. If you are using a model-specific system, it often includes plastic duct converters that bridge the gap between the modern evaporator unit and your classic dashboard registers. This allows you to maintain the period-correct interior aesthetics while enjoying the high-volume airflow provided by a contemporary blower motor. It is the ultimate blend of heritage style and performance.
What is the difference between a binary and a trinary switch?
A binary switch is a simple safety device that disengages the compressor if system pressures are too high or too low. A trinary switch performs those same safety functions but adds a third circuit to trigger your electric cooling fans. Using a trinary switch is the professional choice for restomods because it ensures your fans kick on exactly when the AC head pressure rises. This prevent the system from overheating while you are sitting in traffic.
Do I need to charge the AC system before or after installation?
You must charge the system only after the physical installation is complete and the lines have been vacuumed. Charging involves introducing a specific weight of refrigerant into a sealed, moisture-free environment. Before you add any gas, you must use a vacuum pump to remove all air and humidity from the lines. This process also serves as a final leak test, ensuring your connections are tight before you invest in the refrigerant itself.
How much horsepower does a modern AC compressor take from the engine?
A modern rotary compressor typically draws between 2 and 5 horsepower from your engine. This is a significant improvement over the heavy, archaic piston compressors used in the 1960s, which could sap up to 15 horsepower. Because modern units are so efficient, they place a much lighter parasitic load on your crankshaft. This means you can keep the cabin ice-cold without feeling a massive drop in performance when the compressor clutch engages.
Can I keep my original heater with a new AC kit?
Most modern kits replace your entire factory heater box with an integrated HVAC unit. This combined assembly handles heating, cooling, and defrosting in one compact case. Your original heater core and blower motor are usually removed during the process. This transition is a benefit, as it clears up space on your firewall and eliminates the old, leaky vacuum-operated doors that often plague vintage cars. It results in a much cleaner interior packaging.
What refrigerant do modern vintage air conditioning kits use in 2026?
In 2026, most kits still utilize R-134a, though the industry is rapidly transitioning toward R1234yf due to tightening environmental regulations. While R-134a remains available for servicing, its supply is decreasing and costs are rising. If you are learning how to install vintage air conditioning today, verify which refrigerant your specific compressor and O-rings are rated for. Many modern systems are now engineered to be compatible with the newer, more eco-friendly R1234yf standards for long-term sustainability.
What if the most authentic part of your vintage driving experience is the one thing keeping you from actually hitting the road? We’ve all been there, white-knuckling the steering wheel in a cabin that feels more like a greenhouse than a cockpit, watching the mercury rise while you sweat through your upholstery. You love the heritage of your machine, but the struggle to find R12 refrigerant or fit a bulky, archaic compressor under the hood is a battle no enthusiast should have to fight in 2026. It’s time to stop viewing modern comfort as a compromise to your car’s character.
I understand the hesitation to cut into a classic, but you deserve a ride that performs as well as it looks. In this guide, I’ll teach you how to install vintage air conditioning that delivers ice-cold relief even in 100-degree weather without sacrificing an ounce of your car’s soul. We’re going to dive into the technical nuances of modern Gen V systems, focusing on clean packaging and the precision of electronic controls. You’ll learn to navigate the tightening supply of R-134a and master the electrical requirements of high-performance compressors. By the end of this project, your cabin will be a sanctuary of contemporary performance wrapped in timeless style.
Key Takeaways
- Learn how to transition from bulky, obsolete R12 units to compact, high-performance systems that utilize 2026 refrigerant standards for maximum efficiency.
- Identify the critical components of a modern HVAC kit, including the high-performance Sanden-style compressor and optimized condensers designed for superior heat dissipation.
- Master the technical nuances of how to install vintage air conditioning while preserving your vehicle’s original aesthetics through clean, hidden packaging.
- Prepare your project for success by upgrading your electrical and cooling systems to handle the increased demands of a contemporary climate control unit.
- Evaluate the differences between model-specific and universal builder kits to select the ideal climate solution for your specific restomod roadmap.
The Evolution of Cabin Comfort in Classic Restomods
The climate control system in your classic is often the deciding factor between a weekend cruiser and a vehicle you can actually live with. When we talk about a vintage car air conditioning kit, we aren’t just discussing a bolt-on compressor. We are looking at a complete HVAC replacement system that swaps out your entire under-dash assembly for a modern, high-performance unit. This evolution is central to the what is a restomod philosophy, where we prioritize modern reliability to ensure these machines remain on the road rather than gathering dust in a garage.
Looking at the history of automotive air conditioning shows us how far we’ve come from the massive, power-robbing units of the 1950s and 60s. Back then, systems relied on bulky factory R12 setups that were heavy and notoriously difficult to maintain. Today, the transition to compact R134a or R1234yf units allows for far more efficiency in a package half the size of the original. Understanding how to install vintage air conditioning starts with recognizing that you are upgrading the very lungs of your vehicle to handle the demands of 2026 driving conditions.
Why Your Original Factory AC is Failing You
Your factory system likely relies on a massive piston-style compressor. These units are essentially small engines themselves, creating significant drag and vibration that saps power from your crank. Modern rotary units are lighter, quieter, and draw far less horsepower. Beyond the hardware, sourcing R12 refrigerant in 2026 is an expensive, regulated hurdle that makes servicing old systems a nightmare for the DIY builder.
Original setups also suffer from several mechanical bottlenecks:
- Brittle vacuum-actuated doors that fail, leaving you with air that only blows through the defroster regardless of your settings.
- Bulky evaporator cases that cramp the passenger footwell and limit your interior design options.
- Corroded copper-brass coils that lack the thermal efficiency of modern aluminum brazed-louver designs.
A modern integrated unit combines the heater and AC into one compact box. This eliminates the need for a separate heater core assembly and frees up significant interior real estate for a cleaner build.
The Aesthetic Advantage of Modern Kits
One of the greatest rewards of this upgrade is the visual transformation of your engine bay. By removing the massive factory heater box from the firewall, you achieve a smooth, “shaved” look that highlights your engine rather than a plastic crate. These kits also utilize electronic conversion technology. This means you can keep your original factory knobs and sliders on the dash while they command precise, modern servos behind the scenes. It’s the ultimate blend of heritage style and contemporary performance. Mastering how to install vintage air conditioning gives you the power to redesign your interior layout without the constraints of 50 year old engineering. You can tuck your lines inside the fenders and hide the evaporator behind the dash for a truly professional finish that looks as cool as it feels.
Anatomy of Modern Vintage Car Air Conditioning Kits
To master how to install vintage air conditioning, you must first understand the mechanical symphony occurring under your hood and dash. While the basic principles of how car AC systems work remain consistent, the hardware has undergone a radical transformation. Modern kits are designed to be modular, efficient, and discreet, allowing you to hide the modern part of your restomod while enjoying its benefits. Every component, from the compressor to the smallest O-ring, plays a specific role in moving heat out of your cabin and into the atmosphere.
The Heart of the System: The Rotary Compressor
The Sanden compressor is the industry standard for restomod builds. Unlike the massive, vibrating piston compressors of the 1960s, these rotary units use a series of small pistons that move in a smooth, circular motion. This design shaves significant weight from your engine’s front end and drastically reduces parasitic power loss. You’ll find various mounting options, such as top-mount or side-mount brackets, which are essential for clearing custom suspension components or low-profile hoods. It’s vital to choose a compressor that matches your specific pulley system. Whether you’re retaining a period-correct V-belt or upgrading to a high-performance serpentine drive, the alignment must be precise to prevent belt squeal or premature failure.
Beyond the compressor, the condenser is your primary tool for heat dissipation. It sits in front of your radiator, catching the incoming airflow to cool the high-pressure refrigerant. In 2026, we prioritize parallel-flow condensers because they offer significantly more surface area than older tube-and-fin designs. Connecting these parts requires reduced-barrier hoses. These are now the mandatory standard because they prevent modern refrigerant molecules from leaching through the hose walls. Finally, the receiver-drier acts as a vital safeguard. It contains a desiccant that pulls moisture out of the closed system, ensuring that ice crystals don’t form and clog your expansion valve during a long summer drive.
Evaporator Technology: Fly-By-Wire vs Mechanical
The evaporator unit is where the magic happens inside the cabin. Modern units are engineering marvels that combine heating, cooling, and defrosting into a single, compact case. Gone are the days of stiff, binding cables that required a heavy hand to adjust. Today’s kits use electronic servo motors, often referred to as fly-by-wire technology. These motors provide smooth, infinite adjustment of your air blend and fan speed, allowing for the kind of precision climate control found in a modern luxury car. Because these units are completely sealed, they also prevent the annoying cabin leaks and drafts that were common in factory assemblies. If you find the technical specs of these systems daunting, my Restomod Consulting Services can provide a steady hand to help you select the right hardware for your project’s goals.
Model-Specific vs Universal AC Kits: Evaluating Your Options
Choosing your climate control package is a fork in the road that defines your entire assembly process. When you’re researching how to install vintage air conditioning, you’ll quickly find that kits generally fall into two categories: model-specific and universal builder series. This decision isn’t just about what fits your car; it’s about how you intend to use the vehicle and how much custom fabrication you’re willing to undertake. For many enthusiasts, the goal is a balance between rapid progress and a professional, integrated finish that respects the car’s original design.
The Pros and Cons of Model-Specific Systems
Model-specific kits are the gold standard for popular muscle cars and vintage trucks. These systems are engineered to utilize factory mounting holes, which means you won’t be drilling unnecessary holes in your pristine firewall. They often include pre-formed hardlines designed to snake around original engine components, and they utilize your existing dash vent locations for a seamless look. This saves a massive amount of installation time, allowing you to focus on the precision of the assembly rather than engineering a mounting solution from scratch.
However, these kits have limitations. If you’ve already executed the definitive guide to an LS engine swap or a Coyote conversion, the “model-specific” engine brackets might not align with your new power plant. You’ll need to verify that the kit’s compressor location doesn’t interfere with your modern steering rack or custom headers. While these kits are excellent for keeping a car looking stock, they can be restrictive if you’ve moved away from the factory configuration in other areas of your build.
When to Choose a Universal Builder Series Kit
A universal builder series kit is the right choice when your project moves beyond the boundaries of a standard restoration. If you’ve smoothed your firewall for a show-car finish or completely redesigned your dashboard, a model-specific kit simply won’t fit. Universal units offer the flexibility to mount the evaporator anywhere in the cabin, even tucked away in the trunk if you’re building a radical custom with limited dash space. This path requires you to create your own mounting brackets and custom-route your refrigerant hoses, but the creative freedom is unmatched.
Working with a universal kit allows you to integrate bespoke louvers and registers that match your custom interior. You aren’t limited by where the factory thought the vents should go in 1968. You can prioritize airflow to the driver’s face or hide the vents entirely for a minimalist aesthetic. While this approach demands more patience and technical labor, the result is a climate control system that is as much a part of the car’s artistry as the paint or upholstery. Remember that every custom choice adds a layer of complexity to how to install vintage air conditioning, so always measure twice and plan your plumbing routes before making your first cut.
Planning Your AC Install: Power, Space, and Plumbing Requirements
Planning how to install vintage air conditioning requires a holistic view of your vehicle’s ecosystem. You aren’t just adding a luxury; you’re increasing the thermal and electrical load on every supporting system. Successful integration starts long before you pick up a wrench. You must evaluate if your classic is prepared to support modern performance without overheating or stalling out at a stoplight. This preparation phase is the difference between a system that blows lukewarm air and one that keeps you comfortable in the harshest conditions.
Most factory alternators from the 1960s or 70s produced between 35 and 60 amps. A modern climate control system, especially when paired with high-velocity electric fans, will easily exceed that capacity. To maintain a steady voltage at idle, you should upgrade to a 100+ amp alternator. This ensures your ignition system and fuel pump receive clean power while the AC blower is on high. Additionally, your cooling stack needs attention. The AC condenser sits directly in front of your radiator, pre-heating the air before it reaches the engine. I recommend upgrading to a high-capacity aluminum radiator and a shrouded electric fan setup to handle the extra heat during a sweltering 2026 summer drive.
Firewall preparation is where you define the professional quality of your build. Instead of running hoses through jagged holes with rubber grommets, use a dedicated bulkhead plate. This provides a leak-free, structural pass-through for your refrigerant and heater lines. When routing these lines, keep them away from your exhaust headers. Heat soak can raise vent temperatures by several degrees before the air even reaches the cabin. If you’re building a high-end restomod, take the time to install sound and heat deadening materials throughout the cabin. Insulating the floor and firewall will significantly reduce the load on your AC unit, allowing it to reach ice-cold temperatures faster.
Engine Swap Integration: LS, Coyote, and Hemi
If you’ve followed the definitive guide to an LS engine swap, you know that accessory drive space is a precious commodity. You must choose a compressor bracket that keeps the unit tight to the engine block to avoid interference with the frame rails or steering box. Modern serpentine systems are far superior to old V-belt configurations for high-RPM reliability and consistent belt tension. Always mock up your compressor with the engine in the car to ensure you have enough clearance for your fittings and hose ends, especially on narrow-chassis cars.
Electrical and Vacuum Considerations
Modern kits have moved beyond the unreliable vacuum-operated controls of the past. By using electronic servo motors, these systems provide precise door movement without the risk of a vacuum leak causing your vents to fail. Proper grounding is essential to prevent electronic noise from interfering with your EFI or digital dash. Connect your AC system to a dedicated ground block rather than relying on a rusty chassis bolt. Finally, install a trinary safety switch. This protects your compressor from high or low pressure spikes and automatically triggers your electric fans when head pressure rises. If you’re feeling overwhelmed by the plumbing and electrical layout, my Restomod Consulting Services can help you map out a blueprint that ensures your first install is your last.
Selecting Your Climate Control System and Starting Your Build
Finalizing your climate control strategy is the bridge between dreaming and doing. You have already assessed your electrical capacity and understood the mechanical anatomy of these systems. Now, you must weigh your specific car model against your engine type and dashboard layout to select the perfect kit. Whether you are aiming for a factory-correct look or a completely custom cabin, the choice of hardware sets the pace for the rest of your interior assembly. This is a pivotal moment in your project where precision in selection prevents frustration during the installation.
Building Your Restomod Interior Strategy
Integrating AC should happen early in your interior timeline. You want the evaporator mounted and the refrigerant lines routed before the carpet, insulation, and dash pads are permanently installed. For inspiration on vent placement and blending modern controls with heritage aesthetics, explore restomod interior ideas. This resource helps you visualize how to hide modern components while maintaining the soul of your classic. I always tell my students to document every step of their installation with photos and detailed wiring diagrams. This documentation is a gift to your future self when it comes to maintenance or troubleshooting in the years to come.
Your Roadmap to a Cooler Classic
Before you place your order, conduct a final audit of your space. Measure your under-dash clearances and verify that your chosen kit won’t interfere with your glove box or wiper motor. It is also wise to check the warranty and technical support reputation of the manufacturer. I suggest looking at our product reviews for feedback on specific kits from builders who have tackled these same challenges. Ensure you have the right specialized tools on hand by reviewing our recommended gear, which includes the manifold gauges and vacuum pumps necessary for a successful startup.
If you are tackling a unique one-off build with a custom chassis or a rare engine swap, standard kits might fall short. This is where my Restomod Consulting Services or Premium Project Blueprints become invaluable. We can help you navigate the technical nuances of how to install vintage air conditioning in complex scenarios, ensuring your project doesn’t stall due to a packaging conflict. Always consult the Ultimate Restomod Guide for a full roadmap of how this climate control install fits into your total vehicle transformation. With a clear plan and the right education, you can turn your sweltering cabin into a sanctuary of modern performance by the summer of 2026.
Take Command of Your Cabin Comfort
You have the roadmap. Upgrading your classic with a modern HVAC system is more than a luxury; it’s a commitment to the longevity and drivability of your machine. By understanding the mechanical anatomy of rotary compressors and the nuances of electrical integration, you’ve moved past the intimidation of complex assembly. Whether you’ve chosen a model-specific kit for its seamless fit or a universal builder series for ultimate creative freedom, the reward is a vehicle that performs as beautifully in August as it does in October.
Mastering how to install vintage air conditioning is a significant milestone in any restomod journey. This process bridges the gap between the raw mechanical spirit of the past and the precision of 2026 technology. If you’re ready to dive deeper into your interior transformation, download The Ultimate Restomod Guide to plan your perfect interior upgrade. Featuring authoritative guidance from enthusiast Brook Walsh, these resources are used by beginners and professional builders worldwide to achieve excellence. Pick up your tools, trust your meticulous preparation, and get ready to enjoy the coolest ride of your life.
Frequently Asked Questions
Do modern AC kits require a high-output alternator?
Yes, you should upgrade to an alternator capable of at least 100 amps. Original factory units often produced as little as 35 amps, which is insufficient for a modern climate control system. When you factor in the high-velocity blower motor and the electric cooling fans required to pull air through the condenser, the electrical load increases significantly. Maintaining a steady voltage at idle ensures your electronics and ignition system remain stable during operation.
Can I install a vintage car air conditioning kit myself?
You can certainly tackle this project yourself if you have basic mechanical skills and a patient approach. Learning how to install vintage air conditioning is one of the most rewarding DIY milestones in the restomod community. You will need to handle under-dash assembly, engine bracket mounting, and hose routing. While you can perform the physical installation, I recommend taking the car to a professional shop for the final vacuum and refrigerant charge to ensure precision.
Will a modern AC compressor work with my original factory vents?
Most modern kits are designed to integrate seamlessly with your original factory vents through specialized adapters. If you are using a model-specific system, it often includes plastic duct converters that bridge the gap between the modern evaporator unit and your classic dashboard registers. This allows you to maintain the period-correct interior aesthetics while enjoying the high-volume airflow provided by a contemporary blower motor. It is the ultimate blend of heritage style and performance.
What is the difference between a binary and a trinary switch?
A binary switch is a simple safety device that disengages the compressor if system pressures are too high or too low. A trinary switch performs those same safety functions but adds a third circuit to trigger your electric cooling fans. Using a trinary switch is the professional choice for restomods because it ensures your fans kick on exactly when the AC head pressure rises. This prevent the system from overheating while you are sitting in traffic.
Do I need to charge the AC system before or after installation?
You must charge the system only after the physical installation is complete and the lines have been vacuumed. Charging involves introducing a specific weight of refrigerant into a sealed, moisture-free environment. Before you add any gas, you must use a vacuum pump to remove all air and humidity from the lines. This process also serves as a final leak test, ensuring your connections are tight before you invest in the refrigerant itself.
How much horsepower does a modern AC compressor take from the engine?
A modern rotary compressor typically draws between 2 and 5 horsepower from your engine. This is a significant improvement over the heavy, archaic piston compressors used in the 1960s, which could sap up to 15 horsepower. Because modern units are so efficient, they place a much lighter parasitic load on your crankshaft. This means you can keep the cabin ice-cold without feeling a massive drop in performance when the compressor clutch engages.
Can I keep my original heater with a new AC kit?
Most modern kits replace your entire factory heater box with an integrated HVAC unit. This combined assembly handles heating, cooling, and defrosting in one compact case. Your original heater core and blower motor are usually removed during the process. This transition is a benefit, as it clears up space on your firewall and eliminates the old, leaky vacuum-operated doors that often plague vintage cars. It results in a much cleaner interior packaging.
What refrigerant do modern vintage air conditioning kits use in 2026?
In 2026, most kits still utilize R-134a, though the industry is rapidly transitioning toward R1234yf due to tightening environmental regulations. While R-134a remains available for servicing, its supply is decreasing and costs are rising. If you are learning how to install vintage air conditioning today, verify which refrigerant your specific compressor and O-rings are rated for. Many modern systems are now engineered to be compatible with the newer, more eco-friendly R1234yf standards for long-term sustainability.